How to Put Freon in a Mazda 6
Contents
- 1 Key Takeaways
- 2 📑 Table of Contents
- 3 Understanding Your 2026 Mazda 6’s Air Conditioning System
- 4 Essential Tools and Materials for the Job
- 5 Safety First: Critical Precautions Before You Begin
- 6 Step-by-Step Guide: How to Put Freon in a Mazda 6
- 7 Common Mistakes and Troubleshooting
- 8 When to Call a Professional: Know Your Limits
- 9 Conclusion: A Cool Ride Requires a Smart Approach
- 10 Frequently Asked Questions
Putting Freon in your Mazda 6 is a precise task that requires the correct refrigerant type, proper safety gear, and careful system diagnosis. Never simply add refrigerant without first checking for leaks, as this is illegal and harmful to the environment. For most 2026 models, the process involves locating service ports, connecting gauges, and charging to specific pressures while the engine runs. If you are unsure or lack the tools, always consult a certified technician to avoid costly damage.
Is your Mazda 6 blowing warm air on a hot day? A common culprit is low refrigerant, often called “Freon” (a brand name that became generic). While recharging your car’s air conditioning might seem like a simple DIY fix, doing it correctly on a modern 2026 Mazda 6 is a detailed process that prioritizes safety, precision, and environmental responsibility. This guide will walk you through everything you need to know, from understanding your car’s specific system to the step-by-step charging procedure. Remember, the goal isn’t just to add refrigerant; it’s to restore your AC to peak, long-lasting performance.
Key Takeaways
- Correct Refrigerant is Critical: 2026 Mazda 6 models almost exclusively use R-1234yf (HFO-1234yf) refrigerant. Using the wrong type, like older R-134a, will damage the system and is illegal.
- Diagnosis Before Charging: Low refrigerant almost always indicates a leak. You must locate and repair any leak before adding new Freon; otherwise, the problem will return quickly.
- Safety is Non-Negotiable: Always wear safety glasses and gloves. Refrigerant can cause severe frostbite on contact and is harmful if inhaled. Never work on a running AC system without understanding the risks.
- Use Proper Manifold Gauges: You need a set of gauges calibrated for R-1234yf. Cheap, universal kits may be inaccurate and can introduce contaminants into the sensitive system.
- Follow Pressure Specifications: Charging is done by pressure, not by “can count.” Refer to your owner’s manual or under-hood sticker for exact low-side and high-side pressures for your specific engine and ambient temperature.
- Environmental Law Compliance: In the U.S. and many other countries, it is illegal to intentionally vent refrigerant into the atmosphere. You must use a recovery machine to capture any existing charge during repairs.
- Know When to Walk Away: If you find no obvious leaks but the system is empty, or if the compressor doesn’t engage, the problem is likely complex. Professional diagnosis is the smarter, safer choice.
📑 Table of Contents
- Understanding Your 2026 Mazda 6’s Air Conditioning System
- Essential Tools and Materials for the Job
- Safety First: Critical Precautions Before You Begin
- Step-by-Step Guide: How to Put Freon in a Mazda 6
- Common Mistakes and Troubleshooting
- When to Call a Professional: Know Your Limits
- Conclusion: A Cool Ride Requires a Smart Approach
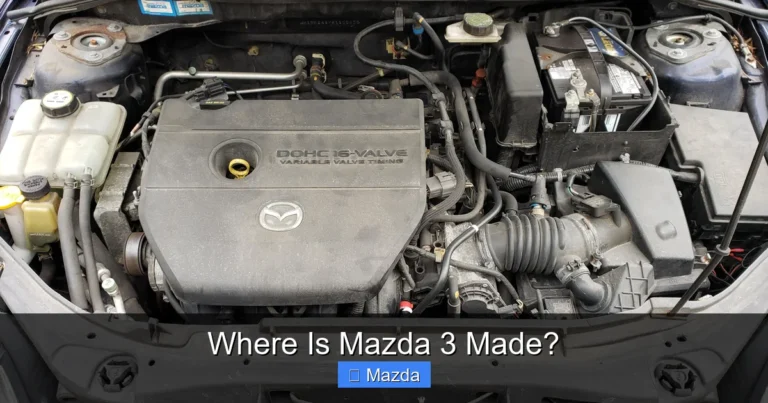
Understanding Your 2026 Mazda 6’s Air Conditioning System
Before touching a wrench or a can of refrigerant, you need to understand what you’re working with. The air conditioning system in your Mazda 6 is a closed-loop, high-pressure hydraulic system. It doesn’t “use up” refrigerant; it circulates the same amount indefinitely. If the system is low, refrigerant has escaped. The 2026 model year firmly sits in the era of next-generation refrigerants.
The Shift to R-1234yf (HFO-1234yf)
Gone are the days of R-134a. Since the early 2020s, automakers, including Mazda, have phased in R-1234yf for all new vehicles. This refrigerant has a global warming potential (GWP) less than 1% of R-134a’s, making it far more environmentally friendly. This is the single most important fact for your 2026 Mazda 6. Using any other refrigerant is not only ineffective but also illegal and damaging. The fittings for R-1234yf systems are often different (with a tap-style valve) to prevent cross-contamination, so ensure your gauge hoses and charging cans are specifically for R-1234yf.
Key Components: Compressor, Condenser, Evaporator, and Orifice Tube
Your Mazda 6’s AC has four main components. The compressor (driven by the engine belt) pressurizes the refrigerant. It moves to the condenser (in front of the radiator) where it releases heat and condenses into a liquid. The liquid then passes through the orifice tube (Mazda’s expansion device), which causes a rapid pressure drop, making it cold. This cold liquid travels into the evaporator inside your dash. As cabin air blows over the evaporator’s fins, heat is absorbed, cooling your car. The refrigerant, now a low-pressure gas, returns to the compressor to start the cycle again. A leak anywhere in this sealed loop will cause a loss of charge.
Essential Tools and Materials for the Job
Trying to charge your AC without the right tools is like trying to bake a cake without an oven. You need specific, compatible equipment. Here’s your checklist.
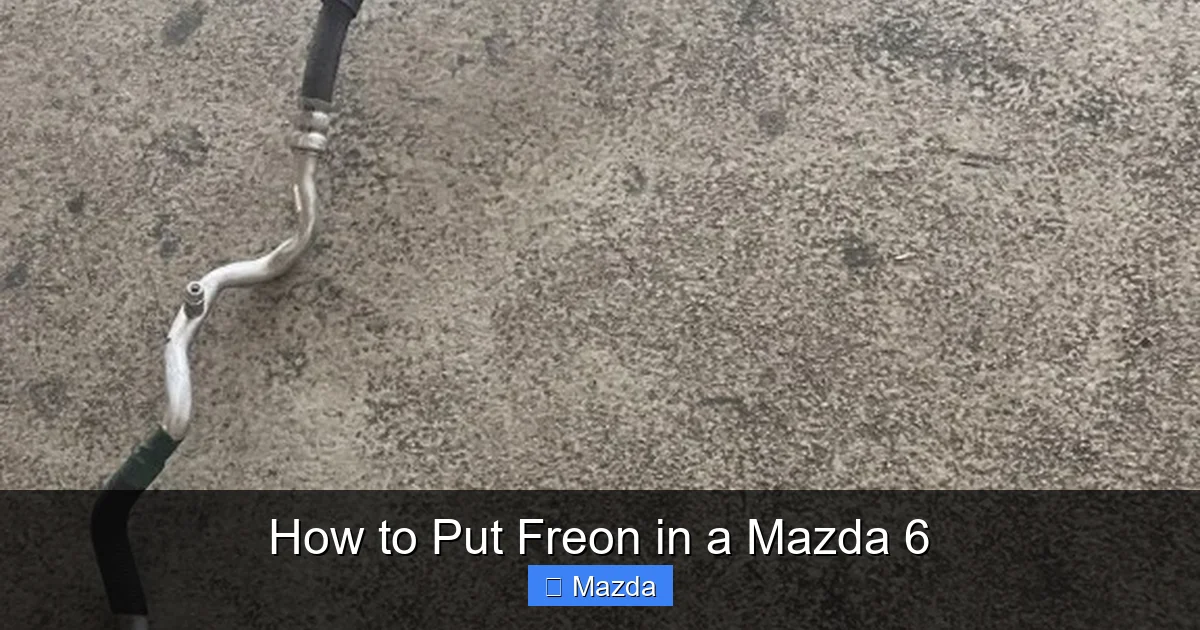
Visual guide about How to Put Freon in a Mazda 6
Image source: pieseauto.ro
1. The Correct Refrigerant: R-1234yf
Purchase a single 12-ounce (or larger) can of genuine R-1234yf. Avoid “universal” or “stop leak” products. They are ineffective for a proper recharge and the sealants can destroy your compressor. Look for brands like DuPont, Honeywell, or major auto parts store brands that clearly state “R-1234yf” or “HFO-1234yf.” For a Mazda 6, a full system recharge from empty typically requires 18-24 ounces, but you should only add what’s needed based on pressure readings.
2. R-1234yf-Specific Manifold Gauge Set
This is your most critical tool. A standard R-134a gauge set will not seal properly on R-1234yf service ports and can introduce incompatible oils. You need a set with:
- Two pressure gauges: One for low-side (blue) and one for high-side (red) pressure.
- Hoses with R-1234yf connectors: These have a different, smaller diameter thread to prevent accidental hookup to an R-134a system.
- A sight glass (optional but helpful): Allows you to see refrigerant flow and check for bubbles indicating moisture or low charge.
investing in a quality gauge set from a reputable brand (like Yellow Jacket, Robinair, or Mityvac) is wise if you plan to do this more than once. For a one-time job, some auto parts stores offer rental programs.
3. Safety Gear and Basic Tools
- Safety glasses and nitrile gloves: Refrigerant under pressure can cause instant frostbite.
- A shop towel or rag: For cleaning ports and wiping away any oily residue (a sign of a leak).
- Basic hand tools: Likely a 10mm or 13mm socket to remove any protective covers over the service ports.
- A flashlight: For seeing into the tight engine bay.
- A vacuum pump (highly recommended): If you’ve had a major leak or the system was completely empty, you must pull a deep vacuum (below 500 microns) to boil out moisture before charging. This is a professional step that significantly improves results. A small, affordable vacuum pump can be rented.
Safety First: Critical Precautions Before You Begin
Air conditioning refrigerant is not a toy. It is a chemical under high pressure (over 200 PSI when running). Mishandling can cause serious injury, system damage, and legal penalties. These steps are not optional.
Visual guide about How to Put Freon in a Mazda 6
Image source: jeepzine.com
Identify the Refrigerant Type for Certainty
Your 2026 Mazda 6’s refrigerant type is almost certainly R-1234yf. But verify. Look for a label under the hood, usually on the radiator support or the strut tower. It will state the refrigerant type and the exact system charge (e.g., “R-1234yf: 20 oz”). Do not guess.
Wear Appropriate Personal Protective Equipment (PPE)
Put on your safety glasses and gloves before you even open the refrigerant can. If refrigerant sprays on your skin, it will freeze the tissue instantly. Do not rub the area; flush with lukewarm water and seek medical attention. Never inhale refrigerant vapor directly from a charging hose. Work in a well-ventilated area.
Never Connect Gauges to a Running System
The engine and AC must be OFF when connecting or disconnecting gauge hoses. The high pressure in the system can cause a violent hose whip if you try to connect under pressure. Start with everything off. Only start the engine after the gauges are securely connected and you are ready to begin the charging procedure.
Environmental and Legal Responsibility
It is a federal violation (EPA Section 608) to intentionally release refrigerant into the atmosphere. If your system is completely empty, you must recover the old refrigerant (if any remains) with a recovery machine before opening the system. For a simple top-off, this is less of an issue, but if you suspect a major leak, recovery is mandatory. This is a primary reason many DIYers opt for a professional—they have the expensive, required recovery equipment.
Step-by-Step Guide: How to Put Freon in a Mazda 6
Assuming your Mazda 6’s AC is blowing warm but the compressor clutch engages (you hear a click when you turn the AC on), and you’ve verified it uses R-1234yf, here is the procedure. This is for adding refrigerant to a system that is low but not completely empty. If the system is empty or you suspect a major leak, jump to the “When to Call a Professional” section.
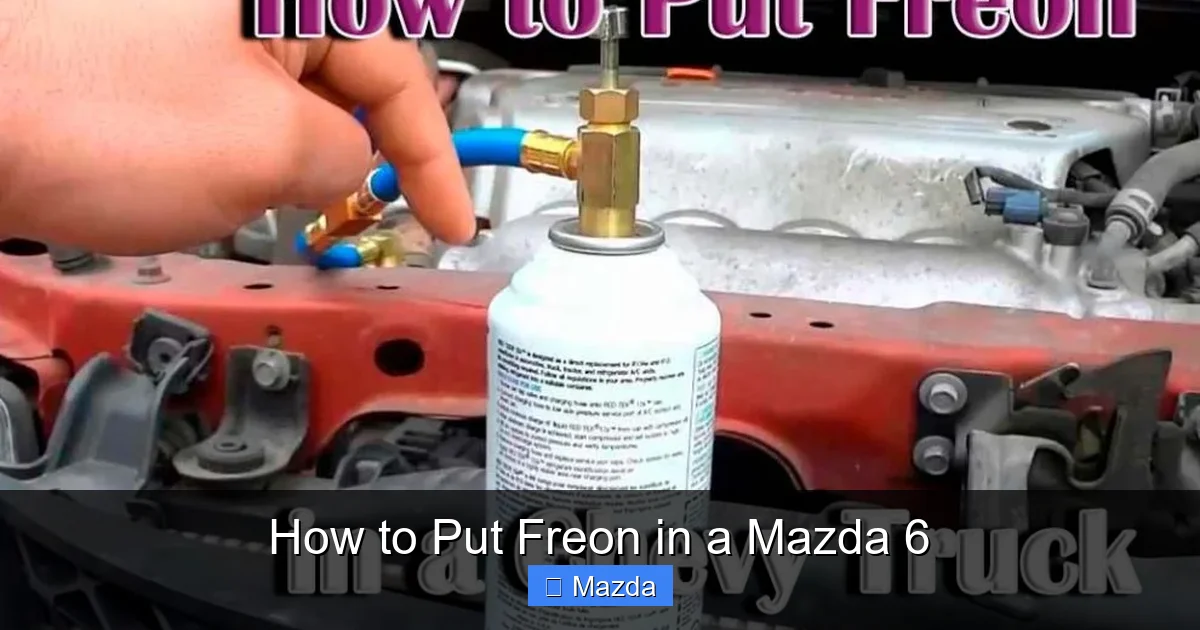
Visual guide about How to Put Freon in a Mazda 6
Image source: carpartsfaq.com
Step 1: Locate the Service Ports
Open the hood of your Mazda 6. The AC service ports are on the high-pressure line, which is the smaller-diameter aluminum tube running from the compressor to the condenser. You will see two service ports with plastic caps:
- The Low-Side Port: This is the larger diameter port, usually located on the accumulator/receiver-drier or on the line coming from the evaporator. It has a blue cap on many Mazdas.
- The High-Side Port: This is the smaller port on the discharge line from the compressor. It often has a red cap.
On many 2020+ Mazda 6 models, the ports are on the passenger side of the engine bay, near the firewall. Consult your owner’s manual diagram if you cannot find them. Remove the caps carefully. Clean the port tops with a rag to prevent dirt from entering the system.
Step 2: Connect the Manifold Gauge Set
Ensure the gauge set’s valves are closed (turn knobs clockwise until tight). Connect the blue hose to the low-side service port. You should hear a firm click as the connector seats. Connect the red hose to the high-side service port. The yellow hose (center) will not be used for charging from a can; it’s for recovery or vacuum pumping.
Step 3: Perform a Preliminary Pressure Check (Engine OFF)
With the engine off and the AC controls set to MAX COLD and highest fan speed, look at your gauges. You should see static pressures. The low-side might read 40-70 PSI, and the high-side 80-120 PSI, depending on ambient temperature. This is a rough sanity check. If both sides read 0 PSI, your system is likely completely empty, and you must address the leak first. Note any oily residue around fittings—a sign of a leak.
Step 4: Start the Engine and Observe Pressures
Start your Mazda 6’s engine. Let it idle. Turn the AC ON, set to MAX COLD, and fan to HIGH. After about 2-3 minutes, the compressor clutch should engage (you’ll hear/see it click). Now, observe the gauge pressures.
- Normal Operating Pressures (R-1234yf, ~80°F ambient): Low-side: 30-40 PSI. High-side: 200-250 PSI. These numbers vary with temperature. Higher ambient temps mean higher pressures.
- Diagnosis: If the low-side is very low (near 0 PSI) and the high-side is also low, you have a significant undercharge. If the high-side is very high (over 300 PSI) and the low-side is high too, you may have an overcharge, a blocked condenser, or a failing compressor. For this guide, we assume low-side is low.
Step 5: Add Refrigerant Slowly Through the Low-Side
This is the core of the process. You add refrigerant to the low-side only, while the engine and AC are running.
- Shake the R-1234yf can vigorously for 10 seconds.
- Screw the charging hose (with a tap valve) onto the refrigerant can. Do not open the tap valve yet.
- With the can upright, slowly open the tap valve to puncture the can. You will hear refrigerant flow.
- Place the other end of the charging hose onto the low-side service port (the blue hose from your manifold set is already there). You can use a “T” fitting or simply hold it against the port if your hose design allows. The goal is to let refrigerant vapor enter the low-side suction line.
- Slowly open the can’s tap valve. Add refrigerant in short bursts (5-10 seconds), then close the valve and wait 30-60 seconds for the pressures to stabilize. Watch the low-side gauge climb slowly toward the target range (30-40 PSI for typical temps).
- Periodically feel the air coming from your dash vents. It should be getting colder. Also, feel the low-side line (the larger tube) between the accumulator and compressor. It should become cold and start sweating.
NEVER overcharge. Adding too much refrigerant raises high-side pressure dangerously, reduces cooling efficiency, and can damage the compressor. Stop adding when the low-side pressure is in the normal range and the air is cold. The system will pull the exact amount it needs from the can as long as you stop at the correct pressure.
Step 6: Final Checks and Disconnection
Once the desired pressures are reached and the air is cold:
- Close the valve on the refrigerant can.
- Disconnect the charging hose from the low-side port. You may hear a hiss—this is normal as pressure equalizes.
- Finally, disconnect the blue and red hoses from the service ports. Replace the plastic caps on the ports.
- Let the engine run for a few more minutes, checking for any new leaks around the ports you just used (look for oil bubbles with a leak detection dye if you have it).
- Turn off the engine. You’re done.
Common Mistakes and Troubleshooting
Even with this guide, pitfalls exist. Here’s what can go wrong and how to avoid it.
Mistake 1: Adding Refrigerant to the High-Side
The high-side is liquid refrigerant under extreme pressure. Adding a can to this side is dangerous and ineffective. The liquid can slug into the compressor, causing hydraulic lock and catastrophic failure. Always add to the low-side suction port only.
Mistake 2: Ignoring the Root Cause (The Leak)
This is the biggest error. You’ve added a can, the AC blows cold for a week, then it’s warm again. Why? Because the leak that caused the low charge was never fixed. Before adding any refrigerant, perform a basic leak check. Use an electronic leak detector or UV dye (added to the system before charging) to find the source. Common leak points on a Mazda 6 include the compressor shaft seal, condenser (from road debris), and O-rings on service ports. Repairing a leak often requires specialized tools and parts. For complex leaks, professional service is essential.
Mistake 3: Using the Wrong Refrigerant or Oil
Mazda’s R-1234yf systems use a specific polyalkylene glycol (PAG) oil, usually PAG 46 or 100. Mixing in the wrong oil (like the mineral oil used with old R-12) or even the wrong viscosity PAG oil can cause compressor failure. If you ever open the system (e.g., to replace a component), you must use the exact oil specified in the factory service manual. For a simple top-off, the refrigerant can’s propellant is compatible, but a major system breach requires professional flushing and refilling.
Mistake 4: Overcharging the System
“A little more can’t hurt” is a dangerous myth. An overcharged system has too much refrigerant. This prevents the evaporator from getting cold enough, causes the high-side pressure to skyrocket (putting strain on hoses and the compressor), and can lead to liquid slugging. The only way to know the correct amount is by weight (using a scale) or by achieving the correct operating pressures. If you overcharge, you must recover the excess refrigerant with a recovery machine.
When to Call a Professional: Know Your Limits
DIY AC recharge is a temporary fix for a minor leak at best. There are many scenarios where you should stop and call a certified technician.
Signs of a Major Leak or System Failure
If your system is completely empty (both gauges read 0 PSI with the engine off), or if you cannot get the pressures into the normal range after adding a full can, you have a significant leak. Other red flags include:
- No clutch engagement (compressor not turning on). This could be low pressure, a bad clutch, or an electrical issue.
- Grinding or loud noises from the compressor.
- Visible damage to the condenser (front of radiator).
- An oily residue on multiple components, indicating a widespread seal failure.
These issues require diagnostic tools like a UV light, electronic leak detector, and recovery machine. Professionals also have access to the precise factory specifications for your specific VIN.
The Sealed System Reality in Modern Cars
Manufacturers design modern AC systems to be essentially “sealed for life.” In an ideal world, they never need recharging. The fact yours is low points to a component failure. A professional will not just recharge it; they will perform a comprehensive diagnostic: a system pull-down vacuum test to check for leaks, a full refrigerant recovery, a repair (like replacing a seal, O-ring, or condenser), a deep vacuum pull to remove moisture, and a precise charge by weight. This is the correct, long-term fix. For a related look at maintenance in other vehicles, you might find our guide for a 2007 Nissan Altima helpful for understanding older system differences, or our RV air conditioner guide for working with larger, often more accessible systems.
Conclusion: A Cool Ride Requires a Smart Approach
Learning how to put Freon in your Mazda 6 empowers you with valuable knowledge. You now understand that it’s not about dumping a can; it’s about diagnosing a closed-loop system, using the correct R-1234yf refrigerant, following strict safety protocols, and charging to precise pressures. For a minor, slow leak that you’ve located and are comfortable with, a careful DIY top-off can restore comfort temporarily. However, always remember that the refrigerant is just the working fluid. The real fix is in the components—the seals, O-rings, and compressors that keep it contained. If the problem persists, or if you lack the specific tools and confidence, investing in professional service is the best way to protect your vehicle’s AC system, your safety, and the environment. A properly functioning air conditioner is more than a luxury; it’s a critical component for driver comfort and safety on the road.
Frequently Asked Questions
How do I know if my Mazda 6 needs Freon?
The primary symptom is warm or hot air blowing from the vents when the AC is on MAX COLD. You might also hear the compressor clutch engage frequently but feel little cooling, or see a hissing/bubbling sound from the engine bay (a large leak). A simple pressure check with manifold gauges is the definitive test.
What type of refrigerant does a 2026 Mazda 6 use?
All 2026 Mazda 6 models use R-1234yf (also known as HFO-1234yf). This is a mandatory, next-generation refrigerant. You must use only this type. Using older R-134a will cause poor performance and system damage. Check the label under your hood to confirm.
How long does it take to put Freon in a Mazda 6?
For a simple top-off on a system that is just slightly low, the actual charging process takes 10-15 minutes after setup. However, with locating ports, connecting gauges, performing pressure checks, and adding refrigerant slowly, you should budget 30-45 minutes total. If you need to diagnose a leak first, it can take much longer.
How much does it cost to put Freon in a Mazda 6 professionally?
Professional AC recharge and diagnosis typically costs between $150 and $300 at a reputable shop. This includes evacuating the old refrigerant, pulling a vacuum, checking for leaks, and charging the system by weight. If a component like a condenser or compressor needs replacement, costs can range from $500 to over $2000.
Can I put Freon in my Mazda 6 myself?
Yes, you can if you have the correct R-1234yf refrigerant, a proper manifold gauge set, and understand the procedure and safety risks. It is legal for a vehicle owner to purchase refrigerant and service their own vehicle in most areas. However, if the system is empty or has a major leak, professional service with EPA-certified recovery equipment is required by law.
How can I check for an AC leak in my Mazda 6 before adding Freon?
The simplest method is to visually inspect all AC components (compressor, lines, condenser, evaporator drain) for oily residue, which indicates a refrigerant leak. For a more thorough check, add UV dye to the system (available in cans of R-1234yf), run the AC, and then use a UV flashlight to find the glowing leak source. An electronic leak detector is the professional tool of choice.