How to Remove Mazda 6 Door Panel
Removing your Mazda 6 door panel is a manageable DIY task with the right guidance. Our 2026-focused guide walks you through each step, from disconnecting the battery to handling electrical components. Avoid common pitfalls like broken clips and ensure a smooth reassembly with our expert tips.
So, you need to remove the door panel on your Mazda 6. Maybe the speaker blew out, the window regulator is acting up, or the door lock is sticking. Whatever the reason, taking off the door panel might seem intimidating at first. But with a calm approach and the right steps, it’s a very doable DIY project for any car owner. In this complete guide, we’ll walk through the entire process for 2026 Mazda 6 models. We’ll cover the tools you need, the exact steps for both front and rear doors, how to safely handle all those electrical connectors, and how to put everything back together without a hitch. By the end, you’ll feel confident to tackle this job and save money on expensive labor charges.
First, a quick note about your 2026 Mazda 6. While the fundamental design of door panels hasn’t changed drastically over the years, manufacturers occasionally tweak clip placements or wiring setups. The process we describe is based on the latest generation Mazda 6 and should align closely with your model. Always work slowly and deliberately—your car’s interior components are mostly plastic, and they can crack if forced. Patience is your most important tool here.
Key Takeaways
- Always disconnect the battery first: Prevent electrical shorts and airbag warnings by removing the negative terminal before starting.
- Use proper plastic trim tools: Metal tools can crack panels; invest in a quality trim removal kit to protect your Mazda 6’s interior.
- Locate all screws and hidden fasteners: Check armrests, door handles, and grab handles—missing one screw can complicate panel removal.
- Handle electrical connectors with extreme care: Release locking tabs before pulling; damaged connectors cause costly repai
- Rear doors may differ from fronts: Some Mazda 6 rear doors have manual windows or child locks; adjust your approach accordingly.
- Document your process: Take photos of connector positions and clip locations to simplify reassembly.
- Test functions before final tightening: Check windows, locks, and speakers with the panel loose to catch issues early.
📑 Table of Contents
Essential Tools and Safety Precautions
Before you even touch a screw, gather your tools and set up a safe workspace. Having everything within reach prevents frustration and stops you from improvising with the wrong tool, which often leads to damage.
Basic Tool Kit
You won’t need a giant toolbox, but specific items are non-negotiable. Start with a set of plastic trim removal tools. These are inexpensive and come in various shapes for prying clips, removing door handles, and popping off covers. Metal tools like flathead screwdrivers can work in a pinch, but wrap the tip in tape to minimize scratching. You’ll also need a set of screwdrivers—both Phillips-head and flat-head—in various sizes. A socket set with extensions is helpful for the deeper screws, often 8mm or 10mm, located in the armrest. A flashlight is crucial for seeing into dark crevices behind the panel. Finally, have a container or magnetic tray to keep all those tiny screws and clips organized.
Safety First: Disconnect the Battery
This is the most critical step. Your Mazda 6’s door contains multiple electrical components: power window motors, door lock actuators, mirror adjustment switches, and sometimes even side curtain airbags. If you accidentally short a connector or disturb an airbag system while the battery is connected, you could trigger a warning light, damage a module, or—worst case—cause an airbag to deploy. Always, always disconnect the negative terminal of the car battery before starting. Wait at least 10 minutes after disconnecting to ensure any residual power in the system is drained. This simple step protects you and your car’s electronics.
Protecting Your Interior
Lay down a blanket or old towels on the seat and floor. When the panel comes off, it’s full of sharp plastic edges and protruding connectors. You don’t want to scratch the seats or carpet. Also, wear gloves to protect your hands from sharp clip edges and to improve grip. A clean, well-lit workspace makes a huge difference in not losing small parts.
Now, let’s talk about those internal links. When you’re dealing with delicate electrical connectors, it’s wise to reference procedures from other vehicles that emphasize caution. For instance, the process for carefully disconnecting a Nissan push-start button involves similar locking tab mechanisms. You can see our detailed guide here for a visual on handling those tricky connectors without breakage. Similarly, the technique for prying off trim pieces without cracking them is universal; our tutorial on removing the back seat in a Toyota Yaris demonstrates proper tool placement and leverage that applies directly to door panels. If you find yourself tackling more extensive interior work, like removing the middle seat in a 2023 Toyota Sienna, you’ll encounter similar clip patterns and panel angles, which you can review in this guide.
Step-by-Step: Front Door Panel Removal
The front doors on your Mazda 6 house the power window controls, door locks, and mirror adjustments. The removal process is systematic: remove all external fasteners, pry away the trim, then carefully lift and disconnect the panel.

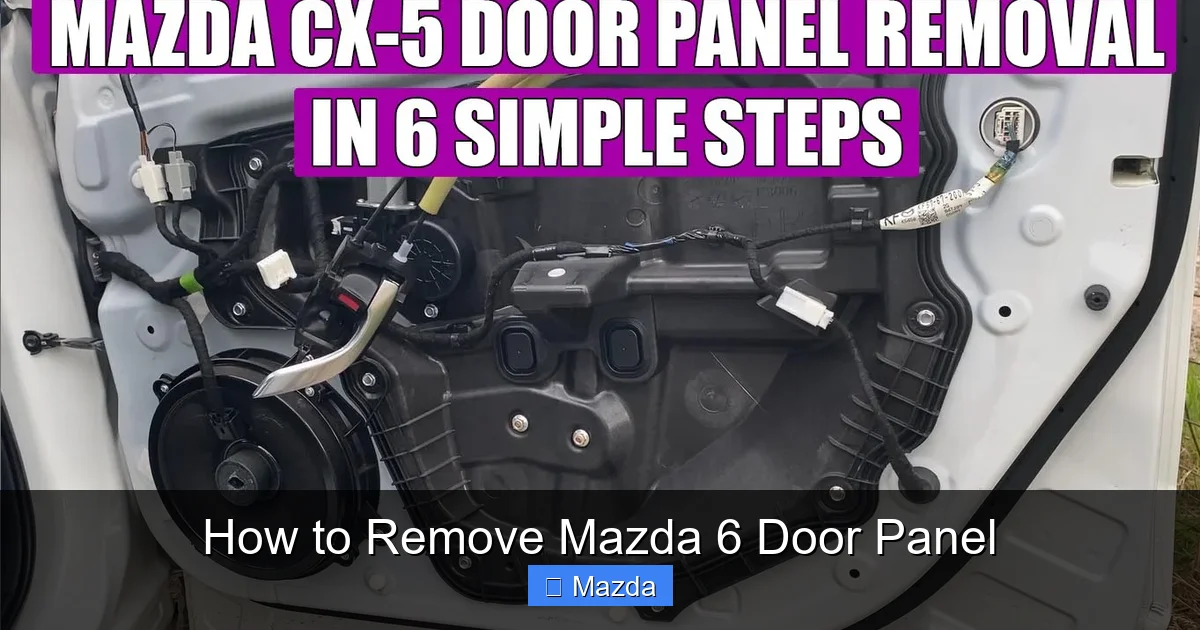
Visual guide about How to Remove Mazda 6 Door Panel
Image source: buzzlyo.com
1. Remove the Door Handle and Lock Cover
Start with the interior door handle. There’s usually a small plastic cap or bezel covering a screw. Gently pry this off with a trim tool. Underneath, you’ll find a Torx or Phillips screw. Remove it. Next, look at the lock knob (if your model has a manual lock button). It often has a small clip or retaining ring behind it. Use a flat tool to pop the knob off, then release the clip with needle-nose pliers. Set these small parts aside safely.
2. Armrest and Grab Handle Screws
Slide your fingers along the inside edge of the armrest. You’ll feel one or two screws, typically covered by a plastic cap or rubber insert. Pry out the cap and remove the screws with a socket or screwdriver. Now, check the grab handle (the strap you hold to close the door). It usually has two small screws at each end, often hidden under rubber or plastic caps. Pry those caps off and remove the screws.
3. Prying the Panel Away
With all screws out, the panel is held by a series of plastic clips around its perimeter. Starting at the bottom corner, insert a trim tool between the panel and the door frame. Gently lever the panel outward. You’ll hear a series of pops as the clips release. Work your way around the bottom, then the back, and finally the front edge. Be extra careful near the front—the wiring for the mirror and handle runs through a rubber grommet here. Don’t pull the panel away sharply; instead, once the clips are free, tilt the panel outward from the bottom to create space.
4. Disconnecting Electrical Connectors
Once the panel is loose but still hanging by wires, you’ll see several connectors. These control the window switch, lock switch, and mirror adjustment. Each connector has a small locking tab—usually a plastic flap or sliding mechanism. Press or slide the tab to release it, then gently pull the connector apart. Never pull on the wires themselves; always grip the hard plastic housing. Take a photo of each connector’s position before unplugging if you’re unsure. This is where referencing that Nissan push-start button guide helps—the principle of releasing locks before pulling is universal.
5. Lifting Off the Panel
With all connectors unplugged, carefully lift the door panel upward and outward. It may be caught on a small plastic hook near the mirror area. Wiggle it free. Once off, place it on a soft surface, right-side up, to avoid scratching the vinyl or plastic.
Step-by-Step: Rear Door Panel Removal
Rear door panels on the Mazda 6 are similar but have a few key differences. They typically lack power window regulators in some trims (though many have them), and they include child safety lock mechanisms. The general sequence is the same: screws first, then clips, then connectors.
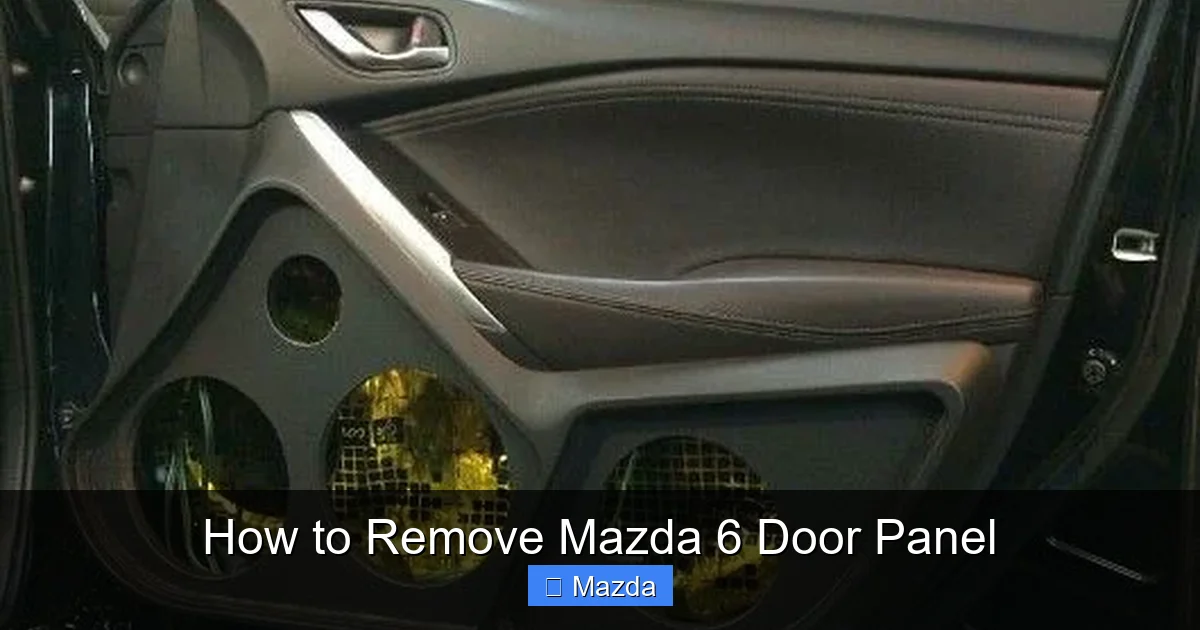
Visual guide about How to Remove Mazda 6 Door Panel
Image source: servicetutorials.com
1. Identify and Remove All Screws
Check the armrest and grab handle just like the front. Rear doors often have an additional screw at the bottom of the door panel, behind a small plastic cover near the latch area. Don’t miss this one—it’s a common oversight. Also, some models have a screw behind the interior door handle cup or pull. Use your trim tool to pop any covers and extract all screws.
3. Dealing with the Child Lock Switch
If your rear door has a manual child lock lever (usually a small plastic switch near the latch mechanism), you may need to access it from the panel side. In some Mazda 6 models, the panel must be partially removed to reach the lock mechanism. If you see a plastic cover or access hole behind the panel, you might need to pop the panel partially to disengage the child lock before full removal. Consult your owner’s manual for your specific trim level.
4. Prying and Lifting
The clip pattern is similar to the front. Start at the bottom and work around. Rear panels sometimes have more clips along the top edge because they don’t have a window regulator housing to contend with. Be gentle but persistent. Once the clips are free, tilt the panel outward. You’ll likely encounter the wiring for the switch pack (if equipped) and possibly a speaker connector. Unplug these carefully, noting their positions.
Handling Electrical Components and Connectors
This is the part that worries most DIYers, but it’s straightforward once you know what to look for. Your Mazda 6 door contains several electrical components connected via plastic plugs.
Visual guide about How to Remove Mazda 6 Door Panel
Image source: i.pinimg.com
Common Connectors and Their Release Mechanisms
You’ll typically see three to four connectors:
- Window switch pod: Usually a 2- or 4-pin connector with a small black locking tab. Press the tab down and pull.
- Door lock switch: Similar, often with a tab that slides sideways.
- Mirror adjustment switch: Small connector, same release method.
- Speaker (if equipped): Simple plug, sometimes with a clip that must be squeezed.
Inspect each connector carefully. If a tab is broken, you may need needle-nose pliers to gently release the internal latches. Never force a connector—if it stuck, double-check for a hidden lock. This careful approach is exactly what we emphasize in our Nissan push-start button removal guide, where connector damage is a common pitfall.
What to Do If a Connector is Stuck
Sometimes connectors seize over time. Try wiggling them side-to-side while pressing the tab. Use a plastic tool to gently pry between the plug and the housing if needed. If the plastic tab breaks, you can often still separate the connector by carefully prying the two halves apart with a flat tool, but be prepared to possibly replace the connector or use electrical tape for a temporary fix.
Reassembly, Testing, and Common Issues
Putting the door back together is essentially the reverse of removal, but there are important steps to ensure everything works perfectly.
Reconnecting Electrical Components
Before you try to fit the panel, plug all the connectors back in. You should hear a definite click when each lock engages. Give each wire a gentle tug to confirm it’s secure. This prevents you from installing the panel only to discover a loose connection behind it.
Positioning the Panel
Hold the panel at an angle and align the top edge first. The panel has plastic hooks or tabs that must slide into the door frame’s corresponding slots. Get the top edge seated properly, then swing the panel inward. You’ll feel the bottom clips engage. Don’t force it—if it doesn’t fit, you likely missed a clip or a wire is pinched. Start over.
Reinserting Screws and Replacing Covers
Once the panel is flush with the door, reinstall all screws in their original locations. Don’t overtighten—plastic threads can strip. Snap any plastic caps or covers back into place. Reattach the door handle bezel and lock knob.
Final Testing Before Full Reassembly
Before you reinstall the door handle screw, reconnect the battery (if you haven’t already). Test the window up/down, lock/unlock, and mirror adjustments. Listen for unusual noises. If something doesn’t work, unplug the battery immediately and check your connections. It’s much easier to fix now than after you’ve screwed everything back together.
Common Issues and Solutions
Broken plastic clips: These are common. You can buy replacement clip kits online. Use a plastic welding adhesive or epoxy for a temporary fix, but a new clip is best.
Panel doesn’t fit flush: Usually a missed clip or a wire harness pinched behind. Remove the panel and check carefully.
Window or lock not working: Almost always an electrical connector issue. Unplug, inspect for damage, and reseat.
Pro Tips and Troubleshooting
Even with a perfect guide, a few extra tips can save you time and frustration.
Work from the Bottom Up
When prying the panel, start at the bottom corner. The bottom edge usually has the fewest hidden wires and is the easiest to free. Once the bottom is loose, work your way up each side.
Keep Screws Organized
Use a small parts organizer or a piece of cardboard with holes punched in it to pin each screw. Label them by location (e.g., “armrest,” “grab handle”). Trust me, you won’t remember which 10mm screw goes where when you’re under the door.
If You’re Stuck, Consult Visual Guides
Sometimes a picture is worth a thousand words. While our text is detailed, watching a video on front door panel removal for a similar model year can clarify tricky steps. Many Mazda 6 forums have user-submitted photos that show exact clip locations.
When to Seek Professional Help
If you encounter a broken airbag component, severely damaged wiring, or a window regulator that’s completely seized, it might be time to call a pro. Also, if your car is still under warranty, taking it to the dealer might cover the repair.
Remember, the process for removing interior panels is largely consistent across many vehicles. The techniques you learn on your Mazda 6—gentle prying, clip identification, and careful connector handling—will serve you well on other projects. Whether you’re following our guide on removing a Toyota Yaris back seat or taking out a Toyota Sienna middle seat, those same skills apply. Take your time, respect the plastic, and you’ll succeed.
Conclusion
Removing the door panel on your 2026 Mazda 6 is not just a repair task—it’s a chance to get intimately familiar with your car’s inner workings. You’ve now learned the critical steps: disconnect the battery, remove all screws and covers, pry clips systematically, handle connectors with care, and test thoroughly before final assembly. Armed with this knowledge, you can tackle speaker replacements, window regulator fixes, lock repairs, and even custom wiring projects with confidence. The key is patience and the right tools. Don’t rush, take photos if needed, and enjoy the satisfaction of a job done well. Your Mazda 6’s door will be back together and functional in no time, and you’ll have saved a significant amount on labor costs. Happy fixing!
Frequently Asked Questions
Do I need to disconnect the battery before removing the door panel?
Yes, absolutely. Disconnecting the negative battery terminal is mandatory to prevent electrical shorts and avoid triggering airbag warning lights. Wait 10 minutes after disconnection to ensure systems are fully powered down.
What’s the most common mistake when prying off the door panel?
The biggest mistake is using metal tools or applying too much force, which cracks the plastic clips and panel. Always use plastic trim tools and work slowly around the perimeter, releasing clips one by one.
Are front and rear door panels removed differently on a Mazda 6?
The basic process is similar, but rear doors may have an extra screw at the bottom and often include a child safety lock mechanism that might need special attention. Always check for all screws before prying.
What if a plastic clip breaks during removal?
Broken clips are common but not catastrophic. You can often find replacement clips online or at dealerships. For a temporary fix, use a plastic welding adhesive. When reinstalling, ensure the new clip is properly seated to hold the panel securely.
My window stopped working after reinstalling the panel. What should I check?
First, ensure all electrical connectors are fully plugged in and their locking tabs are engaged. If connections are good, check the window fuse. Most often, a loose or misaligned connector is the culprit. Reconnect the battery and test with the panel slightly loose to isolate the issue.
Can I remove the door panel alone, or do I need help?
You can do it alone, but having a second set of hands helps, especially when lifting the panel off and supporting it while unplugging connectors. It prevents strain on wires and makes the process smoother.