How to Check Primary Oil on a Harley-davidson
Contents
- 1 Key Takeaways
- 2 📑 Table of Contents
- 3 The Harley Primary System: More Than Just a Chain Case
- 4 Why Checking Primary Oil Is Non-Negotiable
- 5 Tools, Safety, and Preparation
- 6 How to Check Primary Oil: A Step-by-Step Guide
- 7 Interpreting the Dipstick and Fluid Condition
- 8 Common Mistakes and Troubleshooting
- 9 Establishing a Maintenance Routine
- 10 Conclusion: Your Primary Oil, Your Responsibility
- 11 Frequently Asked Questions
Regularly checking the primary oil on your Harley-Davidson is a non-negotiable maintenance task that directly impacts clutch feel and transmission longevity. This guide simplifies the process into clear, actionable steps, from locating the dipstick to interpreting the correct fluid level. By mastering this quick check, you safeguard your bike’s performance and avoid expensive repairs, ensuring many more miles of reliable riding.
Key Takeaways
- The primary system is critical: It houses your clutch and transmission, requiring specific oil for lubrication and cooling, separate from engine oil.
- Check when the engine is warm: For the most accurate reading, check the primary oil level after a short ride, when the bike is upright and level.
- Use only Harley-Davidson primary oil or a recommended equivalent: Using the wrong fluid can cause clutch slippage and premature wear.
- The dipstick has unique markings: Harley primary dipsticks use “ADD” and “FULL” lines, often with a crosshatch pattern between them for the ideal range.
- Never overfill: Overfilling can cause aeration, foaming, and increased pressure, leading to seal leaks and component damage.
- Inspect for leaks during every check: Look around the primary cover and derby cover for any signs of oil seepage, which indicates a seal issue.
- Consult your owner’s manual: Your specific model year may have unique procedures or oil capacity specifications.
📑 Table of Contents
- The Harley Primary System: More Than Just a Chain Case
- Why Checking Primary Oil Is Non-Negotiable
- Tools, Safety, and Preparation
- How to Check Primary Oil: A Step-by-Step Guide
- Interpreting the Dipstick and Fluid Condition
- Common Mistakes and Troubleshooting
- Establishing a Maintenance Routine
- Conclusion: Your Primary Oil, Your Responsibility
The Harley Primary System: More Than Just a Chain Case
When you think of motorcycle maintenance, checking engine oil probably comes to mind first. But on your Harley-Davidson, the primary system is a world unto itself—a sealed chamber that houses the heart of your bike’s power delivery: the clutch and the transmission’s primary drive. This isn’t just a chain guard; it’s a precision-engineered unit that demands its own dedicated lubricant. Understanding this system is the first step to appreciating why checking primary oil on a Harley-Davidson is so vital.
The primary system connects the engine’s crankshaft to the transmission. Inside, a complex dance of clutch plates, a primary chain or belt, and gears occurs, all bathed in primary oil. This fluid has a tough job: it lubricates the clutch plates to prevent slippage under torque, cools the system, and protects the metal components from wear. Unlike engine oil, which deals with combustion byproducts, primary oil primarily battles shear forces and friction. It’s a specialized fluid, and its condition and level are paramount to your Harley’s health and your riding experience.
What Makes Harley Primary Oil Different?
Harley-Davidson formulates its primary oil specifically for the demands of its V-twin clutch and drivetrain. It has a different viscosity and additive package than engine oil or even other motorcycle primary oils. Using car engine oil or the wrong motorcycle oil can lead to a slippery clutch that can’t transfer power effectively, resulting in frustrating clutch slip, especially when you crack the throttle. Conversely, oil that’s too thick can cause dragging, making shifting difficult. Always stick to the recommended specification—typically Harley-Davidson Primary/Transmission Oil or a high-quality equivalent meeting JASO MA2 standards for wet clutches.
Why Checking Primary Oil Is Non-Negotiable
Neglecting your primary oil is a classic case of “pay me now or pay me later.” The consequences of low or degraded primary oil range from annoying to catastrophic. Let’s break down why this simple check should be a staple of your pre-ride or monthly maintenance routine.
Visual guide about How to Check Primary Oil on a Harley-davidson
Image source: i.ytimg.com
Preventing Costly Clutch and Transmission Damage
The primary oil’s primary (pun intended) function is to allow the clutch plates to grip without welding themselves together. If the oil level is low, the clutch can overheat and burn, leading to slippage where the engine revs but the bike doesn’t accelerate proportionally. This is not only dangerous but also expensive to fix, requiring a complete clutch rebuild. Similarly, the primary drive chain or belt and its sprockets run in this oil. Insufficient lubrication causes rapid wear, excessive noise (a loud rattle), and ultimately, failure that can strand you. A broken primary chain can cause massive internal damage.
Ensuring Smooth, Reliable Shifting
That notchy, hard shift you’re experiencing? It could be your primary oil. The transmission’s shift mechanism is lubricated by the primary oil. Old, contaminated, or low oil increases friction in the shift linkage and bearings, making each gear change feel like a tiny battle. Fresh oil at the correct level ensures that satisfying, confident click into gear every time. It’s a direct link between maintenance and ride quality.
Avoiding Costly Leaks and Seal Failures
Overfilling the primary is just as bad as underfilling. Excess oil creates pressure within the sealed primary case. This pressure has to go somewhere, and it usually pushes out the weakest seals—typically the output shaft seal (where the chain exits) or the derby cover gasket. A slow, messy leak not only drips on your paint and rear tire (a serious safety hazard) but also slowly starves the system of oil. Regularly checking the level helps you maintain the perfect balance.
For a broader perspective on vehicle fluid maintenance, the principles of regular checks are universal. Understanding how to systematically check vital fluids, as outlined in guides for other vehicles, reinforces the habit that keeps your Harley running smoothly.
Tools, Safety, and Preparation
Checking primary oil on a Harley-Davidson is a simple task, but doing it correctly requires the right setup. Rushing or skipping steps leads to inaccurate readings and potential messes. Let’s get prepared.
Visual guide about How to Check Primary Oil on a Harley-davidson
Image source: blog.amsoil.com
Essential Tools You’ll Need
- A clean, lint-free cloth or paper towel: For wiping the dipstick clean. Grease or dirt on the dipstick will give a false reading.
- The correct primary oil: Have a funnel and your chosen Harley-approved primary oil on hand. A typical primary oil change on many Sportsters and Softails requires about 1 quart (32 oz), but always verify for your specific model.
- A flashlight: The primary dipstick can be in a dimly lit area under the seat or near the battery.
- Gloves (optional but recommended): Primary oil can be messy and is not kind to skin or paint.
Critical Safety Precautions
Your safety is paramount. Never check primary oil with the engine running. The primary system is connected to the spinning crankshaft. Removing the dipstick while the engine is on could result in hot, pressurized oil spraying out, causing severe burns or fire risk. Always ensure the ignition is off and the key is removed. Additionally, perform the check on a stable, level surface. If your bike has a center stand, use it. If it only has a side stand, ensure the bike is as level as possible; you may need to use a paddock stand for a perfectly level reading, especially on uneven ground.
When is the Best Time to Check?
The ideal time is after a short ride of 5-10 minutes. This warms the oil to its operating temperature (around 180-200°F), allowing it to drain back into the sump and give a true “hot” level reading. Cold oil will cling to components and show lower on the dipstick, potentially leading you to overfill. If the bike has been sitting for hours or days, start it and let it idle for a few minutes to circulate the oil, then turn it off and wait 2-3 minutes for the oil to settle before checking.
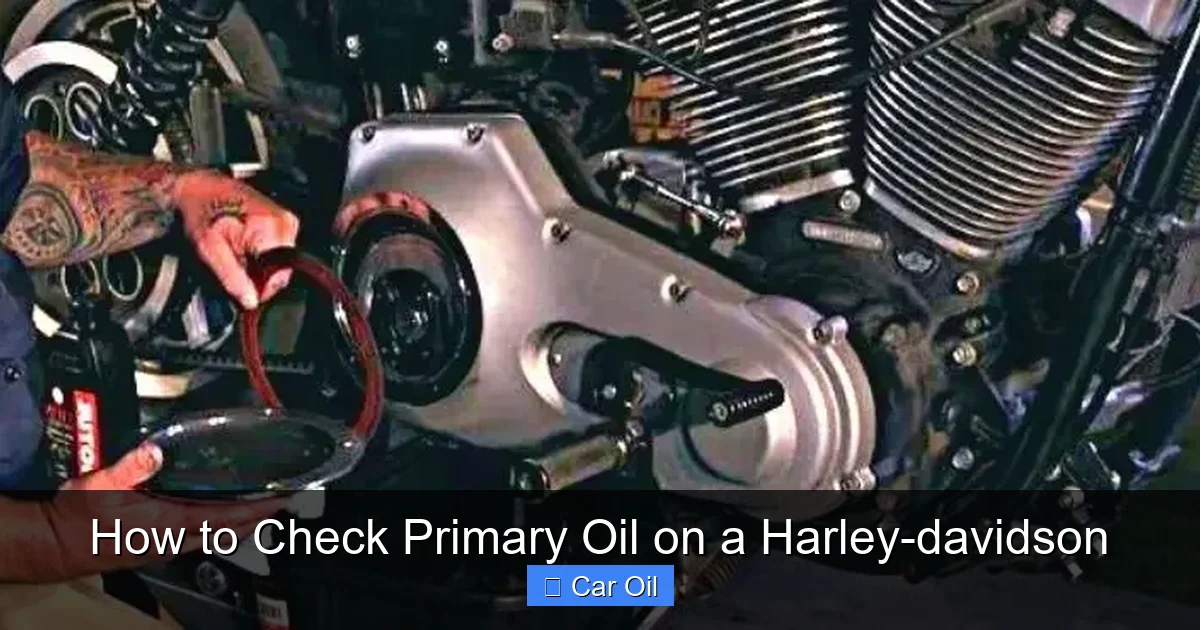
How to Check Primary Oil: A Step-by-Step Guide
Now for the main event. While dipstick location and design vary slightly across Harley model families (Sportster, Dyna, Softail, Touring), the fundamental process is identical. We’ll cover the most common bayonet-style dipstick found on models from the late 1990s onward. Always defer to your specific owner’s manual if available.
Visual guide about How to Check Primary Oil on a Harley-davidson
Image source: whitestarrides.com
Step 1: Position the Motorcycle
Park your Harley on a solid, level surface. Engage the center stand if equipped. For models without a center stand, use a quality paddock stand to hold the bike upright and perfectly level. This is crucial; an unlevel bike will give a false reading. Turn off the engine and remove the key.
Step 2: Locate and Prepare the Dipstick
The primary dipstick is typically located on the right side of the primary cover, near the top. It’s usually a metal rod with a knurled (grip-patterned) end or a T-handle. On some earlier models or specific Touring bikes, it might be a screw-in type with a hex head. Before pulling the dipstick, have your clean cloth ready. This minimizes oil drips onto the bike.
Step 3: Remove, Wipe, and Reinsert
Firmly pull the dipstick straight out. It may have an O-ring seal—be careful not to lose it. Wipe the entire length of the dipstick clean with your cloth. Now, reinsert the dipstick fully into its tube. Make sure it’s seated completely. For screw-in types, hand-tighten until snug, then give it a final quarter-turn with a wrench if specified in your manual (do not over-tighten).
Step 4: The Crucial Reading
Pull the dipstick out again, holding it vertically. The oil will cling to the stick, showing a clear line. The dipstick will have markings. On most modern Harleys, you’ll see two lines or a crosshatched area. The ideal oil level should be between the “ADD” (or “LOW”) and “FULL” lines, with the optimal point often being the center of the crosshatch pattern. If the oil level is at or below the “ADD” line, you must add oil. If it’s above the “FULL” line, you must remove the excess. Never operate the bike with oil below the “ADD” line.
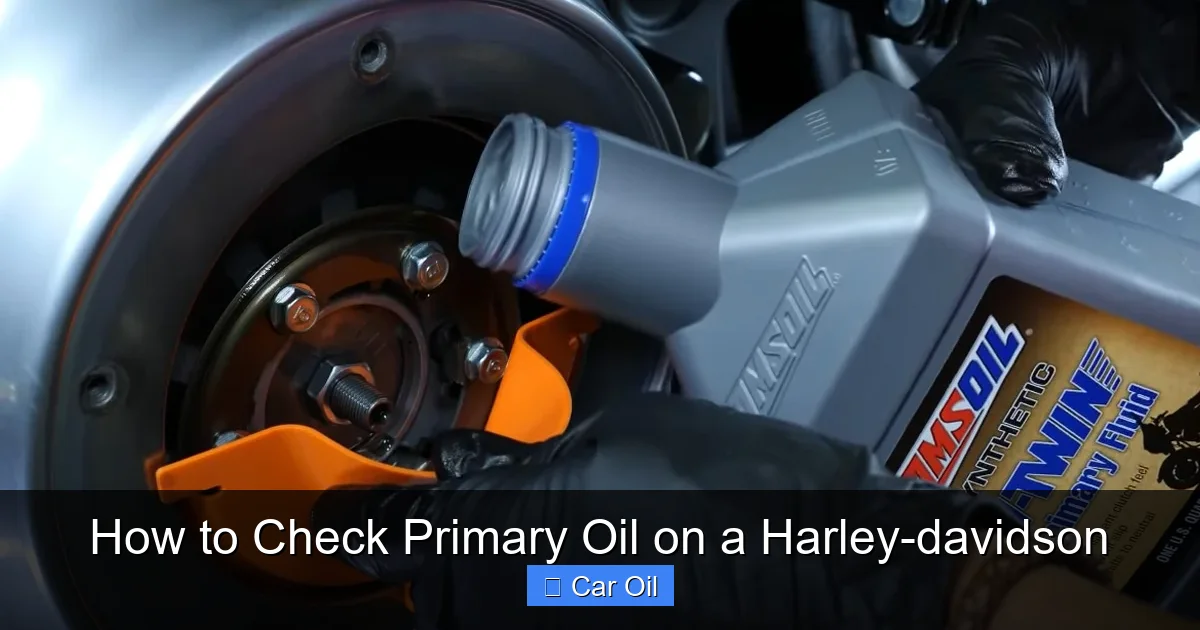
Step 5: Adding or Correcting Oil Level
If oil needs to be added, remove the dipstick again. You will add oil through the dipstick tube. Use a funnel with a flexible spout to avoid spills. Slowly add the recommended Harley primary oil. Add about 1 ounce at a time, waiting a moment for it to drain down, then re-check the level with the dipstick as in Step 4. It’s easy to overfill, so add incrementally. If you’ve overfilled, you’ll need to remove some oil. The cleanest method is to use a fluid extractor pump (like a turkey baster or a dedicated pump) inserted down the dipstick tube to siphon out the excess. Alternatively, you can carefully loosen the derby cover (the round cover on the primary with the inspection window) to drain a small amount, but this is messier.
Interpreting the Dipstick and Fluid Condition
Getting a number on the stick is only half the battle. What that number means and the state of the oil itself tell the full story of your primary’s health.
Decoding the Markings
As mentioned, look for the “ADD” and “FULL” lines. Some older dipsticks might only have a single “FULL” line. In that case, the oil level should be right at that line when the bike is level. The crosshatch area (a series of diagonal lines) between these lines is your “safe zone.” Oil anywhere within this zone is acceptable. The middle is ideal. If you’re consistently finding the oil at the low end of this range, you may have a small leak or a consumption issue that needs investigation.
What Your Oil’s Color and Consistency Reveal
While you have the dipstick out, examine the oil on it. Fresh Harley primary oil is typically a translucent amber or light brown color. As it ages and shears, it darkens to a deep brown or almost black. This is normal. More important than color is consistency. Wipe the oil between your fingers. It should feel slick and smooth. If you feel any grittiness, that’s a major red flag—it means metal particles are suspended in the oil, indicating severe internal wear (clutch or transmission). If the oil feels gritty, do not run the engine. Have the primary inspected by a professional immediately. Also, smell the oil. A strong, acrid, burnt odor indicates overheating and oil breakdown, likely from low level or a slipping clutch.
Common Mistakes and Troubleshooting
Even experienced riders can make errors when checking primary oil. Avoiding these pitfalls saves time, money, and prevents damage.
Mistake 1: Checking a Cold Bike
This is the #1 error. Cold oil hasn’t drained back into the sump, so the dipstick will show artificially low. You might add oil, only to have an overfilled condition once the engine warms up and the oil expands and circulates. Always aim to check after a warm-up period.
Mistake 2: Not Ensuring a Level Bike
This cannot be stressed enough. A bike on a sloped driveway or even a slightly uneven garage floor will give a wildly inaccurate reading. The oil will pool to the low side. Use a center stand or paddock stand for a true level check.
Mistake 3: Forcing the Dipstick
Some dipsticks, especially on older models, can be sticky due to old O-rings or debris. If it doesn’t pull out easily, don’t brute-force it. Try wiggling it gently while pulling. Forcing it can break the tube or damage the seal. If stuck, a little penetrating oil around the base (applied carefully) can help, but often the best solution is to have it inspected during a service.
Mistake 4: Ignoring a Slight Leak
A few drops under the bike after a long ride? That’s your first warning. The primary system is under slight pressure. A slow leak from a derby cover gasket or seal will eventually lower the oil level. Don’t just keep adding oil; identify and replace the failing seal. A leaking primary can also fling oil onto the rear tire, creating a serious loss-of-traction hazard.
When troubleshooting issues like clutch slip or hard shifting, the primary oil is the first suspect. However, remember that other systems interconnect. For instance, poor overall vehicle maintenance can sometimes mask as specific component issues. A systematic approach to checking all vital fluids, similar to the method used for checking oil levels in other vehicles, is a sound strategy for any mechanic.
Establishing a Maintenance Routine
Knowing how to check is only part of the equation. Knowing when and what to do with that information completes the cycle of responsible ownership.
How Often Should You Check?
As a minimum, check your primary oil level at every oil change interval. For most Harleys, this is every 5,000 miles or once a year, whichever comes first. However, given the critical nature of this system, a quick monthly visual check and level verification is a fantastic habit. It takes less than two minutes and provides invaluable peace of mind. If you ride hard, tow a trailer, or frequently ride in very hot or dusty conditions, check it more often.
When to Change the Oil
Primary oil doesn’t get contaminated by fuel or combustion like engine oil, but it still breaks down from heat and shear stress. The standard recommendation is to change the primary oil every 10,000 to 20,000 miles, or at the same interval as your engine oil if you’re being conservative. Many riders change it at every second engine oil change. If the oil looks excessively dark, smells burnt, or you’ve had a clutch or transmission repair, change it immediately. A primary oil change is a straightforward process involving draining via the drain plug (if equipped) or by removing the derby cover, then refilling through the dipstick tube. Capacity varies by model—common amounts are 32 oz (1 quart) for many Sportsters and Softails, but Touring models may require more. Always look up the exact capacity for your model year in your service manual.
Building a Holistic Maintenance Habit
Your Harley is a symphony of systems. While the primary is unique, the discipline of regular fluid checks applies across the board. Just as you wouldn’t neglect your engine oil, tire pressure, or transmission fluid in a car, you shouldn’t neglect your primary. Integrating this check into a broader monthly inspection routine—tires, brakes, lights, all fluid levels—creates a comprehensive safety net. In fact, the routine of checking fluid levels is a foundational skill for any vehicle owner, whether it’s a Harley or a Honda Civic. The act of lifting the seat, finding the dipstick, and verifying a level is a universal language of mechanical care.
Conclusion: Your Primary Oil, Your Responsibility
Checking primary oil on your Harley-Davidson is one of the simplest yet most impactful maintenance tasks you can perform. It requires no special tools, takes less than five minutes, and directly protects components that are expensive and complex to repair. The process—warm up the bike, ensure it’s level, pull the dipstick, wipe, reinsert, and read—is straightforward. The key is consistency and using the correct fluid.
By making this a regular habit, you move from being a rider to a true steward of your machine. You’ll develop a deeper connection to your Harley, understanding its needs and responding proactively. You’ll enjoy smoother shifts, a more responsive clutch, and the confidence that comes from knowing you’ve prevented a potential breakdown. So, at your next service interval or even this weekend, take those few minutes to check your primary oil. Your future self, and your wallet, will thank you with countless trouble-free miles on the open road.
Frequently Asked Questions
Can I use regular Harley engine oil in the primary?
No. Harley engine oil and primary/transmission oil have different formulations. Engine oil contains friction modifiers that can cause clutch slippage. Always use oil specifically labeled for Harley primary and transmission use, or a JASO MA2-certified motorcycle oil suitable for wet clutches.
What should I do if my primary oil level is low?
First, add the correct Harley primary oil to bring the level to the “FULL” mark. Then, inspect the primary cover and derby cover gaskets for leaks. A recurring low level usually indicates a seal that needs replacement. Do not ignore it, as running low can destroy the clutch and transmission quickly.
How much primary oil does my Harley need?
Capacity varies significantly by model and year. Sportsters and Softails typically hold about 32 oz (1 quart). Touring models often hold more, sometimes 36-40 oz. The only way to be certain is to consult your official Harley-Davidson owner’s manual for your specific model year.
My primary oil looks milky or foamy. What does that mean?
Milky or foamy oil indicates water contamination. This is serious. Water can enter through a faulty seal or from condensation if the bike is stored in a humid environment with temperature swings. Do not run the engine. The primary cover must be removed, the oil completely drained and replaced, and the source of the leak identified and fixed.
Is it okay to check primary oil when the bike is cold?
You can check it cold, but the reading will be inaccurate—it will show lower than the true “hot” level. The best practice is to check after a short ride when the oil is warm and has settled. If you must check cold, be aware the level may be slightly low, and re-check after warming up.
What are the symptoms of bad or low primary oil?
Symptoms include clutch slippage (engine revs but bike doesn’t accelerate normally), hard or notchy gear shifts, loud rattling from the primary drive, and visible leaks around the primary cover or derby cover. You may also feel excessive heat from the primary area after riding.