Does a 2014 Ford F150 Have a Cabin Air Filter
Contents
- 1 Key Takeaways
- 2 📑 Table of Contents
- 3 The Verdict: Yes, Your 2014 F150 Has a Cabin Air Filter
- 4 What Exactly is a Cabin Air Filter and Why Should You Care?
- 5 Finding the Filter: Location in Your 2014 Ford F150
- 6 Step-by-Step: How to Replace the Cabin Air Filter Yourself
- 7 Warning Signs: When Your Cabin Filter Needs Attention
- 8 Maintenance Schedule and Choosing the Right Replacement Filter
- 9 Conclusion
- 10 Frequently Asked Questions
Yes, your 2014 Ford F150 comes equipped with a cabin air filter. It’s located behind the glovebox and filters incoming air to remove pollen, dust, and pollutants. Replacing it every 15,000-30,000 miles is a simple DIY task that ensures clean air and optimal HVAC performance.
Key Takeaways
- The 2014 Ford F150 does have a cabin air filter. It’s a standard feature in this model year, located behind the glovebox compartment.
- Its primary job is to clean the air entering your truck’s HVAC system, trapping pollen, dust, soot, and other airborne contaminants.
- Replacement is a straightforward DIY project requiring only basic tools and about 30 minutes of your time.
- Replace it every 15,000 to 30,000 miles or annually, depending on driving conditions in your area.
- Ignoring a clogged filter reduces airflow from vents, strains the HVAC system, and can cause unpleasant musty odors.
- Both OEM and quality aftermarket filters work well—choose based on your budget and desired filtration efficiency (e.g., activated carbon for odors).
- Regular changes improve cabin air quality and protect your truck’s heating and cooling components from excess wear.
📑 Table of Contents
- The Verdict: Yes, Your 2014 F150 Has a Cabin Air Filter
- What Exactly is a Cabin Air Filter and Why Should You Care?
- Finding the Filter: Location in Your 2014 Ford F150
- Step-by-Step: How to Replace the Cabin Air Filter Yourself
- Warning Signs: When Your Cabin Filter Needs Attention
- Maintenance Schedule and Choosing the Right Replacement Filter
- Conclusion
The Verdict: Yes, Your 2014 F150 Has a Cabin Air Filter
Let’s address the core question directly: the 2014 Ford F150 does come equipped with a cabin air filter. This isn’t a trim-level exclusive or an optional extra; it’s a standard feature across all 2014 F150 models, from the base XL to the premium Limited. Ford has included cabin air filters in the F150 since at least the early 2010s, recognizing the importance of interior air quality even in work trucks.
The filter is housed within the HVAC system and is typically located behind the glovebox on the passenger side. It’s a rectangular panel filter, usually measuring about 10 inches by 10 inches, though exact dimensions can vary slightly depending on cab configuration (regular, super, or crew cab) and engine type. The filter media is made of pleated, non-woven fibers that trap particles as they pass through. Some aftermarket upgrades include activated carbon layers to absorb odors and gases, which can be a worthwhile investment if you often drive in heavy traffic or polluted areas.
It’s worth noting that not all trucks of this era had cabin filters as standard. For comparison, the Toyota Tundra introduced cabin air filters around the same time, making it a common feature in full-size pickups by 2014. So, you can rest easy knowing your F150 is not missing this key component. If you’re ever in doubt, a quick visual inspection behind the glovebox will confirm its presence—just be gentle to avoid damaging plastic clips.
Evolution of Cabin Filters in Trucks
Cabin air filters weren’t always standard in pickup trucks. In the 1990s and early 2000s, they were mostly found in luxury cars and SUVs. As awareness of in-car air quality grew and regulations tightened, automakers began adding them to more models. By the 2010s, even full-size trucks like the F150 and Tundra included them as standard equipment. This shift was driven by consumer demand for better comfort and health, as well as the need to protect sensitive HVAC components from dust and debris common in truck usage.
How to Verify If Your Specific F150 Has It
While we can confidently say all 2014 F150s have a cabin filter, there are ways to double-check:
- Owner’s manual: Check the maintenance section—it should list cabin filter replacement intervals.
- Visual inspection: Remove the glovebox as described later. If you see a rectangular filter slot, you have one.
- VIN lookup: A Ford dealer can look up your VIN and confirm the presence of a cabin filter based on the build sheet.
If, for some rare reason, your truck lacks a filter (perhaps due to a previous owner’s modification), you can install an aftermarket kit. But this is unlikely for a 2014 model.
What Exactly is a Cabin Air Filter and Why Should You Care?
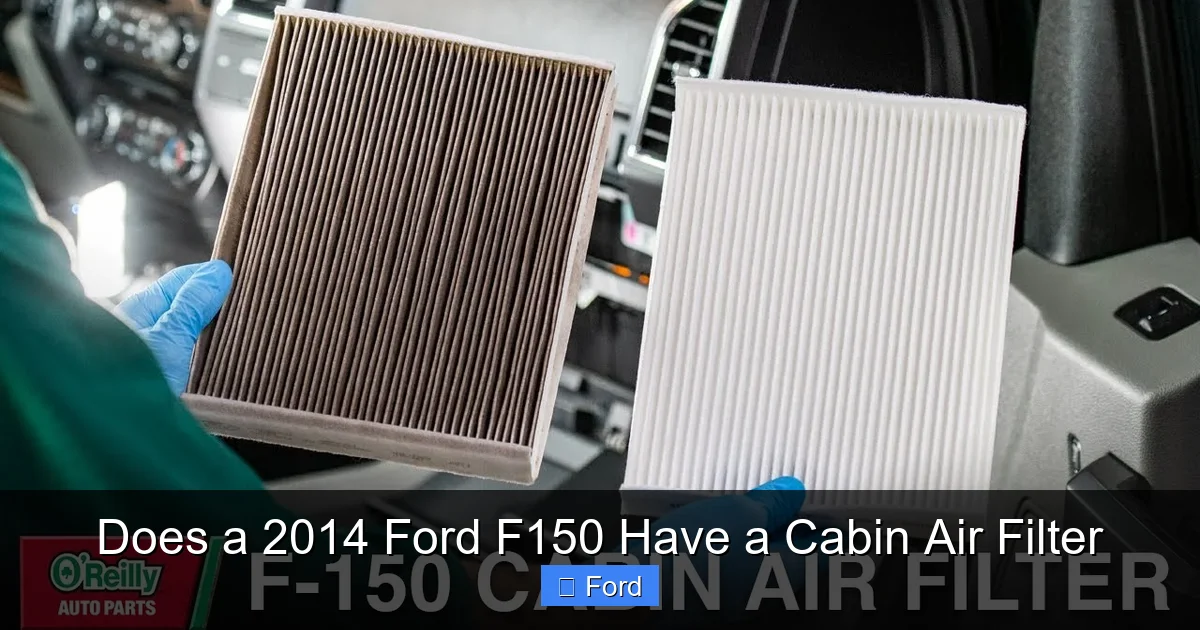
To appreciate the cabin air filter, it helps to understand its function within your truck’s HVAC system. Essentially, it’s a barrier that cleans the air before it enters the cabin. When you set your climate control to draw fresh air from outside (as opposed to recirculating interior air), that air must pass through the filter first. The filter’s job is to capture a wide range of contaminants, from large particles like dust and pollen to microscopic pollutants like soot and brake dust.

Visual guide about Does a 2014 Ford F150 Have a Cabin Air Filter
Image source: carglassadvisor.com
How Filtration Works
Cabin filters use mechanical interception, diffusion, and electrostatic attraction to trap particles. The pleated design increases surface area, allowing more air to pass through while capturing debris. Standard filters are rated by MERV (Minimum Efficiency Reporting Value), which indicates their ability to capture particles of various sizes. Most OEM filters for the F150 are MERV 8-11, effective for common allergens and dust. Higher MERV ratings (like 12+) capture smaller particles but may restrict airflow if your HVAC system isn’t designed for them—so stick to the recommended rating.
Types of Cabin Filters
There are three main types available for the F150:
- Particulate filters: These are the most common and trap solid particles like dust, pollen, and soot. They’re made from paper or synthetic fibers and are adequate for most drivers.
- Activated carbon filters: These include a layer of activated carbon that adsorbs gases, odors, and volatile organic compounds (VOCs). They’re excellent for city driving, smokers, or anyone sensitive to smells. They often combine particulate media with carbon.
- Electrostatic filters: Some aftermarket filters use electrostatic charge to attract and hold particles. They can be washable and reusable, but they’re less common for the F150. K&N offers a reusable cabin filter for some models, but check fitment for your 2014.
Health and System Protection
The benefits of a clean cabin filter are twofold: personal health and HVAC longevity. For health, removing pollen, mold spores, and particulate matter reduces allergy symptoms and respiratory irritation. For the system, the filter prevents debris from building up on the evaporator coil, heater core, and blower motor. A dirty evaporator can lead to mold growth and foul odors, while debris on the blower motor causes imbalance and premature wear. In extreme cases, a clogged filter can cause the blower motor to overheat and fail, costing hundreds in repairs. Thus, the $15-$30 filter is a tiny price to pay for protecting both your well-being and your truck’s expensive components.
Additionally, a clean filter ensures optimal airflow, which is crucial for defogging windows in humid conditions. If you’ve ever struggled with foggy windows despite the defroster being on high, a clogged filter might be the hidden culprit. It also maintains A/C cooling efficiency—restricted airflow means less cold air and longer cool-down times.
Cabin Filter vs. Engine Air Filter
Don’t confuse the cabin air filter with the engine air filter. The engine air filter sits under the hood and cleans air entering the engine for combustion. The cabin air filter is inside the dash and cleans air for the passenger compartment. Both need regular replacement, but they serve different purposes. The engine air filter typically lasts 15,000-30,000 miles as well, but it’s exposed to much dirtier conditions.
Impact on Fuel Efficiency
A clogged cabin filter can slightly reduce fuel efficiency. Why? Because the HVAC blower motor has to work harder to pull air through a blocked filter, drawing more electrical power from the alternator, which in turn increases engine load. While the effect is minor (maybe 1-2% at most), it’s another reason to keep the filter clean, especially if you do a lot of city driving with frequent HVAC use.
Finding the Filter: Location in Your 2014 Ford F150
Now, let’s get practical. Where exactly is this filter in your 2014 F150? As mentioned, it’s located behind the glovebox. But the glovebox isn’t just a storage compartment—it’s a door that hides the filter access panel. Removing it is the first step to accessing the filter.
Visual guide about Does a 2014 Ford F150 Have a Cabin Air Filter
Image source: i.ytimg.com
Accessing the Glovebox: A Detailed Walkthrough
The process is similar across most 2014 F150 configurations, but there are minor variations. Here’s a step-by-step guide with tips to avoid common pitfalls:
- Prepare the area. Park on a level surface, engage the parking brake, and open the glovebox fully. Remove all items from inside to prevent them from falling out during disassembly.
- Locate and disconnect the damper. The damper is a small pneumatic arm or fabric strap that slows the glovebox door as it opens. It’s usually attached to the glovebox on one end and the dash or center console on the other. For the 2014 F150, it’s often a black plastic arm with a clip. Squeeze the clip to release it, or pull a retaining pin. If it’s a fabric strap, there may be a plastic retainer you can pry out. Be gentle—these parts become brittle with age and can break if forced.
- Remove the glovebox retaining clips. With the damper detached, the glovebox is held by two or three plastic clips along the top edge. These are usually U-shaped clips that grip a flange on the dash. To release them, pull the glovebox straight down with steady pressure. If they don’t release easily, use a flathead screwdriver to gently pry the clip outward while pulling. Avoid using excessive force; if a clip breaks, you can often find replacements at a Ford dealership or online for a few dollars.
- Lower the glovebox and disconnect any wires. Once the clips are disengaged, the glovebox will hang down. Check for any wiring harnesses or hoses attached—most F150s don’t have any for the glovebox, but some models with integrated electronics might. If you see a wire, press the tab and pull it out gently.
- Set the glovebox aside. You can lay it on the passenger seat or floor. Be careful not to scratch the interior or lose small parts.
- Locate the filter access panel. Behind where the glovebox was, you’ll see a rectangular plastic cover, about 8×10 inches, on the passenger side. It’s usually held by two or four plastic clips. Some models may have a Torx screw instead, so have a T20 or T25 screwdriver ready.
- Remove the access panel. Press the clips inward or unscrew to release the cover. Then pull it out carefully. You should now see the cabin filter, sliding into a slot.
Take note of the filter’s orientation—most have an arrow printed on the side indicating airflow direction (usually pointing toward the blower motor, which is deeper into the dash).
Cab Configuration Differences
While the basic location is the same, there are slight differences based on cab style:
- Regular Cab: The glovebox might be smaller, but the filter location is identical. The damper might be a simple strap rather than an arm.
- SuperCab and CrewCab: These have a full-size glovebox, but the damper may be positioned differently. In some crew cabs, there’s an additional storage bin behind the glovebox that must be removed first. Consult your owner’s manual for diagrams specific to your configuration.
- King Ranch or Limited trims: These may have extra trim pieces around the glovebox that need removal. Usually, they’re just snap-in plastic covers.
If you’re unsure, a YouTube search for “2014 F150 cabin air filter location” will show videos for your specific cab style. Watching one can save you time and frustration.
Common Access Issues and Solutions
Here are some problems you might encounter and how to solve them:
- Broken glovebox clips: If a plastic clip breaks, don’t panic. You can often find replacement clips at the dealership or online (search for “F150 glovebox clip”). In the meantime, you can sometimes reattach the glovebox with zip ties or small screws, but be careful not to damage the dash.
- Stuck damper: If the damper won’t release, inspect it for a hidden pin or clip. Sometimes it’s easier to remove the entire glovebox with the damper still attached, then disconnect the damper from the dash side. But this can be tricky.
- Filter stuck in housing: Old filters can become brittle and break when pulled. If it’s stuck, try wiggling it gently side-to-side while pulling. If it tears, you may need to carefully remove pieces with needle-nose pliers. Clean the housing thoroughly before installing the new filter.
- Missing access panel screws: Some models use screws instead of clips. If the screw is missing, you can often use a short sheet metal screw from the hardware store, but be careful not to over-tighten and crack the plastic.
Step-by-Step: How to Replace the Cabin Air Filter Yourself
With the filter located, replacement is straightforward. Here’s a detailed walkthrough to ensure you do it correctly the first time.
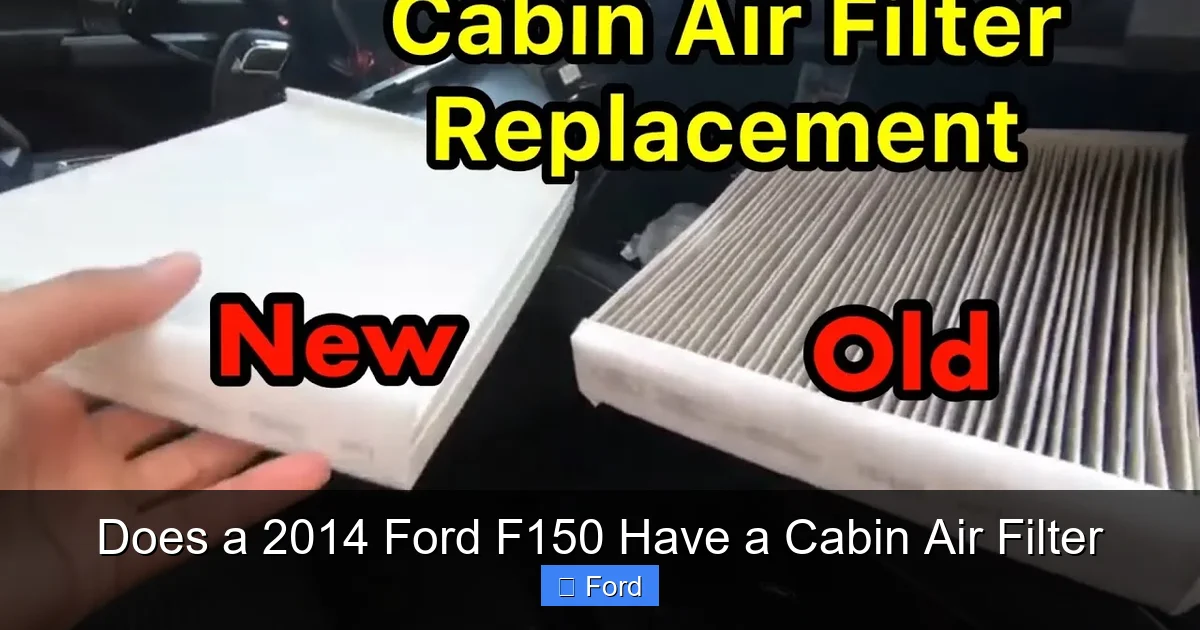
Visual guide about Does a 2014 Ford F150 Have a Cabin Air Filter
Image source: i.ytimg.com
Tools and Materials Checklist
You’ll need:
- New cabin air filter. For a 2014 F150, common part numbers include:
- Motorcraft FL-820 (OEM)
- Fram CF10285
- WIX 24838
- Purolator C35418
Always verify fitment for your specific cab and engine. You can check online or at the parts counter by providing your VIN. If you have a crew cab supercrew, the part number might differ slightly from a regular cab.
- Basic hand tools: Usually none required, but having a flathead screwdriver and a Phillips screwdriver (in case of screws) helps. Some people like to use plastic trim removal tools to avoid scratching.
- Gloves and vacuum: Optional but recommended to keep your hands clean and remove debris from the housing. A small handheld vacuum works best.
- Flashlight: To see inside the dark housing.
- Shop towel or rag: To wipe away any dust.
Pre-Replacement Checklist
Before you start:
- Ensure the vehicle is parked safely with the parking brake on.
- Disconnect the negative battery terminal if you’re concerned about airbag systems (though not necessary for this task).
- Have your new filter ready and verify it’s the correct part.
- Clear a workspace on the passenger seat or floor to place the glovebox.
- Take a photo of the installed filter before removal to remember orientation.
Replacement Procedure: Detailed Steps
- Remove the glovebox. Follow the steps from the previous section: disconnect the damper, remove clips, and pull the glovebox down. If you encounter resistance, double-check for any hidden screws or clips. Set the glovebox aside carefully.
- Access the filter. Remove the plastic access panel by releasing clips or screws. You should now see the old filter.
- Extract the old filter. Slide it out slowly. It will be dirty—avoid shaking it. Note the orientation (arrow direction) before fully removing it. If it’s stuck, wiggle gently. If it tears, remove all pieces carefully.
- Clean the housing. Use a vacuum to remove loose dirt, leaves, or debris from the filter chamber. Wipe the plastic surfaces with a damp cloth if needed. This prevents contaminants from entering the new filter and ensures a good seal. Pay special attention to the rubber seal around the housing—make sure it’s clean and intact.
- Install the new filter. Slide it in with the airflow arrow pointing toward the blower motor (usually downward or toward the center of the dash). Ensure it fits snugly with no gaps on the sides. The filter should seat fully into the slot; if it’s loose, it’s not installed correctly.
- Reassemble. Replace the access panel, securing clips or screws. Then reattach the glovebox: align the top edge and push up to engage the clips. You should hear them snap into place. Reconnect the damper arm/strap. Test the glovebox door to ensure it opens and closes smoothly without binding.
- Test the HVAC system. If you disconnected the battery, reconnect it. Turn on the fan to various speeds and check for proper airflow. Listen for any unusual noises. If airflow seems weak, double-check the filter installation—it might be installed backward or not seated fully. Also, ensure the access panel is securely closed; an improper seal can reduce airflow.
Pro Tips for a Smooth Replacement
Work in good lighting. Take photos as you remove clips and panels so you can reference them during reassembly. If a plastic clip breaks, don’t panic—they’re often sold separately at dealerships or online. For a different perspective on the process, you can review a guide for a Honda Civic, which, while on a different vehicle, demonstrates the general principles of accessing and replacing a cabin filter behind the glovebox. Many steps are similar, like removing the glovebox and cleaning the housing.
Also, consider replacing the filter during routine maintenance like oil changes to stay on schedule. And if you have an activated carbon filter, note that it may have a distinct smell when new—this is normal and will dissipate after a few uses.
Troubleshooting After Replacement
If after replacement you notice:
- Weak airflow: Double-check that the filter is installed with the arrow pointing the correct way. Also, ensure the access panel is fully sealed. If the problem persists, the filter might be defective (rare) or there could be another blockage in the HVAC ducts.
- Strange noises: A new filter might be slightly tighter, causing the blower motor to whine briefly. This often goes away. If it continues, check for debris in the blower motor or a failing motor.
- Odors still present: A new filter won’t immediately eliminate mold smells if the evaporator is contaminated. You may need an HVAC cleaner treatment or a professional to clean the evaporator case.
Remember, the cabin filter is just one part of the system. If issues persist, there could be other problems like a dirty blower motor or clogged evaporator.
Warning Signs: When Your Cabin Filter Needs Attention
Even with a set schedule, your cabin filter might need replacing sooner based on driving conditions. Here are the most common symptoms that indicate a clogged or failing filter:
Symptom Deep Dive
- Noticeably weak airflow from vents: This is the most obvious sign. If your HVAC fan sounds like it’s working hard but air barely comes out, the filter is likely blocked. Try setting the fan to high and placing your hand over a vent—if you feel minimal air movement, it’s time for a change. This often develops gradually, so you might not notice until it’s quite clogged.
- Musty, moldy, or stale odors: A saturated filter can harbor moisture and develop mildew, especially in humid climates. When you run the A/C or heat, you might smell a musty odor reminiscent of old socks. This often means the filter is overdue for replacement, and you may also need to clean the evaporator case. The smell is usually strongest when you first turn on the system after it’s been sitting.
- Increased dust inside the cabin: If your dash, seats, and console are accumulating dust faster than usual, the filter may be too clogged to catch particles effectively. You might also notice dust particles visible in sunlight streaming through the windows. This is a sign that the filter is no longer trapping contaminants.
- Foggy windows that won’t clear: The defroster relies on strong airflow across the windshield. A clogged filter reduces that airflow, making it harder to clear condensation or frost. If your defroster seems weak, check the filter before assuming a problem with the heater core. This is especially noticeable in cold, wet weather.
- Unusual noises from the HVAC system: A struggling blower motor might make whirring, squealing, or grinding sounds. While not exclusively caused by a clogged filter, it’s a common contributor. If the noise changes when you adjust the fan speed, it points to the blower motor being strained. You might also hear a whistling sound if air is forced through a small gap around a poorly seated filter.
- Allergy symptoms worsening while driving: If you or your passengers sneeze, itch, or have watery eyes more often in the truck, a dirty filter might be recirculating allergens instead of trapping them. This is particularly noticeable during pollen season.
How to Inspect the Filter Without Removing
You can often gauge filter condition by:
- Airflow test: With the fan on high, feel the air from multiple vents. If it’s weak across all vents, the filter is likely clogged.
- Smell test: Turn on the A/C to max and sniff the air from vents. A musty odor suggests a dirty filter or evaporator.
- Visual check through access panel: Sometimes you can see the filter’s edge through the access panel opening. If it looks dark gray or black, it’s dirty.
However, the only sure way is to remove and inspect it. If it’s visibly dirty or you can’t see light through it when holding it up, replace it.
When to Replace Immediately vs. Can Wait
If you experience severe symptoms like no airflow or strong odors, replace the filter right away. A clogged filter can cause the blower motor to overheat and fail, which is a costly repair. For mild symptoms like slightly reduced airflow, you can wait until your next scheduled maintenance, but don’t delay more than a few thousand miles.
Maintenance Schedule and Choosing the Right Replacement Filter
While Ford doesn’t mandate a specific interval for the 2014 F150’s cabin filter, industry best practice is to replace it every 15,000 to 30,000 miles or once per year. The exact frequency depends on your environment:
- Normal conditions (highway driving, low dust): Every 30,000 miles or two years.
- Severe conditions (dusty roads, high pollen, heavy traffic): Every 15,000 miles or annually.
- If you have allergies or respiratory issues: Consider every 10,000-15,000 miles for maximum protection.
Also, consider replacing the filter when you notice any warning signs, regardless of mileage.
Selecting the Best Replacement Filter
When shopping for a new filter, you’ll encounter two main types:
- Standard particulate filters: These trap dust, pollen, and solid particles. They’re sufficient for most drivers and are the most affordable. Look for brands like Fram, Motorcraft, WIX, and Purolator. They typically cost $10-$25.
- Activated carbon filters: These include a layer of activated carbon that absorbs odors, exhaust fumes, and volatile organic compounds (VOCs). They’re excellent for city driving, smokers, or anyone sensitive to smells. They often combine particulate media with carbon. Prices range $15-$40.
For the 2014 F150, ensure the filter matches your cab style. CrewCab and SuperCab models may use a slightly different filter size than Regular Cab. Also, some filters are “high airflow” designs that reduce restriction—good for maintaining HVAC performance. Check customer reviews and ratings online to gauge real-world effectiveness.
Popular Filter Brands for 2014 F150
Here are some top choices:
- Motorcraft FL-820: OEM Ford part, guaranteed fit. Usually $20-$30.
- Fram CF10285: Reliable aftermarket, easy to find. $12-$20.
- WIX 24838: Good filtration, often on sale. $10-$18.
- K&N 3333: If available, this is a reusable filter that you can wash and re-oil. Expensive upfront but lasts longer. Check fitment carefully.
- STP CAF10285: Budget-friendly, decent performance. $8-$15.
Always cross-reference part numbers. You can use online interchange guides or ask at the parts counter.
Where to Buy and Pricing
You have several options:
- Dealership: Guaranteed OEM fit, but highest price ($30-$50). Good if you want peace of mind.
- Auto parts stores: Stores like AutoZone, Advance Auto Parts, and O’Reilly carry multiple brands. Staff can help you find the right part using your vehicle info. Prices range $15-$35. They often have rewards programs.
- Online retailers: Amazon, eBay, and specialty sites like RockAuto have competitive prices and bulk deals. Make sure to check return policies and shipping costs. RockAuto is great for comparing part numbers across brands.
- Warehouse clubs: Costco and Sam’s Club sometimes sell cabin filters in multi-packs at good value, but selection may be limited.
Don’t forget to compare part numbers. For example, Motorcraft FL-820 is a common OEM number, but cross-references exist. If you’re unsure, bring your old filter to the store for matching.
Creating a Maintenance Schedule
To stay on top of this task:
- Link to oil change: Since oil changes are typically every 5,000-7,500 miles, consider checking the cabin filter every other oil change. That’s about every 10,000-15,000 miles.
- Set a calendar reminder: If you drive less than 10,000 miles per year, set an annual reminder to inspect and replace if needed.
- Seasonal check: Spring is a good time because pollen loads are high. Fall is good for clearing out leaves and debris that might have accumulated.
Keep a record of replacements in your maintenance log or on the window sticker (some people write the date and mileage on the new filter box).
Environmental Disposal and Sustainability
Old cabin filters are considered regular trash in most areas, but they contain dust and contaminants. It’s best to seal them in a plastic bag before disposal. Some auto parts stores offer recycling programs for filters—ask if they take used filters. If you opt for a reusable filter like K&N, you wash and re-oil it, reducing waste. However, reusable filters may not capture as fine particles as disposable ones, so weigh the trade-offs.
Interestingly, maintenance intervals for cabin filters are consistent across many vehicles. For instance, the Toyota Tundra also recommends inspection every 15,000 miles and replacement based on conditions. So, regardless of your truck, staying proactive with this simple task saves money and improves air quality.
Cost Analysis: DIY vs. Professional
Having a dealership or shop replace the cabin filter typically costs $80-$150 in labor plus the filter cost. Doing it yourself takes about 30 minutes and costs only the price of the filter ($10-$40). That’s a savings of $40-$110 per service. Over the life of the truck, DIY can save hundreds. The only tools required are basic hand tools, which most people have. So, it’s a no-brainer to do it yourself unless you’re uncomfortable with the process.
Conclusion
In summary, the 2014 Ford F150 does have a cabin air filter, and it’s a vital component for clean interior air and HVAC system health. Located behind the glovebox, it’s accessible for a straightforward DIY replacement that takes less than an hour. By replacing it every 15,000-30,000 miles—or more often in harsh conditions—you’ll enjoy better airflow, reduced odors, and protection against costly repairs. Whether you choose an OEM or aftermarket filter, the key is to use a high-quality unit that fits properly and to change it regularly. Don’t neglect this small but mighty part; your lungs and your truck’s HVAC system will thank you. If you’ve followed this guide, you’re now equipped to handle this maintenance task with confidence. Safe driving and breathe easy!
Frequently Asked Questions
How often should I change the cabin air filter in my 2014 Ford F150?
Ford doesn’t specify an exact interval, but most experts recommend every 15,000 to 30,000 miles or annually. If you drive in dusty or high-pollen areas, change it more frequently, around every 10,000 miles.
What happens if I never change my cabin air filter?
A severely clogged filter restricts airflow, causing weak HVAC performance, strange blower noises, and musty odors. It can also strain the blower motor and lead to premature wear or failure of HVAC components, resulting in expensive repairs.
Can I drive without a cabin air filter?
Technically yes, but it’s not advisable. Without the filter, dust, pollen, and debris will enter your cabin and clog HVAC ducts and evaporator coils. This reduces system efficiency, creates mess, and can cause health issues, especially for allergy sufferers.
Is it hard to replace the cabin air filter myself?
No, it’s considered a beginner-friendly DIY task. For the 2014 F150, you mainly need to remove the glovebox, which takes about 20-30 minutes with basic tools. No special mechanical skills are required—just patience and care with plastic clips.
What’s the cost of a replacement cabin air filter for a 2014 F150?
A standard filter costs between $10 and $30, while premium filters with activated carbon run $20-$50. OEM parts may be slightly higher. You can save by buying aftermarket from auto parts stores or online retailers.
Does a dirty cabin air filter affect fuel efficiency?
Indirectly, yes. A clogged filter makes the HVAC blower work harder, drawing more power from the engine. This can slightly increase fuel consumption, especially if you run the fan on high frequently. Keeping it clean helps maintain optimal efficiency.