
How Much Does It Cost to Lift a Subaru Outback
Contents
- 1 Key Takeaways
- 2 📑 Table of Contents
- 3 Why Lift Your Subaru Outback?
- 4 Types of Lift Kits for the Subaru Outback
- 5 Cost Breakdown: What You’re Paying For
- 6 DIY vs. Professional Installation: What’s Right for You?
- 7 Performance and Handling After a Lift
- 8 Tips for Getting the Most Out of Your Lift
- 9 Conclusion
- 10 Frequently Asked Questions
Lifting a Subaru Outback can cost anywhere from $500 to $3,000+, depending on the type of lift kit, labor, and additional modifications. Whether you’re aiming for better off-road performance or a more aggressive look, understanding the full scope of costs—including parts, installation, and potential upgrades—is key to making a smart investment.
If you’re a Subaru Outback owner who loves hitting the trails, exploring backroads, or just wants a bolder stance on the highway, you’ve probably considered lifting your ride. The Outback is already one of the most capable wagons on the market, with standard all-wheel drive and decent ground clearance. But let’s be honest—sometimes “decent” isn’t enough when you’re navigating rocky trails, muddy forest roads, or deep snow.
Lifting your Subaru Outback can transform it from a comfortable family hauler into a rugged adventure machine. It gives you more room for larger tires, improves approach and departure angles, and helps you avoid scraping the undercarriage on uneven terrain. But before you dive in, it’s important to understand what lifting actually involves—and how much it’s going to cost.
The price to lift a Subaru Outback isn’t a one-size-fits-all number. It depends on several factors: the type of lift kit you choose, whether you install it yourself or hire a professional, the year and model of your Outback, and any additional upgrades you want to pair with the lift. In this guide, we’ll break down all the costs, options, and considerations so you can make an informed decision that fits your budget and your off-road dreams.
Key Takeaways
- Cost Range: A basic 1.5-inch lift can cost $500–$800, while a full 2.5-inch suspension lift may run $1,500–$3,000+.
- Lift Kit Types: Choose from spacer lifts (cheapest), strut extensions, or full suspension kits (most capable).
- Installation Matters: DIY saves money, but professional installation ensures safety and proper alignment.
- Additional Upgrades: Larger tires, skid plates, and drivetrain mods can add $500–$2,000 to your total cost.
- Warranty & Resale: Modifications may void factory warranties and affect resale value—plan accordingly.
- Performance Gains: A lift improves ground clearance and off-road ability but may reduce on-road handling and fuel economy.
- Budget Smart: Start small, prioritize safety, and research reputable brands like LP Adventure, Primitive Racing, or Anderson Design & Fabrication.
📑 Table of Contents
Why Lift Your Subaru Outback?
So, why go through the trouble and expense of lifting your Outback? It’s not just about looking cool—though let’s admit, a lifted Outback does have a certain rugged charm. There are real functional benefits that make the investment worthwhile for many owners.
First and foremost, lifting increases ground clearance. The stock Outback has about 8.7 inches of ground clearance, which is already better than most SUVs. But if you’re serious about overlanding, rock crawling, or driving on unmaintained forest roads, that extra inch or two can mean the difference between getting stuck and cruising through.
A lift also allows you to fit larger tires. Bigger tires improve traction, help you roll over obstacles more easily, and give you better performance in snow, mud, and sand. Plus, they look awesome. Many lifted Outbacks run 235/70R16 or even 245/70R16 tires, which can dramatically improve off-road capability.
Another benefit is improved approach and departure angles. These are the angles at which your vehicle can approach or leave an obstacle without scraping the bumper or undercarriage. A lift raises the front and rear, giving you more flexibility on steep inclines or uneven terrain.
Finally, a lift can enhance your overall driving experience. Whether you’re exploring national parks, camping in remote areas, or just want to feel more confident in winter weather, a lifted Outback gives you the freedom to go further.
Types of Lift Kits for the Subaru Outback
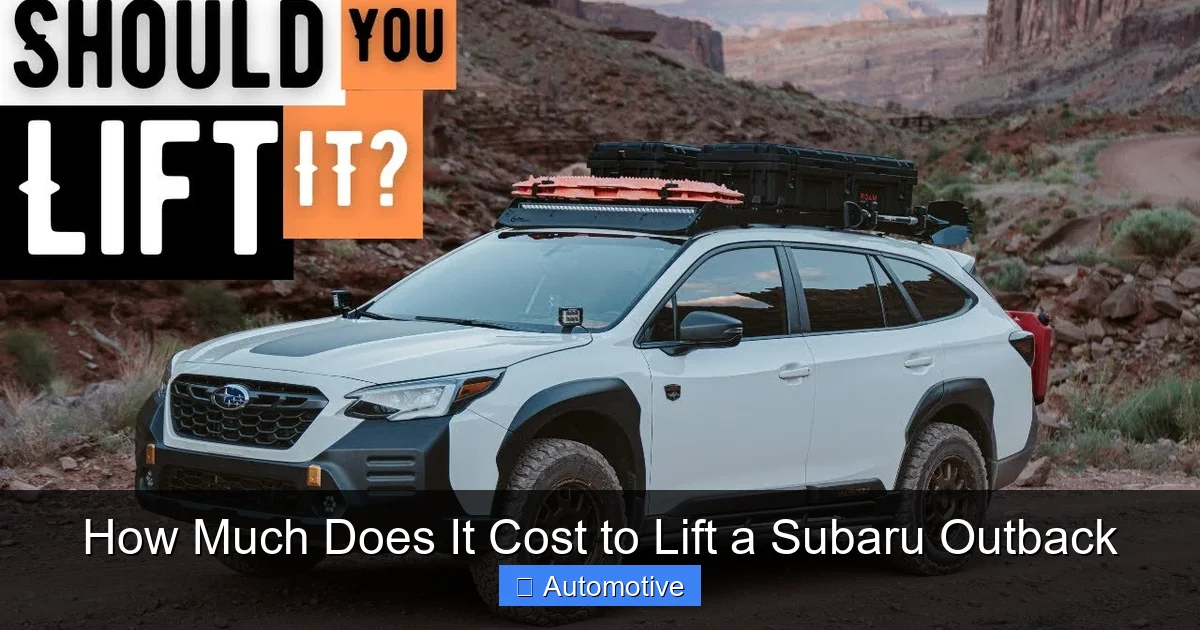
Visual guide about How Much Does It Cost to Lift a Subaru Outback
Image source: i.ytimg.com
Not all lift kits are created equal. The type you choose will have a big impact on cost, performance, and complexity. Here’s a breakdown of the most common options for the Subaru Outback.
Spacer Lifts (Budget-Friendly Option)
Spacer lifts are the most affordable and simplest way to lift your Outback. They work by inserting polyurethane or metal spacers between the strut and the chassis, effectively raising the ride height. Most spacer lifts add 1.5 to 2 inches of lift.
These kits typically cost between $200 and $400 for parts alone. Installation is relatively straightforward and can often be done at home with basic tools, making them a popular choice for DIYers. However, spacer lifts don’t improve suspension performance—they just raise the body. This means you won’t get better shock absorption or off-road handling.
One downside is that spacer lifts can affect suspension geometry. On some models, they may cause the CV axles to operate at a steeper angle, potentially leading to premature wear. It’s also important to check if your lift requires extended brake lines or sway bar links, which can add to the cost.
Popular brands for spacer lifts include LP Adventure and Primitive Racing. LP Adventure offers a well-reviewed 1.5-inch spacer kit that’s compatible with most Outback models from 2005–2024.
Strut Extension Lifts (Mid-Range Option)
Strut extension lifts are a step up from spacer lifts. Instead of just adding spacers, these kits replace or extend the factory struts to increase ride height. They typically provide 2 to 2.5 inches of lift and are designed to maintain better suspension geometry than spacer lifts.
These kits cost between $400 and $800, depending on the brand and whether they include new springs or just extensions. Installation is more involved than spacer lifts but still manageable for experienced DIYers. Some kits require spring compressors, which can be dangerous if not used properly.
Strut extension lifts offer a better balance of cost and performance. They don’t drastically alter suspension dynamics, and many are designed to work with the stock shocks and springs. This makes them a solid choice for owners who want more lift than a spacer kit but don’t want to spend thousands on a full suspension overhaul.
Anderson Design & Fabrication (ADF) offers a popular 2.5-inch strut extension kit that’s well-regarded in the Subaru community. It includes extended brake lines and sway bar links, which are often overlooked but essential for safety and performance.
Full Suspension Lift Kits (Premium Option)
If you’re serious about off-roading and want the best performance, a full suspension lift kit is the way to go. These kits replace the entire front and rear suspension components—struts, springs, control arms, and sometimes even the subframe—to provide 2.5 to 3.5 inches of lift.
Full suspension lifts are the most expensive option, typically ranging from $1,500 to $3,000+ for parts alone. Installation is complex and usually requires professional help, adding $500–$1,000 in labor costs. However, the results are worth it for many enthusiasts.
These kits are engineered to maintain or improve suspension travel, damping, and geometry. They often include upgraded shocks, longer control arms, and reinforced components that can handle rough terrain. Some even allow for adjustable ride height or improved articulation.
Brands like Primitive Racing, LP Adventure, and Ironman 4×4 offer high-quality full suspension kits for the Outback. Primitive’s “All Terrain” kit, for example, includes custom coilovers, extended brake lines, and a rear subframe drop, providing a true off-road-ready setup.
One thing to note: full suspension lifts may require additional modifications, such as a transmission skid plate, differential drop kit, or even a re-gearing of the differentials if you’re running significantly larger tires. These extras can add another $500–$1,500 to your total cost.
Cost Breakdown: What You’re Paying For
Visual guide about How Much Does It Cost to Lift a Subaru Outback
Image source: images.simplepart.com
Now that you know the types of lift kits available, let’s look at the actual costs involved in lifting your Subaru Outback. The total price can vary widely, but here’s a realistic breakdown based on common scenarios.
Parts Cost
The cost of the lift kit itself is the biggest variable. Here’s a rough estimate:
– Spacer Lift: $200–$400
– Strut Extension Lift: $400–$800
– Full Suspension Lift: $1,500–$3,000+
Keep in mind that some kits include everything you need (spacers, bolts, extended brake lines, etc.), while others are sold as base kits and require additional components. Always read the product description carefully and check customer reviews to see what others have needed to complete the install.
Installation Cost
If you’re handy with tools and have a good workspace, you can save a lot of money by doing the installation yourself. A spacer lift might take 4–6 hours for a first-timer, while a full suspension lift could take 10–15 hours or more.
However, if you’re not confident in your mechanical skills, professional installation is strongly recommended—especially for full suspension kits. Labor costs vary by location and shop, but expect to pay:
– Spacer Lift: $200–$400 (if done professionally)
– Strut Extension Lift: $400–$600
– Full Suspension Lift: $800–$1,200
Some shops offer package deals that include alignment and test drives, which can be worth the extra cost.
Additional Upgrades and Modifications
Lifting your Outback often opens the door to other upgrades. While not strictly necessary, many owners choose to add:
– Larger Tires: $600–$1,200 for a set of 4 all-terrain or mud-terrain tires (e.g., BFGoodrich KO2 or Falken Wildpeak)
– Skid Plates: $300–$600 for front, transmission, and rear protection
– Differential Drop Kit: $100–$200 (reduces stress on CV joints after a lift)
– Extended Brake Lines: $100–$200 (often included in kits, but good to verify)
– Alignment: $100–$150 (required after any lift to ensure proper tire wear and handling)
These extras can easily add $1,000–$2,000 to your total investment. But they also significantly improve safety, durability, and off-road performance.
Hidden Costs to Watch For
There are a few hidden costs that can catch you off guard:
– Warranty Issues: Modifying your suspension may void parts of your factory warranty, especially if damage is linked to the lift.
– Insurance: Some insurers may charge more for modified vehicles or require documentation of professional installation.
– Fuel Economy: Larger tires and increased weight can reduce fuel efficiency by 1–3 MPG.
– Resale Value: While some buyers love a well-done lift, others may see it as a red flag. A clean, documented install can help maintain value.
DIY vs. Professional Installation: What’s Right for You?

Visual guide about How Much Does It Cost to Lift a Subaru Outback
Image source: crankshaftculture.com
One of the biggest decisions you’ll make is whether to install the lift yourself or hire a professional. Both options have pros and cons.
DIY Installation: Save Money, Gain Skills
Doing it yourself can save you $500–$1,000 in labor costs. It’s also a rewarding project that gives you a deeper understanding of your vehicle. Many Subaru owners enjoy the challenge and pride of a self-installed lift.
However, DIY comes with risks. Suspension work involves heavy parts, high spring tension, and precise alignment. A mistake can lead to unsafe driving conditions, premature wear, or even accidents. If you’re not experienced with suspension systems, it’s easy to overlook critical steps like torquing bolts to spec or checking for binding in the CV joints.
If you go the DIY route, make sure you have:
– A safe workspace (garage or level driveway)
– Proper tools (jack stands, torque wrench, spring compressor if needed)
– A detailed installation guide or video
– A helper for heavy lifting
Many online forums, like SubaruOutback.org and NASIOC, have step-by-step guides and user reviews that can help.
Professional Installation: Peace of Mind
Hiring a professional ensures the job is done correctly and safely. A reputable shop will use proper tools, follow manufacturer guidelines, and often provide a warranty on their work. They’ll also handle alignment and test the vehicle to make sure everything is functioning properly.
The downside is the cost. But for complex lifts—especially full suspension kits—professional installation is often the smart choice. It reduces the risk of errors and can save you money in the long run by preventing damage or the need for rework.
Look for shops that specialize in Subaru or off-road modifications. Ask for references, check online reviews, and don’t be afraid to ask questions about their experience with lift kits.
Performance and Handling After a Lift
Lifting your Outback changes how it drives. While you gain off-road capability, there are some trade-offs to be aware of.
On-Road Handling
A lifted Outback will have a higher center of gravity, which can make it feel less stable during sharp turns or sudden maneuvers. The ride may also become slightly stiffer or bouncier, depending on the kit.
Spacer lifts tend to have the least impact on handling, while full suspension kits can actually improve ride quality if they include upgraded shocks. However, larger tires can add weight and rolling resistance, affecting acceleration and braking.
Off-Road Performance
This is where the lift shines. With more ground clearance and the ability to run larger tires, your Outback can tackle obstacles it couldn’t before. You’ll be able to drive over rocks, through mud, and across streams with greater confidence.
Just remember: a lift doesn’t make your Outback a rock crawler. It’s still a unibody vehicle with limited suspension travel compared to a true 4×4 truck. But for overlanding, forest roads, and light trail use, a 2–2.5 inch lift is more than enough.
Fuel Economy and Wear
Larger tires and added weight can reduce fuel efficiency. Expect a drop of 1–3 MPG, depending on tire size and driving habits. You may also notice increased wear on components like CV joints, brakes, and suspension parts—especially if the lift isn’t properly aligned or maintained.
Regular maintenance becomes even more important after a lift. Check torque specs, inspect for leaks or damage, and rotate your tires frequently.
Tips for Getting the Most Out of Your Lift
To make the most of your investment, follow these practical tips:
– Start Small: If you’re new to lifting, begin with a 1.5–2 inch spacer or strut extension kit. You can always upgrade later.
– Choose Quality Parts: Don’t skimp on cheap kits. Reputable brands offer better materials, fitment, and customer support.
– Get an Alignment: Always have your alignment checked after installation. Improper alignment causes uneven tire wear and poor handling.
– Upgrade Tires Gradually: You don’t need to buy the biggest tires right away. Start with a modest increase and see how it performs.
– Document Everything: Keep receipts, photos, and notes on your modifications. This helps with resale and troubleshooting.
– Join the Community: Online forums and local Subaru clubs are great resources for advice, reviews, and group buys.
Conclusion
Lifting your Subaru Outback is a fantastic way to enhance its off-road capability, improve ground clearance, and give it a more aggressive look. But it’s not a decision to take lightly. The cost to lift a Subaru Outback can range from as little as $500 for a basic spacer kit to $3,000 or more for a full suspension overhaul with professional installation and additional upgrades.
Your budget, skill level, and intended use will determine the best approach. If you’re on a tight budget and just want a little extra height, a spacer lift might be perfect. If you’re planning serious overlanding adventures, investing in a full suspension kit will pay off in performance and durability.
No matter which route you choose, make safety a priority. Use quality parts, follow installation instructions carefully, and consider professional help if you’re unsure. And remember: a lift is just the beginning. With the right tires, skid plates, and mindset, your lifted Outback can take you places you’ve only dreamed of.
So go ahead—lift it, love it, and explore it. The road less traveled is waiting.
Frequently Asked Questions
How much does it cost to lift a Subaru Outback?
The cost to lift a Subaru Outback ranges from $500 to $3,000+, depending on the type of lift kit, installation method, and additional upgrades. Basic spacer lifts are the most affordable, while full suspension kits offer the best performance at a higher price.
Can I install a lift kit myself?
Yes, many Subaru owners install lift kits themselves, especially spacer or strut extension kits. However, full suspension lifts are complex and often require professional installation for safety and proper alignment.
Will lifting my Outback void the warranty?
Lifting your Outback may void parts of your factory warranty, particularly if damage is linked to the modification. Always check with your dealer and keep detailed records of your installation.
Do I need larger tires after a lift?
Larger tires are not required, but they are commonly added to take full advantage of the increased ground clearance. They improve off-road performance but may affect fuel economy and require additional modifications.
How much ground clearance does a lifted Outback have?
A stock Outback has about 8.7 inches of ground clearance. A 2-inch lift increases this to around 10.7 inches, significantly improving off-road capability.
What’s the best lift kit for a Subaru Outback?
The best lift kit depends on your needs and budget. For most owners, a 2-inch strut extension or full suspension kit from brands like LP Adventure or Primitive Racing offers the best balance of cost, performance, and reliability.


