How to Remove Fastag from Car Glass
Contents
- 1 Key Takeaways
- 2 📑 Table of Contents
- 3 Why You Might Need to Remove a Fastag from Your Car Glass
- 4 Understanding How Fastags Are Attached to Your Windshield
- 5 Tools and Materials You’ll Need for Safe Removal
- 6 Step-by-Step Guide to Removing a Fastag from Car Glass
- 7 Common Mistakes to Avoid When Removing a Fastag
- 8 What to Do After Removing the Fastag
- 9 When to Seek Professional Help
- 10 Tips for Reapplying a New Fastag
- 11 Environmental and Safety Considerations
- 12 Conclusion
- 13 Frequently Asked Questions
Removing a Fastag from your car glass doesn’t have to be stressful. With the right tools and techniques, you can safely peel it off without damaging your windshield or leaving sticky residue. This guide walks you through every step, from preparation to cleanup, so you can get it done quickly and correctly.
Key Takeaways
- Act quickly: The sooner you remove the Fastag, the easier it is to peel off without residue.
- Use heat wisely: A hairdryer or heat gun softens the adhesive, making removal smoother and safer.
- Avoid sharp tools: Scrapers or knives can scratch your windshield—opt for plastic tools instead.
- Clean residue properly: Use rubbing alcohol or adhesive removers to dissolve leftover glue.
- Check for damage: Inspect the glass after removal to ensure no cracks or scratches were caused.
- Reapply if needed: If you’re replacing the Fastag, make sure the surface is clean and dry before installing a new one.
- Know when to seek help: If the tag is cracked or stuck in a hard-to-reach spot, consider professional assistance.
📑 Table of Contents
- Why You Might Need to Remove a Fastag from Your Car Glass
- Understanding How Fastags Are Attached to Your Windshield
- Tools and Materials You’ll Need for Safe Removal
- Step-by-Step Guide to Removing a Fastag from Car Glass
- Common Mistakes to Avoid When Removing a Fastag
- What to Do After Removing the Fastag
- When to Seek Professional Help
- Tips for Reapplying a New Fastag
- Environmental and Safety Considerations
- Conclusion
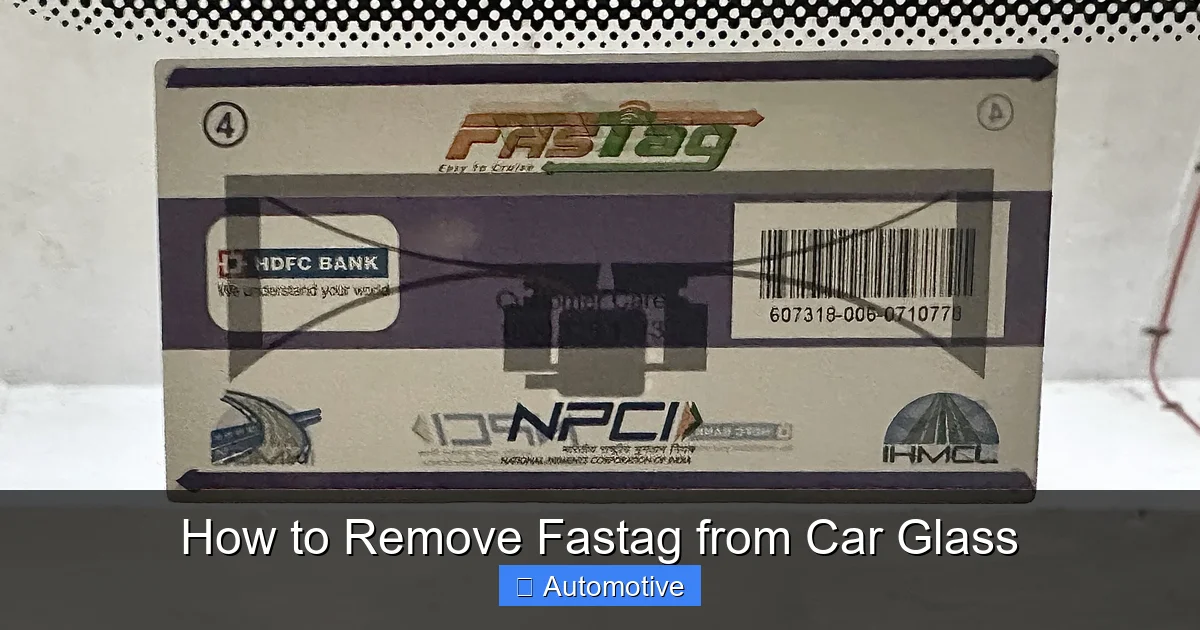
Why You Might Need to Remove a Fastag from Your Car Glass
If you’ve owned a car in India for any length of time, chances are you’ve used a Fastag. These small, rectangular RFID tags have become a mandatory part of toll payments on national highways, offering a seamless, cashless experience at toll plazas. Stuck to the inside of your windshield, usually near the top center, Fastags make life easier—until they don’t.
There are several reasons you might need to remove a Fastag from your car glass. Maybe you’re selling your vehicle and the new owner prefers a different bank or tag provider. Perhaps the tag is damaged, malfunctioning, or no longer active due to a closed account. In some cases, you might simply want to replace an old or worn-out tag with a new one. Whatever the reason, knowing how to remove it properly is essential to avoid damaging your windshield or leaving behind unsightly adhesive residue.
It’s important to understand that Fastags are designed to be durable and long-lasting. The adhesive used is strong enough to withstand weather changes, vibrations, and daily use. While this is great for functionality, it can make removal tricky if you’re not prepared. Rushing the process or using the wrong tools can lead to scratches, cracks, or even permanent damage to your windshield. That’s why taking a careful, methodical approach is key.
Visual guide about How to Remove Fastag from Car Glass
Image source: fastag.hdfcbank.com
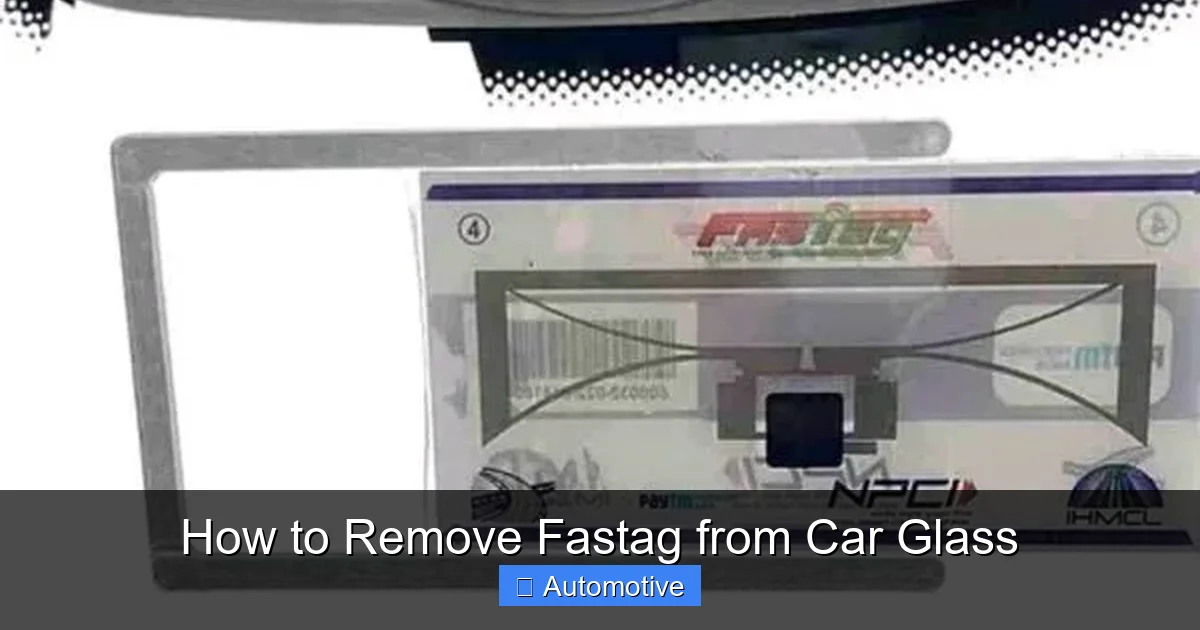
Before you start peeling, it helps to know exactly what you’re dealing with. Fastags are typically mounted on the inner side of the windshield using a strong, double-sided adhesive tape. This tape is engineered to bond firmly to glass and resist moisture, heat, and UV exposure. The tag itself is a small plastic device with an embedded RFID chip and antenna, allowing it to communicate with toll scanners as you drive through.
The placement of the Fastag is usually standardized—centered near the top of the windshield, just below the rearview mirror. This location ensures optimal signal reception while keeping the tag out of the driver’s direct line of sight. Because it’s positioned high up, it can be a bit awkward to reach, especially in larger vehicles like SUVs or sedans with curved windshields.
One thing to note is that some Fastags come with a tamper-proof design. This means that once applied, the tag is meant to be permanent. Attempting to remove it might trigger a warning or disable the tag, which is actually a security feature to prevent fraud. However, this doesn’t mean you can’t remove it—it just means you need to be extra careful not to damage the tag or the glass in the process.
Tools and Materials You’ll Need for Safe Removal
Visual guide about How to Remove Fastag from Car Glass
Image source: img.cdnx.in
Having the right tools on hand can make all the difference when removing a Fastag. You don’t need anything fancy, but using the correct items will help you avoid common pitfalls like scratches, broken glass, or stubborn residue.
Here’s a list of recommended tools and materials:
- Hairdryer or heat gun: Essential for softening the adhesive. A hairdryer is safer and more accessible for most people.
- Plastic scraper or credit card: Ideal for gently prying the tag loose without scratching the glass.
- Rubbing alcohol (isopropyl alcohol): Great for dissolving leftover adhesive.
- Microfiber cloth: For cleaning and wiping down the area after removal.
- Adhesive remover (optional): Products like Goo Gone can help with tough residue, but use them sparingly and test on a small area first.
- Gloves: Protect your hands from sticky residue and chemicals.
- Flashlight: Helps you see the edges of the tag, especially in low-light conditions.
Avoid using metal scrapers, razor blades, or knives. These can easily scratch or crack your windshield, leading to costly repairs. Even if you’re careful, the risk isn’t worth it. Stick to plastic tools—they’re gentle on glass but still effective when used correctly.
Step-by-Step Guide to Removing a Fastag from Car Glass
Visual guide about How to Remove Fastag from Car Glass
Image source: img.cdnx.in
Now that you’re prepared, let’s walk through the actual removal process. Follow these steps carefully to ensure a clean, damage-free removal.
Step 1: Prepare Your Workspace
Start by parking your car in a shaded or indoor area. Direct sunlight can make the adhesive harder to work with, and heat from the sun might interfere with your hairdryer. Make sure the engine is off and the car is cool to the touch.
Gather all your tools and place them within reach. Put on your gloves to protect your hands. If you’re working inside the car, consider opening the doors or windows for better ventilation, especially if you plan to use adhesive remover later.
Step 2: Apply Heat to the Fastag
Turn on your hairdryer and set it to medium or high heat. Hold it about 6–8 inches away from the Fastag and move it slowly back and forth. The goal is to warm up the adhesive without overheating the tag or the glass.
Heat for about 30–60 seconds. You’ll notice the tag start to feel slightly warm to the touch. This softens the glue, making it easier to peel off. Be patient—rushing this step can lead to tearing or residue.
Step 3: Gently Pry the Tag Loose
Once the adhesive is warm, take your plastic scraper or an old credit card. Slide it carefully under one edge of the Fastag. Apply gentle, steady pressure to lift the tag. Don’t force it—if it doesn’t budge, apply more heat and try again.
Work your way around the edges, lifting the tag bit by bit. The goal is to separate the adhesive from the glass without breaking the tag or scratching the surface. If the tag starts to crack or tear, stop immediately and reapply heat.
Step 4: Remove the Tag Completely
Once the tag is loose, carefully peel it off the glass. Hold it by the edges to avoid touching any sticky residue. If parts of the adhesive remain stuck, don’t panic—this is normal. You’ll clean that up in the next step.
Place the removed Fastag on a paper towel or in a plastic bag. If it’s still active, consider deactivating it through your bank or the National Payments Corporation of India (NPCI) portal to prevent unauthorized use.
Step 5: Clean Off Adhesive Residue
Now it’s time to tackle any leftover glue. Dampen a corner of your microfiber cloth with rubbing alcohol. Gently rub the sticky area in circular motions. The alcohol will break down the adhesive, making it easy to wipe away.
For stubborn spots, let the alcohol sit for 30 seconds before wiping. Avoid using excessive force—glass can scratch if you press too hard. If alcohol doesn’t work, try a small amount of adhesive remover, but always test it on a hidden area first to ensure it won’t damage the glass or tint.
Step 6: Polish and Inspect the Area
Once the residue is gone, use a clean part of the microfiber cloth to buff the area. This will restore shine and remove any smudges or streaks. Take a close look at the glass—check for scratches, cracks, or cloudiness. If everything looks good, you’re done!
If you notice minor scratches, they might be superficial and can often be polished out with a glass cleaner or scratch remover kit. However, deep scratches or cracks should be evaluated by a professional.
Common Mistakes to Avoid When Removing a Fastag
Even with the best intentions, it’s easy to make mistakes during the removal process. Here are some common pitfalls and how to avoid them:
- Using metal tools: As mentioned earlier, metal scrapers can scratch your windshield. Always use plastic alternatives.
- Skipping the heat step: Trying to peel the tag cold will likely result in tearing and residue. Heat is your friend.
- Pulling too hard: Fastags are designed to stay put. If it’s not coming off easily, apply more heat instead of forcing it.
- Ignoring residue: Leaving adhesive behind can attract dust and dirt, making your windshield look dirty. Always clean it thoroughly.
- Using harsh chemicals: Ammonia-based cleaners or acetone can damage tinted windows or seals. Stick to alcohol or mild adhesive removers.
- Not wearing gloves: Adhesive can be sticky and hard to wash off. Gloves keep your hands clean and protected.
Another mistake is assuming all Fastags are the same. Some newer models have stronger adhesives or different mounting systems. If you’re unsure, check the manufacturer’s guidelines or contact your bank for advice.
What to Do After Removing the Fastag
Removing the tag is only half the job. What you do next depends on your situation.
If you’re replacing the Fastag with a new one, make sure the windshield surface is completely clean and dry. Any leftover residue or moisture can prevent the new tag from sticking properly. Use a glass cleaner and a fresh microfiber cloth to wipe the area, then let it air dry for a few minutes.
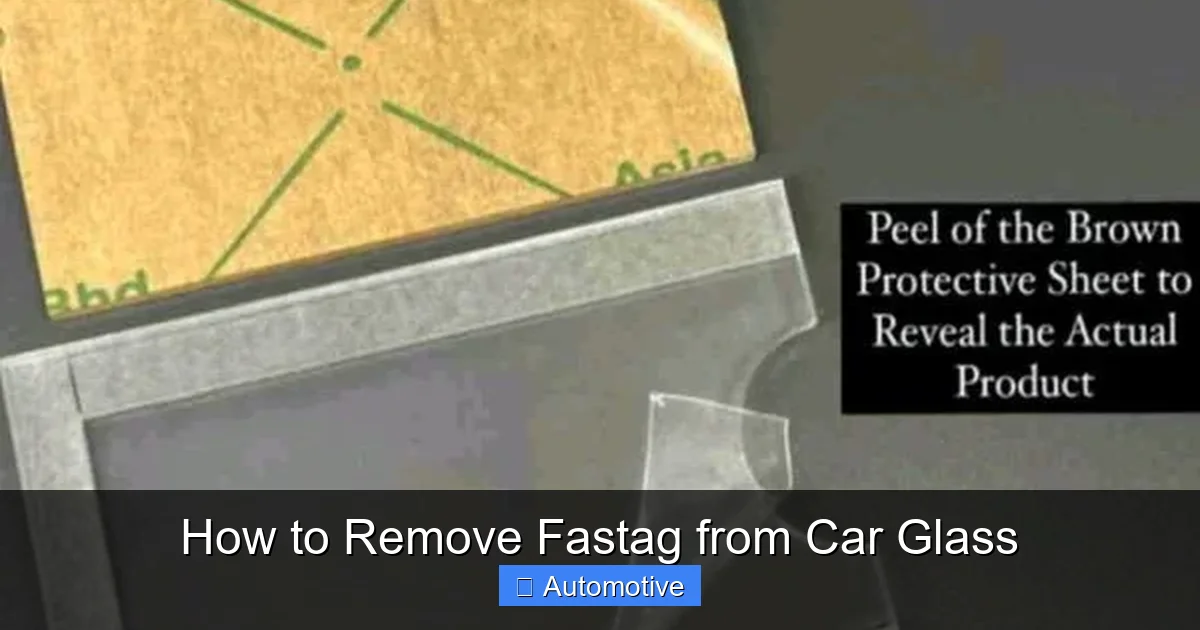
When applying the new Fastag, follow the manufacturer’s instructions carefully. Most tags come with a peel-off backing—remove it slowly and press the tag firmly onto the glass. Hold it in place for 30 seconds to ensure a strong bond.
If you’re selling your car, inform the buyer that the Fastag has been removed. Provide them with the tag (if it’s still functional) or let them know it’s been deactivated. This transparency builds trust and avoids confusion during the transfer process.
For those who no longer need a Fastag—perhaps you’ve sold your car or switched to a different vehicle—make sure to close the account with your bank or the NPCI. This prevents accidental charges or misuse of the tag.
When to Seek Professional Help
While most people can remove a Fastag at home, there are situations where it’s better to call in a professional.
If the tag is cracked or broken, attempting to remove it yourself could cause further damage. Similarly, if the adhesive has hardened over time and won’t soften with heat, a professional may have specialized tools to handle it.
Another scenario is if your windshield has a tint or protective film. Removing a Fastag from tinted glass requires extra care, as some adhesives can react with the film and cause discoloration or peeling. In such cases, a trained technician can assess the situation and recommend the safest approach.
Lastly, if you’re uncomfortable doing it yourself—especially if you’re not confident with tools or heat—don’t hesitate to visit a car service center or windshield specialist. The cost is usually minimal, and it’s worth it for peace of mind.
Tips for Reapplying a New Fastag
If you’re installing a new Fastag after removal, here are some tips to ensure it sticks properly and functions well:
- Choose the right location: Stick to the recommended area—center top of the windshield, below the rearview mirror.
- Clean the surface: Use glass cleaner and a lint-free cloth to remove dust, grease, or fingerprints.
- Avoid touching the adhesive: Oils from your fingers can weaken the bond. Handle the tag by the edges.
- Press firmly: Apply even pressure across the entire tag for at least 30 seconds.
- Wait before driving: Give the adhesive time to set—ideally 1–2 hours before hitting the road.
- Test it: Once installed, drive through a toll plaza to confirm the tag is working.
Proper installation ensures reliable performance and reduces the risk of the tag falling off during travel.
Environmental and Safety Considerations
It’s also worth considering the environmental impact of Fastag disposal. These tags contain small electronic components and should not be thrown in regular trash. Check with your local e-waste recycling center or return the tag to your bank for proper disposal.
Safety-wise, always work in a well-ventilated area when using chemicals like alcohol or adhesive removers. Avoid inhaling fumes, and keep these substances away from children and pets.
Lastly, never attempt to remove a Fastag while driving or in unsafe conditions. Park your car securely and take your time—rushing increases the risk of accidents or damage.
Conclusion
Removing a Fastag from your car glass might seem like a small task, but doing it right can save you time, money, and frustration. With the right tools, a bit of heat, and a gentle touch, you can peel off the tag cleanly and leave your windshield looking as good as new.
Remember to act quickly, avoid metal tools, and clean up any residue thoroughly. Whether you’re replacing the tag, selling your car, or simply deactivating an old one, following these steps ensures a smooth and safe process.
And if you ever feel unsure, don’t hesitate to seek help from a professional. Your windshield is a critical part of your vehicle’s safety system—treat it with care.
By taking the time to remove your Fastag properly, you’re not just solving a minor inconvenience—you’re protecting your investment and ensuring a better driving experience for years to come.
Frequently Asked Questions
Can I reuse a removed Fastag?
No, most Fastags are designed for one-time use. Once removed, the adhesive is compromised, and the tag may no longer function properly. It’s best to install a new one.
Will removing a Fastag damage my windshield?
If done correctly, no. Using heat and plastic tools minimizes the risk. However, forcing the tag or using metal scrapers can cause scratches or cracks.
How long should I heat the Fastag before removal?
Apply heat for 30–60 seconds, or until the tag feels warm to the touch. Avoid overheating, as this can damage the glass or tag.
What if adhesive residue won’t come off?
Try using rubbing alcohol or a commercial adhesive remover. Let it sit for a minute before wiping. Avoid harsh chemicals that could damage the glass.
Can I remove a Fastag from a tinted windshield?
Yes, but be extra cautious. Some adhesives can react with tint film. Test any cleaner on a small area first, or consult a professional.
Do I need to deactivate the Fastag after removal?
Yes, especially if you’re selling the car or closing the account. Contact your bank or the NPCI portal to deactivate it and avoid unauthorized use.