
Harley-davidson Drive Belt Size Chart
Contents
- 1 Key Takeaways
- 2 📑 Table of Contents
- 3 Why the Right Harley-Davidson Drive Belt Size Matters
- 4 Understanding Harley-Davidson Drive Belt Basics
- 5 How to Determine Your Harley-Davidson Drive Belt Size
- 6 Common Harley-Davidson Drive Belt Sizes by Model
- 7 How to Replace Your Harley Drive Belt
- 8 Maintaining Your Harley Drive Belt for Longevity
- 9 Choosing Between OEM and Aftermarket Belts
- 10 Conclusion
- 11 Frequently Asked Questions
Choosing the correct Harley-Davidson drive belt size is essential for optimal performance, safety, and longevity of your motorcycle. This guide breaks down everything you need to know—from measuring your current belt to understanding sizing charts and maintenance tips—so you can ride with confidence and avoid costly repairs.
Key Takeaways
- Accurate belt sizing ensures smooth power transfer: A correctly sized drive belt prevents slippage, reduces wear, and maintains efficient performance from the engine to the rear wheel.
- Measure your current belt or check your owner’s manual: Use a flexible tape measure or refer to your Harley’s documentation to find the exact length, width, and tooth count.
- Different Harley models require specific belt sizes: Touring, Softail, and Dyna models often use different belts—never assume compatibility across models.
- Replace belts every 20,000 to 50,000 miles: Regular inspection and timely replacement prevent sudden failures and costly damage to the drivetrain.
- Use only high-quality OEM or reputable aftermarket belts: Cheap belts may save money upfront but can lead to premature wear and safety risks.
- Proper tension and alignment are just as important as size: Even the right-sized belt will fail early if not installed correctly.
- Keep a spare belt on long trips: A broken drive belt can leave you stranded—being prepared is smart riding.
📑 Table of Contents
- Why the Right Harley-Davidson Drive Belt Size Matters
- Understanding Harley-Davidson Drive Belt Basics
- How to Determine Your Harley-Davidson Drive Belt Size
- Common Harley-Davidson Drive Belt Sizes by Model
- How to Replace Your Harley Drive Belt
- Maintaining Your Harley Drive Belt for Longevity
- Choosing Between OEM and Aftermarket Belts
- Conclusion
Why the Right Harley-Davidson Drive Belt Size Matters
When it comes to Harley-Davidson motorcycles, the drive belt is one of the most critical—and often overlooked—components of the drivetrain. Unlike chain-driven bikes, Harley’s use a toothed rubber belt to transfer power from the transmission to the rear wheel. This design offers a smoother, quieter ride with less maintenance than chains, but it also means that getting the belt size exactly right is non-negotiable.
Imagine cruising down the highway, feeling the rumble of your Twin Cam or Milwaukee-Eight engine, when suddenly you hear a loud snap. Your bike lurches, and you’re coasting to a stop. That’s what happens when a drive belt fails—and more often than not, it’s due to using the wrong size or a worn-out belt. A belt that’s too tight can overstress the transmission and rear pulley, while one that’s too loose can slip, wear unevenly, or even come off entirely. That’s why knowing your Harley-Davidson drive belt size isn’t just helpful—it’s essential for safe, reliable riding.
But it’s not just about avoiding breakdowns. The right belt size ensures optimal power delivery, fuel efficiency, and ride quality. Harley engineers design each model with a specific belt in mind, taking into account engine torque, rear wheel size, and suspension travel. Using the correct belt means your bike performs exactly as intended. Whether you’re riding a classic Softail, a sleek Road King, or a powerful Street Glide, the drive belt is the silent workhorse that keeps everything moving smoothly.
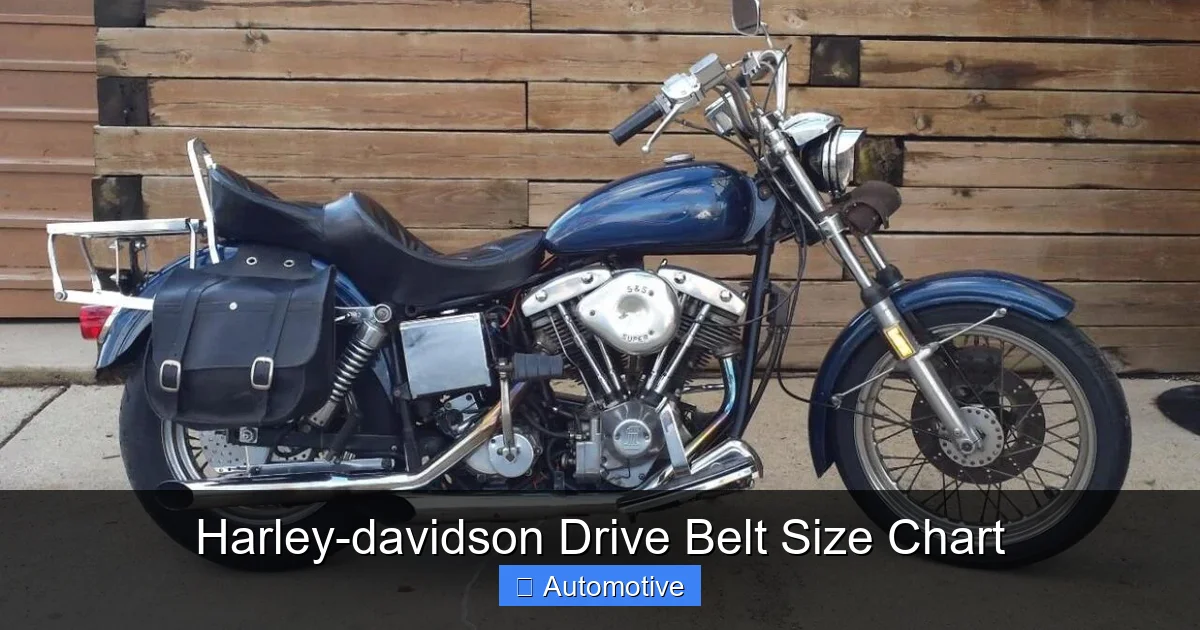
Understanding Harley-Davidson Drive Belt Basics
Visual guide about Harley-davidson Drive Belt Size Chart
Image source: motorbikeinsider.com
Before diving into sizing charts and measurements, it helps to understand what a drive belt actually does—and why Harleys use them in the first place. Unlike motorcycles with chain drives, Harley-Davidson models (with few exceptions) use a toothed rubber belt made from high-strength materials like neoprene or EPDM. This belt wraps around the transmission output sprocket and the rear wheel pulley, transferring rotational force to move the bike forward.
One of the biggest advantages of a belt drive is reduced maintenance. Chains need regular cleaning, lubrication, and tension adjustments. Belts, on the other hand, are sealed and require no lubrication. They’re also quieter and don’t throw grease onto your rear fender or saddlebags. But this convenience comes with a trade-off: belts are less tolerant of misalignment and improper sizing.
Harley drive belts are not universal. Each model and year may require a different size, depending on the frame, rear suspension, and drivetrain configuration. For example, a 2000 Harley-Davidson FLHTCUI Electra Glide Ultra Classic uses a different belt than a 2015 FLTRX Road Glide. Even within the same model line, changes in rear wheel size or suspension travel can affect belt length.
Types of Harley Drive Belts
There are two main types of drive belts used on Harley-Davidson motorcycles: standard and reinforced (also called high-performance or heavy-duty). Standard belts are designed for everyday riding and stock engine setups. They’re made from durable rubber compounds and reinforced with fiber cords for strength.
Reinforced belts, on the other hand, are built for modified engines, high-torque applications, or heavy loads—like when you’re riding two-up with full saddlebags. These belts often feature Kevlar or aramid fiber reinforcement, which resists stretching and heat buildup. While they cost more, they’re a smart investment if you’ve upgraded your engine or frequently ride in demanding conditions.
It’s also worth noting that some aftermarket companies offer “stretch-fit” belts, which are slightly shorter than OEM specs and designed to be installed by stretching over the pulleys. These can be convenient for quick replacements, but they’re not recommended for long-term use unless specifically approved for your model.
Belt Construction and Materials
Harley drive belts are built to withstand extreme conditions. The outer layer is made of heat-resistant rubber that grips the pulleys without slipping. Inside, layers of polyester or Kevlar cords provide tensile strength, preventing the belt from stretching under load. The teeth are precision-molded to match the pulley grooves, ensuring smooth engagement and minimal wear.
Over time, exposure to heat, oil, and road debris can degrade the rubber. UV rays from the sun can cause cracking, while oil leaks from the transmission or rear pulley can soften the material. That’s why regular inspection is crucial—even if your belt looks fine, internal damage may already be occurring.
How to Determine Your Harley-Davidson Drive Belt Size
Visual guide about Harley-davidson Drive Belt Size Chart
Image source: motorbikeinsider.com
So, how do you figure out the right belt size for your Harley? There are three reliable methods: checking your owner’s manual, measuring your current belt, or using a Harley-Davidson drive belt size chart. Let’s walk through each one.
Method 1: Check the Owner’s Manual
The easiest and most accurate way to find your belt size is to consult your motorcycle’s owner’s manual. Harley-Davidson includes the OEM part number and belt specifications for every model. For example, a 2010 Harley-Davidson FLSTF Fat Boy uses a 130-tooth, 1.125-inch wide belt with a part number like 40100015A.
If you don’t have the manual, you can often find it online through Harley’s official website or forums like Harley Davidson Forums or Iron Horseman. Just enter your VIN or model/year, and you’ll get access to the original specs.
Method 2: Measure Your Current Belt
If you’re replacing a belt and don’t have the manual, you can measure the old one. Here’s how:
1. **Remove the belt** from the motorcycle (you’ll need to loosen the rear axle and possibly the swingarm).
2. **Lay it flat** on a clean surface.
3. **Measure the length** by wrapping a flexible tape measure around the inside of the belt (following the curve of the teeth). This gives you the effective length in inches.
4. **Count the number of teeth**—this is usually stamped on the belt or can be counted manually.
5. **Measure the width** at the widest point (typically across the top of the belt).
For example, a common Harley belt might measure 136 inches in length, 1.125 inches wide, with 136 teeth. This would be written as 136L x 1.125W.
Method 3: Use a Harley-Davidson Drive Belt Size Chart
If you don’t have the old belt or manual, a size chart is your best bet. These charts list belt sizes by model, year, and engine type. Here’s a simplified example of what you might find:
– **2000–2006 FLHTCUI Electra Glide Ultra Classic:** 130T x 1.125″
– **2007–2015 FLTRX Road Glide:** 136T x 1.125″
– **2000–2015 FLSTF Fat Boy:** 130T x 1.125″
– **2012–2015 FLS Softail Slim:** 136T x 1.125″
Keep in mind that these are general examples—always double-check with your VIN or a trusted parts dealer. Some models, especially those with custom wheels or aftermarket suspensions, may require non-standard sizes.
Common Harley-Davidson Drive Belt Sizes by Model

Visual guide about Harley-davidson Drive Belt Size Chart
Image source: motorbikeinsider.com
To make things easier, here’s a breakdown of common belt sizes across popular Harley models. This isn’t an exhaustive list, but it covers many of the most frequently ridden bikes.
Touring Models (FLH/FLTR Series)
Touring bikes like the Road King, Street Glide, and Electra Glide are built for long-distance comfort and often use longer belts to accommodate larger rear wheels and suspension travel.
– **2000–2006 FLHTCUI Electra Glide Ultra Classic:** 130T x 1.125″ (Part #40100015A)
– **2007–2015 FLTRX Road Glide:** 136T x 1.125″ (Part #40100032A)
– **2014–2015 FLHTK Electra Glide Ultra Limited:** 136T x 1.125″ (Part #40100032A)
These models typically use 1.125-inch wide belts with 130 to 136 teeth, depending on the year and rear wheel size.
Softail Models (FLST/FLS Series)
Softail bikes like the Fat Boy, Heritage Softail, and Softail Slim have a hidden rear suspension that allows for a cleaner look. Their belt sizes vary slightly based on wheel and swingarm design.
– **2000–2015 FLSTF Fat Boy:** 130T x 1.125″ (Part #40100015A)
– **2012–2015 FLS Softail Slim:** 136T x 1.125″ (Part #40100032A)
– **2006–2015 FLSTC Heritage Softail Classic:** 130T x 1.125″ (Part #40100015A)
Note that later Softail models (post-2012) often use longer belts to accommodate wider rear tires.
Dyna Models (FXD Series)
Dyna bikes like the Super Glide and Wide Glide are lighter and more agile, with shorter belt lengths due to compact rear ends.
– **2000–2015 FXDWG Dyna Wide Glide:** 120T x 1.125″ (Part #40100012A)
– **2006–2015 FXDB Street Bob:** 120T x 1.125″ (Part #40100012A)
These models typically use 120-tooth belts, which are shorter and better suited for tighter drivetrain layouts.
Sportster Models (XL Series)
While most Sportsters use chain drives, some early models (like the 1999–2003 XL883R) used belts. Always verify your model before assuming belt compatibility.
– **1999–2003 XL883R:** 120T x 1.0″ (Part #40100008A)
These belts are narrower (1.0 inch) and shorter than Touring or Softail belts.
How to Replace Your Harley Drive Belt
Replacing a drive belt isn’t as simple as swapping a tire—it requires precision and the right tools. Here’s a step-by-step guide to help you do it safely and correctly.
Tools You’ll Need
– Socket wrench set (including a rear axle nut socket)
– Torque wrench
– Belt tension gauge (optional but recommended)
– Jack and jack stands (or a motorcycle lift)
– Owner’s manual (for torque specs)
Step-by-Step Replacement Process
1. **Lift the motorcycle** securely using a jack or lift. Make sure it’s stable before working underneath.
2. **Remove the saddlebags and rear fender** if necessary to access the belt area.
3. **Loosen the rear axle nut** and slide the wheel forward to create slack.
4. **Remove the old belt** by sliding it off the transmission and rear pulleys.
5. **Inspect the pulleys** for wear, cracks, or debris. Clean them with a soft brush and mild solvent.
6. **Install the new belt** by threading it over the transmission pulley first, then the rear pulley. Make sure the teeth engage properly.
7. **Slide the rear wheel back** to tension the belt. Use a belt tension gauge if available—most Harleys require 10–15 lbs of force to deflect the belt 1/2 inch.
8. **Tighten the rear axle nut** to the manufacturer’s torque specification (usually 80–100 ft-lbs).
9. **Reinstall fender and saddlebags**, then lower the bike.
10. **Test ride** at low speed to ensure smooth operation.
Tips for a Successful Installation
– Always replace the belt in pairs if you’re doing a major service—don’t mix old and new.
– Avoid twisting the belt during installation—it should lay flat and smooth.
– Check alignment by spinning the rear wheel and watching the belt track. It should run centered on both pulleys.
– If the belt squeaks or slips after installation, recheck tension and alignment.
Maintaining Your Harley Drive Belt for Longevity
A little maintenance goes a long way in extending the life of your drive belt. Here are some best practices to keep your belt in top shape.
Regular Inspections
Check your belt every 5,000 miles or during oil changes. Look for:
– Cracks or fraying on the edges
– Missing or worn teeth
– Glazing (shiny spots) on the sides
– Oil or grease contamination
If you see any of these signs, replace the belt immediately.
Keep It Clean
While belts don’t need lubrication, they do need to stay clean. Wipe down the belt and pulleys with a dry cloth to remove dirt and debris. Avoid using harsh chemicals or pressure washers, which can damage the rubber.
Watch for Oil Leaks
Oil is the enemy of rubber belts. If you notice oil around the transmission or rear pulley, fix the leak right away. Even small amounts can degrade the belt over time.
Store Your Bike Properly
If you store your Harley for the winter, keep it in a cool, dry place away from direct sunlight. UV rays can dry out the rubber and cause premature aging.
Replace on Schedule
Even if your belt looks good, replace it every 20,000 to 50,000 miles, depending on riding conditions. High-torque engines, frequent two-up riding, or hot climates may require more frequent changes.
Choosing Between OEM and Aftermarket Belts
When it’s time to replace your belt, you’ll face a choice: stick with Harley-Davidson OEM parts or go with an aftermarket brand. Both have pros and cons.
OEM Belts
OEM (Original Equipment Manufacturer) belts are made by Harley or their licensed suppliers. They’re designed to exact specifications and are the safest choice for reliability and warranty compliance. The downside? They’re often more expensive.
Aftermarket Belts
Aftermarket brands like Gates, Dayco, or Belt Drive Sport offer high-quality alternatives at lower prices. Many are made to or exceed OEM standards and come with warranties. However, quality can vary, so stick with reputable brands.
Which Should You Choose?
If you’re riding a stock bike and want peace of mind, go OEM. If you’re on a budget or have a modified engine, a quality aftermarket belt can be a great option—just make sure it’s the correct size and rated for your application.
Conclusion
Getting the right Harley-Davidson drive belt size isn’t just about fitting a part—it’s about ensuring your motorcycle performs safely, smoothly, and reliably mile after mile. Whether you’re a weekend rider or a cross-country tourer, understanding how to measure, select, and maintain your drive belt is a skill every Harley owner should have.
From checking your owner’s manual to using a size chart or measuring your current belt, there are multiple ways to find the correct size. And once you’ve got it, proper installation and regular maintenance will keep you riding strong for years to come.
Remember: a small component like a drive belt plays a huge role in your bike’s performance. Don’t cut corners. Invest in quality, follow the specs, and ride with confidence. Your Harley—and your safety—deserve nothing less.
Frequently Asked Questions
How often should I replace my Harley drive belt?
Most Harley-Davidson drive belts should be replaced every 20,000 to 50,000 miles, depending on riding conditions. Inspect it regularly for cracks, wear, or glazing, and replace it sooner if you notice damage or performance issues.
Can I use a belt from a different Harley model?
No, you should never use a belt from a different model unless it’s confirmed to be the exact same size. Even small differences in length or tooth count can cause slippage, wear, or drivetrain damage.
How do I know if my drive belt is too tight or too loose?
A properly tensioned belt should deflect about 1/2 inch when pressed with 10–15 lbs of force. Too tight can stress components; too loose can cause slipping. Use a belt tension gauge for accuracy.
What happens if my drive belt breaks while riding?
If your belt breaks, your bike will lose power to the rear wheel and you’ll need to coast to a stop. Always carry a spare belt and tools on long trips, and know how to replace it in an emergency.
Can I install a drive belt myself?
Yes, with the right tools and knowledge, most riders can replace a drive belt at home. Follow your owner’s manual, use proper torque specs, and double-check alignment and tension.
Are aftermarket drive belts as good as OEM?
Many aftermarket belts are high quality and meet or exceed OEM standards. Stick with reputable brands and ensure the size and specs match your Harley for the best results.


