
How to Put UPPAbaby Mesa Car Seat Cover Back On: Step-by-Step Guide

Putting an infant car seat back together after washing the fabric can feel harder than taking it apart. Plastic tabs disappear under the padding, harness straps can end up in the wrong place, and the cover may look correct even when part of it is not fully secured.
If you are trying to learn how to put UPPAbaby Mesa car seat cover back on, the most important thing is to work slowly and confirm which Mesa model you own. UPPAbaby has produced several versions, including the Mesa, Mesa V2, Mesa Max, and Mesa V3, and fabric attachment details can vary.
This guide explains the basic reassembly process, the areas that deserve extra attention, and the safety checks you should complete before putting your child back in the seat.
Quick Answer
To put an UPPAbaby Mesa car seat cover back on, position the seat pad over the shell, fit it around the headrest, route the harness and adjuster strap through their openings, secure the upper and lower plastic tabs, reinstall the headrest padding, and confirm that every harness strap lies flat and moves freely.
Confirm Which UPPAbaby Mesa Model You Have
Before installing the cover, identify your exact car seat model. Do not assume that instructions for one Mesa generation are identical to another.
UPPAbaby currently provides separate documentation for different Mesa versions through its Mesa support resources. (UPPAbaby)
Look for the model information on the labels attached to the car seat shell. You may have:
- Original UPPAbaby Mesa
- Mesa V2
- Mesa Max
- Mesa V3
This matters because the headrest, side-impact protection padding, attachment tabs, and fabric routing can differ slightly.
The procedure below closely follows the seat-padding arrangement used on models such as the Mesa V2, but your specific owner’s manual should always override general instructions.
What You Need Before Reinstalling the Cover
You normally do not need special automotive tools.
Have these items ready:
- Clean, completely dry seat cover
- Car seat carrier
- Headrest or SIP padding
- Buckle cover
- Shoulder pads and infant insert, if applicable
- Your model-specific instruction manual
- Good lighting
- A clean table or floor
Do not start while the fabric is still damp. Moisture trapped between the cover and shell can create unpleasant odors and may contribute to mildew during storage.
UPPAbaby’s Mesa V2 instructions specify washing compatible fabrics with mild detergent and allowing them to dry before reuse. They also give different cleaning instructions for the harness webbing, buckle, and plastic components. (UPPAbaby)
How to Put UPPAbaby Mesa Car Seat Cover Back On
The following steps cover the main seat pad and related padding. Keep the carrier outside the vehicle while doing the work so you can clearly see every attachment point.
1. Loosen the Harness Before Starting
Press the harness-release control and pull the shoulder straps forward to create plenty of slack.
Unbuckle:
- The chest clip
- The main harness buckle
Move the straps to the sides.
This makes it easier to position the cover without accidentally folding or twisting the harness underneath it.
Never trap a harness strap behind the cover. The harness must remain visible, flat, and free to move.
2. Lower the Headrest or SIP Assembly
On Mesa versions with an adjustable side-impact protection/headrest assembly, move it to its lowest position before installing the main cover.
On the Mesa V2, UPPAbaby specifically instructs owners to begin seat-padding installation with the SIP assembly in its lowest position. (UPPAbaby)
This creates the clearance needed to fit the cover around the headrest.
3. Lay the Seat Cover Over the Carrier
Place the fabric over the car seat shell with the seating surface facing upward.
Start at the upper portion rather than immediately stretching the fabric around the bottom edge.
Open the fabric flap around the headrest area and carefully guide the opening over the SIP or headrest assembly.
The cover should naturally match the contours of the shell. If you have to pull extremely hard, stop and check its orientation.
Do not force plastic attachment tabs into openings that do not line up.
4. Secure the Upper Fabric Tabs
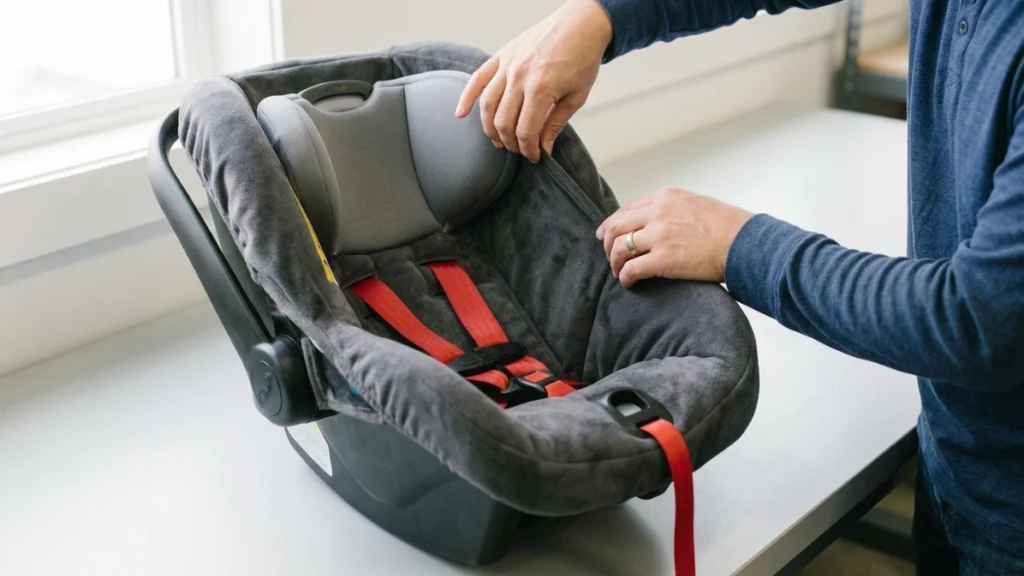
Locate the upper plastic tabs sewn into the cover.
Guide each tab into its designated slot in the car seat shell.
For the Mesa V2, UPPAbaby’s instructions call for securing two upper tabs while the SIP/headrest is lowered.
Run your fingers along the upper edge afterward.
You should not see:
- A tab hanging loose
- Fabric folded underneath itself
- A large gap between the shell and cover
- Fabric covering the headrest mechanism
5. Route the Headrest Adjuster Through Its Opening
Locate the buttonhole or opening near the top of the cover.
Pull the headrest/SIP adjustment tab through it.
Do not leave the adjuster underneath the upholstery. You need to be able to operate the headrest normally after reassembly.
Move the adjustment mechanism slightly to make sure the fabric does not interfere with it.
6. Bring the Harness Straps Through the Correct Openings
Lift the lower portion of the headrest or SIP assembly enough to access the harness area.
Guide each shoulder harness strap into its corresponding opening in the padding.
Make certain:
- The left strap remains on the left
- The right strap remains on the right
- Neither strap is folded
- Neither strap crosses behind the padding
- The straps slide freely
UPPAbaby’s Mesa V2 reassembly procedure specifically calls for bringing the harness straps to each side of the opening before securing the padding panel. (UPPAbaby)
This is one of the most important steps.
A cover that looks neat is not enough. The harness routing must also be correct.
7. Secure the Padding Panel
Once the harness straps are correctly positioned, close the fabric or hook-and-loop panel around the headrest area.
Press along the entire attachment surface so it is securely joined.
Check that no part of the panel:
- Blocks the harness
- Sits underneath a strap
- Covers the headrest adjustment mechanism
8. Raise the Headrest
Move the headrest/SIP assembly to its highest position.
This exposes the lower areas of the seat cover and gives you room to finish fitting the upholstery around the front of the carrier.
The Mesa V2 installation sequence uses this approach before securing the lower portion of the cover.
9. Route the Harness Adjuster Strap Through the Cover
Find the long strap that comes from the front center of the car seat. This is the strap you pull to tighten the child’s harness.
Thread it through the corresponding opening in the seat pad.
Then carefully position the fabric around the harness-release button housing.
Test the mechanism:
- Press the harness-release button.
- Pull the shoulder straps outward.
- Release the button.
- Pull the front adjuster strap.
Everything should move smoothly.
Stop using the seat if the fabric prevents the harness from tightening or loosening correctly.
10. Wrap the Cover Around the Front Edge
Pull the lower part of the upholstery over the front lip of the carrier.
Work gradually from the center toward each side.
Avoid pulling only from one corner because this can leave the cover crooked and make the opposite tabs difficult to secure.
On the Mesa V2, UPPAbaby specifies installing four lower plastic tabs after wrapping the padding around the front edge.
11. Secure the Lower Plastic Tabs
Locate each lower attachment tab.
Push every tab into its proper slot until it is fully seated.
Check both sides of the carrier. A missed tab can allow the padding to shift during normal use.
Run your hand around the entire front and side edge afterward.
The cover should feel:
- Smooth
- Centered
- Firmly attached
- Free of large wrinkles
- Clear of the harness hardware
12. Reinstall the Headrest/SIP Cover
If you removed the separate headrest or side-impact protection padding, reinstall it next.
On the Mesa V2, the manufacturer’s sequence includes fitting the lower portion of the SIP padding onto the SIP carriage, guiding the harness straps through the appropriate padding slots, and securing the cover around the side sections. (UPPAbaby)
Do not simply stretch the headrest cover over everything.
Confirm that the harness exits through its designed openings.
13. Reinstall the Buckle Cover and Pads
Replace the buckle cover and any manufacturer-supplied shoulder pads or infant inserts that are appropriate for your child’s size and your specific model.
Do not substitute universal padding or aftermarket inserts just because they fit physically.
NHTSA describes aftermarket car-seat products as accessories or replacement items that generally should not be used unless the original car-seat manufacturer makes or permits them for that restraint. You can review that guidance in the NHTSA car seat glossary. (NHTSA)
Final Safety Check Before Using the Seat
Once everything is back together, do not immediately place the carrier in the vehicle.
Perform a complete check first.
| Item to Check | What You Want to See | Warning Sign |
|---|---|---|
| Main cover | Flat and securely attached | Loose or missing tabs |
| Shoulder harness | Flat and untwisted | Crossed or folded straps |
| Harness adjuster | Moves smoothly | Strap sticks or binds |
| Headrest | Adjusts normally | Fabric blocks movement |
| Chest clip | Fully operational | Clip damaged or difficult to close |
| Buckle | Locks securely | Does not click or release normally |
| Padding | Correct manufacturer parts | Extra/unapproved padding |
| Fabric | Completely dry | Dampness or mildew odor |
After reinstalling the cover, place your child in the seat and adjust the harness according to your model’s instructions.
For a rear-facing infant seat, NHTSA says the harness should lie flat without twists and be positioned at or below the child’s shoulders. The chest clip should be at armpit level, and the harness should be snug enough that excess webbing cannot be pinched at the shoulder. See the NHTSA rear-facing infant car seat instructions for additional safety guidance. (NHTSA)
What If the Cover Will Not Fit?
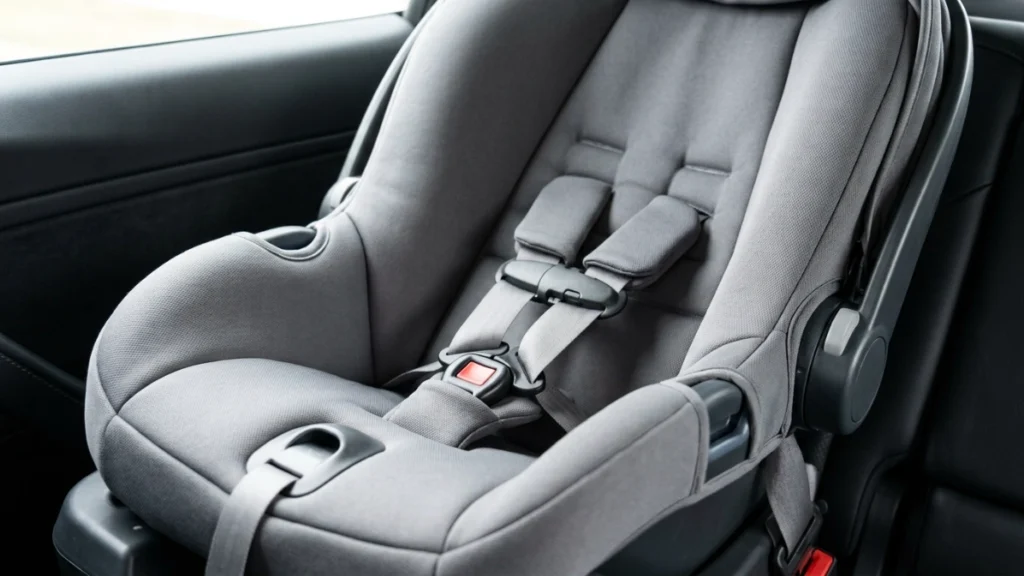
A cover that suddenly seems too small is usually not something you should solve by stretching harder.
Check these areas first.
The Cover Is Backward or Off-Center
Compare:
- Harness openings
- Buckle opening
- Headrest opening
- Front adjuster-strap opening
These should naturally line up with the hardware.
The Headrest Is in the Wrong Position
Some attachment points become difficult to reach when the headrest is raised.
Follow your model-specific sequence for lowering and raising it during installation.
One Tab Is Attached Too Early
A common mistake is pulling one side extremely tight and securing it before the rest of the cover is aligned.
Release the problem area and center the fabric again.
The Fabric Is Not Fully Dry
Washed upholstery can feel slightly different before it has completely dried and settled.
Follow the drying instructions for your exact Mesa model rather than using high heat simply to speed things up.
You Have the Wrong Replacement Cover
If you purchased replacement upholstery, confirm that it is specifically approved for your exact Mesa model.
Physical similarity does not guarantee compatibility.
Expert Tip
Expert Tip: Take several photos of your car seat before removing washable fabric. Photograph the harness openings, plastic tabs, buckle area, and headrest from multiple angles. Those reference photos can make correct reassembly much easier.
Safety Matters More Than Appearance
The car seat cover is not merely decorative upholstery.
It fits around a child-restraint system containing:
- Harness webbing
- Buckle hardware
- Harness adjustment components
- Energy-management structures
- Head and side-impact protection components
That is why you should avoid cutting openings, adding padding, modifying tabs, or improvising attachment methods when something does not fit.
If the factory cover is torn, severely stretched, missing attachment tabs, or otherwise damaged, contact UPPAbaby about the correct replacement rather than modifying it yourself.
Cost, Quality, and Replacement Considerations
Reinstalling a washable cover yourself normally does not require paid labor.
However, replacement may make more sense when:
- Fabric is badly torn
- Attachment tabs are broken
- Padding has deteriorated
- An approved component is missing
- The cover no longer stays securely attached
When buying replacement upholstery, compatibility matters more than getting the lowest price.
A cheaper generic cover may look similar but could interfere with harness routing or introduce padding that was not part of the restraint’s tested configuration.
The safest buying approach is to verify the model number and obtain manufacturer-approved replacement components.
Common Mistakes Car Owners Should Avoid
- Twisting the shoulder harness. Flatten each strap before using the seat.
- Leaving plastic tabs unattached. Check every edge after reassembly.
- Covering the harness-release button. The adjustment system must operate freely.
- Routing the front tightening strap underneath the fabric. It needs to pass through its proper opening.
- Forcing the headrest mechanism. Fabric may be caught underneath it.
- Using aftermarket padding to make the seat softer. Only use components allowed by the manufacturer.
- Installing damp fabric. Let washable components dry according to the manufacturer’s instructions.
- Assuming all Mesa models reassemble identically. Check the manual for your exact model.
- Skipping the harness test. Loosen and tighten the harness several times before putting your child in the seat.
When to Call a Professional Mechanic
A general automotive mechanic is usually not the right professional for car-seat cover or harness questions. Child restraints are specialized safety equipment, and most auto repair shops are not trained or certified to reassemble them.
Instead, contact UPPAbaby or have the seat checked by a certified Child Passenger Safety Technician if:
- You cannot determine the correct harness routing
- A plastic attachment tab is broken
- The harness remains twisted
- The headrest does not adjust correctly
- The tightening strap binds after installing the cover
- You are unsure whether a replacement part is approved
- The seat was involved in a crash
- You cannot confidently reinstall the restraint in your vehicle
NHTSA provides resources for finding trained car-seat technicians and inspection locations through its Car Seat Finder and installation assistance resources. (NHTSA)
A professional seat check is especially worthwhile when you have removed multiple harness-related components and are uncertain that everything went back into its original position.
FAQs
Can I remove the entire UPPAbaby Mesa cover for washing?
Washable components depend on the exact Mesa model. Consult the care section of your model’s UPPAbaby manual before removing or machine-washing any fabric.
How do I know whether my UPPAbaby Mesa cover is installed correctly?
The cover should be smooth and securely attached, all tabs should be engaged, the harness should remain flat, and both the headrest and harness-adjustment system should move freely.
Why will my UPPAbaby Mesa cover not stretch back over the seat?
The cover may be off-center, positioned backward, incorrectly routed around the headrest, or attached in the wrong sequence. Do not force it. Remove a few attachment points and realign it.
Can I use my Mesa if one cover tab is broken?
It is better to contact UPPAbaby before continuing to use a seat with a damaged upholstery attachment. A broken component should not be repaired with glue, tape, or another improvised method.
Can I wash the UPPAbaby Mesa harness straps?
Do not wash harness webbing using the same process as removable seat fabric unless your specific manual explicitly allows it. Manufacturer cleaning instructions typically treat fabric, harness webbing, buckle hardware, and plastic components differently. (UPPAbaby)
Should the UPPAbaby Mesa harness straps go over or under the cover?
The harness must pass through the designated openings in the seat padding and remain exposed where intended. It should never be trapped underneath the cover.
Can I buy a universal replacement cover for an UPPAbaby Mesa?
Using the manufacturer-approved cover for your exact model is the safer choice. NHTSA advises against aftermarket car-seat products unless they are made or permitted by the original car-seat manufacturer. (NHTSA)
Conclusion
Learning how to put UPPAbaby Mesa car seat cover back on is mostly about following the correct sequence rather than using force. Start with the correct model instructions, center the seat pad, secure the upper tabs, route every harness component through its intended opening, finish the lower attachments, and test all adjustments.
Most importantly, inspect the seat before your child rides in it. The harness should be flat, the cover should be fully secured, and nothing should interfere with the buckle, headrest, or tightening mechanism.
If anything does not look or operate the way it did before the cover was removed, do not improvise a repair. Check your UPPAbaby manual, contact the manufacturer, or have a certified Child Passenger Safety Technician inspect the seat before your next drive.
