
Safety 1st Grand 2 in 1 Booster Car Seat Manual: Setup & Safety Guide

Quick Answer
Before using a Safety 1st Grand 2 in 1 booster, match the manual to the model number and manufacture information printed on your seat. Current BC208 owners should start with the official Safety 1st BC208 user guide, because older Grand models can have different child-size limits and instructions.
Check These Before You Start
- Model number: Confirm whether your seat is BC208, BC149, or another Grand version.
- Manufacture information: Match the seat label with the correct manual revision.
- Child size: Measure your child’s weight and height instead of estimating them.
- Vehicle manual: Check approved seating positions, lower anchors, seat belts, and tether-anchor locations.
- Correct mode: Follow the limits printed on your specific seat for harness or belt-positioning booster use.
One Rule That Matters Most
- Never copy limits or installation steps from another Grand model just because the seats look similar.
I’d check the model label before touching the harness or vehicle belt. That’s the easiest way to avoid following an older Safety 1st Grand 2 in 1 booster car seat manual that doesn’t match your seat.
This matters even more in 2026 because several Grand versions remain in use. This guide shows you how to identify the right instructions, understand both modes, install the seat, and avoid common mistakes.
In This Guide
- Which Safety 1st Grand 2 in 1 manual do you need?
- What are the Safety 1st Grand weight and height limits?
- How do you install the Grand in forward-facing harness mode?
- How do you switch the Safety 1st Grand to booster mode?
- How do you clean and troubleshoot the Grand booster seat?
- Safety 1st Grand 2 in 1 booster seat FAQ
- What should you check before every ride?
Which Safety 1st Grand 2 in 1 Manual Do You Need?
You need the user guide that matches the model number and manufacture information on your actual seat. Don’t choose a manual by product name alone.
Safety 1st currently identifies the Grand 2 N 1 model BC208 with user guide 8686, effective March 28, 2025. You can also use the Safety 1st Owner Center to locate product support.
Definition: A 2-in-1 booster car seat is a forward-facing child restraint that can use an internal harness first and later work as a belt-positioning booster, subject to the limits and instructions for that specific model.
Why the model number matters
The Grand name has been used on more than one version. Their operating ranges aren’t necessarily identical.
| Version | Harness Mode | Booster Mode | Manual Reference |
|---|---|---|---|
| Current BC208 product | 40–65 lb; 43.4–49 in. | 40–100 lb; 43.4–52 in. | Guide 8686, effective 03/28/25 |
| Older BC149 example | 30–65 lb; 32–49 in. | 40–120 lb; 43–57 in. | Older 8023A manual |
Those differences are large enough to matter. A limit printed in an older BC149 manual shouldn’t be applied automatically to a BC208 seat.
Look for the model and manufacture label on the child restraint itself. When the label and an online page disagree, stop and contact Safety 1st before using the seat.
What Are the Safety 1st Grand Weight and Height Limits?
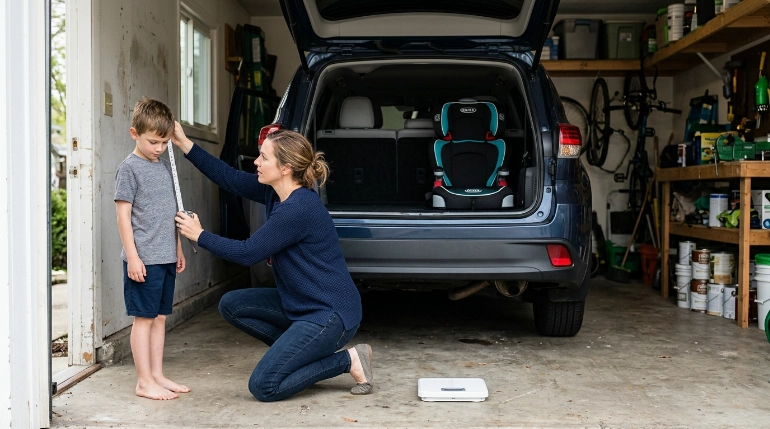
The limits depend on your exact Grand model. For the current BC208 product, Safety 1st lists 40–65 pounds in harness mode and 40–100 pounds in belt-positioning booster mode.
Height matters too. The current BC208 product page lists 43.4–49 inches for harness use and 43.4–52 inches for booster use.
Don’t switch modes based on weight alone
A child needs to meet every applicable fit requirement in the manual. Weight alone doesn’t tell you whether the harness or vehicle belt fits correctly.
- Check weight: Use a reliable scale.
- Measure height: Don’t estimate from age or clothing size.
- Check harness fit: Follow the shoulder-position instructions in your exact manual.
- Check booster maturity: The child must sit correctly for the whole trip.
- Check belt fit: The vehicle lap and shoulder belt must stay in the correct position.
The National Highway Traffic Safety Administration car-seat guidance recommends keeping children in each restraint stage until they reach the manufacturer’s applicable limits.
That means a minimum printed on a forward-facing seat isn’t a reason to move a child out of a rear-facing restraint early. Follow the child’s current seat instructions and NHTSA’s stage guidance.
How Do You Install the Grand in Forward-Facing Harness Mode?
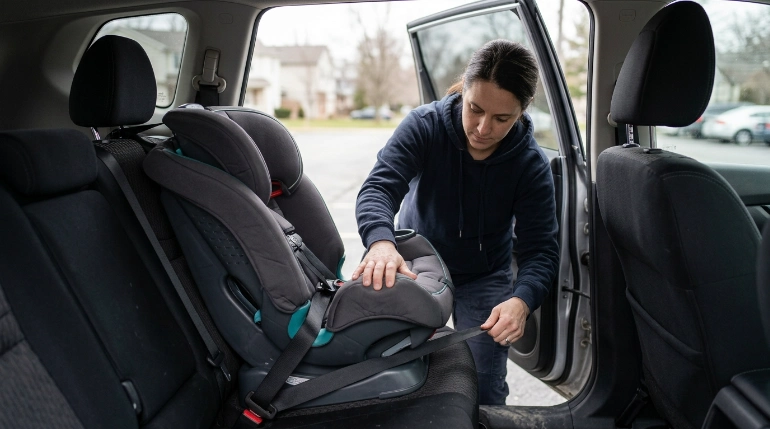
Use either the approved vehicle-belt method or lower-anchor method described by your exact manual. The vehicle owner’s manual is just as important because it identifies compatible seating positions and tether anchors.
Older Grand instructions also show why model-specific reading matters. They require a correctly secured tether during forward-facing harness installation and tell users to test movement at the belt path.
Basic forward-facing installation sequence
- Choose a rear seating position. Confirm that your vehicle permits a child restraint there.
- Place the seat forward-facing. Position it according to the child-restraint manual.
- Choose one installation method. Use the vehicle belt or lower anchors as directed, not both unless your exact manual specifically permits it.
- Route the belt correctly. Use the forward-facing belt path shown on the seat and in the manual.
- Remove slack. Press the restraint toward the vehicle seat while tightening the installation belt.
- Connect the tether. Attach it to the vehicle’s designated tether anchor when required.
- Test the installation. Check movement at the belt path before placing the child in the seat.
How tight should the seat be?
The older BC149 manual specifies less than 1 inch of side-to-side movement when checked at the forward-facing belt path. NHTSA likewise emphasizes a secure installation using the permitted method.
Don’t test by pulling hard on the headrest or top of the shell. Check the restraint where the vehicle belt or lower-anchor belt passes through it.
How should the harness fit?
The harness should lie flat without twists and sit in the position required for forward-facing use. Tighten it until you can’t pinch excess harness webbing at the shoulder.
- Place the child’s back and bottom flat against the seat.
- Buckle the harness completely.
- Tighten the harness until snug.
- Position the chest clip at armpit level when your manual specifies that placement.
- Recheck harness height as your child grows.
Mechanic Alert: If your vehicle lacks a tether anchor required by the child-seat instructions, don’t drill, fabricate, or improvise one yourself. Check the vehicle manual and contact the vehicle manufacturer, dealer, or an appropriately qualified technician.
Section Takeaway: Match the installation method to both manuals, secure the tether as directed, and verify a tight installation at the belt path before every trip.
How Do You Switch the Safety 1st Grand to Booster Mode?
Switch only after your child meets the booster requirements for your exact seat and can remain properly positioned. Conversion normally requires changing or storing the internal harness exactly as the manual shows.
NHTSA advises reading both the child-seat manual and vehicle owner’s manual before converting a combination seat. Don’t simply tuck harness parts behind the child.
Before converting the seat
- Confirm your child’s current weight and height.
- Confirm the harness has been outgrown according to your manual.
- Make sure your child can remain upright and properly belted.
- Read the harness-removal or storage section for your specific model.
- Confirm the chosen seating position has a lap-and-shoulder belt.
For a detailed overview of the belt-positioning process, see NHTSA’s combination car seat booster instructions.
How should the vehicle belt fit?
The lap belt should sit low and snug across the upper thighs or hips, not across the stomach. The shoulder belt should cross the chest and shoulder without riding against the neck or face.
- Lap belt: Low across the child’s stronger hip area.
- Shoulder belt: Across the center of the shoulder and chest.
- Child position: Back against the booster with the child sitting upright.
- Belt routing: Follow every belt guide and armrest-routing instruction for your model.
Never place the shoulder belt under the child’s arm or behind their back. A booster works by positioning the vehicle belt correctly on the child’s body.
How Do You Clean and Troubleshoot the Grand Booster Seat?
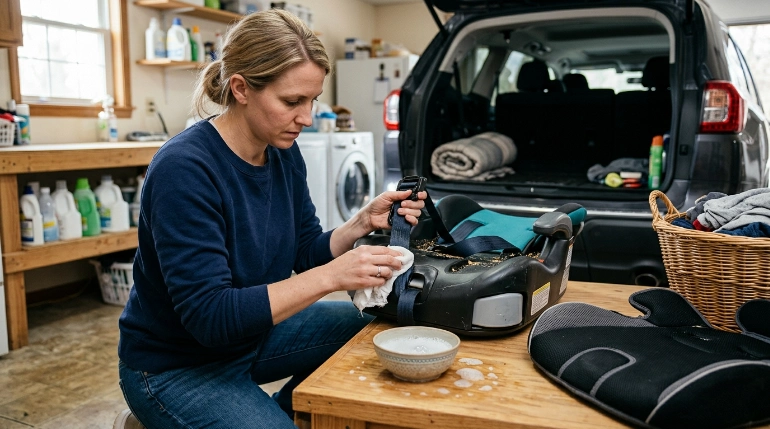
Cleaning instructions can differ by revision, so check your manual before removing the pad or harness. Don’t soak, lubricate, or chemically treat harness components unless the manufacturer specifically allows it.
Older Grand instructions allow the removable pad to be machine washed in cold water on a gentle cycle. They instruct users to spot-clean harness straps with warm, sudsy water instead of machine washing them.
Common problems to check
- Harness won’t tighten: Check for crumbs, sticky spills, twists, or incorrect routing.
- Buckle feels sticky: Follow the manufacturer’s cleaning instructions and never lubricate it.
- Seat moves too much: Recheck the belt path, locking method, and installation tension.
- Shoulder belt hits the neck: Recheck booster fit, belt routing, and seating position.
- Missing manual: Find the exact model through Safety 1st support instead of using a similar manual.
What if the seat was in a crash?
Don’t guess whether a restraint should remain in service after a collision. Follow the child-seat manufacturer’s instructions and review NHTSA’s car-seat guidance after a crash.
Also inspect the restraint regularly for damaged plastic, frayed harness webbing, missing parts, or labels you can no longer read. Stop using a damaged seat until Safety 1st confirms the correct next step.
Register your car seat
Registration helps the manufacturer contact you about safety recalls or notices. Use the model number and manufacture information from the restraint label when registering it.
Keep the manual somewhere you can find it later. You’ll probably need it again when adjusting the harness, converting modes, cleaning the seat, or moving it to another vehicle.
Safety 1st Grand 2 in 1 Booster Seat FAQ
Where can I find the Safety 1st Grand 2 in 1 booster car seat manual?
Start with Safety 1st Consumer Care or the Safety 1st Owner Center. Match the model number and manufacture information on your seat to the guide before downloading or following installation instructions.
Is BC208 the same as BC149?
No. They are different model identifiers, and published limits can differ. For example, Safety 1st’s current BC208 product information lists different harness and booster ranges from an older BC149 8023A manual.
Can I use both LATCH and the vehicle seat belt?
Use only the installation method permitted by your exact car-seat manual and vehicle manual. NHTSA generally directs parents to secure a car seat with either lower anchors or the vehicle belt rather than combining methods without manufacturer approval.
Does the Safety 1st Grand need a top tether?
Follow your model’s manual. Older Grand BC149 instructions specifically require the tether during forward-facing use with the internal harness, while your vehicle manual identifies the correct tether anchor for each seating position.
When should I switch from the harness to booster mode?
Switch when your child meets the requirements in your exact manual and is mature enough to remain properly positioned. NHTSA recommends keeping children harnessed until they outgrow the applicable height or weight limit of their forward-facing seat.
Can I use the Grand booster with a lap-only belt?
Not in belt-positioning booster mode. A booster requires a lap-and-shoulder belt so the lap portion can fit low across the hips and the shoulder portion can cross the child’s chest and shoulder correctly.
What Should You Check Before Every Ride?
The best manual is only useful when its instructions become part of your routine. I use a short check rather than trying to remember every warning at once.
- Confirm the seat hasn’t loosened.
- Check the harness or vehicle belt for twists.
- Verify the child’s current fit.
- Confirm the chest clip and harness are positioned correctly when using harness mode.
- Check lap-and-shoulder belt placement when using booster mode.
- Make sure the tether and installation belt remain secure when required.
- Keep loose objects around the child to a minimum.
The biggest mistake to avoid is treating every Safety 1st Grand as the same seat. Check the label, use the matching manual, and follow both the child-restraint and vehicle instructions.
If anything about the installation still looks wrong, don’t improvise. Get help from Safety 1st or a qualified child-passenger safety professional before driving with the child in that restraint.
