Royal Enfield Disc Brake Kit: Upgrade Now
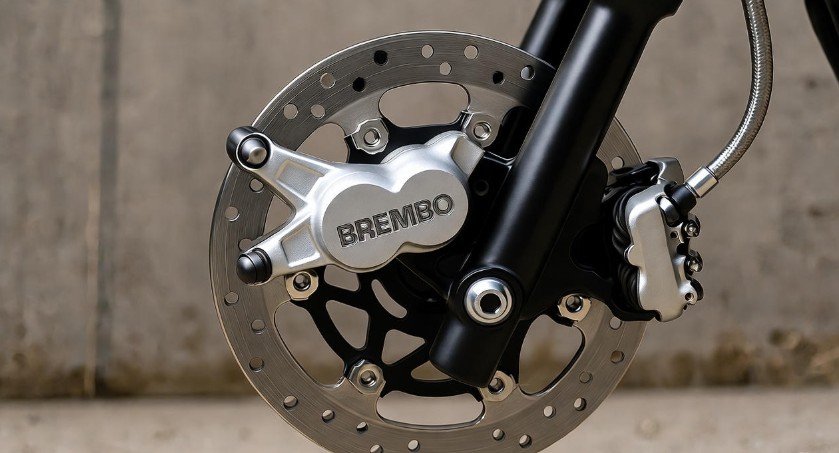
Upgrade your Royal Enfield with a disc brake kit for significantly improved stopping power and safety. This guide explains why and how to make this essential upgrade.
Key Takeaways
- Enhance Royal Enfield braking performance.
- Increase rider safety with better stopping.
- Choose the right disc brake kit for your model.
- Understand the installation process and its benefits.
- Maintain your new disc brake system effectively.
Are you looking to boost the performance and safety of your Royal Enfield motorcycle? One of the most impactful upgrades you can make is installing a disc brake kit. For many years, classic Royal Enfield models relied on drum brakes, which, while functional, don’t offer the same stopping power as modern disc brake systems. If you’re new to motorcycle maintenance or considering this upgrade, you might be wondering what a Royal Enfield disc brake kit entails and why it’s a worthwhile investment. Don’t worry, we’re here to break it down for you. This guide will walk you through everything you need to know, making the process clear and manageable. Let’s get your Royal Enfield stopping as confidently as it rides.
Why Upgrade to a Royal Enfield Disc Brake Kit? The Benefits Explained
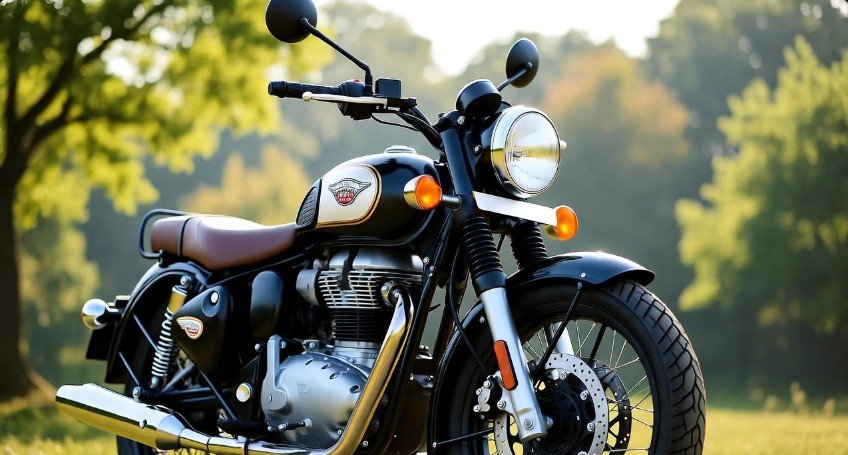
Riding a Royal Enfield is an experience steeped in heritage and character. However, modern riding conditions and expectations demand modern safety features. The original braking systems, often drum brakes, were designed for a different era of motorcycling. While they served their purpose, they often struggle with consistent performance, especially in wet conditions or during emergency stops. Upgrading to a Royal Enfield disc brake kit is a transformative change that significantly enhances your riding experience. It’s not just about tradition; it’s about safety and control.
Superior Stopping Power
The primary advantage of a disc brake system is its sheer stopping power. A disc brake works by clamping brake pads onto a rotating disc (rotor) attached to the wheel hub. This mechanism provides much greater friction and leverage compared to drum brakes, where brake shoes are expanded against the inner surface of a drum. This means you can slow down or stop your motorcycle much more quickly and effectively. For riders in the USA, where traffic can be unpredictable, this increased responsiveness is crucial for avoiding potential hazards. According to safety studies, improved braking systems are a key factor in reducing motorcycle accident severity. The National Highway Traffic Safety Administration (NHTSA) consistently highlights braking system effectiveness as a critical safety component for all vehicles.
Enhanced Performance in All Conditions
Drum brakes can be notoriously sensitive to water and heat. When wet, their performance diminishes significantly, and in prolonged heavy braking, they can suffer from “brake fade”—a dangerous reduction in braking effectiveness due to overheating. Disc brake systems, especially those with modern materials and designs, are far more resistant to these issues. The rotor is exposed to the air, allowing for better heat dissipation, and the clamping action is less affected by moisture. This means your Royal Enfield will brake more consistently and reliably, whether you’re riding through a sudden downpour or navigating a long descent. This reliability is a cornerstone of confident riding, especially for those exploring diverse American landscapes.
Improved Modulation and Feel
Beyond raw stopping power, disc brakes offer better modulation. This refers to the rider’s ability to finely control the braking force. With a disc brake kit, you’ll likely experience a more progressive and predictable brake lever feel. You can apply just the right amount of pressure for smooth deceleration or go for a hard stop when necessary, with greater confidence that the bike will respond as you intend. This nuanced control is particularly beneficial for newer riders or those who value precise handling and a connected feel to their machine.
Modernization and Aesthetics
While Royal Enfields are cherished for their vintage charm, an upgrade to modern disc brakes can also enhance their aesthetic appeal. Many disc brake kits feature stylish calipers and slotted or drilled rotors that add a contemporary touch to the classic design. This blend of old and new can create a unique look that appeals to riders who appreciate both heritage and performance.
Choosing the Right Royal Enfield Disc Brake Kit
With the decision made to upgrade, the next crucial step is selecting the right Royal Enfield disc brake kit. The market offers a variety of options, and the best choice often depends on your specific motorcycle model, your riding style, and your budget. Fortunately, many reputable aftermarket manufacturers specialize in creating kits designed to fit specific Royal Enfield models, ensuring a straightforward installation.
Identify Your Motorcycle Model and Year
This is the most critical step. Royal Enfield has produced numerous models over the decades, and a disc brake kit designed for a Classic 350 Bullet will not fit a Continental GT 650, for instance. Ensure you know the exact model and manufacturing year of your Royal Enfield. This information will help you narrow down compatible disc brake kits. Websites of aftermarket parts suppliers usually have detailed compatibility charts.
Types of Disc Brake Kits
Generally, you’ll find two main types of kits:
- Direct Bolt-On Kits: These are designed to replace your existing drum brake setup with minimal or no modifications to the motorcycle’s frame or forks. They often include the caliper, rotor, master cylinder, brake lines, and sometimes even a new brake pedal. These are usually the easiest to install for beginners.
- Universal or Custom Kits: These might require more fabrication or adaptation to fit your specific motorcycle. They can be a good option if a direct bolt-on kit isn’t available for your model, but they generally require a higher level of mechanical skill or professional installation.
Key Components of a Disc Brake Kit:
A comprehensive Royal Enfield disc brake kit typically includes:
- Brake Rotor (Disc): The metal disc that attaches to the wheel hub.
- Brake Caliper: The component that houses the brake pads and clamps onto the rotor.
- Brake Pads: Friction material that presses against the rotor.
- Master Cylinder: Converts lever or pedal pressure into hydraulic pressure.
- Brake Lines (Hoses): Carry the hydraulic fluid from the master cylinder to the caliper.
- Mounting Hardware: Bolts, brackets, and other necessary fittings.
Consider Material and Quality
The materials used in the disc and pads affect performance and longevity. High-quality stainless steel rotors offer durability and resistance to corrosion. Different brake pad compounds are available for various riding conditions – organic pads are good for street riding and offer a smooth feel, while sintered metallic pads offer higher performance and better heat resistance for more aggressive riding or touring.
Brands to Consider
Several reputable brands offer disc brake kits for Royal Enfields. Some popular choices include:
- Allens Performance: Known for high-quality aftermarket parts for classic bikes.
- EBC Brakes: A popular choice for brake upgrades, offering a wide range of pads and rotors.
- Brembo: A premium brand offering top-tier performance, though often at a higher price point.
- Hitchcock Motorcycles: A specialist in Royal Enfield parts, offering various upgrade options.
Always research reviews and consult with experienced Royal Enfield owners or mechanics to find the best fit for your needs.
Table: Disc Brake Kit Components and Their Function
| Component | Function | Material Examples |
|---|---|---|
| Brake Rotor | Rotating disc that the caliper clamps onto to slow the wheel. | Stainless Steel, Carbon Ceramic (rare for classic bikes) |
| Brake Caliper | Houses brake pads and applies hydraulic pressure to the rotor. | Aluminum Alloy, Cast Iron |
| Brake Pads | Friction material that creates resistance against the rotor. | Organic, Sintered Metallic, Ceramic |
| Master Cylinder | Converts rider input (lever/pedal) into hydraulic pressure. | Aluminum Alloy |
| Brake Lines | Transport hydraulic fluid; braided stainless steel lines are common upgrades for better feel and durability. | Rubber, Braided Stainless Steel |
The Royal Enfield Disc Brake Kit Installation Process: A Step-by-Step Overview
Installing a Royal Enfield disc brake kit can be a rewarding DIY project if you have basic mechanical knowledge and the right tools. However, if you’re not comfortable with working on your motorcycle’s braking system, it’s always best to have a qualified mechanic perform the installation. The braking system is a critical safety component, and any errors can have serious consequences.
Tools You’ll Likely Need:
- Wrench set (metric)
- Socket set (metric)
- Allen keys (metric)
- Torque wrench (essential for proper tightening)
- Pliers
- Screwdrivers
- Brake fluid (DOT 3, DOT 4, or DOT 5.1, depending on the kit manufacturer’s recommendation)
- Brake fluid syringe or bleeder kit
- Clean rags
- Gloves and eye protection
- Workshop manual for your specific Royal Enfield model
General Installation Steps:
- Preparation and Safety: Park your motorcycle on a level surface. Ensure the engine is cool. If you are lifting the front of the bike, use a sturdy motorcycle stand. Disconnect the battery if you are working on electrical components related to the brake light switch.
- Remove Old Drum Brake Components: Carefully remove the old drum brake assembly. This typically involves removing the wheel, the brake drum, and any associated linkage or cover. Refer to your motorcycle’s service manual for specific instructions.
- Install New Hub and Rotor: If your kit includes a new wheel hub, install it onto the front fork. Then, securely attach the new brake rotor to the hub using the provided hardware. Ensure all bolts are tightened to the manufacturer’s specified torque. Over-tightening or under-tightening can lead to significant issues.
- Mount the Caliper: Attach the new brake caliper to the fork bracket. This bracket is often part of the kit or designed to bolt onto existing mounting points on your fork leg. Ensure the caliper is positioned correctly over the rotor.
- Install the Master Cylinder and Brake Lines: If replacing the entire system, mount the new master cylinder, usually to the handlebar or frame. Connect the new brake lines from the master cylinder to the caliper. Ensure you use the correct fittings and routing to avoid kinks or chafing. Braided stainless steel lines are often recommended for their durability and improved feel over standard rubber lines.
- Connect Brake Light Switch (if applicable): If your new master cylinder or lever incorporates a brake light switch, connect it according to the kit’s instructions.
- Bleed the Brakes: This is a critical step to remove any air from the hydraulic system. Open the bleeder screw on the caliper, and use the brake lever or pedal to pump brake fluid through the system. Add fresh brake fluid to the master cylinder reservoir as you go, ensuring it never runs dry. Continue until no air bubbles are visible in the fluid exiting the bleeder screw. Follow the specific bleeding procedure recommended by your kit manufacturer. You may need a helper for this.
- Install the Wheel: Reinstall the wheel, ensuring it is properly aligned and secured.
- Final Checks: Double-check all fasteners for proper torque. Inspect all connections for leaks. Gently squeeze the brake lever/pedal a few times to ensure it feels firm and the brakes engage.
- Test Ride: Perform a slow, cautious test ride in a safe area to gradually test the new brakes. Listen for any unusual noises and feel for proper brake engagement. Gradually increase braking pressure and speed as you gain confidence.
Pro Tip: Always consult your Royal Enfield’s owner’s manual and the specific installation guide for your chosen disc brake kit. Torque specifications are vital for safety and component longevity.
Maintaining Your Royal Enfield Disc Brake System
Once your Royal Enfield is equipped with a new disc brake kit, proper maintenance is key to ensuring its continued performance and longevity. A well-maintained braking system is crucial for your safety on every ride. Regular checks and timely replacements will keep your brakes performing at their best.
Regular Inspections:
- Brake Fluid Level: Check the brake fluid level in the master cylinder reservoir regularly. It should be between the minimum and maximum marks. Low fluid can indicate a leak or worn pads.
- Brake Lines: Inspect brake lines for any signs of wear, cracks, abrasion, or leaks. Braided lines are more durable but still require inspection.
- Rotor Condition: Look for any scoring, warping, or excessive wear on the brake rotor. Minor surface imperfections might be normal, but deep grooves or a visibly uneven surface warrant attention.
- Caliper: Check the caliper for any signs of leaks or damage. Ensure the mounting bolts are secure.
Brake Pad Replacement:
Brake pads are wear items and will need to be replaced periodically. The frequency depends on your riding habits and the type of pads used. Most kits have a “wear indicator” or a minimum thickness specification. When pads reach this limit, they must be replaced. Follow the manufacturer’s instructions for removal and installation of new pads.
Brake Fluid Flush and Replacement:
Brake fluid absorbs moisture over time, which can degrade its performance and lead to corrosion within the brake system. It is recommended to flush and replace your brake fluid every one to two years, or as indicated by the kit manufacturer or your motorcycle’s service manual. Use only the specified type of brake fluid (e.g., DOT 4).
Rotor Replacement:
Rotors also wear down over time. If your rotor is warped, excessively worn, or damaged, it needs to be replaced. Always replace rotors in pairs if you are upgrading both front and rear, and ensure they are compatible with your calipers and pads.
Cleaning Your Brake System:
Keep the brake components clean. Wash the rotor and caliper area with a degreaser specifically designed for brakes, ensuring no residue is left behind. Avoid getting lubricants or cleaners on the brake pads or rotor surface, as this can severely compromise braking performance.
Table: Recommended Maintenance Schedule
| Task | Frequency | Notes |
|---|---|---|
| Check Brake Fluid Level | Monthly | Ensure it’s between MIN and MAX marks. |
| Inspect Brake Lines | Monthly | Look for cracks, leaks, or damage. |
| Check Pad Thickness | Every 3,000-5,000 miles (or per manual) | Replace if below minimum thickness. |
| Flush & Replace Brake Fluid | Every 1-2 years | Use recommended DOT fluid. |
| Inspect Rotor Condition | Every 6,000-10,000 miles (or per manual) | Check for wear, warping, or scoring. |
Frequently Asked Questions (FAQ) about Royal Enfield Disc Brake Kits
Q1: Will a disc brake kit fit my older Royal Enfield?
Many aftermarket kits are available for classic Royal Enfield models, especially those that originally came with drum brakes. However, compatibility varies greatly by model and year. Always confirm the specific kit’s fitment for your motorcycle before purchasing.
Q2: Is it difficult to install a Royal Enfield disc brake kit?
Installation difficulty depends on the kit and your mechanical experience. Direct bolt-on kits are generally manageable for DIYers with basic tools. Kits requiring modifications or custom fabrication are best left to professionals.
Q3: How much does a Royal Enfield disc brake kit typically cost?
Prices can range from a few hundred dollars for simpler kits to over a thousand dollars for high-performance or premium brand components. Factor in potential installation costs if you plan to have it done by a mechanic.
Q4: Do I need to upgrade other parts of my motorcycle when installing disc brakes?
While not always strictly necessary, upgrading your tires and suspension can complement the improved braking performance, offering a more balanced and safer ride. For very old motorcycles, ensuring the frame and forks are in good condition is also wise.
Q5: Can I install a disc brake on the rear wheel as well?
Yes, many kits are available for both front and rear wheels. Upgrading both provides the most comprehensive improvement in stopping power and control. For most riders, a front disc brake upgrade is the most impactful first step.
Q6: What type of brake fluid should I use?
Always use the brake fluid type recommended by the disc brake kit manufacturer. Common types for modern systems are DOT 3, DOT 4, or DOT 5.1. Never mix different types of brake fluid unless explicitly stated as compatible.
Q7: How often should I check my brake pads?
It’s a good practice to inspect your brake pads at least every few thousand miles, or whenever you have your wheels off for other maintenance. Listen for squealing noises, which can sometimes indicate worn pads, and visually check their thickness.
Conclusion
Upgrading your Royal Enfield with a disc brake kit is a significant enhancement that pays dividends in safety, performance, and confidence on the road. Whether you’re navigating bustling city streets, cruising scenic highways across the USA, or simply enjoying a weekend ride, superior stopping power provides invaluable peace of mind. By understanding the benefits, carefully selecting the right kit for your specific model, and following proper installation and maintenance procedures, you can transform your Royal Enfield’s braking capabilities. This upgrade not only honors the spirit of your classic machine but also equips it with modern, reliable technology, ensuring your journeys are as safe as they are enjoyable.

