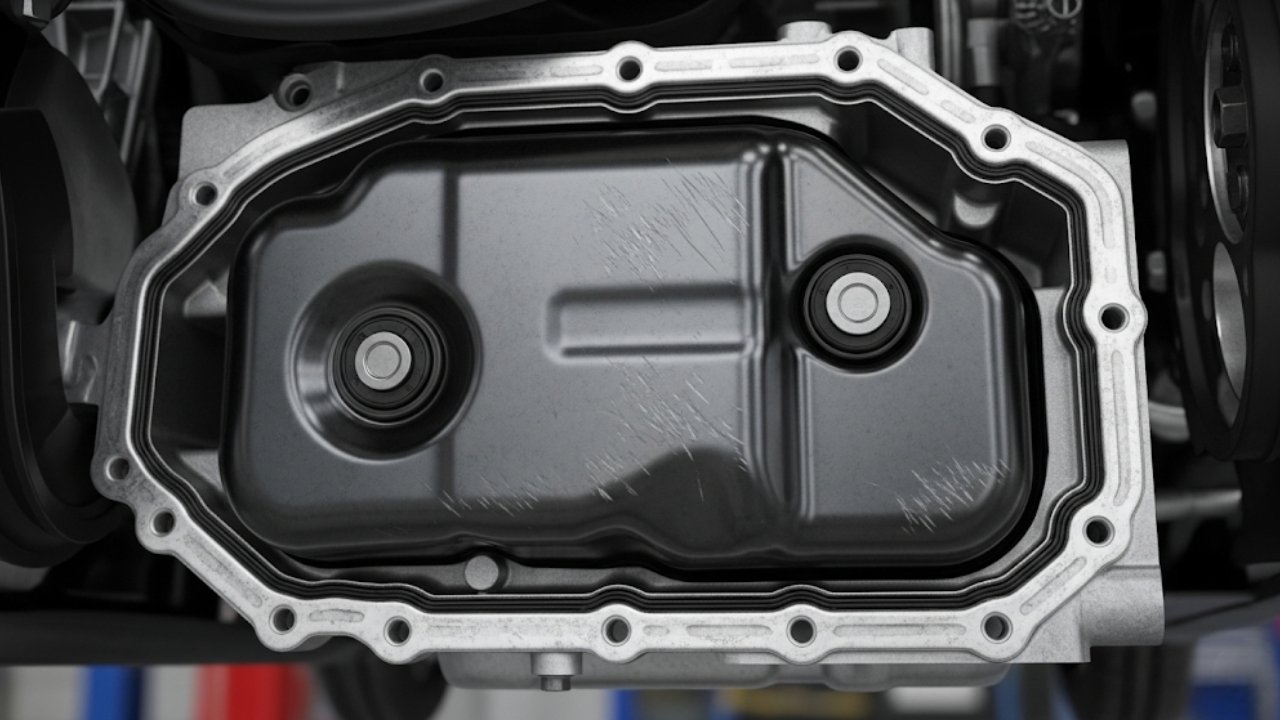
Mastering the Oil Pan in Car Mechanic Simulator 2018

Ever had a game teach you more than just how to play it? That’s exactly how Car Mechanic Simulator 2018 feels—especially when you’re dealing with the oil pan. At first glance, it’s just another metal part under the car. But in the game, removing and replacing the car mechanic simulator 2018 oil pan can be oddly satisfying. And trust me, once you understand its role, your virtual garage will run smoother than a brand-new V8 engine.
Think of the oil pan as the stomach of the car’s engine—it stores and collects the oil that keeps everything moving. Miss it, mess it up, or ignore it, and your car’s engine goes hungry. And no engine wants to run on empty.
This article isn’t just a walkthrough. It’s like sitting down for tea with a fellow gamer-mechanic buddy who’s been through the grime, the joy, and the head-scratching moments under the digital hood. So, grab your virtual wrench—we’re diving deep.
Understanding the Oil Pan’s Role in Car Mechanic Simulator 2018

In the real world, the oil pan collects oil that cycles through the engine, letting it cool and stay lubricated. The game mimics that reality closely. If the pan is rusted, cracked, or missing its drain plug, your car’s oil system is toast.
Here’s what the car mechanic simulator 2018 oil pan does:
-
Holds the engine oil at the base of the motor
-
Contains the oil drain plug for oil changes
-
Connects directly under the crankshaft
-
Easily gets damaged if ignored during repairs
The coolest part? You can visually inspect and interact with it. Unlike some auto games that oversimplify components, CMS2018 gives the oil pan its due respect.
How to Remove and Replace the Oil Pan – Step-by-Step
So, your customer’s car is running rough, and the diagnosis leads to the oil pan. Let’s walk through the greasy process, step by step. This is where the real fun—and sometimes frustration—begins.
1. Lift the Car
Use the car lifter to get the vehicle up. You won’t see the oil pan unless you’re under the car. It’s like spelunking in an engine cave.
2. Drain the Oil
Never skip this. If you remove the oil pan with oil still inside, it’s going to pour out—and CMS2018 punishes messiness with wasted oil and bad repair ratings.
3. Remove the Exhaust (if necessary)
Some models won’t give you direct access. You’ll need to unscrew the exhaust pipe or front section. It’s a bit of a puzzle—and that’s the charm.
4. Unscrew the Bolts
You’ll need to remove multiple bolts holding the car mechanic simulator 2018 oil pan. Use the Disassemble Mode and zoom in for precision.
5. Inspect and Replace
Look at the condition. If it’s under 30%, toss it. Buy a new one from the in-game parts store or the junkyard for a budget fix.
6. Reinstall Everything
Reverse the steps: bolt the new pan in, reattach the exhaust, and refill the oil.
Tools You’ll Need (In-Game)
You don’t need a full real-world toolbox, but in the CMS2018 world, make sure you’ve unlocked the following:
-
Oil Drain Tool
-
Car Lifter A or B
-
Tablet (for quick parts ordering)
-
Repair Bench (to possibly fix the old pan)
-
Wrench Set (automatic, if upgraded)
Table: Common Oil Pan Errors in CMS2018
| Problem | Cause | Solution |
|---|---|---|
| Oil Pan Missing | Forgot to reinstall after repairs | Buy a new one and reinstall |
| Oil Leak | Old or cracked pan | Replace the car mechanic simulator 2018 oil pan |
| Can’t Remove | Exhaust blocking access | Remove interfering parts first |
| Engine Won’t Start | No oil due to missing pan | Drain, refill, and check connections |
These issues might seem small, but they can ruin an entire repair job. Trust me, I once forgot to reinstall an oil pan, charged the customer, and the engine exploded on the test drive. Lesson learned.
Real Talk: Why This Tiny Part Matters So Much
You’d think something as boring-looking as a metal tray wouldn’t carry much weight. But here’s where the metaphor kicks in. The oil pan is like trust in a relationship—silent, supportive, and vital. Lose it, and everything falls apart.
In CMS2018, fixing the car mechanic simulator 2018 oil pan teaches you patience and attention to detail. It’s not just about slapping parts together. It’s about thinking three steps ahead. Like chess, but with more grease.
When I first played, I ignored the oil pan completely. I’d rebuild engines, fix suspensions, swap out transmissions—but always forgot to drain oil or check the pan. Then, I saw the warning signs: oil pouring out, poor engine performance, angry customers. That’s when it clicked. Respect the pan.
Quick Tips for Oil Pan Success
Here’s a quick rundown you can pin to your CMS2018 garage wall:
-
Always drain oil before removal
-
Inspect exhaust systems blocking access
-
Use the repair bench before buying new
-
Never reinstall without refilling oil
-
Take screenshots of tricky car builds
-
Use test drive mode to confirm oil pressure
These tips saved me countless hours. The oil pan isn’t glamorous, but it’s powerful in its quiet contribution.
Advanced Troubleshooting: When Things Get Messy
Sometimes, no matter how careful you are, things go wrong. The oil pan can be one of the sneakiest culprits. It’s often not the part itself, but what it affects. If your car’s engine feels sluggish, overheats, or makes that terrifying clunky noise, the car mechanic simulator 2018 oil pan might be hiding the issue.
Let’s explore a few tricky scenarios I’ve personally encountered:
-
Oil Light Still On After Replacement:
Even after installing a new pan, if the oil light stays on, double-check that you’ve actually refilled the oil. I once forgot. Took the car on a test drive. Big mistake. -
Can’t Install New Oil Pan:
This happens if other parts are blocking access. Suspension crossmembers or exhaust pipes often interfere. Remove those first—CMS2018 won’t let you “cheat” the bolt positions. -
Pan Installs, But Car Still Leaks Oil:
Either you bought a low-condition used pan, or the oil filter or oil pump is damaged. It’s not always the pan’s fault, but it does take the blame often.
Oil Pan = Gaming Wisdom?
Let me get real for a second. You ever notice how this game is like life? The oil pan is such a basic thing. We overlook it, just like we overlook the small stuff in our daily routine. But when it goes bad—suddenly, everything breaks.
In Car Mechanic Simulator 2018, fixing an oil pan feels like one of those minor acts of self-care in life. You don’t see the impact immediately, but it prevents bigger disasters. Like changing your phone’s password, updating software, or checking your tire pressure before a road trip. Boring, yes. But essential.
One time, I restored a 1970s V8 junker in the game. Did everything. Beautiful paint, tuned engine, all green status bars. Took it for a joyride—boom. White smoke, rattling sound, engine toast. Why? I reused an old oil pan at 15% condition. That one decision ruined a 4-hour rebuild. That’s when I stopped taking pans lightly.
Rebuilding Strategy: Don’t Just Replace—Optimize
Want to really master the car mechanic simulator 2018 oil pan game loop? Go beyond replacing it. Think system-wide.
Here’s how I do it:
-
When replacing an oil pan, I always check these too:
-
Oil filter
-
Oil pump
-
Crankshaft bearings
-
Timing parts if mileage is high
-
-
I also run a test drive before and after replacing any pan. It helps catch pressure issues.
-
Never install a used part under 50% unless you’re desperate or doing a budget junkyard build.
And if you’re into XP farming, remember: draining and replacing oil, even on easy jobs, adds points. Stack them by batch repairing multiple cars with pan issues.
Bonus Tip: Hidden Mechanic—Don’t Forget the Drain Plug!
Some players miss this: You can interact with the oil drain plug directly. You don’t always have to remove the pan if your job is just an oil change.
But here’s the catch—if the pan is too damaged, the plug won’t unscrew. That’s how the game gently pushes you to upgrade parts, not just maintain them.
Also, take note of this in higher difficulty settings: broken drain plugs = automatic oil loss = angry clients.
❓ Frequently Asked Questions (FAQs)
1. How do I know if the oil pan is bad in Car Mechanic Simulator 2018?
Check its condition in Examine Mode. Anything below 30% should be replaced. Also, look for oil leaks or a warning light after an oil change.
2. Can I repair the oil pan instead of buying a new one?
Yes, but only if it’s not severely damaged. Use the Repair Bench and check the success rate. Sometimes it’s cheaper to buy new.
3. Why is my oil pan not visible?
It could be blocked by the exhaust or crossmember. Raise the car on a lift and switch to Undercarriage View.
4. What happens if I don’t drain the oil before removing the pan?
The oil spills. You lose money and might fail part of the job. Always use the Oil Drain Tool first.
5. Where do I buy a new oil pan in CMS2018?
Use your tablet or the computer in the garage. Search by car model or engine type.
6. Can a car run without an oil pan in the game?
Technically yes—but you’ll get errors, and the engine won’t perform. Plus, it’s not realistic, and the test drive will likely fail.
7. Is it better to use junkyard oil pans or buy new ones?
Depends on your build. For a high-value client car, go new. For junkyard rebuilds or flip projects, a repaired used part is fine.
8. Do oil pans affect car value in the game?
Not directly, but a bad oil pan causes engine issues. And that does hurt value. Fix everything to increase resale.
Bullet Recap: Your Oil Pan Checklist
Before you call a job done, tick these boxes:
✅ Car is lifted
✅ Oil fully drained
✅ Exhaust cleared if needed
✅ Oil pan bolts removed in order
✅ Old pan condition checked
✅ Repair attempt made (if viable)
✅ New or repaired oil pan installed
✅ Oil filter and pump checked
✅ Oil refilled
✅ Test drive completed
✅ No leaks or warning lights
Final Thoughts: Small Part, Big Responsibility
Look, in a game filled with engines, tires, timing belts, and transmission nightmares, the car mechanic simulator 2018 oil pan seems almost too humble. But that’s the magic.
It’s the reminder that even in virtual life, the tiniest parts can cause the biggest problems—or prevent them. You could say the oil pan is the “unsung hero” of the digital garage.
So the next time you’re under the lift, don’t rush it. Give that oil pan a second look. Replace it if it needs love. And maybe, just maybe, think about the little things in your own life you’ve been ignoring.
Because whether it’s under a car or in your heart—it’s always the small stuff that keeps everything running smooth.


