
How to Remove Chicco KeyFit 35 Car Seat From Base Safely

If your Chicco infant carrier feels stuck in the vehicle base, it can be tempting to pull harder, press random buttons, or start moving the base itself. That is usually unnecessary.
Learning how to remove Chicco KeyFit 35 car seat from base is straightforward once you know which release control to use. The KeyFit 35 has a base release handle on the back of the carrier. Chicco instructs users to squeeze that release handle and then lift the carrier using its carry handle.
Below, you will learn the correct removal process, what to do when the carrier seems stuck, mistakes to avoid, and how to check the seat before putting your baby back in the vehicle.
Quick Answer
To remove a Chicco KeyFit 35 car seat from its base, put the carry handle in its locked carrying position. Support the carrier, squeeze the base release handle on the back of the carrier, and lift upward using the carry handle. Do not force, twist, or pry the carrier away from the base.
Understanding How the KeyFit 35 Connects to Its Base
The Chicco KeyFit 35 is a rear-facing infant car seat with a removable carrier and stay-in-car base. The carrier locks onto attachment points in the base when it is installed correctly. (Chicco)
That design allows you to leave the base installed in your vehicle while carrying the infant seat in and out.
The important distinction is that you do not need to uninstall the base to remove the carrier. The carrier has its own release mechanism.
According to the official Chicco KeyFit 35 product manual, the base release handle is located on the back of the carrier. Squeezing this handle releases the carrier so it can be lifted from the base.
How to Remove Chicco KeyFit 35 Car Seat From Base Step by Step
The process should require controlled pressure rather than significant force.
1. Park the Vehicle Safely
Before removing the carrier:
- Put the vehicle in Park.
- Set the parking brake when appropriate.
- Turn off the vehicle.
- Open the door fully so you have enough room to lift the carrier.
- Remove bags or other objects that could interfere with your movement.
Working from a stable position makes it easier to lift the seat straight up.
2. Check the Carry Handle
Before lifting the carrier by its handle, make sure the handle is in the locked carrying position.
Chicco identifies three handle positions on the KeyFit 35 and specifically warns that the handle should be locked in its carrying position before you lift the carrier by the handle. An unlocked handle could move unexpectedly.
If the handle needs adjustment:
- Press both handle-release buttons.
- Rotate the handle upward.
- Release the buttons.
- Make sure the handle locks securely into the carrying position.
Do not lift the carrier by an unlocked handle.
3. Locate the Base Release Handle
Stand beside the infant carrier and look toward the back of the seat.
The control you need is the base release handle located on the rear of the carrier. Do not confuse it with:
- The harness adjuster
- Carry-handle adjustment buttons
- Base recline controls
- LATCH controls
- Canopy attachments
Using the correct control is important because pulling on unrelated parts will not release the carrier.
4. Squeeze the Base Release Handle
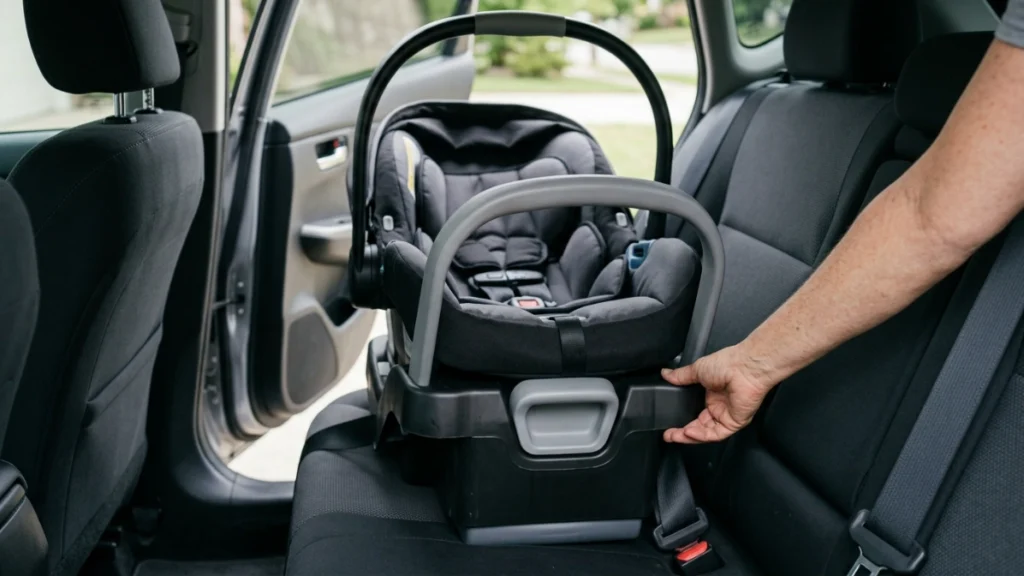
Place one hand where you can comfortably operate the release.
Squeeze the base release handle fully.
You may feel the locking mechanism disengage as you squeeze it. Keep the release engaged while beginning to lift.
Chicco’s instructions describe the process as squeezing the base release handle and then lifting the carrier using the carry handle.
5. Lift the Carrier Up From the Base
With the release handle squeezed, lift upward using the locked carry handle.
Try to keep the movement:
- Smooth
- Controlled
- Mostly vertical
- Balanced from side to side
The carrier should separate from the base without excessive force.
If your baby is inside, maintain firm control of the carrier throughout the movement.
Never jerk the carrier upward or pull aggressively from only one side.
6. Confirm the Carrier Is Completely Free
Once released, move the carrier clear of the base before turning your body or stepping away from the vehicle.
Watch for:
- Clothing caught against the base
- A blanket hanging outside the carrier
- Bags wrapped around the handle
- Canopy material caught on nearby objects
Removing these obstructions first reduces the chance of losing your balance.
What Should Normal Removal Feel Like?
A properly functioning system should release with a deliberate squeeze and upward lift.
| What You Notice | What It Usually Means | What to Do |
|---|---|---|
| Carrier releases smoothly | Release mechanism is operating normally | Lift carrier clear |
| Carrier moves slightly but stays attached | Release may not be fully engaged | Lower it, squeeze fully, retry |
| One side rises but the other stays locked | Carrier may be under uneven pressure | Set it back down and lift straight |
| Release handle feels unusually stiff | Mechanism may be loaded or obstructed | Stop and inspect carefully |
| Carrier will not release after several careful attempts | Possible obstruction or mechanical issue | Consult Chicco or a child passenger safety technician |
| Carry handle will not lock | Handle mechanism requires attention | Do not carry seat by handle until resolved |
A stuck carrier is not a reason to use more force. Stop and identify why it is not releasing.
What to Do If the Chicco KeyFit 35 Is Stuck in the Base
A carrier that does not come out immediately is often experiencing tension, uneven loading, or an incomplete release.
Push Down Slightly Before Releasing
Sometimes the carrier can be under upward tension against its attachment mechanism.
Try this:
- Put the carrier fully back into the base.
- Apply light downward pressure.
- Squeeze the rear base release handle completely.
- Lift straight upward.
Do not repeatedly slam the carrier into the base.
Make Sure You Are Using the Correct Handle
The KeyFit 35 has several controls.
Confirm that your hand is actually operating the base release handle on the back of the carrier described in Chicco’s instructions.
Lift Straight Instead of Twisting
Pulling one side upward first may place unnecessary stress on the attachment mechanism.
Use the main carry handle and keep the carrier reasonably level while lifting.
Check for Obstructions
Inspect the area where the carrier meets the base.
Look for something unusual such as:
- Loose fabric
- A toy
- A strap
- Food debris
- A foreign object
Do not insert screwdrivers or other tools into the locking mechanism.
Verify That You Have the Correct Base
This is particularly important if you own several Chicco seats or purchased a secondhand base.
Chicco currently lists the dedicated KeyFit 35 Base as compatible with KeyFit, KeyFit 30, and KeyFit 35 infant seats. In contrast, Chicco states that its standard KeyFit Infant Car Seat Base for KeyFit/KeyFit 30 is not compatible with the KeyFit 35. (Chicco)
Always verify the exact model numbers and manufacturer instructions rather than assuming two similar-looking bases are interchangeable.
Expert Tip
Expert Tip:
When removing the KeyFit 35, squeeze the rear release completely before trying to lift aggressively. If it does not release normally, lower the carrier back into the base and reset your grip instead of twisting or pulling harder.
Should You Remove the Base Too?
Normally, no.
If you are simply taking your baby out of the vehicle, the base can remain securely installed. Only the carrier needs to come out.
You might remove the entire base when:
- Moving the seat to another vehicle
- Cleaning underneath it
- Reinstalling it
- Checking an installation problem
- Replacing the base
- No longer using the infant seat
Removing the carrier and uninstalling the base are two different procedures.
If you reinstall the base, follow both the car-seat manufacturer’s instructions and your vehicle owner’s manual. NHTSA’s rear-facing car-seat installation guidance also advises checking that a properly installed base does not move more than about one inch from side to side or front to back when tested at the belt path. (NHTSA)
Check the Seat Before Putting It Back
Removing the carrier is only half of the everyday routine. You also need to make sure it reconnects correctly.
Chicco instructs users to insert the carrier into the base, push down so it locks onto the attachment hooks, and then lift up on the carrier to verify that it is securely attached.
After putting the carrier back:
- Push it firmly into the base.
- Confirm that it engages normally.
- Pull upward on the carrier to verify that it is locked.
- Check that nothing is trapped between the carrier and base.
- Make sure the carry handle is in a permitted locked position for vehicle use.
Do not assume that hearing a noise alone proves the carrier is properly attached.
Why Proper Car-Seat Handling Matters
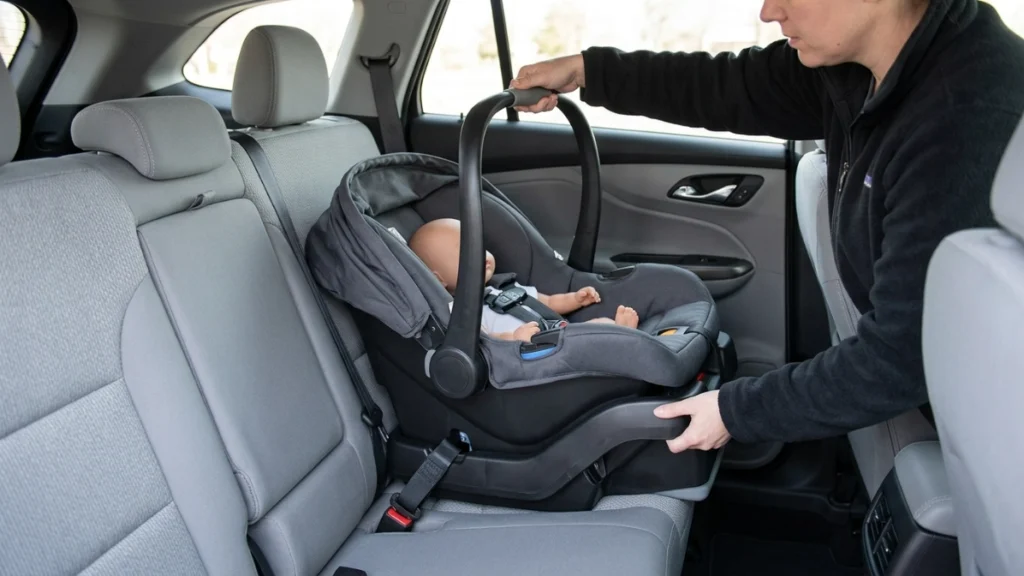
Infant seats are safety equipment, not simply baby carriers.
NHTSA recommends using a rear-facing seat for a child until the child reaches the maximum rear-facing height or weight permitted by the particular car seat. It also emphasizes following the instructions for both the car seat and vehicle. (NHTSA)
You can review additional NHTSA car-seat safety guidance when checking your installation or deciding when your child should transition to another type of restraint. (NHTSA)
The goal is not simply to make the carrier easy to remove. You want the entire restraint system to work exactly as designed every time your child rides.
Common Mistakes Car Owners Should Avoid
- Pulling before squeezing the release fully. This can make the carrier feel more firmly stuck.
- Using the handle-adjustment buttons instead of the base release. They control a different mechanism.
- Twisting the carrier sideways. Lift it evenly rather than forcing one side upward.
- Using screwdrivers or pry tools. Never force apart safety-restraint components.
- Lifting from an unlocked carry handle. Chicco warns that the handle should be locked in the carrying position before lifting the carrier by it.
- Removing the vehicle base unnecessarily. Routine carrier removal does not require uninstalling the base.
- Assuming every Chicco KeyFit base is interchangeable. Verify the exact compatibility for your seat and base. (Chicco)
- Skipping the attachment check after reinstalling the carrier. Pull upward afterward to verify that the carrier is locked to the base.
- Continuing to use damaged components. A broken release, cracked base, damaged attachment point, or malfunctioning handle deserves manufacturer or qualified safety guidance rather than a homemade repair.
When to Call a Professional Mechanic
A conventional auto mechanic is usually not the right professional for a car-seat carrier or base problem. The car seat is specialized child-restraint equipment, so manufacturer support or a certified Child Passenger Safety Technician (CPST) is generally more appropriate.
Consider professional help if:
- The carrier refuses to release after normal troubleshooting.
- The base release handle appears broken.
- The carrier does not lock securely when reinstalled.
- You cannot confirm that the base is installed correctly.
- You are unsure whether your base and carrier are compatible.
NHTSA provides a car-seat inspection and technician finder that can help families locate trained assistance, including car-seat inspection resources. (NHTSA)
A mechanic or dealership may be appropriate when the problem involves the vehicle itself, such as a damaged seat belt, buckle, vehicle seat structure, or lower-anchor hardware. Do not ask an automotive shop to modify the car seat or base to make it fit.
Safety Checks Worth Doing Regularly
Because the carrier is repeatedly connected and disconnected, make a short inspection part of your routine.
Check that:
- The release handle moves normally.
- The carry handle locks securely.
- The carrier attaches firmly to the base.
- No straps or fabric are trapped in the attachment area.
- The base remains securely installed.
- No plastic parts appear cracked or damaged.
- Nothing has been added that interferes with the carrier-to-base connection.
If something suddenly feels different from normal operation, investigate before the next trip.
FAQs
Where is the release button on the Chicco KeyFit 35?
The KeyFit 35 uses a base release handle on the back of the carrier. Squeeze this handle while lifting the carrier by its carry handle to release it from the base.
Do I need to press both side buttons to remove the KeyFit 35 from the base?
No. The buttons on both sides of the carry handle are used to adjust the handle position. Carrier removal uses the separate rear base release handle.
Why won’t my Chicco KeyFit 35 come out of the base?
The release may not be fully squeezed, the carrier may be under uneven tension, or something may be interfering with the attachment. Set the carrier back down, squeeze the release completely, and lift straight up. Do not pry it loose.
Can I remove the KeyFit 35 with my baby still in it?
The infant carrier is designed to be removable, but you must maintain full control of it. Before lifting by the carry handle, Chicco says the handle must be locked in its carrying position.
Should the base move when I remove the carrier?
The installed base should remain secure. Chicco and NHTSA guidance use a maximum movement of about one inch at the appropriate installation area as a check for a secure base installation. If the base has loosened, correct the installation before using the seat again.
How do I know the KeyFit 35 is locked back into its base?
After inserting the carrier and pushing it down into the base, lift upward on the carrier to verify that it is securely attached. This physical check is more useful than relying only on a sound.
What should I do if the release handle is broken?
Do not pry, modify, lubricate, or improvise a repair to the restraint mechanism. Stop using the affected setup until you have contacted Chicco or received qualified child-passenger-safety guidance about the proper next step.
Conclusion
Knowing how to remove Chicco KeyFit 35 car seat from base comes down to using the correct mechanism: make sure the carry handle is locked in its carrying position, squeeze the base release handle on the rear of the carrier, and lift the carrier upward in a smooth, controlled motion.
If the carrier does not release normally, avoid pulling harder or using tools. Reset it in the base, check your grip and surroundings, and try the proper release procedure again. If the mechanism appears damaged or continues to stick, contact Chicco or a certified child passenger safety technician.
Most importantly, whenever you return the carrier to the vehicle, verify that it has securely locked onto the base before driving. That simple final check helps ensure the seat is ready to protect your child on the next trip.
