How to Recharge AC in Honda Civic: Quick and Easy Steps

If you’ve ever driven your Honda Civic on a scorching summer afternoon only to feel warm air blowing from the vents, you know that sinking feeling. The air conditioner, once icy cool, now feels powerless. The good news? In most cases, your Civic’s AC just needs a simple recharge—something you can do yourself with the right tools and a bit of patience.
Recharging your car’s AC isn’t some complicated repair. It’s a basic maintenance task that can restore that refreshing breeze you depend on during long drives or traffic jams. Think of it like refilling a water bottle; you’re simply giving the system what it needs to perform at its best.
In this detailed guide, you’ll learn how to recharge AC in Honda Civic step by step. From recognizing signs of a weak system to safely adding refrigerant, we’ll cover everything you need to bring your cool air back without a mechanic’s help. Let’s dive into it—because no one deserves to drive through summer heat without a properly working AC!
Understanding Why Your Honda Civic AC Loses Cooling Power
Before jumping into the recharging process, it helps to know why your AC stops cooling efficiently. Over time, every car’s AC system experiences small leaks or natural refrigerant loss. Even a minor reduction in refrigerant can cause the cooling performance to drop significantly.
Your Honda Civic’s air conditioning system works by compressing refrigerant gas, turning it into a high-pressure liquid, and then expanding it to absorb heat from the cabin air. When refrigerant levels are low, this process becomes inefficient. That’s why you feel warm or slightly cool air instead of a refreshing chill.
You may also notice other signs, like the compressor not engaging or a hissing sound under the hood. Sometimes, the AC clutch refuses to click on because there isn’t enough pressure in the system.
Knowing these symptoms helps you confirm that your Civic’s AC likely needs a recharge rather than a more expensive repair. Still, if your refrigerant keeps running out too quickly, you might have a leak—and that’s when professional help is worth it.
Essential Tools for Recharging Your Honda Civic’s AC
Recharging your AC is easy, but you need to have the right equipment on hand. Here’s a list of essential tools you’ll need before getting started:
| Tool | Purpose |
|---|---|
| Refrigerant (R-134a or R-1234yf) | The cooling gas your AC system uses. Always check your Civic’s manual for the right type. |
| Pressure Gauge Set | Helps you monitor the AC system’s pressure during recharging. |
| AC Recharge Kit | Contains the hoses, connectors, and sometimes refrigerant cans for a DIY recharge. |
| Safety Glasses and Gloves | Protect your eyes and hands from chemical exposure. |
| Thermometer (optional) | Useful to test the temperature difference before and after recharging. |
If you’re buying refrigerant, make sure it’s compatible with your Honda Civic model year. For most Civics built before 2016, R-134a is standard. Newer ones use R-1234yf, an eco-friendlier option.
Before starting, also check if your kit includes a pressure gauge—it’s your best friend in preventing overcharging.
Preparing Your Honda Civic for the AC Recharge
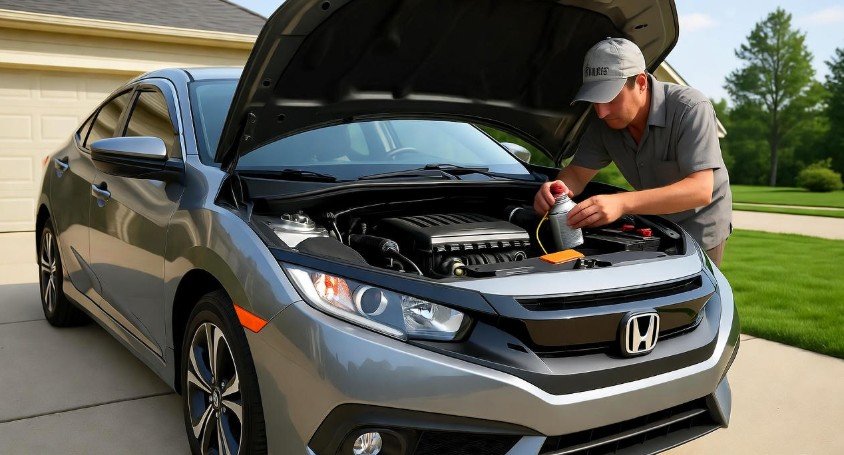
Before you start adding refrigerant, you must properly set up your vehicle for safety and accuracy. Here’s how to prepare:
-
Park on a flat surface: Choose a shaded, level area to keep things stable.
-
Turn off the engine: Let it cool for a few minutes before you pop the hood.
-
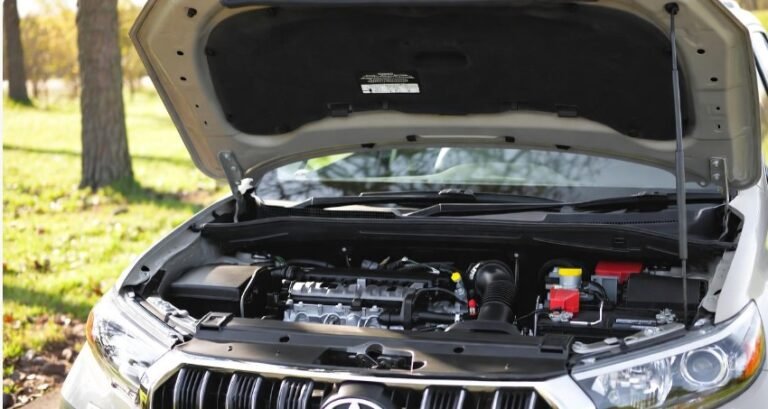
Locate the AC low-pressure service port: It’s usually on the larger aluminum tube running from the compressor. The port cap often has an “L” marking.
-
Gather all tools: Make sure your recharge kit, gloves, and gauge are within easy reach.
Once everything is ready, double-check that the AC system is off and that there are no visible leaks. If you see oily spots around hoses or connections, it could mean refrigerant is escaping. In that case, recharging may not fix the root issue.
You’re now ready to move on to the most important part—connecting the recharge hose and adding refrigerant safely.
Identifying Common AC Problems Before Recharging
Before you grab that refrigerant can, it’s wise to make sure recharging is actually what your Civic needs. Sometimes the issue isn’t refrigerant at all. Here are a few signs and what they usually mean:
-
Warm air blowing from vents: Most often caused by low refrigerant levels.
-
Weak airflow: Could be due to a dirty cabin filter or a failing blower motor.
-
Strange smells or moldy odor: Indicates moisture or bacteria inside the evaporator.
-
Clicking noise when turning on AC: The compressor clutch may be struggling to engage due to low pressure.
-
Visible refrigerant leak: Look for wet or oily residue on hoses or near the condenser.
If any of these symptoms sound familiar, you’re on the right path. But if your compressor doesn’t engage even after recharging, you may have an electrical or mechanical issue that requires a technician’s inspection.
Remember—diagnosing before recharging saves you time and refrigerant.
Step-by-Step Guide: How to Recharge AC in Honda Civic
Now comes the main event—recharging your Honda Civic’s air conditioning system. Follow these steps carefully to ensure a safe and effective process:
Step 1: Connect the Recharge Hose
Attach the recharge hose from your AC kit to the low-pressure service port. It’s crucial that you connect to the low-pressure side only—never the high-pressure port. The connector is designed to fit only one way, so don’t force it.
Step 2: Check the Pressure Reading
With the hose connected, look at your pressure gauge. When the engine and AC are off, normal low-side pressure should read around 25–45 psi. If it’s lower, your system is likely undercharged.
Step 3: Start the Engine and Turn on the AC
Turn on your Honda Civic, set the AC to its maximum cooling and fan speed, and let it run. This activates the compressor and starts circulating refrigerant through the system.
Step 4: Add Refrigerant Slowly
Hold the refrigerant can upright and squeeze the trigger for about 5–10 seconds at a time. Watch the gauge after each burst. Continue until the pressure reaches the optimal range recommended for your vehicle (usually between 35–45 psi on the low side).
Step 5: Monitor Cooling Performance
As refrigerant enters, you’ll notice the air blowing from the vents becoming cooler. Use a thermometer if you want to measure progress. Once the system reaches proper pressure, stop adding refrigerant.
Step 6: Disconnect and Check for Leaks
Turn off the engine, remove the hose carefully, and replace the port cap. Then listen for any hissing or look for oily spots—signs of minor leaks that need attention later.
By now, your Honda Civic should be blowing refreshingly cold air again—just like new.
Testing the AC System After Recharging
Once you’ve recharged the system, it’s time to see if your hard work paid off. Start your Honda Civic, turn on the AC, and set it to the coldest setting.
You should immediately feel cool, strong airflow from the vents. Let it run for a few minutes to stabilize. Check these signs of a successful recharge:
-
Air temperature at the vent drops to around 40–50°F.
-
The compressor cycles smoothly without unusual noises.
-
No hissing, bubbling, or rattling under the hood.
-
The cabin cools quickly even in warm weather.
If you still notice weak cooling, the system might need additional refrigerant or have a slow leak. It’s also worth checking the cabin air filter—a clogged one can restrict airflow, making the AC seem weaker than it really is.
Testing is not just a formality—it confirms that your Honda Civic AC recharge worked properly and that the system is operating safely.
Safety Tips When Recharging AC in Honda Civic
Recharging an AC system involves handling pressurized gas, so safety is non-negotiable. Here are a few quick reminders:
-
Always wear safety goggles and gloves.
-
Keep the refrigerant can upright—never shake or invert it.
-
Avoid breathing in refrigerant fumes.
-
Never overcharge the system; it can damage the compressor.
-
Do not perform recharging indoors or in an enclosed garage.
If you’re ever unsure about pressure readings or notice strange noises during the process, stop and consult a mechanic. It’s better to pause and confirm than risk overcharging or damaging your AC system.


![Maryland Window Tint Laws [Updated, 2025] – Everything You Must Know Before Tinting Your Car 5 Maryland Window Tint Laws [Updated, 2025] – Everything You Must Know Before Tinting Your Car](https://aautomotives.com/wp-content/uploads/2025/10/Maryland-Window-Tint-Laws-Updated-2025-–-Everything-You-Must-Know-Before-Tinting-Your-Car-768x409.jpg)
