
How to Fix a Tear in a Leather Car Seat: A Practical DIY Guide

A tear in a leather car seat can start as a small cosmetic problem and quickly become an expensive one. Every time you sit down, the damaged area stretches. A short split can become a long rip, and exposed foam may begin to break down.
Fortunately, learning how to fix a tear in a leather car seat is fairly straightforward when the damage is small and away from safety components. With the right repair kit, careful preparation, and realistic expectations, many car owners can improve a torn seat without replacing the upholstery.
This guide explains how to identify the damage, choose the right repair method, complete a basic DIY repair, understand likely costs, and recognize when an upholstery professional or dealership should handle the job instead.
Quick Answer
To fix a tear in a leather car seat, clean the damaged area, trim loose fibers, place a backing patch beneath the tear, apply flexible leather filler or repair compound, smooth and cure it, then match the repaired area with leather colorant. Do not DIY-repair seams associated with seat-mounted airbags.
First, Determine What Kind of Seat Damage You Have
Not every damaged leather seat needs the same repair.
Before buying a repair kit, look closely at the seat under good lighting.
Common types of damage include:
- Surface scratches
- Small punctures
- Cracks in the leather finish
- Short tears
- Long splits
- Open seams
- Missing pieces of leather
- Damage exposing the seat foam
A shallow crack in the colored coating is much easier to repair than a four-inch tear with stretched or missing material.
You should also determine whether the seat is genuine leather, synthetic leather, vinyl, or a combination of materials. Many modern vehicles use leather only on certain seating surfaces while using synthetic material on the sides and back.
The repair compound must be compatible with the actual upholstery material.
Watch for Airbag Markings
Pay particular attention to the outer side bolster of the front seat.
Many vehicles have side-impact airbags built into the seat. The airbag may deploy through a specially designed seam or section of upholstery. The NHTSA air bag safety information explains the important role side airbags play in crash protection.
If the tear is on or immediately beside an area marked SRS AIRBAG, AIRBAG, or a similar label, do not treat it as an ordinary upholstery repair.
Have the seat inspected by a dealership, qualified automotive upholstery specialist, or collision repair facility familiar with supplemental restraint systems.
Can You Repair a Torn Leather Car Seat Yourself?
Yes, in many situations.
A DIY repair is most reasonable when:
- The tear is relatively small.
- The surrounding leather is still strong.
- Little or no material is missing.
- The seat foam is intact.
- The damage is not on an airbag deployment seam.
- The stitching is not structurally damaged.
- You are comfortable with a repair that may remain slightly visible.
Professional repair becomes more attractive when the tear is large, leather is badly stretched, multiple sections are damaged, or an exact factory-quality appearance matters.
A repair kit can stop additional tearing and make damage much less obvious, but a DIY repair rarely makes severely damaged leather look completely new.
What You Need to Repair a Leather Car Seat Tear
A typical leather repair requires only a few basic materials.
Depending on the repair kit, you may need:
- Leather or vinyl cleaner
- Microfiber cloths
- Small scissors
- Tweezers
- Backing fabric or repair patch
- Flexible leather adhesive
- Leather repair filler or compound
- Small applicator or palette knife
- Fine abrasive pad or fine-grit sandpaper
- Matching leather colorant
- Sponge or applicator
- Protective leather finish or sealant
Purchase a product specifically intended for flexible automotive upholstery.
Household glue, rigid epoxy, super glue, and ordinary body filler are generally poor choices because car seats constantly flex when people enter, exit, and move around.
How to Fix a Tear in a Leather Car Seat Step by Step
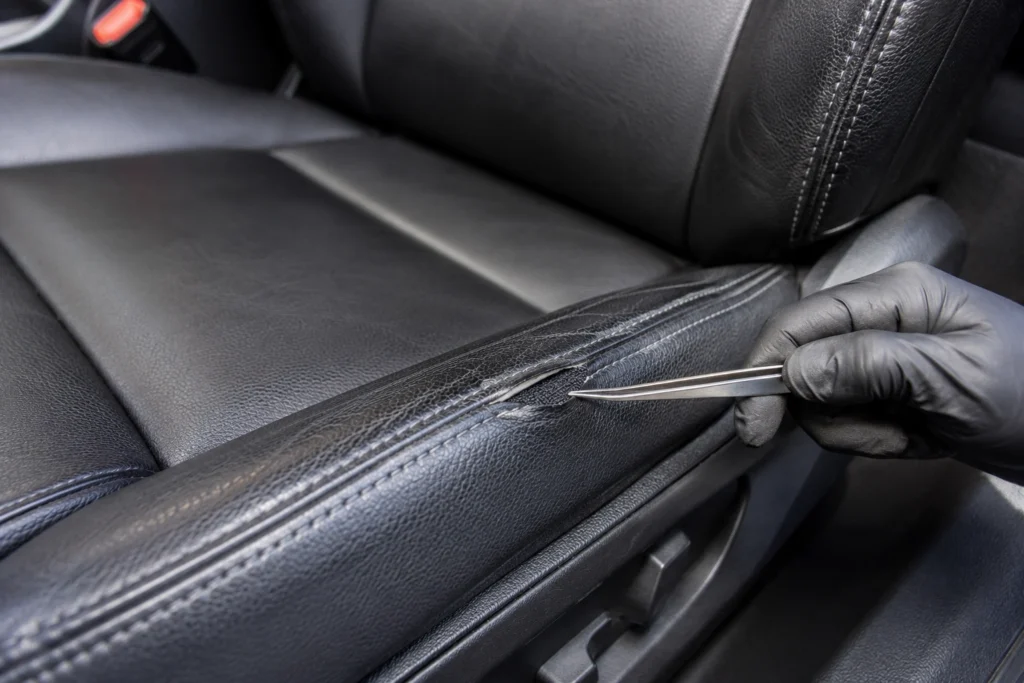
The exact instructions vary by repair product, so always follow the directions supplied with your kit. The following process explains the general approach.
1. Clean the Area Thoroughly
Start with a cool seat out of direct sunlight.
Vacuum crumbs and dirt from around the tear. Then clean the leather using an upholstery-safe cleaner.
Pay particular attention to:
- Body oils
- Grease
- Silicone dressings
- Conditioner residue
- Dirt along the edges of the tear
Repair compounds and colorants need a clean surface to bond properly.
Allow the area to dry completely.
Do not saturate exposed foam with cleaner.
2. Trim Only Loose or Frayed Material
Inspect the edges of the tear.
Use small scissors to remove loose fibers that prevent the edges from lying flat. Remove as little material as possible.
Do not make the tear larger just to create a perfectly shaped opening.
If the edges are still strong, preserve them.
3. Insert a Backing Patch
A backing patch provides support underneath the damaged leather.
Cut the patch slightly larger than the opening. Carefully slide it underneath the tear using tweezers or a small tool.
Center the material so it extends beyond every edge of the damage.
Apply the adhesive recommended by the repair-kit manufacturer and position the torn edges over the backing.
The goal is to create a stable base without pulling the leather unnaturally tight.
4. Let the Adhesive Cure
Do not rush this step.
Allow the backing adhesive to cure according to the manufacturer’s instructions before applying filler.
Moving the leather while the adhesive is still soft may weaken the repair.
Avoid sitting in the seat during the curing period.
5. Apply Leather Repair Compound
Once the backing is secure, apply a thin layer of flexible leather repair compound over the tear.
Use a small applicator to spread it across the damaged area.
Several thin layers are usually better than one thick layer.
Allow each layer to dry or cure as directed before adding another.
Gradually build the repaired surface until it is approximately level with the surrounding leather.
Do not cover a large section of healthy leather unnecessarily.
6. Smooth the Repair
After the filler has fully cured, smooth any raised edges according to the product instructions.
Some kits allow very light sanding with a fine abrasive pad. Others require a different finishing technique.
Work carefully.
Aggressive sanding can damage the surrounding factory finish and turn a small repair into a larger refinishing job.
7. Match the Leather Color
Color matching often determines whether the finished repair looks acceptable.
Some automotive leather repair kits include several colors that can be mixed. Others offer vehicle-specific or upholstery-specific shades.
Test your color mixture on a hidden area before applying it to the repair.
Remember that leather may look different when wet versus dry.
Apply the color in thin layers rather than trying to hide the repair with one heavy coat.
8. Recreate the Surface Texture if Needed
Automotive leather usually has a grain or texture.
Some advanced repair kits include grain pads designed to reproduce this appearance.
This step is mostly cosmetic. If you are repairing an older daily driver, a perfectly replicated factory grain may not be necessary.
Your priority should be creating a repair that is:
- Secure
- Flexible
- Smooth
- Properly colored
- Resistant to additional tearing
9. Apply the Protective Finish
If your system includes a compatible protective topcoat, apply it after the colorant has cured.
The topcoat can improve durability and help create the correct matte, satin, or slightly glossy appearance.
Do not immediately apply ordinary leather conditioner unless the repair-product instructions specifically allow it.
10. Allow the Repair to Fully Cure
The surface may feel dry before it has reached full strength.
Follow the manufacturer’s stated curing time before:
- Sitting on the repaired section
- Cleaning the seat
- Applying conditioner
- Exposing it to heavy friction
A little patience at this stage can substantially improve the repair’s durability.
How Much Does Leather Car Seat Tear Repair Cost?
Costs vary based on the size of the damage, leather type, seat design, color-matching difficulty, labor rates, and whether an entire upholstery panel needs replacement.
| Repair Option | Typical Cost Level | Best For | Main Limitation |
|---|---|---|---|
| DIY leather repair kit | Low | Small tears and cracks | Color and texture may not match perfectly |
| Mobile upholstery repair | Moderate | Small-to-medium cosmetic damage | Results depend heavily on technician skill |
| Professional upholstery repair | Moderate to high | Larger tears or damaged panels | More expensive than DIY |
| Replace one upholstery panel | High | Severe localized damage | Requires matching material and skilled labor |
| Replace/reupholster entire seat | Highest | Extensive deterioration | Usually unnecessary for a small tear |
A basic DIY kit may cost only a few dozen dollars. Professional cosmetic repairs can cost considerably more, while replacing upholstery panels or recovering an entire seat can reach several hundred dollars or more.
Get an estimate before assuming the entire seat needs replacement.
Is Repair Better Than Replacing the Leather?
For a small tear, usually yes.
Repairing the original material can preserve more of the factory upholstery while keeping costs under control.
Replacement makes more sense when:
- A large piece of leather is missing.
- The surrounding leather is brittle.
- The seat has multiple tears.
- Previous repairs are failing.
- Stitching has separated extensively.
- The seat cover is damaged around an airbag seam.
- You want near-factory cosmetic results.
Consider the condition of the entire seat rather than focusing only on the visible tear.
Repairing one opening in severely dried and cracked leather may simply move the failure to another location.
Why Leather Car Seats Tear
Understanding the cause helps prevent the same damage from returning.
Common causes include:
Normal Wear
The driver’s outer bolster receives heavy friction every time the driver enters or exits the vehicle.
Over several years, the protective surface can wear away.
Dry or Neglected Leather
Leather that loses flexibility may become more vulnerable to cracking.
However, more conditioner is not always better. Use products appropriate for your upholstery and follow your vehicle or upholstery manufacturer’s recommendations.
Sharp Objects
Keys, tools, pocket clips, belt hardware, pet claws, and items carried in back pockets can puncture or cut upholstery.
Excessive Heat and Sun Exposure
Vehicle interiors experience significant temperature changes. Repeated heat exposure can contribute to the aging of upholstery and interior finishes.
Using a windshield sunshade and parking in covered areas when practical can reduce direct sun exposure.
Damaged Seat Foam
If the foam underneath has collapsed, the leather may flex much more than intended.
Repairing only the surface may not provide a lasting solution.
How Long Will a DIY Leather Seat Repair Last?
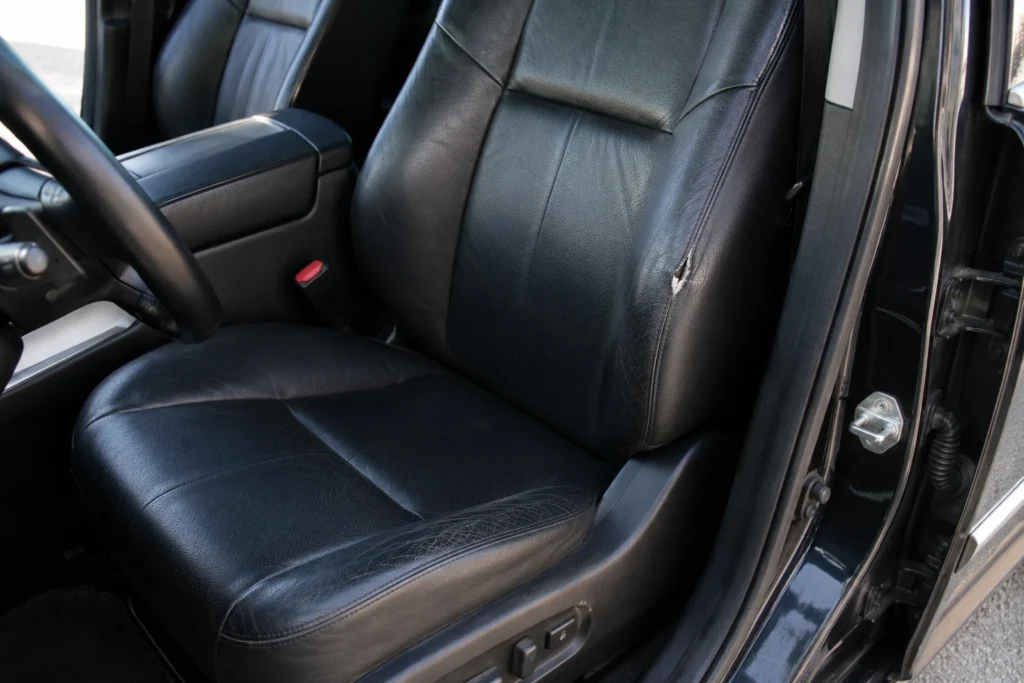
There is no fixed lifespan.
Durability depends on:
- Size of the original tear
- Quality of surface preparation
- Strength of the surrounding leather
- Repair-product quality
- Amount of seat movement
- Location of the tear
- Temperature exposure
- How often the vehicle is used
A carefully repaired small tear in a low-stress area can last much longer than a repair on the driver’s outer bolster.
If the underlying leather continues deteriorating, even a well-applied patch may eventually fail.
Think of DIY repair as a practical restoration method, not a guarantee that aging upholstery will become permanently new again.
How to Make the Repair Look Better
Small details make a noticeable difference.
For cleaner results:
- Clean farther around the repair than you think necessary.
- Use the smallest practical amount of filler.
- Build filler with thin layers.
- Let every product cure properly.
- Test color before applying it.
- Blend color slightly beyond the repair.
- Match the surrounding sheen, not only the color.
- Avoid aggressive sanding.
- Do not sit on the repaired area too soon.
Expert Tip:
Repair a leather tear while it is still small. Continued entry and exit can pull the opening wider, especially on the driver’s side bolster. Stabilizing a one-inch tear is usually easier and less noticeable than repairing the same damage after it grows several inches.
Common Mistakes Car Owners Should Avoid
A leather repair can fail because of technique rather than the product itself.
Avoid these common mistakes:
- Using super glue: It can cure too rigidly for a surface that needs to flex.
- Skipping cleaning: Oils and dressings can interfere with adhesion.
- Using too much filler: Thick repairs are harder to blend and may crack.
- Rushing curing time: A surface that feels dry may not be fully cured.
- Choosing the wrong material kit: Leather and vinyl products are not always interchangeable.
- Ignoring damaged foam: A collapsing cushion can repeatedly stress the repaired leather.
- Over-sanding: This can remove the finish from undamaged upholstery.
- Expecting an invisible DIY repair: Good repairs can be subtle without being completely undetectable.
- Repairing an airbag seam without professional guidance: This can involve safety-critical components.
When to Call a Professional Mechanic
For ordinary leather damage, an automotive upholstery specialist is often more appropriate than a general mechanic.
Professional help is recommended when:
- The tear is several inches long.
- Material is missing.
- The leather is badly stretched.
- Foam underneath the seat is damaged.
- Seat stitching has separated.
- Multiple upholstery sections are failing.
- The seat frame feels loose.
- A power-seat component is damaged.
- The problem involves seat wiring or sensors.
- The damage is near an airbag deployment seam.
If an airbag or supplemental restraint system may be involved, consult your dealership or a repair facility experienced with your specific vehicle. NHTSA provides a vehicle recall lookup tool that can also help you determine whether your vehicle has an unrepaired safety recall.
When comparing professional repair estimates, ask exactly what the shop intends to do. A cosmetic fill-and-dye repair is different from removing the seat cover and replacing an upholstery panel.
The FTC’s auto repair guidance recommends comparing repair shops, asking about warranties, and understanding how the work will be priced before authorizing repairs.
How to Prevent Future Leather Seat Tears
Once the seat is repaired, a few habits can help protect it.
Enter and Exit Carefully
Try not to slide heavily across the driver’s outer bolster.
This is particularly helpful in trucks, SUVs, and sports cars where the seat sides may be tall.
Keep Sharp Objects Away
Check your pockets before sitting down if you routinely carry:
- Tools
- Pocket knives
- Keys
- Metal clips
- Pens
- Other sharp objects
Clean the Seats Regularly
Remove dirt before it becomes embedded in the surface.
Use products intended for automotive leather and avoid soaking perforated areas.
Be Careful With Conditioners
Do not assume that frequently applying a heavy conditioner is always beneficial.
Modern automotive upholstery may have protective coatings that require different care than traditional untreated leather.
Follow your owner’s manual or upholstery manufacturer’s recommendations when available.
Protect the Interior From Excessive Sun
A windshield shade, covered parking, or garage can reduce direct sunlight on the seats.
This can also make the vehicle interior more comfortable during hot weather.
Inspect Small Cracks Early
A surface crack may eventually turn into a split if the material continues to weaken.
Early attention usually means an easier repair.
FAQs
Can a ripped leather car seat really be repaired?
Yes. Small and moderate tears can often be stabilized using a backing patch, flexible repair compound, colorant, and protective finish. Large tears, missing leather, deteriorated surrounding material, and airbag-related areas are better handled professionally.
What is the best glue for a torn leather car seat?
Use a flexible adhesive specifically designed for leather, vinyl, or automotive upholstery and compatible with your repair system. Avoid rigid household adhesives such as super glue unless the product manufacturer specifically states that it is suitable for the application.
Can I sew a tear in my leather car seat?
Sometimes, but sewing can create additional holes and may cause the leather to tear around the stitches if the material is weak. Professional upholstery stitching is usually preferable for open seams or larger structural tears.
Can I repair a leather seat without removing it from the car?
Yes. Many small cosmetic tears can be repaired with the seat installed. Removing the seat may be necessary for more extensive upholstery work, but vehicle seats may contain airbag wiring, occupancy sensors, power connections, and other electrical components.
Will a leather repair kit make the tear invisible?
Not necessarily. A careful repair can make a small tear far less noticeable, but matching the exact color, grain, sheen, and flexibility of factory upholstery is difficult. Professional refinishing generally produces better cosmetic results.
How do I know if my seat has a side airbag?
Look for an AIRBAG or SRS AIRBAG marking on the seat, especially around the outer side bolster. Your owner’s manual should also identify airbag locations. If you are uncertain whether the damaged upholstery is part of an airbag deployment area, get professional advice before repairing it.
Should I replace the entire seat because of one leather tear?
Usually not. A localized tear can often be repaired or the affected upholstery panel can be replaced. Full seat replacement becomes more reasonable when the seat has extensive upholstery deterioration, structural damage, failed components, or other problems that make localized repair impractical.
Conclusion
Learning how to fix a tear in a leather car seat can save money and prevent a small upholstery problem from becoming much larger.
For a minor tear, the basic process is straightforward: clean the surface, support the damaged area with a backing patch, apply flexible repair compound in thin layers, smooth the repair, match the color, and allow everything to cure completely.
The key is knowing the limits of DIY work.
Small cosmetic tears are reasonable projects for many car owners. Large openings, deteriorated leather, damaged foam, failed stitching, and especially damage around seat-mounted airbags deserve professional attention.
Inspect the damage carefully before buying a kit, choose products designed for automotive upholstery, and never sacrifice a safety system simply to save money on a cosmetic repair. Fixing the tear early is usually the smartest next step because it helps prevent continued stretching and more expensive upholstery damage.
