How to Do Oil Change in Car

Changing your own engine oil might sound messy, but it’s easier than you think. It’s like cooking your favorite comfort food—messy hands, but a happy heart. Doing an oil change in car is one of those tasks that sounds harder than it is. Once you’ve done it a couple of times, it becomes second nature—like making that perfect cup of morning coffee.
Let me tell you, the first time I did an oil change, I spilled half a quart down my driveway. My neighbor watched me like I was defusing a bomb. But guess what? I saved money, learned something new, and felt like a proper adult. You can too. You just need a bit of patience, the right tools, and a tiny bit of confidence.
This guide will take you step-by-step through the process, without the usual jargon. Think of it like getting advice from a friend who’s been through it all—greasy hands, oil-stained jeans, and a whole lot of learning.
In This Article
- 1 Why Changing Your Oil Matters (and When to Do It)
- 2 Tools and Materials You’ll Need Before You Start
- 3 Step 2: Drain the Old Engine Oil
- 4 Step 3: Remove and Replace the Oil Filter
- 5 Step 4: Add Fresh Oil and Check Levels
- 6 Step 5: Properly Dispose of Old Oil and Filter
- 7 Step 6: Reset Your Oil Change Light (If Needed)
- 8 How It Feels to Do It Yourself: A Personal Reflection
- 9 Signs You Need an Oil Change (Even Before the Light Comes On)
- 10 Common Mistakes to Avoid When Changing Oil
- 11 How Often Should You Really Change Your Oil?
- 12 Why DIY Oil Changes Save You More Than Money
- 13 Final Checklist Before You Close the Hood
- 14 You’ve Done It — Celebrate the Small Win
Why Changing Your Oil Matters (and When to Do It)

Most cars need an oil change every 3,000 to 7,500 miles, depending on your vehicle, the oil you use, and how you drive. Some newer cars even go 10,000 miles between oil changes. Always check your owner’s manual to be sure.
Here’s what can happen if you delay it too long:
-
Engine wear and tear increases
-
Fuel efficiency drops
-
The engine might overheat
-
You risk permanent engine damage
Changing your oil regularly is one of the best ways to keep your car healthy and running smoothly.
Tools and Materials You’ll Need Before You Start
Before diving in, it’s smart to gather everything you need. Think of this as your car maintenance toolbox. Having the right gear nearby saves time, frustration, and emergency store trips mid-job.
Here’s what you’ll need:
-
New engine oil (check your manual for type and quantity)
-
Oil filter (specific to your vehicle)
-
Oil filter wrench
-
Socket wrench or spanner
-
Oil catch pan or drain container
-
Funnel
-
Gloves and rags
-
Jack and jack stands or car ramps
-
Safety goggles (optional but smart)
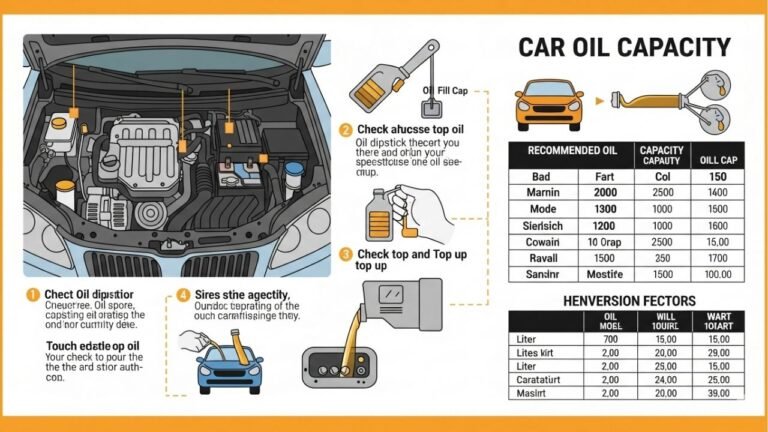
Quick Reference Table for Common Oil Types
| Car Type | Recommended Oil | Oil Filter Size | Change Frequency |
|---|---|---|---|
| Small sedan | 5W-30 synthetic | Medium | 5,000-7,500 mi |
| SUV/Crossover | 5W-20 or 0W-20 | Large | 5,000-10,000 mi |
| Sports car | 0W-40 full synth | High-performance | 3,000-5,000 mi |
| Pickup truck | 10W-30 or 5W-30 | Heavy duty | 5,000-7,500 mi |
Make sure to check your car’s manual for the correct specifications. Using the wrong oil type is like wearing the wrong size shoes—it’ll still fit, but it won’t be right. Step 1: Prepare Your Car for the Oil Change
Doing an oil change in car starts with a bit of setup. Just like prepping your ingredients before cooking, getting your car ready helps things go smoothly.
Start by parking your car on a level surface. Make sure the engine is off and cool, but slightly warm (not hot!). Warm oil drains better. If you just drove the car, give it 30 minutes to cool down.
Now, raise the front of your car using a jack and jack stands or ramps. Never work under a car without secure support. Safety is everything.
Here are a few things to keep in mind:
-
Pull the parking brake.
-
Wear gloves—the oil can be hot and messy.
-
Lay down cardboard or an old towel under the car.
-
Keep your tools and container within reach.
This setup only takes about 10–15 minutes. Once it’s done, you’re ready to dive under and get started.
Step 2: Drain the Old Engine Oil
This is the messy part—but also the most satisfying. Watching that old, dark oil drain out feels like flushing out stress. It’s like cleaning out your closet. Messy? Yes. Worth it? Absolutely.
Slide under the car and locate the oil drain plug. It’s usually at the bottom of the oil pan, which is a flat metal plate under the engine. Use your socket wrench to loosen and remove the plug—counter-clockwise is the trick.
Place your oil catch pan directly under the plug before removing it completely. Be ready—it may gush out quickly.
Here’s what to do:
-
Let the oil drain fully (give it 5–10 minutes).
-
Wipe the drain plug clean.
-
Inspect the crush washer (if your car has one) and replace it if it’s worn.
-
Screw the drain plug back on and tighten firmly (not too tight—just snug).
Tip: Avoid letting the oil splash on your skin. It can cause irritation. And yes, it smells weird. That’s normal.
Step 3: Remove and Replace the Oil Filter
This part might test your patience, especially if the filter is stubborn. But think of it as unscrewing the past to make room for a fresh start. It’s a key part of every oil change in car.
Locate the oil filter—usually near the engine block. It looks like a small metal canister. Use an oil filter wrench to loosen and unscrew it. Some filters can be twisted off by hand, but many need help.
Be careful—old oil will drip when the filter comes off. Let it drain into the pan. Once off, compare the new filter to the old one to ensure it’s the same size.
Steps to follow:
-
Apply a thin layer of new oil to the gasket on the new filter.
-
Screw the new filter on by hand—don’t over-tighten.
-
Wipe off any spilled oil around the filter mount.
That’s it! One of the most annoying steps, done and dusted.
Step 4: Add Fresh Oil and Check Levels
Now comes the good part—filling your car with fresh, golden oil. This is like giving your engine a deep breath of clean air.
Open the oil filler cap on top of the engine. Use a funnel to pour in the new oil. Take your time. Pour slowly to avoid spills. Most cars need 4 to 6 quarts, but always check your manual to be sure.
Once you’ve added the oil, do the following:
-
Wait a minute to let it settle.
-
Pull out the dipstick, wipe it, dip again, and check the level.
-
Add more oil if needed, but don’t overfill.
Once done, replace the cap and start the engine. Let it run for 1–2 minutes, then turn it off and check for any leaks under the car.
Let the oil sit for a minute, then recheck the dipstick. The level should be between the two marks—not too low, not too high.
Step 5: Properly Dispose of Old Oil and Filter
Congratulations—you’ve done an oil change in car like a pro! But wait, don’t just toss the old oil down the drain. It’s hazardous and illegal in many places.
Here’s how to dispose of it responsibly:
-
Pour the old oil into a sealed container (use the empty oil bottles if needed).
-
Place the used oil filter in a plastic bag or a sealable container.
-
Take both to an auto parts store, mechanic shop, or hazardous waste facility. Many of them accept used oil for free.
Doing the right thing here helps protect the environment and keeps our water clean.
Step 6: Reset Your Oil Change Light (If Needed)
Some modern vehicles come with a dashboard light or digital reminder that tells you when it’s time for an oil change. After you’ve finished the process, you’ll want to reset this reminder so your car doesn’t keep nagging you like a to-do list you’ve already done.
Every car does this a little differently, but here are some common ways:
-
Push-button method: With the car off, hold the trip/reset button on your dashboard, then turn the ignition to “on” (without starting the engine) until the light resets.
-
Menu system: For vehicles with digital screens, go to the maintenance settings and select “Reset Oil Life”.
-
Turn key method: Some older models require turning the ignition key to “on” while pressing the gas pedal three times in quick succession.
Always refer to your owner’s manual or do a quick search for your specific make and model. Resetting the light is like marking the job “done” on your mental checklist.
How It Feels to Do It Yourself: A Personal Reflection
I’ll be honest—when I first learned how to do oil change in car, I was intimidated. Not because the process was complicated, but because it felt like something only “real mechanics” could do. I’d watched my dad do it growing up, but I never paid close attention—more interested in cartoons than car filters.
But doing it myself changed something. I felt connected to my car in a way I never had before. It wasn’t just a machine anymore; it became something I cared for. It’s funny how a simple act like changing your oil can give you that sense of ownership, pride, and independence. It’s like baking your first cake or fixing a leaky faucet—empowering, messy, and totally worth it.
So if you’re nervous, don’t be. Just take it step by step. You’ll learn, and next time, it’ll be even easier.
Signs You Need an Oil Change (Even Before the Light Comes On)
Not every car flashes a warning when it’s time for fresh oil. Sometimes, your car sends subtle signals before the dashboard ever lights up. Knowing these signs can save you from engine trouble down the road.
Here’s what to look out for:
-
Engine noise: Oil keeps parts lubricated. If your engine sounds louder or like it’s grinding, that’s a clue.
-
Dark, dirty oil: Check your dipstick. If the oil is black and thick, it’s time to change it.
-
Oil smell inside the car: That’s a red flag. It might mean oil is leaking onto hot engine parts.
-
Low oil level: If your oil keeps dropping, check for leaks.
-
Poor fuel economy: Dirty oil forces the engine to work harder, burning more gas.
Think of oil like coffee—once it gets old and bitter, it loses its power. Keep it fresh, and your engine will thank you.
Common Mistakes to Avoid When Changing Oil
Even though doing an oil change in car is simple, there are a few common mistakes that can trip you up—especially the first few times. Here’s how to sidestep them:
1. Using the Wrong Oil Type
Each engine is built to run on specific oil. Using the wrong viscosity (like 10W-40 instead of 5W-30) can reduce performance. Check your owner’s manual—don’t guess.
2. Over-Tightening the Filter or Drain Plug
You don’t need to muscle it. Over-tightening can damage threads or crush seals, leading to leaks. Just firm and snug is enough.
3. Not Replacing the Oil Filter
Changing oil without replacing the filter is like changing your sheets but not your pillowcases. Old filters carry grime, so swap it out every time.
4. Overfilling the Engine
More isn’t better. Too much oil puts pressure on engine seals and can cause leaks. Stick to the recommended level.
5. Forgetting to Replace the Oil Cap
This sounds silly, but it’s common. Driving without the cap causes oil to spray everywhere under the hood. Always double-check.
Avoiding these mistakes makes the whole job smoother—and saves you from big problems later.
How Often Should You Really Change Your Oil?
We’ve all heard the “every 3,000 miles” rule, but that’s not always true anymore. Thanks to advances in oil and engine design, many cars can go much longer between oil changes.
Here’s a simple breakdown:
| Driving Conditions | Suggested Interval |
|---|---|
| City driving | Every 3,000–5,000 miles |
| Highway driving | Every 5,000–7,500 miles |
| Synthetic oil use | Up to 10,000 miles |
| Severe use (towing, off-road, short trips) | 3,000–5,000 miles |
If you drive a lot of short trips or your engine runs hot (like in hot climates or hilly terrain), consider changing oil more often. When in doubt, check your dipstick monthly—it’s quick and tells you all you need to know.
Why DIY Oil Changes Save You More Than Money
Sure, doing an oil change in car at home saves cash. A professional oil change might cost $50–$100, especially with synthetic oil. Doing it yourself? Around $25–$40, depending on your car and tools.
But the real savings go deeper:
-
You learn about your vehicle—you become more in tune with how it works.
-
You avoid upsells at repair shops (“Your air filter looks dirty!”).
-
You gain confidence and self-reliance.
-
You teach valuable skills to your kids or friends.
There’s also something emotionally satisfying about it. In a world where everything is digital and disposable, this is hands-on, practical care. You get dirty. You fix something. You feel capable.
Final Checklist Before You Close the Hood
To make sure everything’s buttoned up, here’s a final checklist after doing your oil change:
-
✅ Drain plug secured and snug
-
✅ New filter installed and hand-tightened
-
✅ Correct amount and type of oil added
-
✅ Oil level checked with dipstick
-
✅ Engine run and checked for leaks
-
✅ Oil cap replaced
-
✅ Old oil disposed of properly
-
✅ Maintenance light reset (if applicable)
Take your car for a short drive around the block. Let it run, then recheck the dipstick once the engine has cooled for a few minutes. Everything good? You did it!
You’ve Done It — Celebrate the Small Win
Doing an oil change in car yourself isn’t just about maintenance—it’s a ritual of care. It’s one of those small, quiet wins that stack up in life. Like cleaning your home or making a home-cooked meal, it grounds you.
Next time someone talks about car trouble or mentions how expensive shops are, you’ll smile. Because now you know how to do it yourself. And that’s powerful.
So pat yourself on the back. Grab a snack. Tell someone what you did. You’ve earned it. And when that reminder light blinks next time, you’ll know exactly what to do.


