
How Much Does It Cost to Replace a Cabin Air Filter on a Toyota Corolla?
Contents
- 1 Key Takeaways
- 2 📑 Table of Contents
- 3 The Anatomy of Cost: What Influences the Price?
- 4 DIY vs. Professional: Where Should You Get Your Hands Dirty?
- 5 Cost Breakdown by Toyota Corolla Generation
- 6 How Often Should You Replace It? The Maintenance Schedule
- 7 Signs Your Cabin Air Filter is Failing: Don’t Ignore These Clues
- 8 The Big Picture: Why This $20-$100 Job is So Important
- 9 Final Thoughts and Clear Recommendations
- 10 Frequently Asked Questions


Replacing the cabin air filter on a Toyota Corolla typically costs between $20 and $100 when done professionally, depending on your model year and location. Doing it yourself (DIY) can slash the cost to just $10 to $40 for the part alone. This simple maintenance task is crucial for clean air in your car, and with basic tools, most owners can complete it in under 30 minutes. Regular changes, often every 15,000-30,000 miles, prevent HVAC system strain and keep your cabin air fresh.
Ever taken a deep breath inside your Toyota Corolla and noticed a faint musty smell or felt like the air vents are blowing weaker than they used to? Chances are, your cabin air filter is crying out for attention. This simple, often overlooked component is the unsung hero of your car’s HVAC (Heating, Ventilation, and Air Conditioning) system, trapping pollen, dust, pollutants, and even odors before they enter your cabin. But how much does it actually cost to replace a cabin air filter on a Toyota Corolla? The answer might surprise you with its simplicity and affordability. Whether you’re a hands-on DIYer or prefer to leave it to the professionals, understanding the costs involved can save you money and keep your commute breathing easy. Let’s pop the hood—or more accurately, the glovebox—on this essential maintenance task.
For a compact sedan like the Corolla, which has been a global bestseller for decades, the cabin air filter replacement is one of the least expensive and most straightforward services you can perform. The total cost is rarely a budget-buster, but it delivers significant returns in cabin air quality and HVAC system longevity. A clogged filter forces your blower motor to work harder, potentially leading to costly repairs down the line. So, investing a few dollars and a few minutes now can prevent a much larger bill later. In this deep dive, we’ll break down every factor that influences the price, from your specific model year to whether you DIY or visit a shop. We’ll also cover exactly how to know when it’s time for a change and walk you through the process if you choose the do-it-yourself route. By the end, you’ll be a certified cabin air filter expert, ready to ensure every drive in your Corolla is a breath of fresh air.
Key Takeaways
- Cost Range: Professional replacement for a Toyota Corolla cabin air filter generally runs from $20 to $100, with the part itself costing $10-$40 and labor adding $30-$60 at a shop.
- DIY Savings: You can replace the filter yourself for the cost of the part only ($10-$40), making it one of the most cost-effective DIY car maintenance tasks.
- Filter Type Matters: Your Corolla uses a pleated paper or fabric filter; premium versions with activated carbon for odor removal cost more but offer better air quality.
- Model Year Differences: Location of the filter compartment (behind glovebox or under hood) changes by generation, affecting DIY difficulty and sometimes labor time/cost.
- Signs It Needs Changing: Reduced airflow from vents, musty odors, increased dust inside, or HVAC fan noise are clear indicators your filter is clogged and needs replacement.
- Maintenance Schedule: Toyota recommends checking the cabin filter every 15,000 miles and replacing it every 30,000 miles under normal conditions; severe conditions (dusty roads, city driving) may require more frequent changes.
- Not an Engine Filter: The cabin air filter cleans the air you breathe inside the car and is entirely separate from the engine air filter, which protects the motor; they have different replacement intervals and costs.
📑 Table of Contents
- The Anatomy of Cost: What Influences the Price?
- DIY vs. Professional: Where Should You Get Your Hands Dirty?
- Cost Breakdown by Toyota Corolla Generation
- How Often Should You Replace It? The Maintenance Schedule
- Signs Your Cabin Air Filter is Failing: Don’t Ignore These Clues
- The Big Picture: Why This $20-$100 Job is So Important
- Final Thoughts and Clear Recommendations
The Anatomy of Cost: What Influences the Price?
When you get a quote for a cabin air filter replacement, the number isn’t plucked from thin air. Several key factors converge to determine the final bill. Understanding these variables helps you budget accurately and avoid overpaying. The primary components are the filter’s own cost and the labor charged to install it. But within those categories, there’s plenty of nuance.
The Filter Itself: Part Price Variables
The cabin air filter for your Corolla is not a one-size-fits-all part. Its price is dictated by several characteristics:
- OEM vs. Aftermarket: OEM (Original Equipment Manufacturer) parts are made by the same company that supplied the filter when your Corolla was built (often a brand like Denso or Toyota’s own parts division). They guarantee a perfect fit and meet Toyota’s specifications. These typically cost between $25 and $50 for a standard filter. Aftermarket parts from brands like Fram, K&N, or WIX are widely available and often cost less, ranging from $10 to $35. Quality varies, but reputable aftermarket brands are more than adequate for most drivers.
- Filter Media & Features: Basic filters use pleated paper. Premium options incorporate activated carbon or baking soda layers to absorb odors and gases (like exhaust fumes). These “odor-eliminating” or “carbon-infused” filters can add $5-$15 to the cost but are excellent for city drivers or those with allergies.
- Model Year & Generation: The exact part number changes with each Corolla redesign. A filter for a 2014-2018 Corolla (E170/E180 platform) is different from one for a 2020+ model (E210 platform). Newer models sometimes have more complex filter shapes or integrated features, which can affect pricing. Always verify your exact year, make, model, and engine size when purchasing.
Labor: The Human Factor
This is where the biggest price swing happens, and it’s almost entirely about accessibility. The labor cost is the mechanic’s time, billed at the shop’s hourly rate (typically $80-$150 per hour in the U.S.). The time required depends on where the filter housing is located:
- Behind the Glovebox (Most Common): For many Corolla generations (like 2009-2013 and 2014-2018), the filter is accessed by removing the glovebox. This is a simple, tool-free process involving a few clips and screws. A skilled technician can do it in 15-30 minutes, translating to $30-$75 in labor.
- Under the Hood (Less Common): Some older models (like early 2000s) or specific trims might have the filter located at the base of the windshield under the cowl grille. This requires removing wiper arms and plastic panels, taking 45-60 minutes. Labor could then be $60-$150.
- Shop vs. Dealership: Independent repair shops and quick-lube centers (like Jiffy Lube) are almost always cheaper for this job than a Toyota dealership. Dealerships use OEM parts and certified techs but charge a premium. An independent shop might charge $50 total ($20 part + $30 labor), while a dealership could be $90 ($40 OEM part + $50 labor). Always call for a specific quote.
DIY vs. Professional: Where Should You Get Your Hands Dirty?
This is the ultimate question for cost-conscious Corolla owners. The good news is that replacing the cabin air filter is widely considered a beginner-friendly DIY project for most model years. Let’s compare the two paths.
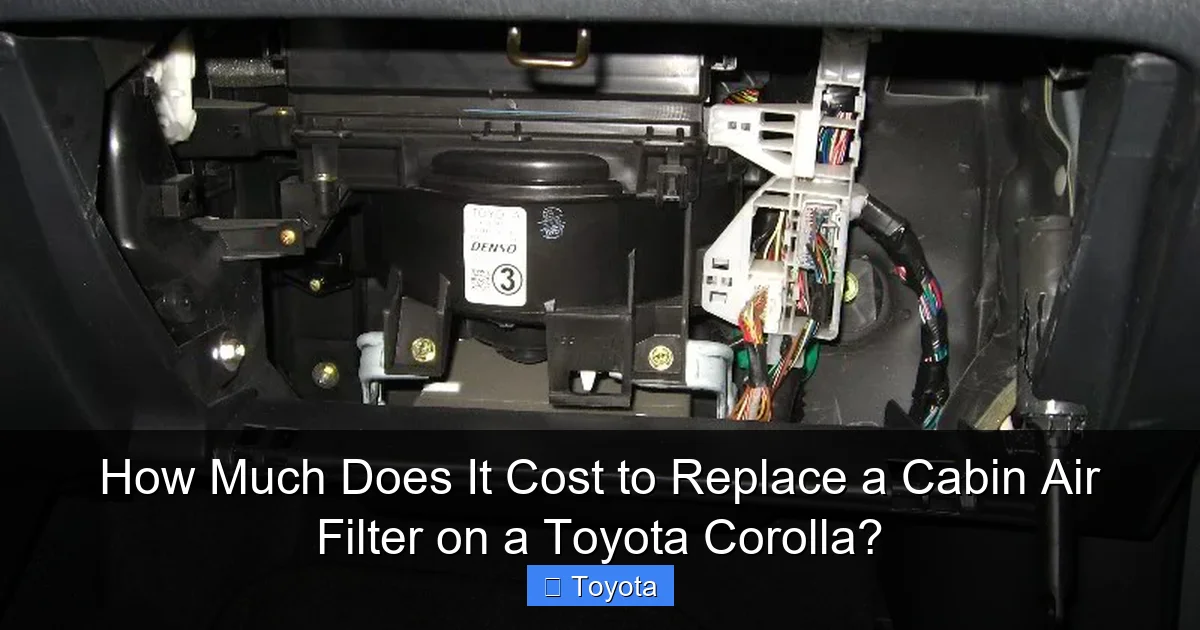
Visual guide about How Much Does It Cost to Replace a Cabin Air Filter on a Toyota Corolla?
Image source: paulstravelpictures.com
The DIY Route: Empowerment and Savings
If your Corolla’s filter is behind the glovebox (which it is for the vast majority of 2009+ models), you’re looking at a 10-20 minute job requiring no tools or just a Phillips screwdriver. The process usually involves:
- Opening the glovebox and emptying it.
- Pushing in the glovebox dampener arms (or removing them) to allow the box to drop fully.
- Locating the rectangular filter cover (usually held by two plastic clips or a couple of screws).
- Opening the cover, sliding out the old filter (note the airflow direction arrow!), and inserting the new one the same way.
- Snapping the cover back and raising the glovebox.
Total DIY Cost: $10 – $40 (price of filter only).
Pros: Maximum savings, immediate gratification, no appointment needed, you learn about your car.
Cons: You must ensure you buy the correct filter. There’s a small risk of breaking plastic clips if you’re forceful. You’re responsible for proper disposal of the old filter.
For a visual, step-by-step guide specific to your Toyota model, resources like the guide for the Toyota RAV4 can be extremely helpful, as the process is nearly identical for many Toyota SUVs and sedans from the same era. The principles of locating the glovebox release, dropping the compartment, and accessing the filter are consistent across the brand.
The Professional Route: Convenience and Peace of Mind
Paying a professional makes sense if you’re uncomfortable with basic car tasks, your filter is in a difficult location (under the hood), or you’re already at the shop for another service.
Total Professional Cost: $30 – $100+.
Where to Go:
- Dealership: Highest cost, but guaranteed OEM part and factory-trained tech. Best if your car is under warranty or you want absolute authenticity.
- Independent Repair Shop: Best balance of cost and quality. A trusted local mechanic will use a quality aftermarket or OEM part and charge fair labor. This is the most recommended option for most people.
- Quick-Lube Chain (e.g., Jiffy Lube, Valvoline): Often the cheapest and fastest. They routinely perform this service and may have it as a special. Ensure they use a filter that meets or exceeds OEM specs.
Pros: No mess, no tool hunt, professional installation, often includes a complimentary inspection of other items.
Cons: Higher cost, need to schedule an appointment, you rely on their part choice.
Cost Breakdown by Toyota Corolla Generation
While the general cost range holds true, knowing your specific generation helps set accurate expectations. Here’s a practical breakdown for popular recent model years.
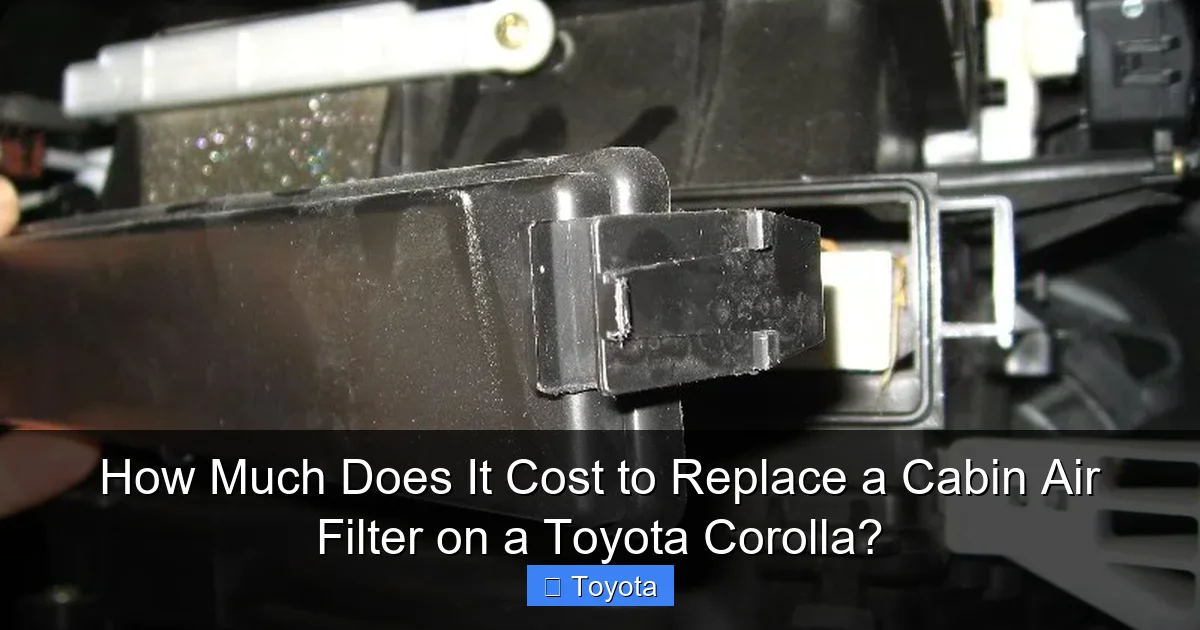
Visual guide about How Much Does It Cost to Replace a Cabin Air Filter on a Toyota Corolla?
Image source: paulstravelpictures.com
2014-2018 Corolla (E170 Platform)
This is the quintessential “glovebox filter” Corolla. The filter is easily accessed by dropping the glovebox. DIY is exceptionally simple. Part cost: $12-$30. Professional labor: 0.2-0.5 hours. Typical Total at Independent Shop: $40-$75.
2020-Present Corolla (E210 Platform)
The current generation also uses the glovebox method. The process is nearly identical to the previous gen. Part cost is similar. Typical Total at Independent Shop: $45-$85. Some early 2020 models might have a slightly different clip design, but nothing major.
2009-2013 Corolla (E140 Platform)
Again, a glovebox filter. This older generation might see even cheaper aftermarket parts. Typical Total at Independent Shop: $35-$70.
Older Models (Pre-2009)
This is where it gets trickier. Many 2000-2008 Corollas have the filter located under the hood, behind the cowl panel. This requires removing wiper arms and plastic trim, increasing labor time and cost significantly. Typical Total at Independent Shop: $60-$120. For these models, professional installation is often the better value unless you are a very confident DIYer.
How Often Should You Replace It? The Maintenance Schedule
Toyota’s official maintenance schedule for the Corolla recommends inspecting the cabin air filter every 15,000 miles and replacing it every 30,000 miles under “normal” driving conditions. However, “normal” is a theoretical ideal. In the real world, your replacement interval depends heavily on your environment.
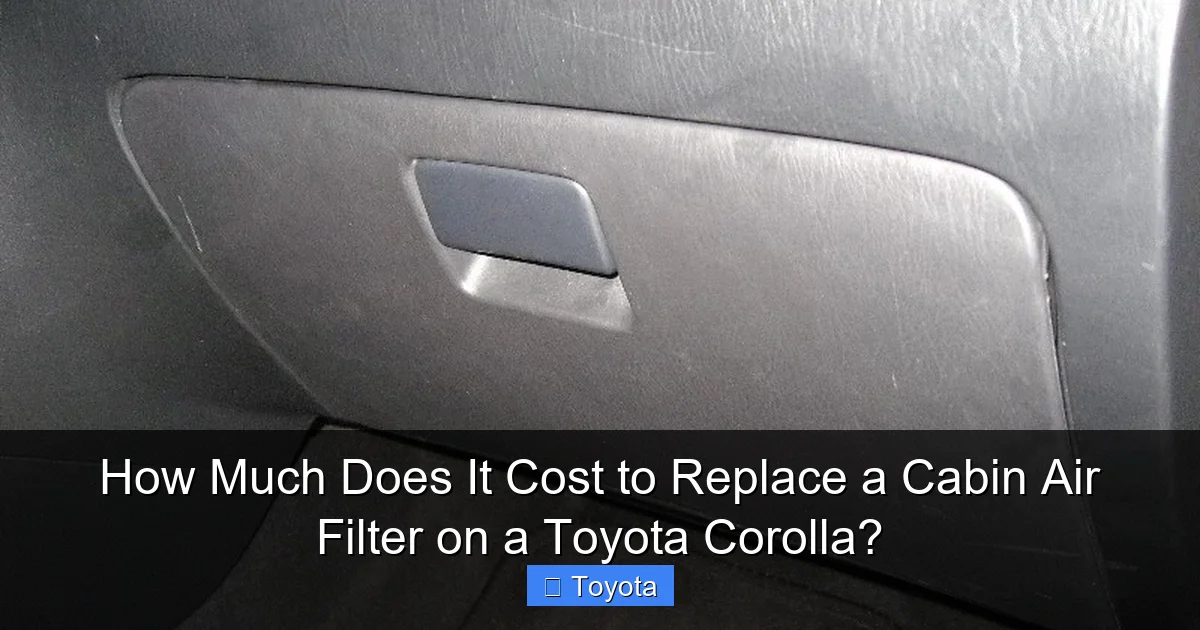
Visual guide about How Much Does It Cost to Replace a Cabin Air Filter on a Toyota Corolla?
Image source: paulstravelpictures.com
Driving Environment is Everything
- Severe Service Conditions: If you frequently drive in heavy traffic (city stop-and-go), on dusty roads (rural areas, construction zones), in areas with high pollen counts (spring), or with high air pollution (major cities), you should shorten the interval to every 15,000 miles or even once a year.
- Moderate Conditions: Suburban driving with a mix of highways and local roads might stretch the filter to 20,000-25,000 miles.
- Garaged, Highway-Only: If your Corolla is mostly used for long highway commutes and stored in a garage, the filter might last the full 30,000 miles.
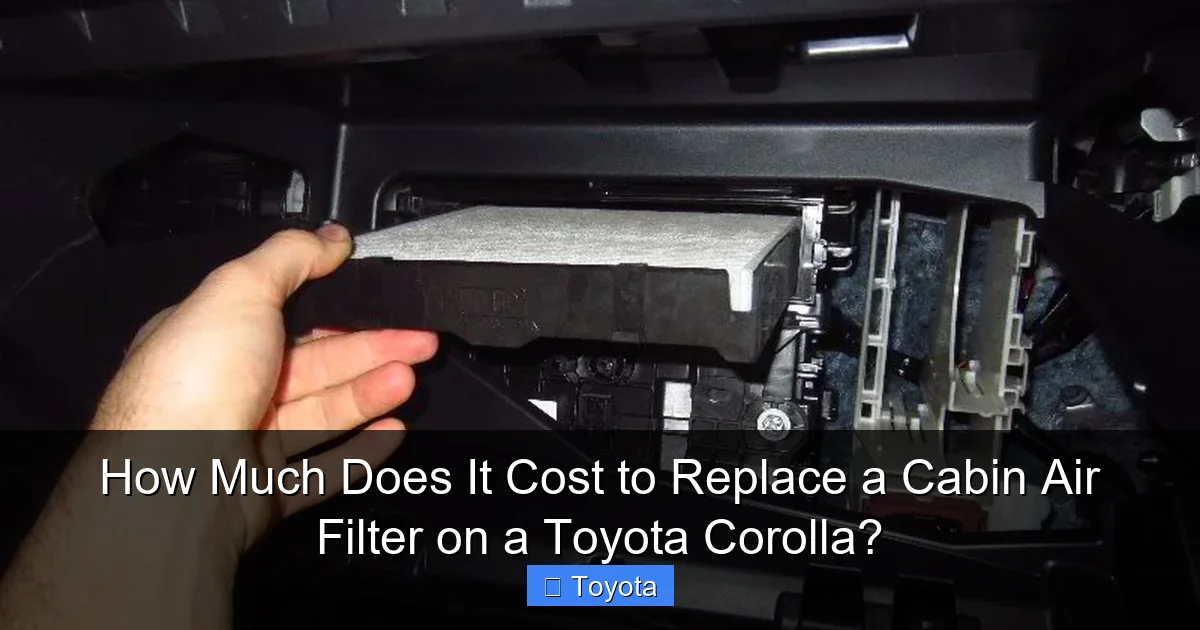
Visual Inspection: Your Best Tool
The schedule is a guide. The best practice is to check the filter yourself during an oil change or other routine service. Simply locate the filter housing (glovebox or under hood) and look through the pleats. If it’s coated in a thick layer of gray/black dust, pollen, or debris, it’s time to replace it regardless of mileage. A filter that looks dirty is a filter that isn’t working. This simple check costs you nothing but a few minutes and provides the most accurate assessment.
Signs Your Cabin Air Filter is Failing: Don’t Ignore These Clues
Sometimes, you don’t need to wait for a mileage interval. Your Corolla will give you subtle (and sometimes not-so-subtle) signs that the filter is clogged and restricting airflow.
Primary Symptoms
- Weak Airflow from Vents: The most common sign. Your AC and heater will feel dramatically less powerful, especially on the highest fan settings. It might feel like the blower motor is dying, but it’s often just a blocked filter.
- Musty or Mildew-Like Odor: A clogged filter traps moisture, creating a breeding ground for mold and bacteria. This leads to a distinct stale, damp smell when you turn on the HVAC system, especially the AC. This odor can permeate the cabin and is a clear red flag.
- Increased Dust and Debris Inside: You notice more dust settling on the dashboard, seats, and center console than usual. The filter is so clogged it’s no longer trapping particles effectively.
- Unusual HVAC Fan Noise: The blower motor has to strain to push air through the dense filter mat. This can create a louder, whining, or straining noise that wasn’t there before.
Secondary & Performance Issues
- Foggy Windows: A functioning cabin filter helps manage humidity. A clogged one can contribute to interior fogging because the HVAC system can’t effectively dehumidify the air.
- Allergy or Respiratory Flare-Ups: If you or passengers experience increased sneezing, itchy eyes, or congestion while in the car, a saturated filter is likely pumping allergens directly into the cabin.
- Reduced HVAC Efficiency: Both heating and cooling performance suffer. In summer, it takes longer to cool the car. In winter, it takes longer to defog windows and heat the cabin. You’re burning more fuel to achieve less comfort.
If you experience one or more of these symptoms, especially weak airflow combined with odor, check the cabin filter immediately. It’s a cheap fix that solves multiple problems.
The Big Picture: Why This $20-$100 Job is So Important
It’s easy to dismiss the cabin air filter as just another consumable part, but its impact on your driving experience and your car’s health is disproportionate to its cost and size. Think of it as the lungs of your car’s interior.
First and foremost, it’s about your health and comfort. Modern cars are designed to be sealed environments, but without a functioning filter, that sealed box is just circulating polluted air. The filter captures particulate matter (PM2.5, pollen, dust mites), road grime, and even some gaseous pollutants. For anyone with allergies, asthma, or respiratory sensitivities, a clean cabin filter is not a luxury—it’s a necessity for safe driving.
Second, it’s about protecting your HVAC system. The blower motor, evaporator, and heater core are expensive components. A clogged filter acts like a clogged artery, forcing the blower motor to work overtime, leading to premature wear and potential failure. Debris that bypasses a damaged filter can settle on the delicate evaporator coils, reducing cooling efficiency and promoting mold growth, which leads to those nasty odors. Replacing a $30 filter is infinitely cheaper than replacing a $500+ blower motor or dealing with a moldy evaporator.
Finally, it’s about resale value and perceived quality. A car that has a clean, fresh-smelling interior with strong HVAC performance feels well-maintained. A potential buyer turning on the AC and getting a weak, musty breeze will immediately question the overall care of the vehicle. Keeping up with this simple service is a mark of a conscientious owner.
In the grand scheme of car ownership, the cabin air filter is one of the clearest wins. For a minimal investment of time and money, you safeguard your health, your car’s critical systems, and your wallet from larger future expenses. It’s a classic case of an ounce of prevention being worth a pound of cure.
Final Thoughts and Clear Recommendations
So, back to the original question: how much does it cost to replace a cabin air filter on a Toyota Corolla? The definitive answer is: as little as $10 if you do it yourself, or typically between $40 and $100 if you have a professional do it. Your exact cost depends on your Corolla’s model year, the filter type you choose, and where you have the service performed.
Our clear recommendation for most owners is this: Buy the correct filter for your specific year and trim (double-check the part number online or at the auto parts store) and replace it yourself. For any Corolla from 2009 onward, this is a 15-minute job that requires no special skills. The savings are substantial, and you gain the satisfaction of a task completed. Keep the old filter as a visual reference for next time.
If you are uncomfortable, your filter is under the hood (pre-2009 models), or you simply prefer the convenience, seek out a reputable independent repair shop or a quick-lube center with good reviews. Get a quote over the phone specifying you only want the cabin air filter replaced—some places may try to upsell additional services. For the small premium, you get professional installation and peace of mind.
Regardless of who installs it, make a note in your maintenance log or phone reminder to check it again in 15,000 miles or a year. Make it a habit, just like checking your oil. Your Corolla’s HVAC system—and your lungs—will thank you for it, mile after mile, breath after fresh breath.
Frequently Asked Questions
How often should I change the cabin air filter in my Toyota Corolla?
Toyota recommends replacing it every 30,000 miles under normal conditions, but you should check it every 15,000 miles. In dusty, high-pollen, or city traffic environments, change it annually or every 15,000 miles for best results.
Can I drive my Corolla without a cabin air filter?
You can technically drive without it, but it’s strongly discouraged. Debris and pollutants will enter your cabin directly, potentially damaging HVAC components and harming your health. It also exposes the system to dust that can clog the evaporator.
Is the cabin air filter the same as the engine air filter?
No. They are completely separate filters. The engine air filter sits in the engine bay and protects the motor from dirt. The cabin air filter is inside the car, usually behind the glovebox or under the hood, and protects you and your passengers. They have different locations and replacement schedules.
What happens if I install the cabin filter backwards?
The filter has an arrow indicating the direction of airflow (usually pointing toward the cabin/away from the blower). Installing it backwards severely restricts airflow, drastically reducing HVAC performance and straining the blower motor. Always ensure the arrow points inward toward the interior.
Do I need special tools to replace the cabin filter in my Corolla?
For most 2009+ Corollas, you likely need no tools at all, as the glovebox is held by plastic clips. Some models may require a Phillips screwdriver to remove a couple of screws holding the glovebox or filter cover. Never use force; if it doesn’t release easily, look for hidden fasteners.
Why does my cabin air filter smell musty even after I change it?
A new filter won’t fix existing mold or bacteria in the HVAC system, especially on the evaporator coil. After replacing the filter, run the HVAC fan on high with the windows down and the AC on to dry out the system. For persistent odors, you may need an evaporator cleaner treatment or professional HVAC system cleaning.


