
How Much Does It Cost to Install a 220v Outlet for Tesla?
Contents
- 1 Key Takeaways
- 2 📑 Table of Contents
- 3 How Much Does It Cost to Install a 220V Outlet for Tesla?
- 4 Why You Need a 220V Outlet for Your Tesla
- 5 Factors That Affect Installation Cost
- 6 Average Cost Breakdown by Scenario
- 7 DIY vs. Hiring a Licensed Electrician
- 8 Tips to Save Money on Installation
- 9 Conclusion
- 10 Frequently Asked Questions


Installing a 220V outlet for your Tesla can cost between $500 and $2,500, depending on your home’s electrical system, distance from the panel, and local labor rates. While it’s a smart investment for faster charging, planning ahead and getting multiple quotes can help you avoid surprises and save money.
Key Takeaways
- Typical cost range: Most homeowners spend $500–$2,500 to install a 220V outlet for Tesla, with average jobs landing around $1,200.
- Electrical panel matters: If your panel is outdated or near capacity, upgrades can add $500–$2,000 to the total cost.
- Outlet type affects price: A NEMA 14-50 outlet is common and affordable, while hardwired Wall Connectors cost more but offer faster charging.
- Permits and inspections: Most areas require electrical permits ($50–$200), and skipping them can lead to fines or insurance issues.
- DIY vs. professional: While tempting, DIY installation is risky and often not code-compliant—always hire a licensed electrician.
- Location impacts labor: Running wire through walls, attics, or long distances increases labor time and cost.
- Future-proofing pays off: Installing a higher-capacity circuit now can save money if you upgrade your Tesla or add another EV later.
📑 Table of Contents
How Much Does It Cost to Install a 220V Outlet for Tesla?
So, you’ve got your shiny new Tesla—or you’re seriously considering one—and you’re thinking about home charging. Great choice! Charging at home is convenient, cheaper than public stations, and way better for your daily routine. But here’s the big question on every new (and soon-to-be) Tesla owner’s mind: How much does it cost to install a 220V outlet for Tesla?
The short answer? It usually costs between $500 and $2,500. But like most things in life, the real price depends on a bunch of factors—your home’s electrical setup, where you want the outlet, local labor rates, and whether you need any upgrades. And while it might seem like a simple plug install, this isn’t your average phone charger. A 220V outlet for Tesla delivers serious power, and doing it right means safety, efficiency, and long-term savings.
In this guide, we’ll walk you through everything you need to know—from what a 220V outlet actually does, to how much you’ll likely pay, to tips for keeping costs down. Whether you’re planning to use a mobile connector or install a Tesla Wall Connector, we’ve got you covered. Let’s plug in and power up your knowledge.
Why You Need a 220V Outlet for Your Tesla
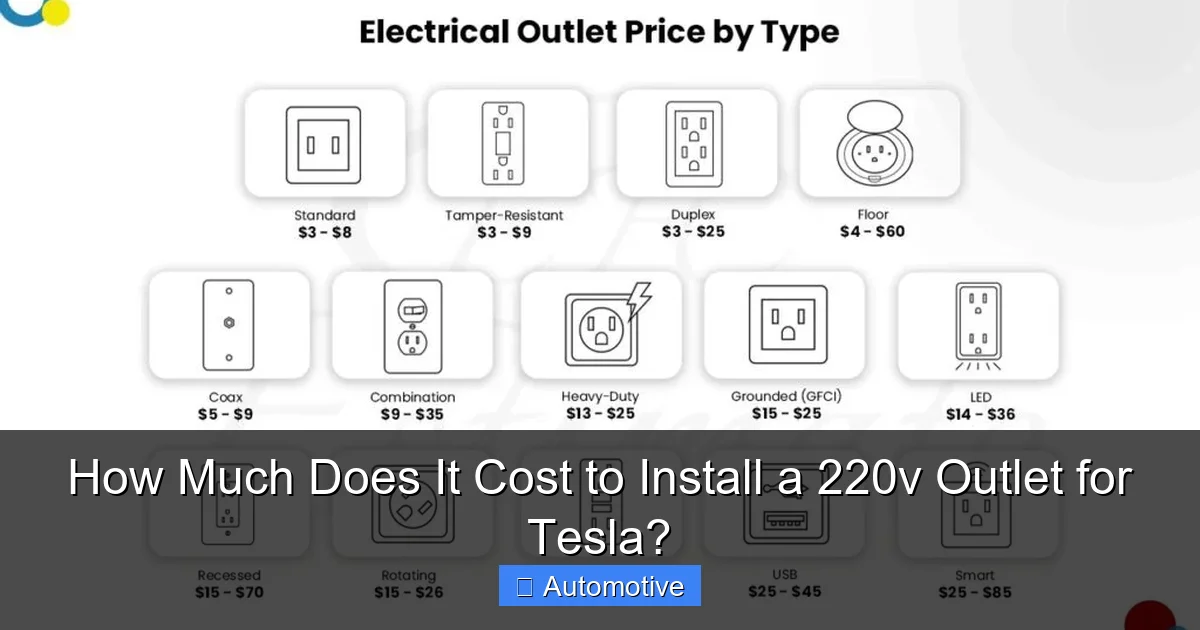
Visual guide about How Much Does It Cost to Install a 220v Outlet for Tesla?
Image source: koala.sh
If you’re new to electric vehicles, you might be wondering: “Can’t I just plug my Tesla into a regular wall outlet?” Technically, yes—but it’s painfully slow. A standard 120V outlet (the kind you use for lamps and TVs) gives your Tesla about 3–5 miles of range per hour. That means a full charge could take 2–3 days if your battery is low. Not exactly ideal for daily use.
That’s where the 220V outlet comes in. Also known as a 240V outlet (the terms are often used interchangeably), it delivers double the voltage and significantly more power. With a 220V outlet, your Tesla can gain 25–30 miles of range per hour—sometimes more, depending on the amperage. That means a full charge in 6–8 hours, even from nearly empty. For most people, that’s overnight charging, wake up full, and go.
Types of 220V Outlets for Tesla
There are a few common outlet types you’ll see when setting up home charging:
- NEMA 14-50: This is the most popular choice for Tesla owners. It’s a 50-amp outlet with four prongs and is commonly used for electric dryers and RVs. It’s compatible with Tesla’s Mobile Connector and provides up to 40 amps of power (about 9.6 kW), giving you around 30 miles of range per hour.
- NEMA 14-30: A 30-amp outlet, often used for dryers. It delivers about 24 amps to your Tesla, adding roughly 20–25 miles per hour. It’s cheaper to install but slower than a 14-50.
- NEMA 6-50: A 50-amp outlet with two hot wires and a ground—no neutral. It’s less common but still works with Tesla’s adapter. Output is similar to the 14-50.
- Tesla Wall Connector (hardwired): This isn’t an outlet at all—it’s a dedicated charging station that’s wired directly into your electrical panel. It can deliver up to 48 amps (11.5 kW) and charges even faster. It’s more expensive upfront but offers a cleaner, permanent solution.
For most homeowners, the NEMA 14-50 is the sweet spot: affordable, widely available, and fast enough for daily use. But if you want the fastest charging or plan to install multiple EVs, the Wall Connector might be worth the investment.
Benefits of Home 220V Charging
Beyond speed, there are several reasons to install a 220V outlet:
- Convenience: No more waiting at public chargers or worrying about availability. Your car is ready every morning.
- Cost savings: Home electricity is cheaper than public fast chargers, especially if you charge during off-peak hours.
- Increased home value: EV charging infrastructure is a growing selling point for homes.
- Better battery health: Level 2 charging (220V) is gentler on your battery than frequent DC fast charging.
- Future-proofing: As EVs become more common, having a charging setup puts you ahead of the curve.
In short, a 220V outlet isn’t just a nice-to-have—it’s a game-changer for Tesla ownership.
Factors That Affect Installation Cost
Visual guide about How Much Does It Cost to Install a 220v Outlet for Tesla?
Image source: weldingproperty.com
Now that you know why you need a 220V outlet, let’s talk money. The cost to install a 220V outlet for Tesla isn’t one-size-fits-all. Several factors can push your price up or down. Understanding these will help you budget and avoid sticker shock.
1. Electrical Panel Capacity and Condition
Your home’s electrical panel is the heart of your power system. If it’s old, undersized, or already near capacity, adding a 220V circuit might require an upgrade.
- Panel age: Homes built before the 1990s often have 100-amp panels. Modern EVs need 200-amp service for optimal performance. If yours is outdated, you may need a panel upgrade—costing $1,500–$3,000.
- Available space: Even if your panel is modern, it needs open breaker slots. If it’s full, you might need a subpanel ($500–$1,500) or a tandem breaker (cheaper, if compatible).
- Load calculation: A licensed electrician will perform a load calculation to ensure your home can safely handle the added demand. This is required by code and prevents overloads.
Example: Sarah lives in a 1980s home with a 100-amp panel. She wants a 220V outlet in her garage, but her panel is full and can’t support the extra load. Her electrician recommends a 200-amp panel upgrade. Total cost? Around $2,800—$800 for the outlet install and $2,000 for the panel.
2. Distance from Electrical Panel to Outlet
The farther the outlet is from your panel, the more wire you need—and the more labor it takes to run it.
- Short runs (under 20 feet): Minimal wire and easy access (e.g., through a basement or crawlspace). Cost: $500–$800.
- Medium runs (20–50 feet): May require drilling through walls or running conduit. Cost: $800–$1,500.
- Long runs (50+ feet): Often need trenching, underground conduit, or attic access. Cost: $1,500–$2,500+.
Tip: If your garage is detached or far from the house, consider installing the outlet on an exterior wall near the panel to reduce wire length.
3. Type of Outlet and Charging Equipment
As mentioned earlier, the outlet type affects cost.
- NEMA 14-50 outlet: $10–$30 for the receptacle, plus $300–$800 for labor and materials. Total: $350–$850.
- Tesla Wall Connector: $500 for the unit, plus $600–$1,200 for hardwiring and installation. Total: $1,100–$1,700.
- Other adapters or upgrades: If you need a specific adapter or want a smart charger with app control, add $100–$300.
Note: The Wall Connector is more expensive but offers faster charging, Wi-Fi connectivity, and a sleek design. It’s ideal if you want a permanent, high-performance solution.
4. Local Labor Rates and Permits
Electricians charge by the hour, and rates vary by region.
- National average: $50–$100 per hour.
- High-cost areas (e.g., NYC, San Francisco): $100–$150/hour.
- Rural or low-cost areas: $40–$70/hour.
Most 220V outlet installs take 2–6 hours, depending on complexity.
Permits are another cost. Most cities require an electrical permit for new circuits ($50–$200). Inspections may follow. Skipping permits can void insurance or cause issues when selling your home.
5. Additional Upgrades or Challenges
Sometimes, unexpected issues pop up.
- Conduit installation: If wires must be run through walls or underground, conduit adds $2–$5 per foot.
- Wall or floor modifications: Cutting drywall, patching, or finishing can add $100–$300.
- GFCI protection: Required in garages and outdoor areas. Most modern breakers include this, but older systems may need an upgrade.
- Dedicated circuit: A 220V outlet must be on its own circuit. No sharing with other appliances.
Pro tip: Get a detailed quote before work begins. Ask for line items so you know exactly what you’re paying for.
Average Cost Breakdown by Scenario
Visual guide about How Much Does It Cost to Install a 220v Outlet for Tesla?
Image source: cdn.shopify.com
To give you a clearer picture, here’s how costs might look in real-life situations.
Scenario 1: Simple Garage Install (Close to Panel)
- Home: Modern 200-amp panel, garage attached, 15 feet from panel.
- Work: Run 6/3 NM-B wire through basement, install NEMA 14-50 outlet.
- Cost: $600–$900 (includes outlet, wire, breaker, labor, permit).
Scenario 2: Detached Garage with Trenching
- Home: 150-amp panel, detached garage 60 feet away.
- Work: Trench 18 inches deep, install PVC conduit, run 6 AWG THWN wire, install outlet.
- Cost: $1,800–$2,500 (includes trenching, conduit, wire, labor, permit).
Scenario 3: Panel Upgrade Required
- Home: 100-amp panel from 1975, full breaker slots.
- Work: Upgrade to 200-amp panel, install NEMA 14-50 in garage 30 feet away.
- Cost: $2,500–$3,500 (panel upgrade + outlet install).
Scenario 4: Tesla Wall Connector Installation
- Home: 200-amp panel, garage 25 feet away.
- Work: Hardwire Wall Connector, run 6 AWG wire, install dedicated breaker.
- Cost: $1,300–$1,800 (unit + installation).
These examples show how quickly costs can vary. The key is assessing your home’s unique setup before getting quotes.
DIY vs. Hiring a Licensed Electrician
You might be tempted to save money by installing the outlet yourself. After all, how hard can it be? But here’s the truth: this is not a DIY job.
Why You Should Hire a Professional
- Safety: Working with 220V circuits is dangerous. One mistake can cause electrocution, fire, or damage to your Tesla.
- Code compliance: Electrical work must meet the National Electrical Code (NEC). Only licensed electricians can ensure compliance.
- Insurance and resale: DIY electrical work can void your homeowner’s insurance. It may also raise red flags during home inspections.
- Warranty protection: Tesla recommends professional installation to maintain warranty coverage.
When DIY Might Be Tempting (But Still Not Recommended)
Some homeowners with electrical experience might consider installing the outlet themselves—especially if they’re confident in their skills. But even then:
- You still need a permit and inspection.
- You must turn off the main power and verify it’s dead.
- You need the right tools: voltage tester, wire strippers, conduit bender, etc.
- One error—like reversing wires or over-tightening—can cause serious problems.
Bottom line: The risk far outweighs the savings. Hire a licensed electrician. It’s worth the peace of mind.
How to Find a Qualified Electrician
- Ask for referrals from friends, Tesla forums, or local EV groups.
- Check reviews on Google, Yelp, or Angi.
- Verify licensing and insurance.
- Get at least three quotes.
- Ask about experience with EV charger installations.
A good electrician will explain the process, provide a detailed estimate, and pull the necessary permits.
Tips to Save Money on Installation
While you can’t cut corners on safety, there are smart ways to reduce costs.
1. Plan Ahead
If you’re building a new home or renovating, install the 220V circuit during construction. It’s much cheaper than retrofitting later.
2. Choose the Right Location
Install the outlet as close to the electrical panel as possible. Even 10 extra feet of wire can add $100–$200.
3. Combine with Other Projects
If you’re upgrading your panel, adding solar, or finishing a basement, bundle the work. Electricians often offer discounts for multiple jobs.
4. Use Existing Pathways
Run wires through basements, crawlspaces, or attics instead of cutting through finished walls.
5. Compare Quotes
Don’t go with the first bid. Get detailed estimates from at least three electricians. Look for transparency in pricing.
6. Consider a Lower-Amp Outlet (Temporarily)
If budget is tight, start with a NEMA 14-30 (30-amp) outlet. It’s cheaper to install and still offers decent charging. You can upgrade later.
7. Check for Incentives
Some utilities and states offer rebates for EV charger installations. For example:
- California’s Clean Fuel Rebate: Up to $1,000.
- Federal tax credit: 30% of installation cost (up to $1,000) for qualifying chargers.
- Local utility programs: Many offer discounts or free chargers.
Check the Database of State Incentives for Renewables & Efficiency (DSIRE) for local offers.
Conclusion
So, how much does it cost to install a 220V outlet for Tesla? The answer isn’t one number—it’s a range, shaped by your home, your goals, and your budget. But with proper planning, you can expect to spend between $500 and $2,500 for a safe, code-compliant installation.
Remember, this isn’t just about plugging in your car. It’s about convenience, savings, and future-proofing your home. A 220V outlet turns your garage into a personal charging station, giving you peace of mind and a smoother EV experience.
Don’t rush the process. Get multiple quotes, understand your electrical system, and hire a qualified professional. And if you’re unsure, consult with a Tesla advisor or local EV expert.
Investing in home charging is one of the best decisions you can make as a Tesla owner. It’s not just about the cost—it’s about the freedom to charge on your terms, whenever you want. So go ahead, power up, and enjoy the ride.
Frequently Asked Questions
Can I install a 220V outlet for Tesla myself?
Technically, yes—but it’s not recommended. Working with high-voltage circuits is dangerous and must meet electrical codes. DIY installations can void insurance and warranties. Always hire a licensed electrician.
How long does it take to install a 220V outlet?
Most installations take 2–6 hours, depending on distance, access, and whether upgrades are needed. Complex jobs (like trenching or panel upgrades) may take a full day or more.
Do I need a permit to install a 220V outlet?
Yes, in most areas. Electrical permits ensure the work is safe and up to code. Your electrician should handle the permit and inspection process.
Can I use a 220V outlet for other appliances?
No. A 220V outlet for Tesla should be on a dedicated circuit. Sharing it with other high-power devices (like a dryer or oven) can cause overloads and safety hazards.
Will installing a 220V outlet increase my electric bill?
Yes, but not as much as you might think. Charging a Tesla at home costs about $0.10–$0.20 per mile, depending on your electricity rate. That’s still cheaper than gas.
Can I charge my Tesla with a 120V outlet?
Yes, but it’s very slow—only 3–5 miles of range per hour. A 220V outlet is strongly recommended for daily use and faster charging.


