
How Do I Reset Maintenance Required on a Toyota Corolla?
Contents
- 1 Key Takeaways
- 2 📑 Table of Contents
- 3 Understanding Your Corolla’s Maintenance Reminder System
- 4 Essential Preparation Before You Begin
- 5 Method 1: The Odometer Button Trick (For Older Corollas, ~2009 and Earlier)
- 6 Method 2: The Multi-Information Display (MID) Menu (For 2010-2018 Corollas)
- 7 Method 3: The Fuse Box Reset (The Universal Backup Method)
- 8 After the Reset: Verification and Best Practices
- 9 Common Mistakes, Troubleshooting, and When to Seek Help
- 10 Conclusion: Your Simple Key to Dashboard Peace
- 11 Frequently Asked Questions


Resetting the maintenance required light on your Toyota Corolla is a simple DIY task that takes under 5 minutes. You’ll use either the odometer button or multi-information display, depending on your model year. Always reset only after completing the required service to avoid engine damage and maintain your warranty.
That little “MAINTENANCE REQUIRED” icon glowing on your Toyota Corolla’s dashboard isn’t trying to stress you out. It’s actually your car’s way of giving you a friendly high-five for being a responsible owner—and a gentle nudge that it’s time for some scheduled love. But once you’ve changed the oil, rotated the tires, or completed whatever service was due, that light needs to go off. Leaving it on defeats its purpose and can even confuse you later when a real warning appears. The good news? Resetting it is one of the easiest DIY tasks you can do in your driveway, usually taking less time than finding your phone. No special tools, no computer scans. Just you, your keys, and a few button presses. In this complete guide, we’ll walk through every method for every generation of Corolla, so you can confidently turn off that reminder and get back to enjoying your smooth, reliable ride.
Key Takeaways
- Reset only after maintenance: Never reset the light without completing the scheduled service (usually oil/filter change).
- Two main methods: Older models (pre-2010) use the odometer button; newer models (2010+) use the steering wheel/dash controls.
- Fuse box method is universal: Pulling the ECU fuse works as a reliable backup for any model year.
- The light indicates service intervals: It typically illuminates every 5,000-10,000 miles as a reminder for scheduled maintenance.
- Consult your owner’s manual: Model-specific instructions can vary slightly; your manual is the final authority.
- Do not ignore persistent lights: If the light returns immediately after reset, have a mechanic diagnose the issue.
- This is not a check engine light: The maintenance light is a routine reminder, while a check engine light signals a problem.
📑 Table of Contents
- Understanding Your Corolla’s Maintenance Reminder System
- Essential Preparation Before You Begin
- Method 1: The Odometer Button Trick (For Older Corollas, ~2009 and Earlier)
- Method 2: The Multi-Information Display (MID) Menu (For 2010-2018 Corollas)
- Method 3: The Fuse Box Reset (The Universal Backup Method)
- After the Reset: Verification and Best Practices
- Common Mistakes, Troubleshooting, and When to Seek Help
- Conclusion: Your Simple Key to Dashboard Peace
Understanding Your Corolla’s Maintenance Reminder System
Before we start pushing buttons, it’s crucial to understand what that light actually means. It’s not a “low oil” warning that triggers at a specific pressure. Instead, it’s a mileage-based service interval reminder. Your Corolla’s computer tracks the miles you drive and calculates when the next scheduled maintenance in your owner’s manual is due. For most modern Corollas, this is set to illuminate every 5,000 to 10,000 miles, typically coinciding with an oil and filter change. Older models might have used a simpler timer.
What the Light Actually Means
The “MAINTENANCE REQUIRED” text or wrench icon is a pre-programmed reminder. It means your car has reached a predetermined mileage or time interval (e.g., 5,000 miles or 6 months) since the last reset. It does not mean something is broken or that your oil is critically low at that moment. It’s proactive, not reactive. Think of it like a calendar alert for your car’s health checkup. Ignoring it won’t cause immediate harm, but delaying recommended maintenance can lead to increased wear, poor performance, and potentially void certain aspects of your warranty if you can’t prove you followed the schedule.
How the System Works (A Simple Analogy)
Imagine your car’s computer has a little counter. Every time you drive a mile, it adds one to the counter. When that counter hits the number set by Toyota engineers (say, 5,000 for an oil change), the computer flips a switch that lights up your dashboard. When you (or your mechanic) perform the reset procedure, you tell the computer: “Okay, the service is done. Start counting from zero again for the next interval.” The system is beautifully simple, which is why the reset is so straightforward. It does not require scanning a code or diagnosing a sensor; it’s just resetting a timer.
Essential Preparation Before You Begin
Resetting the light takes seconds, but proper preparation ensures you don’t accidentally create a new problem. Rushing this step is the most common mistake.
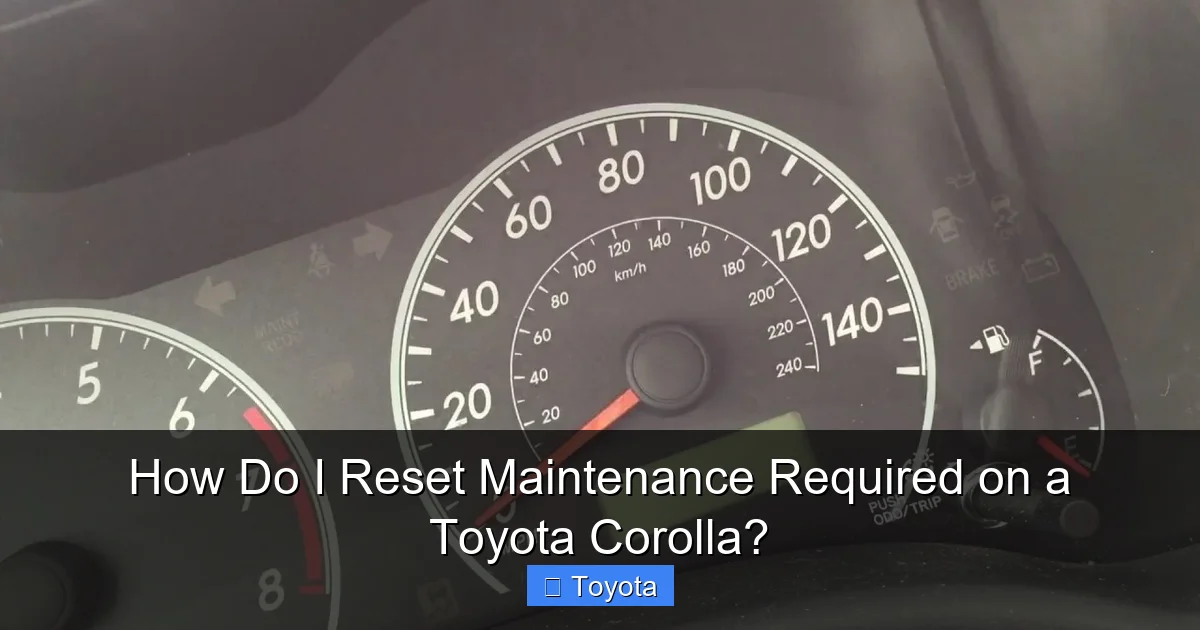
Visual guide about How Do I Reset Maintenance Required on a Toyota Corolla?
Image source: i0.wp.com
Rule Number One: Complete the Service First!
This cannot be stressed enough. Only reset the maintenance required light after you have physically completed the required service. This usually means an oil and filter change, but check your owner’s manual for the specific “B” or “A” service code that triggered the light. If you reset it without doing the work, you are simply erasing the reminder to do a necessary task. You’ll drive with degraded oil past its service life, risking engine sludge and premature wear. The light is your servant, not your master. Serve your car first, then tell the computer the job is done.
Gather Your (Minimal) Tools and Know Your Model Year
You need nothing more than your car key or key fob. However, knowing your Corolla’s approximate model year is critical because the reset procedure changes dramatically. Here’s a quick breakdown:
- Pre-2010 Models (E100, E110, E120 generations): Primarily use the trip/odometer button on the gauge cluster. You’ll need to cycle the ignition while holding a button.
- 2010-2018 Models (E140, E150 generations): Use the multi-information display (MID) controlled by buttons on the steering wheel or a stalk.
- 2019-Present Models (E210 generation): Also use the MID, but the menu structure is slightly different. The “Menu” button on the steering wheel is key.
If you’re unsure, your owner’s manual will have the exact procedure for your specific VIN. A quick Google search for “[Your Year] Toyota Corolla maintenance light reset” will also yield model-specific videos.
Safety First: Park and Prepare
Park your Corolla on a level surface, engage the parking brake, and ensure the transmission is in “Park” (or “Neutral” for manuals). You do not need to pop the hood for the primary reset methods, but you should have your keys handy. If you plan to use the fuse box method (our universal backup), you will need to open the hood. If you haven’t done that before, our guide on how to open the hood on a Toyota Corolla walks you through the simple latch process for all models.
Method 1: The Odometer Button Trick (For Older Corollas, ~2009 and Earlier)
This classic method is a holdover from decades of Toyota design. It uses the odometer reset button to trick the computer into a service mode. If your Corolla has a traditional, non-digital odometer display (or a simple digital one without a full menu system), this is your go-to.
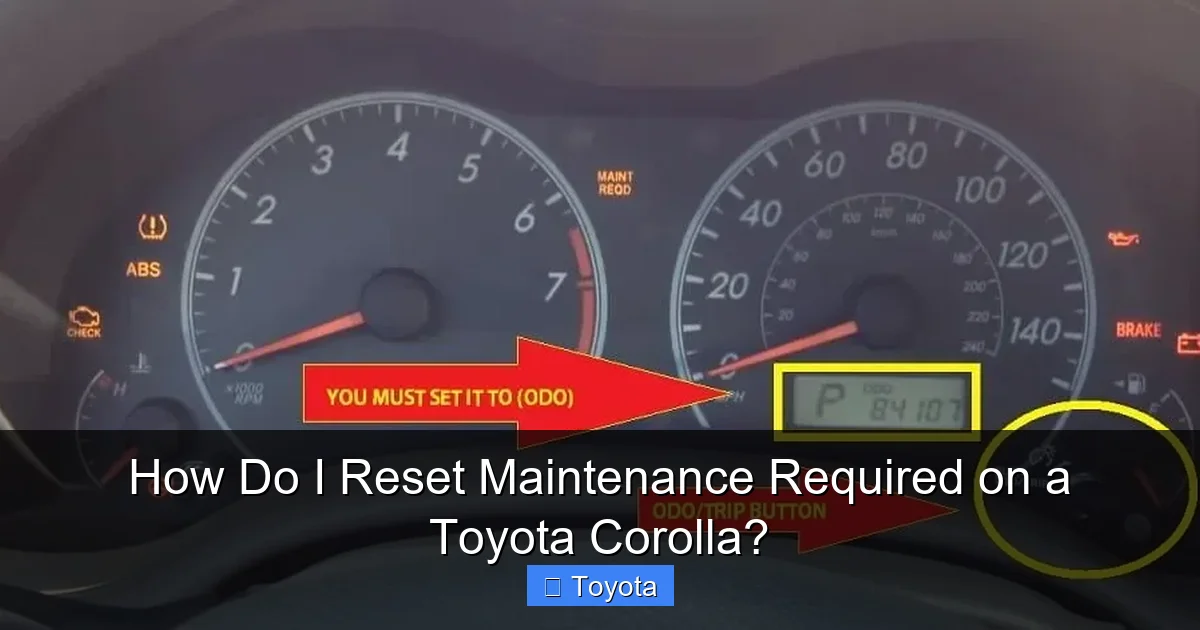
Visual guide about How Do I Reset Maintenance Required on a Toyota Corolla?
Image source: i.ytimg.com
Step-by-Step Odometer Button Procedure
Follow these steps precisely. Timing is everything.
- Turn the ignition to the “ON” position. Do not start the engine. Simply press the ignition button once (or turn the key to the “ON” position, which is the setting right before “START”). All dashboard lights should illuminate, including the maintenance required light.
- Press and hold the “ODO/TRIP” button. This is the button you normally use to switch between the odometer and trip meter. It’s usually on the gauge cluster itself, near the speedometer. Press and hold it down firmly.
- While still holding the button, turn the ignition “OFF.” You can release the button after the dash lights go completely dark.
- Immediately turn the ignition back to “ON.” Do this quickly. You should see the odometer display change. Instead of the mileage, it will likely show a series of zeros or the word “SET.” The maintenance light may blink or turn off.
- Release the button. The odometer should return to normal. Start the engine. The maintenance required light should be off.
Pro Tip: If it doesn’t work the first time, try again. Sometimes the “OFF” to “ON” transition needs to be very quick. If the light comes back on after a few drive cycles, you may have a model that requires the fuse method or you didn’t hold the button long enough during the “OFF” phase.
Method 2: The Multi-Information Display (MID) Menu (For 2010-2018 Corollas)
Starting around 2010, Corollas moved to a digital dash with a screen between the speedometer and tachometer. This screen, called the Multi-Information Display (MID), is controlled by buttons on the steering wheel. The reset is now a menu-driven process.
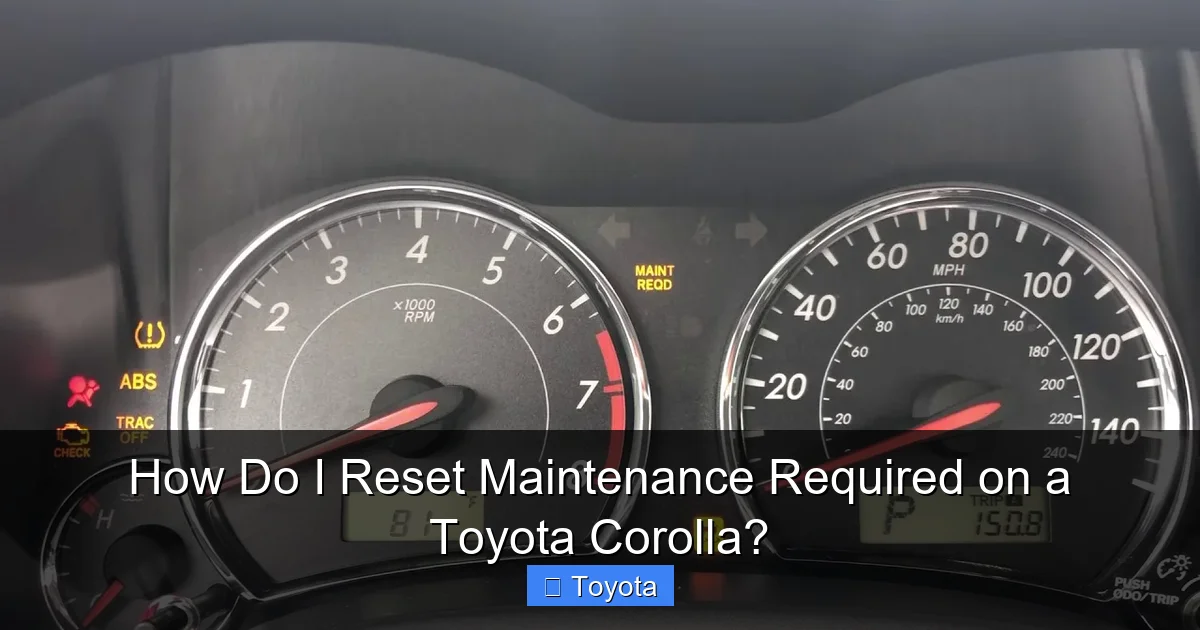
Visual guide about How Do I Reset Maintenance Required on a Toyota Corolla?
Image source: backyardmechanic.org
Navigating the Menu System
Locate the buttons on the left side of your steering wheel. You’ll typically have an “Up/Down” arrow button (often used for scrolling the MID) and a “Menu” or “Set” button. The exact labels vary.
- Turn the ignition to “ON.” The car should be in “Park.” Do not start the engine.
- Use the arrow buttons to cycle the MID. Press the “Up” or “Down” arrow button on the steering wheel until you see a menu option like “Settings,” “Vehicle Settings,” or a wrench icon. On many models, you need to press the button repeatedly until you scroll past the trip meters and fuel economy screens.
- Enter the settings menu. Once you see “Settings” or a gear icon, press and hold the “Menu” or “Set” button (or sometimes just press it) to enter the submenu.
- Find the “Maintenance” or “Service” option. Use the arrow buttons to scroll through the submenu. Look for options like “Maintenance Reset,” “Service Reset,” or “Oil Maintenance.” Select it.
- Confirm the reset. The screen will likely ask “Reset?” or “Sure?” Use the arrow buttons to select “Yes” or “Reset” and press the “Menu/Set” button to confirm.
- Verify the light is off. The maintenance required light on your dash should extinguish immediately. You can now start the car.
Visual Aid: If this sounds confusing, search for “2015 Toyota Corolla reset maintenance light” on YouTube. Watching a 60-second video for your specific model year will make it crystal clear in a way text sometimes can’t.
Method 3: The Fuse Box Reset (The Universal Backup Method)
This method works on virtually any Toyota, regardless of year or dashboard type. It’s a bit more “old school” and involves resetting the car’s computer (ECU) by temporarily removing its power source. Use this if the button methods fail or if your Corolla’s MID is malfunctioning.
Locating and Using the ECU Fuse
Warning: This method will reset other electronic settings as well. Your radio presets, clock, and possibly power window auto-up/down functions may need to be re-learned or reset. It’s harmless but can be a minor inconvenience.
- Open the hood. As mentioned, if you need help, refer to our guide on opening the hood on a Toyota Corolla. Secure the hood prop rod.
- Locate the fuse box. It’s typically a black rectangular box near the battery or on the driver’s side fender well. Look for a diagram on the underside of the lid that shows what each fuse controls.
- Identify the correct fuse. You are looking for a fuse labeled “ECU,” “ECU-B,” “Backup,” or “IG”. It’s usually a 10A or 15A blade-style fuse (the small, colored plastic rectangles). If your diagram is unclear, consult your owner’s manual’s fuse box section. Do not pull the main battery cable.
- Pull the fuse. Use a fuse puller (often provided in the box) or a pair of needle-nose pliers. Grip the fuse firmly and pull straight out.
- Wait and replace. Wait for 10-15 seconds. This ensures the capacitor in the ECU fully discharges. Then, firmly push the exact same fuse back into its slot. Ensure it’s seated properly.
- Close the hood and test. Turn the ignition to “ON.” All dashboard lights will illuminate as part of a self-check. The maintenance required light should be off. Start the engine. You may need to reset your clock and radio.
This method is essentially a soft reboot for your car’s computer. It clears all temporary memory, including the service interval counter. It’s foolproof but has the side effect of clearing other minor settings.
After the Reset: Verification and Best Practices
You’ve pressed the buttons or pulled the fuse. The light is off. You’re done, right? Almost. A few final steps ensure everything is perfect.
Confirming a Successful Reset
Do not just glance at the dash. Perform this check: With the ignition still in the “ON” position (engine off), cycle through all the screens on your MID using the steering wheel buttons. Ensure the maintenance light does not reappear. Then, start the engine and let it idle for 30 seconds. Watch the dash. The light should remain off. If it comes back on immediately or within a few drive cycles, the reset was not successful, or there is an underlying issue with the system (like a faulty odometer button or a glitch in the MID). Try the procedure again. If it persists, move to the fuse method.
Resetting Your Trip Meter and Setting a New Reminder
Now is the perfect time to reset your trip meter to zero. This gives you a rough, manual way to track when your next service is due (e.g., 5,000 miles from now). Use the same “ODO/TRIP” button to reset the “A” or “B” trip meter. More importantly, put the next service date in your phone calendar or a physical planner. Do not rely solely on the car’s reminder. Life happens. A calendar alert that pops up on your phone a week before the interval is a much more reliable backup system.
Documenting the Service
Whether you did the work yourself or took it to a shop, keep the receipt or write down the date and mileage in your owner’s manual’s service record section. This is crucial for warranty claims and for future owners. It also helps you track what was done last time (e.g., “oil change & tire rotation at 85,000 miles”).
Common Mistakes, Troubleshooting, and When to Seek Help
Even with a simple procedure, things can go wrong. Here’s how to handle the most common hiccups.
“The Light Came Back On Immediately!”
This is the most frequent complaint. First, don’t panic. It usually means one of two things: 1) The reset procedure was not performed correctly (timing was off, wrong menu item selected). Try the procedure again, following the steps for your exact model year slowly. 2) The service was not actually completed. Did you change the oil? If you did, did the mechanic forget to reset it? Call them. If you didn’t do the service yet, you must do that before resetting. The light is a symptom of the mileage counter, not the cause.
“The Button/Display Isn’t Responding.”
If your odometer button feels sticky or the MID screen is frozen, the issue might be electrical or mechanical. Try the fuse method. If pulling and replacing the ECU fuse doesn’t reboot the system, you may have a faulty button, a blown fuse for the dash cluster, or a deeper computer glitch. At this point, it’s time to consult a professional. A dealership or reputable independent shop can diagnose whether it’s a simple wiring issue or a failed instrument cluster.
“My Car Has a ‘Service Engine Soon’ Light, Not ‘Maintenance Required.'”
This is critical. A “Service Engine Soon” or “Check Engine” light (usually an engine icon) is a completely different, more serious warning. It indicates the engine computer has detected a fault in the emissions, fuel, or ignition system. It is not reset by the procedures in this article. Resetting a check engine light without fixing the problem is illegal in many areas and will cause the light to return. If you have a check engine light, you must use an OBD2 scanner to read the trouble code and address the underlying issue. Our guide on resetting the check engine light on a Toyota Corolla explains that separate process, which should only be done after repairs.
When to Call a Professional
Seek help if: The maintenance light flashes (some models do this for severe service intervals), the light and other warning lights (like the check engine light) are on simultaneously, none of the reset procedures work after multiple attempts, or you are simply uncomfortable accessing the fuse box. A professional can ensure the job is done correctly and check for any related fault codes that might be inhibiting the reset function.
Conclusion: Your Simple Key to Dashboard Peace
Resetting the maintenance required light on your Toyota Corolla isn’t a mystery—it’s a simple, empowering routine. By understanding that you’re not erasing a problem but acknowledging a completed task, you take full control of your car’s care schedule. Remember the golden rule: service first, reset second. Identify your model year, follow the precise button sequence (odometer for older, steering wheel menu for newer), and keep the fuse box method in your back pocket as a universal failsafe.
Your Corolla is designed for longevity and low-fuss ownership. Part of that ownership is staying on top of these scheduled reminders. A five-minute reset now saves you from potential costly repairs later and keeps your service history clean. So, after your next oil change, don’t just drive away with that wrench icon glaring at you. Take a moment, follow these steps, and enjoy the clean, clear dashboard that signifies a job well done. Your car will thank you with thousands more miles of reliable service.
Frequently Asked Questions
How often does the maintenance required light come on a Toyota Corolla?
It typically illuminates every 5,000 to 10,000 miles, depending on your model year and the specific service interval programmed by Toyota. Always check your owner’s manual for the exact mileage schedule for your vehicle.
Can I reset the maintenance light without changing the oil?
Technically yes, using the methods described, but you should not. The light is a reminder that a specific service is due. Resetting it without performing the work means you will drive with old oil, which can cause engine damage. Always complete the required maintenance first.
What should I do if the maintenance light comes back on right after resetting it?
First, double-check that you performed the correct reset procedure for your model year. If it still returns, it usually means the required service was not actually completed, or there is an electrical issue with the reset button or system. Have a mechanic inspect the vehicle and verify all due services were performed.
Will resetting the maintenance light affect my car’s warranty?
No, resetting the light itself does not affect your warranty. However, failing to perform the scheduled maintenance outlined in your owner’s manual can void certain warranty coverage. Always keep detailed service records to prove you followed the maintenance schedule.
Is the process the same for all Toyota Corolla model years?
No. Pre-2010 models generally use the odometer button method. 2010-2018 models use the steering wheel/dash multi-information display menu. 2019+ models also use the MID but with a slightly different menu path. Always confirm your model year before starting.
Can I drive my Corolla with the maintenance required light on?
Yes, it is not an emergency warning like a check engine light. It’s a reminder that scheduled maintenance is due. You can drive for a short period, but you should schedule the required service (usually an oil change) as soon as possible to maintain your engine’s health and warranty compliance.


