
Common Car Window Tinting Mistakes to Avoid
Contents
- 1 Key Takeaways
- 2 📑 Table of Contents
- 3 Introduction: Why Window Tinting Matters—And Why It’s Easy to Get Wrong
- 4 Mistake #1: Ignoring Local Tinting Laws and Regulations
- 5 Mistake #2: Choosing Price Over Quality
- 6 Mistake #3: Attempting DIY Tinting Without Experience
- 7 Mistake #4: Skipping Proper Window Preparation
- 8 Mistake #5: Choosing the Wrong Type of Tint
- 9 Mistake #6: Neglecting Post-Installation Care
- 10 Conclusion: Invest in Quality, Avoid Regret
- 11 Frequently Asked Questions

Car Cup Holder Expander

Solar Car Battery Maintainer

Car Back Support Cushion

Tire Pressure Monitoring System (TPMS)
Getting your car windows tinted can boost privacy, reduce heat, and enhance style—but only if done right. Many drivers make avoidable mistakes that lead to bubbling, peeling, or even legal trouble. This guide reveals the most common car window tinting mistakes and how to steer clear of them for a flawless, long-lasting finish.
Key Takeaways
- Ignoring local tinting laws: Each state has specific rules about how dark or reflective your tint can be—breaking them can result in fines or forced removal.
- Choosing the cheapest option: Low-cost tints often use poor-quality materials that fade, bubble, or peel within months.
- DIY installation without experience: Without proper tools and technique, DIY jobs often lead to uneven edges, air bubbles, and reduced visibility.
- Neglecting window prep: Dust, grease, or old adhesive left on the glass causes adhesion problems and premature failure.
- Using the wrong tint type: Not all films are created equal—ceramic, carbon, and dyed tints offer different benefits for heat rejection and durability.
- Overlooking aftercare instructions: Washing or rolling down windows too soon after installation can ruin even the best professional job.
- Focusing only on darkness: The darkest tint isn’t always the best—consider heat rejection, UV protection, and clarity for daily driving comfort.
📑 Table of Contents
- Introduction: Why Window Tinting Matters—And Why It’s Easy to Get Wrong
- Mistake #1: Ignoring Local Tinting Laws and Regulations
- Mistake #2: Choosing Price Over Quality
- Mistake #3: Attempting DIY Tinting Without Experience
- Mistake #4: Skipping Proper Window Preparation
- Mistake #5: Choosing the Wrong Type of Tint
- Mistake #6: Neglecting Post-Installation Care
- Conclusion: Invest in Quality, Avoid Regret
Introduction: Why Window Tinting Matters—And Why It’s Easy to Get Wrong
Car window tinting isn’t just about looking cool—it’s a practical upgrade that can improve your driving experience in more ways than one. From reducing glare and blocking harmful UV rays to keeping your cabin cooler and protecting your privacy, quality window film delivers real benefits. But here’s the catch: a poorly done tint job can do more harm than good. It might look uneven, trap heat instead of rejecting it, or even violate local laws and get you pulled over.
Many car owners assume tinting is a simple DIY project or that all tint shops offer the same level of quality. Unfortunately, that’s rarely the case. The market is flooded with low-grade films, inexperienced installers, and misleading claims about performance. Without knowing what to look for—or what to avoid—you could end up wasting money, damaging your windows, or facing legal consequences. That’s why understanding the most common car window tinting mistakes is essential before you book an appointment or grab a roll of film from the auto store.
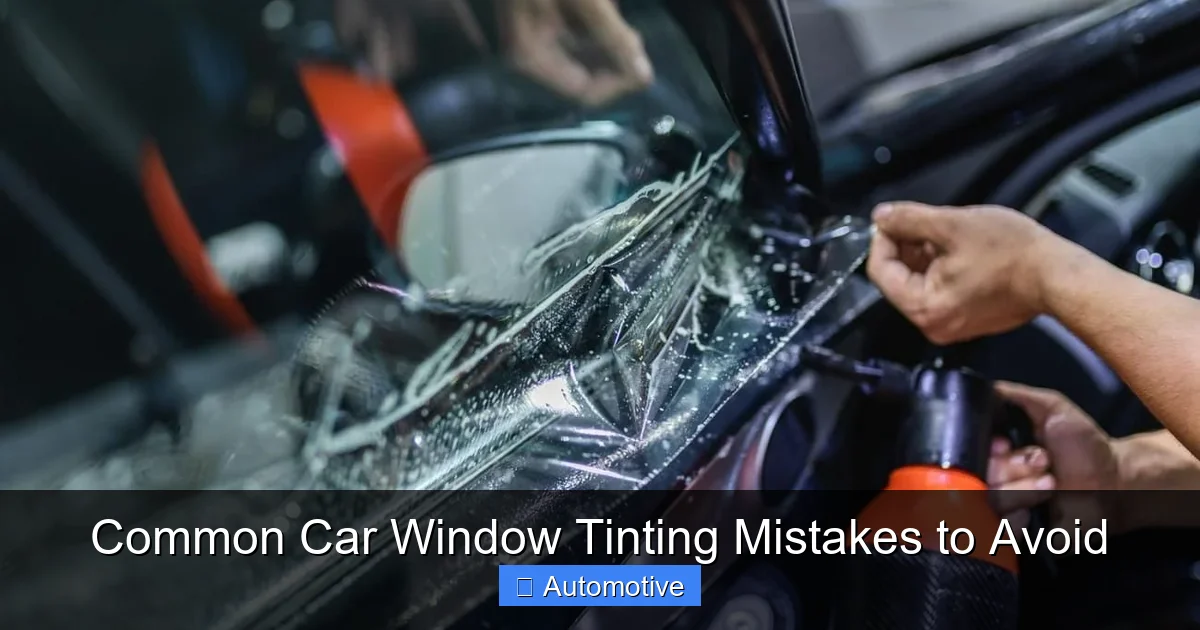
Mistake #1: Ignoring Local Tinting Laws and Regulations
Visual guide about Common Car Window Tinting Mistakes to Avoid
Image source: lirp.cdn-website.com
One of the biggest—and most avoidable—mistakes drivers make is failing to check their state’s window tinting laws before getting their car tinted. Every U.S. state has its own regulations regarding how dark your tint can be, which windows can be tinted, and whether reflective films are allowed. These rules aren’t just suggestions—they’re enforceable by law, and violating them can lead to fines, failed inspections, or even having to remove the tint entirely.
For example, California allows a minimum visible light transmission (VLT) of 70% on the front side windows and windshield, meaning the tint can only block 30% of light. In contrast, states like Pennsylvania allow much darker tints—down to 70% VLT on front side windows and 50% on rear windows and the back windshield. Some states, like Minnesota, prohibit any tint on the front windshield except for a small top strip. Reflective or mirrored films are banned in many states due to safety concerns for law enforcement and other drivers.
The problem? Many drivers assume that because their friend in another state has super dark windows, they can too. Or they buy a pre-tinted car from out of state without realizing it doesn’t comply with local laws. Even reputable shops can make mistakes if they’re not up-to-date on current regulations. That’s why it’s crucial to research your state’s specific rules—or ask your installer to confirm compliance before any film is applied.
How to Stay Legal
Start by visiting your state’s Department of Motor Vehicles (DMV) website or checking resources like the International Window Film Association (IWFA), which maintains a state-by-state guide to tinting laws. Pay close attention to:
– Allowed VLT percentages for each window
– Restrictions on windshield tinting
– Rules about reflective or metallic films
– Whether medical exemptions are available (some states allow darker tints with a doctor’s note)
When choosing a tint shop, ask if they provide legal compliance guarantees. Reputable installers will measure your current windows and recommend films that meet local standards. They should also provide a certificate of compliance upon completion, which can be helpful during vehicle inspections or traffic stops.
Real-World Consequences
Consider this scenario: A driver in Arizona installs 5% tint (nearly black) on all windows because they think it looks sleek and offers maximum privacy. But Arizona law only allows 35% VLT on front side windows. During a routine traffic stop, the officer notices the illegal tint and issues a citation. The driver now faces a fine of $100–$200 and must have the tint removed—costing another $200–$400. Worse, if the film was poorly installed, removing it could leave residue or damage the defroster lines on the rear window.
This isn’t an isolated case. Across the country, thousands of drivers receive tint-related tickets each year—many of which could have been avoided with a quick online search. Don’t let style override safety and legality. Always verify your tint choice against local laws before installation.
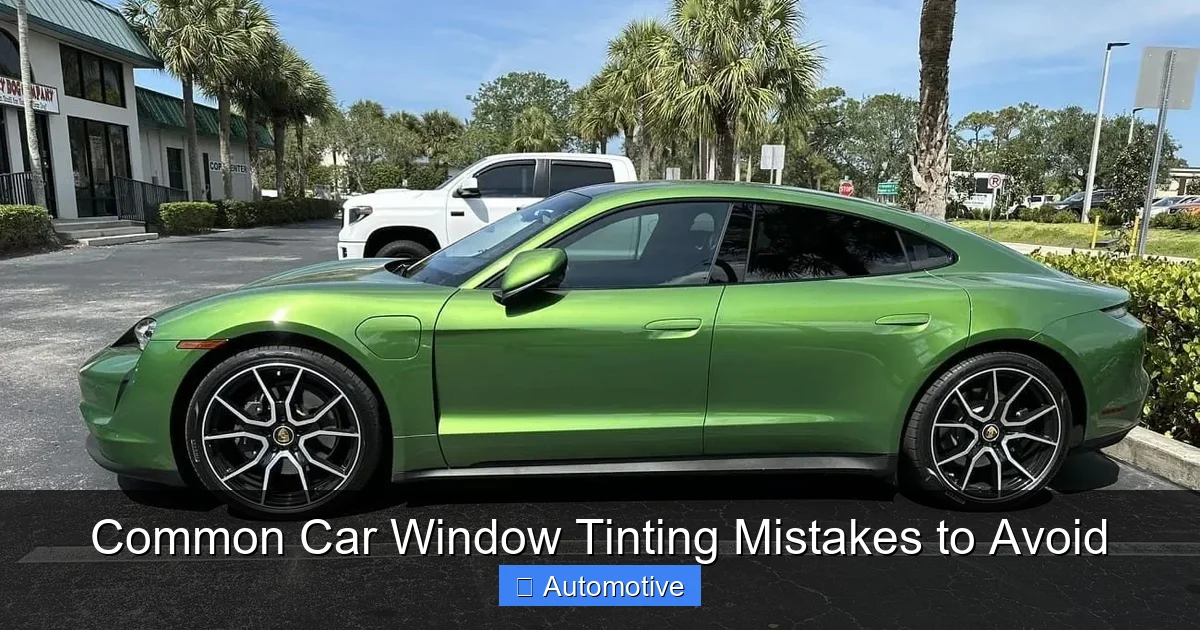
Mistake #2: Choosing Price Over Quality

Visual guide about Common Car Window Tinting Mistakes to Avoid
Image source: windowfilm.com
It’s tempting to go for the cheapest tint job available—especially when you’re on a budget. After all, how different can one tint be from another? Unfortunately, the difference is huge. Low-cost tinting services often use inferior materials that degrade quickly, leading to bubbling, discoloration, and peeling within months. In the long run, paying a little more upfront for quality film and professional installation saves you money, frustration, and the hassle of redoing the job.
Budget tints are typically made from dyed polyester films, which are the least expensive to produce. While they may look fine at first, dyed films absorb heat rather than reflecting it. This means your car’s interior gets hotter, forcing your AC to work harder and increasing fuel consumption. Over time, the dye can fade unevenly, creating a patchy, blotchy appearance—especially on windows exposed to direct sunlight. Worse, some cheap films contain adhesives that break down under heat, causing the film to bubble or lift at the edges.
In contrast, higher-quality films like carbon, ceramic, and metalized tints offer superior performance. Ceramic films, for instance, use nano-ceramic particles to block infrared heat without interfering with radio signals or GPS. They’re more expensive but last longer, reject more heat, and maintain clarity over time. Carbon films provide excellent heat rejection and a matte finish that resists fading. Metalized films use a thin layer of metal to reflect heat and UV rays, offering strong durability and a sleek look.
What You’re Really Paying For
When you pay more for a professional tint job, you’re not just buying film—you’re investing in expertise, precision, and long-term value. A reputable installer will:
– Use high-performance films from trusted brands like 3M, Llumar, or SunTek
– Clean and prep each window thoroughly before application
– Cut the film precisely to avoid gaps or overlaps
– Use heat and pressure tools to eliminate bubbles and ensure adhesion
– Provide a warranty (often 5–10 years) against fading, bubbling, or peeling
Cheap shops may skip steps, rush the process, or use generic films with no warranty. They might also lack proper tools, leading to crooked cuts or poor edge sealing. The result? A tint job that looks amateurish and fails prematurely.
How to Spot a Quality Installer
Don’t judge a shop by its price tag alone. Instead, look for:
– Positive reviews mentioning longevity and clarity
– Clear information about film types and warranties
– A clean, professional workspace
– Willingness to explain the difference between film options
– Proof of certification (e.g., from the IWFA or manufacturer training)
Ask to see samples of their work or photos of completed jobs. A good installer will proudly showcase their craftsmanship. If a shop refuses to provide details or pressures you into the cheapest option, walk away.
Mistake #3: Attempting DIY Tinting Without Experience
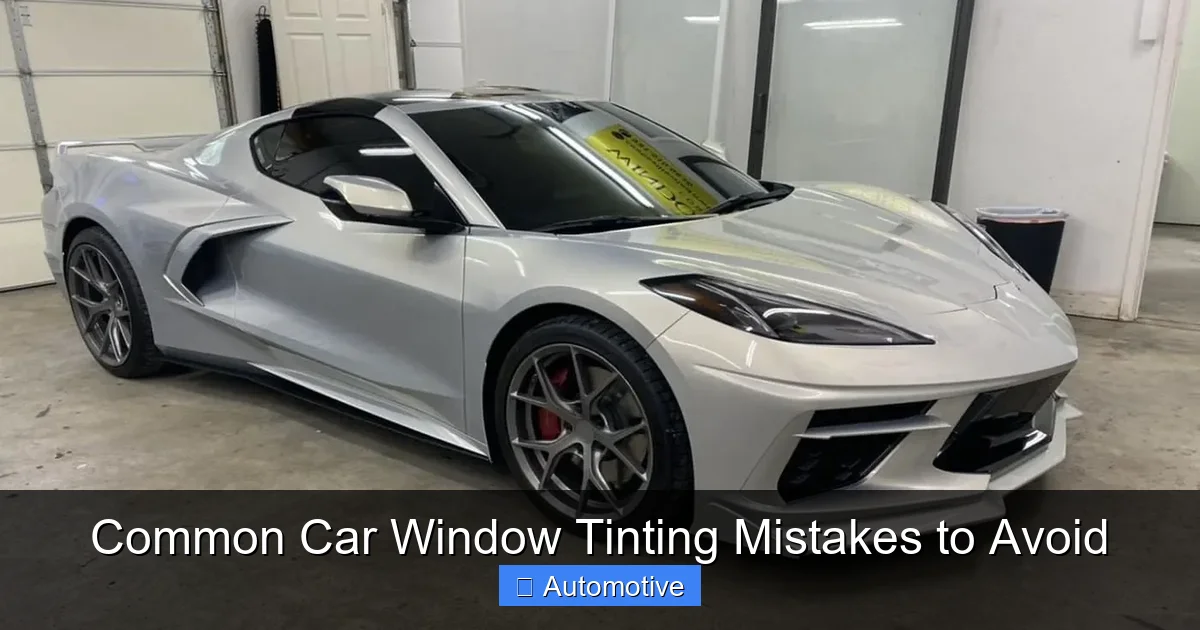
Visual guide about Common Car Window Tinting Mistakes to Avoid
Image source: lirp.cdn-website.com
With countless YouTube tutorials and affordable DIY kits available, it’s no surprise that many car owners try to tint their own windows. On the surface, it seems straightforward: clean the window, spray soapy water, apply the film, squeegee out the bubbles, and let it dry. But in reality, DIY tinting is far more complex—and unforgiving—than it appears. One misstep can ruin the entire job, leaving you with crooked lines, trapped debris, or a film that won’t adhere properly.
The biggest challenge? Working with a flexible, adhesive-backed film on a curved surface. Car windows aren’t flat—they’re contoured, and each window has a unique shape. Cutting the film to fit precisely requires skill, patience, and the right tools. Most DIY kits include pre-cut templates, but these are often generic and don’t account for variations between vehicle models. Even a millimeter off can cause the film to wrinkle or lift at the edges.
Another common issue is contamination. Dust, lint, or grease on the glass will create bumps or bubbles under the film. In a professional shop, installers work in a clean, controlled environment—often using a dust-free booth. At home, even a slight breeze or a pet walking by can introduce particles that ruin the finish. And once the film is applied, it’s nearly impossible to remove without leaving residue or damaging the glass.
The Hidden Costs of DIY
While a DIY kit might cost $50–$100, a professional job typically runs $200–$500 depending on the vehicle and film type. At first glance, DIY seems like a huge savings. But consider the risks:
– Wasted film if you make a mistake
– Potential damage to window seals or defroster lines
– Time spent (most DIY jobs take 4–8 hours for a full car)
– The cost of redoing the job professionally if it fails
Many DIYers end up calling a professional anyway—after spending hours and money on a botched attempt. In some cases, the old film is so damaged that the window must be professionally cleaned or even replaced.
When DIY Might Make Sense
There are rare exceptions where DIY tinting could work—such as tinting a small rear windshield on an older car you don’t plan to keep long-term. But even then, it’s risky. For most drivers, especially those with newer vehicles or high-end cars, the investment in professional installation is well worth it.
If you’re determined to try DIY, at least follow best practices:
– Work in a clean, indoor space with minimal airflow
– Use a high-quality squeegee and razor blades
– Apply a solution of distilled water and a drop of dish soap (no tap water—it leaves minerals)
– Take your time—rushing leads to mistakes
– Watch multiple tutorials and practice on a small window first
But remember: even the most careful DIY job rarely matches the precision of a trained professional.
Mistake #4: Skipping Proper Window Preparation
You wouldn’t paint a wall without cleaning it first—so why skip prep when tinting your windows? Proper surface preparation is the foundation of a successful tint job. Yet, many installers (and DIYers) rush this step, leading to adhesion problems, bubbles, and premature failure. Dust, grease, old adhesive, and even invisible residues can prevent the film from bonding correctly to the glass.
Before any film is applied, each window must be thoroughly cleaned—inside and out. This means removing dirt, fingerprints, and any previous tint residue. Many professionals use a two-step cleaning process: first, a glass cleaner to remove surface grime, followed by an alcohol-based solution to eliminate oils and ensure a pristine surface. They also inspect the window for chips, scratches, or seal damage that could affect the tint.
The Dangers of Contamination
Even a single speck of dust can create a visible bump under the film. Lint from clothing or towels can embed into the adhesive. Grease from hands or cleaning products can cause the film to lift. In humid conditions, moisture can get trapped between the film and glass, leading to fogging or bubbling as it evaporates.
Professional installers use lint-free cloths, specialized cleaning solutions, and often a “tape test” to ensure the surface is spotless. They may also use a steam cleaner to loosen old adhesive or debris in hard-to-reach corners.
Edge Sealing and Defroster Lines
Another critical prep step is protecting the window’s edges and defroster lines (on the rear window). If the film isn’t cut precisely or if adhesive seeps into the defroster grid, it can interfere with heating elements, causing lines to fail. A skilled installer will carefully measure and trim the film to avoid these areas, ensuring full functionality.
Mistake #5: Choosing the Wrong Type of Tint
Not all window films are created equal—and choosing the wrong type can undermine the very benefits you’re seeking. Some drivers focus solely on how dark the tint looks, ignoring factors like heat rejection, UV protection, and signal interference. Others assume all “premium” films are the same, not realizing that ceramic, carbon, and metalized tints serve different purposes.
Understanding Tint Types
– Dyed Film: Least expensive, absorbs heat, prone to fading. Best for basic privacy but offers minimal heat rejection.
– Metalized Film: Contains metal particles that reflect heat and UV rays. Durable and effective, but may interfere with GPS or cell signals.
– Carbon Film: Provides excellent heat rejection and a non-reflective matte finish. Doesn’t interfere with electronics and resists fading.
– Ceramic Film: Top-tier option using nano-ceramic technology. Blocks up to 99% of UV rays and 80% of infrared heat without signal disruption. Ideal for hot climates and luxury vehicles.
Your choice should depend on your priorities. If you live in a sunny area and want maximum cooling, ceramic or carbon film is worth the investment. If you’re on a tight budget and just want privacy, a quality dyed film may suffice—but expect shorter lifespan and less heat control.
Mistake #6: Neglecting Post-Installation Care
Even the best tint job can fail if you don’t follow proper aftercare instructions. Most films require 3–7 days to fully cure, during which time the adhesive continues to bond to the glass. Rolling down windows, washing the car, or touching the film too soon can disrupt this process, leading to peeling, bubbling, or cloudiness.
Do’s and Don’ts After Tinting
– Do wait at least 3–5 days before rolling down windows.
– Do avoid washing the car for at least a week.
– Do use a soft cloth to gently wipe the exterior if needed.
– Don’t use ammonia-based cleaners on the interior—they can degrade the adhesive.
– Don’t apply stickers or decals to the tinted area.
Following these guidelines ensures your tint cures properly and lasts for years.
Conclusion: Invest in Quality, Avoid Regret
Car window tinting is a smart upgrade—but only when done correctly. By avoiding these common mistakes, you’ll enjoy a sleek, functional, and legal tint that enhances your driving experience for years to come. Don’t cut corners on quality, legality, or care. Your car—and your wallet—will thank you.
Frequently Asked Questions
How long does car window tint last?
High-quality tint can last 5–10 years or more, depending on the film type and installation quality. Ceramic and carbon films typically outlast dyed films, which may fade or bubble within 2–3 years.
Can I tint my windshield?
Most states allow a small tinted strip at the top of the windshield, but full windshield tinting is usually prohibited due to visibility and safety concerns. Check your local laws before proceeding.
Will window tint void my car’s warranty?
No, window tinting does not void your vehicle’s manufacturer warranty. However, if the tint damages the glass or defroster, repair costs may not be covered.
Can I remove window tint myself?
Yes, but it’s messy and risky. Use a steam cleaner or heat gun to loosen the adhesive, then peel slowly. Be careful not to scratch the glass or damage defroster lines.
Does darker tint mean better heat rejection?
Not necessarily. Heat rejection depends on the film’s technology, not just darkness. Ceramic films can reject more heat than darker dyed films while maintaining clarity.
Is it legal to have different tint levels on each window?
It depends on your state. Some allow varying VLT percentages across windows, while others require consistency. Always verify local regulations to avoid fines.


