
Common Car Window Tinting Mistakes
Contents
- 1 Key Takeaways
- 2 📑 Table of Contents
- 3 1. Ignoring Local Tinting Laws
- 4 2. Choosing Low-Quality or Inappropriate Film
- 5 3. Attempting DIY Installation Without Experience
- 6 4. Skipping Proper Window Preparation
- 7 5. Using the Wrong Tools or Rushing the Process
- 8 6. Neglecting Post-Installation Care
- 9 7. Overlooking UV and Heat Protection Needs
- 10 Conclusion
- 11 Frequently Asked Questions

Car MP3 Player

Car USB Charger

Fuel Injector Cleaner

Car Windshield Wiper Blades
Getting your car windows tinted seems simple—but one wrong move can lead to bubbling, peeling, or even legal trouble. From choosing the wrong film to ignoring local laws, many drivers make avoidable errors that cost time and money. This guide breaks down the most common car window tinting mistakes and how to dodge them like a pro.
So, you’ve decided to get your car windows tinted. Great choice! Tinting not only gives your vehicle a sleek, modern look but also offers real benefits like reduced glare, increased privacy, and protection from harmful UV rays. It can even help keep your car cooler on scorching summer days. But here’s the thing—while window tinting sounds straightforward, it’s surprisingly easy to mess up.
Many drivers assume that slapping on some film is all it takes. But the reality? A bad tint job can leave your windows looking like a wrinkled plastic bag, full of bubbles, peeling at the edges, or worse—illegal under local laws. And once it’s on, removing or replacing it isn’t cheap or easy. That’s why understanding the common car window tinting mistakes is crucial before you even pick up a squeegee or call a shop.
Whether you’re considering a DIY approach or hiring a professional, knowing what to avoid can save you hundreds of dollars, hours of frustration, and potential run-ins with the law. In this guide, we’ll walk you through the most frequent blunders people make when tinting their car windows—and how to steer clear of them. From choosing the right film to proper aftercare, we’ve got you covered.
Key Takeaways
- Ignoring local tinting laws: Every state has different rules about how dark your tint can be—violating them can result in fines or forced removal.
- Choosing cheap, low-quality film: Budget tints often fade, bubble, or turn purple over time, costing more in the long run.
- DIY installation without experience: Poorly applied tint leads to wrinkles, dust trapped under the film, and premature peeling.
- Not cleaning windows properly before installation: Even tiny dust particles or residue can ruin the finish and adhesion of the tint.
- Using the wrong tools or techniques: Scratched glass, uneven edges, and air bubbles often stem from improper tools or rushed work.
- Neglecting post-installation care: Rolling down windows too soon or using harsh cleaners can damage fresh tint.
- Overlooking UV and heat protection needs: Not all tints offer the same level of UV blocking—choose based on your climate and health concerns.
📑 Table of Contents
- 1. Ignoring Local Tinting Laws
- 2. Choosing Low-Quality or Inappropriate Film
- 3. Attempting DIY Installation Without Experience
- 4. Skipping Proper Window Preparation
- 5. Using the Wrong Tools or Rushing the Process
- 6. Neglecting Post-Installation Care
- 7. Overlooking UV and Heat Protection Needs
- Conclusion
1. Ignoring Local Tinting Laws
One of the biggest—and most avoidable—mistakes drivers make is not checking their state’s window tinting regulations before getting their windows done. Every state in the U.S. (and most countries) has specific laws governing how dark your tint can be, which windows can be tinted, and whether reflective or colored films are allowed. Ignoring these rules might seem harmless at first, but it can lead to serious consequences.
For example, in California, the front side windows must allow more than 70% of light in, meaning only a very light tint is permitted. In contrast, states like Texas allow much darker tints on rear and side windows. Some states even ban tinting on the front windshield entirely, except for a small strip at the top. If you’re caught driving with illegal tint, you could face fines ranging from $50 to over $500, depending on the jurisdiction. In some cases, law enforcement may require you to remove the tint at your own expense.
But it’s not just about avoiding tickets. Illegal tint can also affect your safety. Darker films can reduce visibility at night or in low-light conditions, increasing the risk of accidents. Additionally, if you’re involved in a collision, having non-compliant tint could complicate insurance claims or even be cited as a contributing factor.
So, what’s the solution? Always research your local laws before getting your windows tinted. You can usually find this information on your state’s Department of Motor Vehicles (DMV) website or by calling a local tint shop. Many professional installers are well-versed in local regulations and can recommend legal options that still give you the look and protection you want.
Pro tip: When in doubt, go lighter. It’s easier to add a slightly darker film later (if allowed) than to remove and replace an illegal one. And remember—laws can change, so even if your tint was legal when installed, it might not be now. Stay informed.
2. Choosing Low-Quality or Inappropriate Film

Visual guide about Common Car Window Tinting Mistakes
Image source: lirp.cdn-website.com
Not all window tint films are created equal. One of the most common car window tinting mistakes is opting for the cheapest film available without considering its quality, durability, or performance. While it’s tempting to save money upfront, low-grade tint can cost you more in the long run—both financially and aesthetically.
Cheap dyed films, for instance, are prone to fading, bubbling, and turning purple over time. They often lack the advanced technology found in higher-end options like ceramic or carbon films, which offer superior heat rejection, UV protection, and color stability. Dyed films absorb heat rather than reflecting it, which can increase the temperature inside your car and put extra strain on your AC system.
Then there’s the issue of clarity and visibility. Poor-quality films may have a hazy or distorted appearance, especially when viewed from certain angles. This not only looks unprofessional but can also impair your ability to see clearly while driving—particularly at night or in rain.
Another factor to consider is the type of film that best suits your needs. Are you looking for maximum heat reduction? Do you live in a sunny climate and want strong UV protection? Or are you primarily concerned with privacy and aesthetics? Different films serve different purposes:
– Dyed film: Budget-friendly, reduces glare, but offers minimal heat rejection and fades quickly.
– Metalized film: Contains tiny metallic particles that reflect heat and UV rays, offering better durability and performance.
– Carbon film: Non-reflective, blocks infrared heat, and resists fading—great for a sleek, matte finish.
– Ceramic film: Top-tier option with excellent heat rejection, UV protection, and clarity. Ideal for hot climates and long-term use.
Investing in a higher-quality film may cost more initially, but it pays off in longevity, performance, and appearance. A good rule of thumb: if a tint shop offers a “deal” that seems too good to be true, it probably is. Ask about the brand, warranty, and expected lifespan of the film. Reputable installers will be transparent and happy to explain your options.
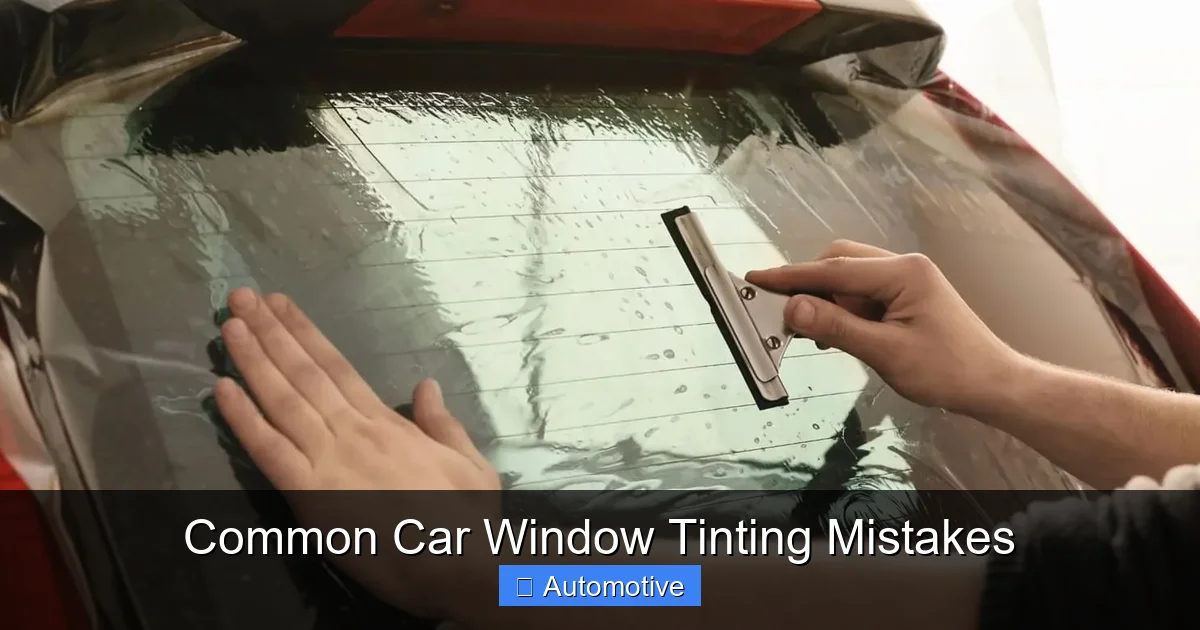
3. Attempting DIY Installation Without Experience
Visual guide about Common Car Window Tinting Mistakes
Image source: usfilmcrew.com
The allure of saving money by doing it yourself is strong—especially when professional tinting can cost anywhere from $150 to $500 or more, depending on the vehicle and film type. But unless you’ve done it before or have steady hands and patience, DIY window tinting is one of the riskiest car window tinting mistakes you can make.
Window tinting is a precision craft. It requires clean conditions, the right tools, and a methodical approach. Even minor mistakes—like a single dust particle under the film or a misaligned edge—can ruin the entire job. And unlike painting or waxing, you can’t easily “touch up” a bad tint job. Once the film is applied and dried, it’s nearly impossible to remove without leaving residue or damaging the glass.
Common DIY pitfalls include:
– Bubbles and creases: These happen when the film isn’t smoothed out properly with a squeegee. Air gets trapped, creating unsightly bumps that don’t go away.
– Dust and debris: No matter how clean you think your workspace is, dust is everywhere. Even a speck can create a permanent bump under the film.
– Cutting errors: Measuring and cutting the film to fit curved windows is tricky. Too much or too little can lead to gaps or overlapping edges.
– Improper adhesion: If the glass isn’t cleaned thoroughly or the film isn’t applied with enough pressure, it may start peeling within days.
And let’s not forget the time investment. A professional can tint a car in 2–4 hours. For a first-time DIYer, it could take an entire weekend—and still not look right.
That said, if you’re determined to try it yourself, preparation is key. Work in a dust-free, climate-controlled environment (like a garage). Use a high-quality tint kit with pre-cut films if available. Watch detailed tutorial videos, and practice on a small, less visible window first. But honestly? For most people, the peace of mind and professional results from a certified installer are worth the extra cost.
4. Skipping Proper Window Preparation
Visual guide about Common Car Window Tinting Mistakes
Image source: lirp.cdn-website.com
You might think cleaning your windows is just a quick wipe-down with glass cleaner—but when it comes to tinting, preparation is everything. One of the most overlooked car window tinting mistakes is failing to properly clean and prepare the glass before applying the film. Even the tiniest bit of dirt, grease, or old adhesive can prevent the tint from adhering correctly, leading to bubbles, peeling, or a cloudy appearance.
Professional installers spend a significant amount of time on this step because they know it’s the foundation of a flawless finish. Here’s what proper preparation involves:
Deep Cleaning the Glass
Start by thoroughly washing the interior and exterior of the windows with a high-quality glass cleaner and a microfiber cloth. Avoid using ammonia-based cleaners if you’re applying ceramic or metalized films, as they can degrade the film over time. Instead, opt for a pH-neutral cleaner.
But washing isn’t enough. You also need to remove any existing residue, such as old tint, stickers, or glue. Use a razor blade (carefully, to avoid scratching the glass) or a specialized adhesive remover. Scrub gently but thoroughly, especially around the edges where buildup is common.
Using a Lint-Free Environment
Dust is the enemy of a smooth tint application. Even if your windows look clean, microscopic particles can float in the air and settle on the glass during installation. That’s why pros often use a “clean room” setup—spraying the interior with water to trap dust, then using a tack cloth to pick up any remaining particles.
If you’re doing it yourself, try to work in the cleanest, most enclosed space possible. Turn off fans, close windows and doors, and avoid working on windy days. Some DIYers even use a spray bottle of soapy water to mist the glass, which helps the film slide into place and traps dust.
Drying and Final Inspection
Once the glass is clean, dry it completely with a lint-free cloth. Then, inspect it under bright light to spot any streaks, smudges, or leftover debris. It’s better to spend an extra 10 minutes here than to ruin the entire job later.
Remember: the cleaner the glass, the better the bond. Skipping this step is like building a house on a shaky foundation—it might look okay at first, but it won’t last.
5. Using the Wrong Tools or Rushing the Process
Even with the best film and clean windows, using the wrong tools or rushing through the installation can lead to disaster. Window tinting requires specific equipment and a patient, methodical approach. One of the most common car window tinting mistakes is trying to cut corners with household items or skipping essential steps to save time.
Essential Tools for a Professional Finish
Here’s what you’ll need for a proper tint job:
– High-quality squeegee: A soft, flexible squeegee helps remove air and water without scratching the film.
– Razor blades: For trimming excess film and cleaning hard-to-reach areas.
– Spray bottle with soapy water: A mix of a few drops of dish soap and water helps the film slide into place during application.
– Microfiber cloths: Lint-free and absorbent for cleaning and drying.
– Heat gun or hair dryer: Used to shrink and conform the film to curved windows.
– Tint application solution: Some pros use a specialized slip solution to aid in positioning.
Using a regular towel, paper towels, or a stiff squeegee can scratch the film or leave lint behind. And trying to apply tint without a heat gun on curved rear windows often results in wrinkles or gaps.
The Danger of Rushing
Tinting takes time—especially if you want it done right. Professionals often spend 30 minutes or more per window, carefully aligning, smoothing, and trimming the film. Rushing leads to mistakes: misaligned edges, trapped air, or uneven pressure.
For example, if you don’t allow enough time for the film to dry and cure (usually 3–7 days), you might be tempted to roll down your windows too soon. But doing so can cause the film to shift or peel at the edges. Similarly, using a hair dryer on high heat too aggressively can warp or bubble the film.
Patience is key. If you’re doing it yourself, set aside a full day—don’t try to squeeze it in between errands. And if you’re hiring someone, ask about their process. A reputable installer won’t rush, and they’ll explain how long you should wait before rolling down windows or washing the car.
6. Neglecting Post-Installation Care
Congratulations—you’ve got your new tint! But the job isn’t over yet. One of the most overlooked car window tinting mistakes is failing to care for the film properly after installation. Fresh tint needs time to cure and adhere fully to the glass, and how you treat it in the first week can determine its lifespan.
Don’t Roll Down Your Windows
For the first 3 to 7 days (depending on climate and film type), avoid rolling down your windows. The adhesive needs time to bond completely, and moving the glass can cause the film to lift or shift. This is especially important for rear windows, which often have defrosters that generate heat and can accelerate curing—but also increase the risk of peeling if disturbed too soon.
Avoid Harsh Cleaners
Once you can clean your windows again, use only ammonia-free glass cleaners. Ammonia can break down the adhesive and cause the film to bubble or peel over time. Stick to mild, pH-neutral cleaners and soft microfiber cloths. Avoid abrasive sponges or paper towels, which can scratch the surface.
Be Gentle with Edges
The edges of the tint are the most vulnerable. Avoid slamming doors or using window cranks aggressively, as this can lift the film. If you notice any lifting, contact your installer immediately—many offer warranties that cover edge lifting or bubbling if reported early.
Regular Maintenance
Even after curing, your tint needs care. Clean your windows regularly to prevent buildup of dirt, grime, or hard water spots. Inspect the edges periodically for signs of peeling or bubbling. With proper maintenance, high-quality tint can last 5–10 years or more.
7. Overlooking UV and Heat Protection Needs
Finally, one of the most strategic car window tinting mistakes is not considering your specific needs when choosing a film. Tinting isn’t just about looks—it’s about functionality. If you live in a hot, sunny climate, UV and heat protection should be a top priority. But if you’re mainly concerned with privacy or reducing glare, your needs might be different.
Understanding UV Protection
Prolonged exposure to UV rays doesn’t just fade your dashboard and seats—it can also increase your risk of skin cancer and premature aging. High-quality tint films can block up to 99% of harmful UV rays, offering a crucial layer of protection for you and your passengers. Look for films with a high UV rejection rating (usually listed as a percentage).
Heat Rejection Matters
In summer, your car can become an oven. Films with infrared (IR) rejection technology can significantly reduce interior temperatures by blocking heat from the sun. Ceramic and carbon films excel in this area, reflecting heat rather than absorbing it. This not only keeps you comfortable but also reduces the load on your air conditioning, improving fuel efficiency.
Balancing Aesthetics and Performance
It’s easy to get caught up in how dark or shiny the tint looks. But remember: the best tint is one that meets your practical needs. A slightly lighter ceramic film might offer better heat rejection and clarity than a very dark dyed film. Don’t sacrifice performance for appearance.
Ask your installer about the film’s specifications: UV rejection, IR rejection, visible light transmission (VLT), and warranty. A good shop will help you find the right balance for your lifestyle and climate.
Conclusion
Getting your car windows tinted can be a smart upgrade—but only if you avoid the common pitfalls. From ignoring local laws to choosing the wrong film or rushing the installation, small mistakes can lead to big problems. The key is to do your research, invest in quality materials, and either hire a skilled professional or prepare thoroughly if going the DIY route.
Remember, window tinting is more than just a cosmetic change. It’s about comfort, safety, and long-term value. By steering clear of these common car window tinting mistakes, you’ll enjoy a sleek, legal, and durable finish that enhances your driving experience for years to come.
So before you book that appointment or buy that kit, take a moment to think it through. Your car—and your wallet—will thank you.
Frequently Asked Questions
Can I tint my car windows myself?
Yes, but it’s not recommended unless you have experience. DIY tinting often leads to bubbles, wrinkles, and peeling due to improper tools or technique. For best results, hire a professional.
How long does car window tint last?
High-quality tint can last 5–10 years or more with proper care. Cheaper films may fade, bubble, or peel within 1–3 years.
Is it legal to tint my front windshield?
It depends on your state. Most states allow a small tint strip at the top of the windshield, but full tinting is often prohibited. Check your local DMV regulations.
Can I wash my car after tinting?
Wait at least 3–7 days before washing your car, especially the windows. Avoid high-pressure sprays near the edges to prevent peeling.
Why is my tint turning purple?
Purple discoloration is a sign of low-quality dyed film breaking down under UV exposure. Upgrade to a ceramic or carbon film for better color stability.
What’s the best type of tint for hot climates?
Ceramic and carbon films are ideal for hot climates because they offer superior heat and UV rejection without darkening the windows too much.


