CBZ Xtreme Disc Brake Kit: Upgrade Now!
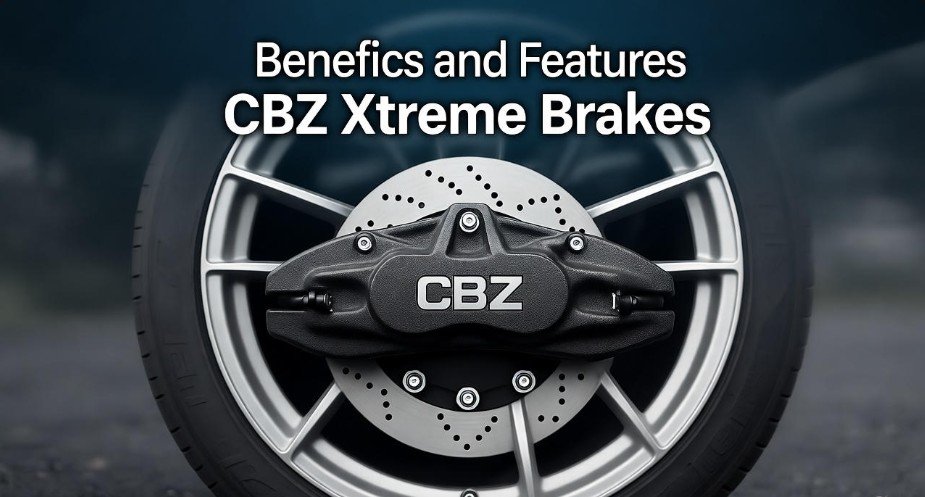
Upgrade your CBZ Xtreme with a disc brake kit now for significantly improved stopping power, enhanced safety, and a sportier ride. This guide makes the process simple for any owner.
In This Article
- 1 Key Takeaways
- 2 Why Upgrade Your CBZ Xtreme Brakes?
- 3 Understanding Disc Brake Kits
- 4 Benefits of a CBZ Xtreme Disc Brake Kit
- 5 Choosing the Right CBZ Xtreme Disc Brake Kit
- 6 Tools and Materials Needed for Installation
- 7 Step-by-Step Installation Guide
- 8 Maintenance for Longevity
- 9 Troubleshooting Common Issues
- 10 FAQ: CBZ Xtreme Disc Brake Kit Upgrade
- 10.1 Q1: Is it difficult to install a CBZ Xtreme disc brake kit myself?
- 10.2 Q2: Will a disc brake kit fit my stock CBZ Xtreme wheels?
- 10.3 Q3: How much does a CBZ Xtreme disc brake kit typically cost?
- 10.4 Q4: Do I need to change my master cylinder when upgrading?
- 10.5 Q5: How often should I change my brake fluid?
- 10.6 Q6: Can I use a disc brake kit designed for another bike on my CBZ Xtreme?
- 10.7 Q7: What’s the difference between sintered and organic brake pads?
- 11 Conclusion
Key Takeaways
- Boost stopping power with a CBZ Xtreme disc brake kit.
- Install easily for immediate safety improvements.
- Experience a sportier, more controlled ride.
- Choose the right kit for your needs.
- Understand basic maintenance for longevity.
Is your bike feeling a little sluggish when it comes to stopping? If you own a Honda CBZ Xtreme, you know it’s a bike with spirit. But even the best machines can benefit from an upgrade. The braking system is arguably the most critical safety feature on any motorcycle, and upgrading to a disc brake kit can make a world of difference. Many riders find themselves wondering about the best way to enhance their bike’s performance and safety. This is where a CBZ Xtreme disc brake kit comes in, offering a significant leap in stopping capability. We’re here to demystify the process and show you exactly how to make this smart upgrade, ensuring you ride with more confidence and control. Let’s get started on making your CBZ Xtreme stop as powerfully as it goes!
Why Upgrade Your CBZ Xtreme Brakes?
Your Honda CBZ Xtreme is a beloved machine, known for its sporty design and performance. However, as bikes age or if you’re pushing your riding further, the original braking system might start to feel inadequate. Drum brakes, often found on older or entry-level models, simply can’t match the performance of disc brakes, especially under demanding conditions. A CBZ Xtreme disc brake kit isn’t just about aesthetics; it’s about tangible improvements to your riding experience and, most importantly, your safety.
Think about those sudden stops, emergency maneuvers, or even just riding in heavy rain. In these situations, superior braking is not a luxury, it’s a necessity. Disc brakes offer more consistent and powerful stopping force compared to drum brakes. They dissipate heat more effectively, reducing the risk of brake fade – that dangerous loss of braking power that can occur when brakes overheat. For riders in the USA, where road conditions and traffic can be unpredictable, having reliable and responsive brakes is paramount. This upgrade ensures your CBZ Xtreme can stop on a dime, giving you peace of mind on every journey.
Understanding Disc Brake Kits
Before diving into the installation, let’s understand what makes up a typical CBZ Xtreme disc brake kit. These kits are designed to replace your existing drum brake setup with a more advanced disc braking system. The core components usually include:
- Brake Disc (Rotor): This is the shiny metal plate that attaches to your wheel hub. When you apply the brakes, the brake pads clamp onto this rotor.
- Brake Caliper: This is the mechanism that houses the brake pads and squeezes them against the disc. It’s typically mounted to the fork or swingarm.
- Brake Pads: These are the friction material that makes contact with the disc. They are crucial for generating the stopping force. Kits often come with standard pads, but performance-oriented options are available.
- Master Cylinder and Lever: For the front brake, this is usually integrated into your handlebar controls. For the rear, it might be a separate unit. It converts your lever or pedal input into hydraulic pressure.
- Brake Lines (Hoses): These carry the hydraulic fluid from the master cylinder to the caliper. Good quality lines ensure efficient pressure transfer.
- Mounting Hardware: Bolts, brackets, and other pieces needed to attach the caliper and disc securely.
Some kits are designed as direct bolt-on replacements, simplifying the installation process significantly. Others might require minor modifications. It’s essential to choose a kit specifically designed for the Honda CBZ Xtreme to ensure proper fitment and function. Reputable brands often provide detailed installation manuals, which are invaluable for a smooth DIY process.
Benefits of a CBZ Xtreme Disc Brake Kit
Upgrading to a disc brake kit for your CBZ Xtreme brings a host of advantages that enhance both the riding experience and safety. Here’s a breakdown of the key benefits:
Enhanced Stopping Power
This is the most significant advantage. Disc brakes offer a much higher coefficient of friction, meaning they can generate more stopping force with less effort. This translates to shorter braking distances, a crucial factor in avoiding accidents. Whether you’re navigating city traffic or descending a steep hill, you’ll feel a noticeable difference in how quickly and effectively your bike slows down.
Improved Heat Dissipation
Drum brakes tend to trap heat, leading to brake fade. Disc brakes, with their exposed rotors, are much better at dissipating heat. This means consistent braking performance, even during prolonged use, such as on winding mountain roads or during spirited riding. This is particularly important for riders in warmer climates across the USA.
Better Wet Weather Performance
Water can significantly reduce the effectiveness of drum brakes. Disc brake rotors, however, tend to shed water more effectively. The brake pads can quickly wipe away moisture, allowing for more reliable braking even in rainy conditions. This increased confidence in adverse weather is a major safety plus.
Superior Feel and Modulation
Disc brake systems, especially those using hydraulic actuation, offer a more refined feel at the lever. You can feel precisely how much braking force you’re applying, allowing for smoother deceleration and better control. This finer modulation is invaluable for advanced riding techniques and everyday riding alike.
Sportier Aesthetics
Let’s be honest, disc brakes look great! The visible rotor and caliper add a modern, performance-oriented look to your CBZ Xtreme, enhancing its overall appeal. It’s a visual cue that suggests an upgraded, capable machine.
Increased Resale Value
A well-maintained motorcycle with desirable upgrades like a disc brake system can command a higher resale value. Potential buyers often recognize the safety and performance benefits, making it a worthwhile investment.
Choosing the Right CBZ Xtreme Disc Brake Kit
With various options available, selecting the right CBZ Xtreme disc brake kit is crucial. Consider these factors:
Compatibility
Ensure the kit is specifically designed for your Honda CBZ Xtreme model and year. Direct bolt-on kits are ideal for beginners. Check if it’s for the front wheel, rear wheel, or both.
Brand Reputation
Opt for reputable brands known for quality and reliability in the motorcycle aftermarket. Brands like Brembo, EBC Brakes, NGK, or specialized aftermarket parts manufacturers often offer high-quality solutions.
Kit Contents
Verify what’s included. Does it have everything needed for installation? Some kits might only include the caliper and rotor, requiring you to source other components separately. A complete kit is generally preferred for ease of installation.
Material Quality
Look for kits with durable materials. Stainless steel rotors are common for their corrosion resistance and longevity. High-performance brake pads can also offer significant improvements.
Budget
Disc brake kits can range in price. Set a budget beforehand, but remember that investing in quality braking components is an investment in your safety. Sometimes, a slightly more expensive, high-quality kit will last longer and perform better.
Installation Requirements
Some kits are straightforward bolt-ons, while others might require minor modifications. If you’re a beginner, prioritize kits that require little to no modification.
For a comprehensive list of parts and their functions, consult official motorcycle repair manuals or reliable automotive resources. For instance, resources like the National Highway Traffic Safety Administration (NHTSA) offer general guidelines on vehicle equipment, which can inform your understanding of brake system importance.
Tools and Materials Needed for Installation
Before you begin, gather all the necessary tools and materials to ensure a smooth and efficient installation of your CBZ Xtreme disc brake kit. Having everything on hand will prevent frustration and potential delays.
Essential Tools:
- Socket wrench set (metric sizes)
- Wrench set (metric sizes)
- Torque wrench (crucial for proper tightening of critical bolts)
- Allen wrenches (hex keys)
- Pliers
- Screwdrivers (Phillips and flathead)
- Brake cleaner spray
- Clean rags or shop towels
- Gloves (to keep hands clean and protect from brake fluid)
- Safety glasses
Brake System Specific Items:
- New CBZ Xtreme disc brake kit (ensure all parts are present)
- New DOT 3 or DOT 4 brake fluid (as recommended by the kit manufacturer or your bike’s manual)
- Bleeder kit (syringe or vacuum bleeder can make bleeding easier)
- Container for old brake fluid
It’s always a good idea to consult the specific instructions that come with your chosen disc brake kit, as they may recommend specialized tools or techniques. If you’re unsure about using any of these tools, particularly the torque wrench, seeking advice from a professional mechanic is recommended.
Step-by-Step Installation Guide
Installing a CBZ Xtreme disc brake kit can be a rewarding DIY project for those with some mechanical aptitude. Always prioritize safety and double-check every step. If at any point you feel unsure, consult a professional mechanic.
Step 1: Preparation and Safety
Park your motorcycle on a level surface. Engage the parking brake or use wheel chocks to prevent rolling. Wear safety glasses and gloves. It’s often easier to work with the wheel removed, so you might need a motorcycle stand to lift the bike securely.
Step 2: Remove Old Brake Components
If you are replacing a drum brake, you’ll need to remove the wheel and the old drum brake assembly. If you are upgrading from an existing disc brake, you’ll need to remove the old caliper and rotor. Carefully loosen and remove the bolts holding the caliper in place. Then, remove the bolts holding the brake disc to the wheel hub. Be mindful of brake fluid – it can damage paint, so use rags to protect the surrounding areas.
Step 3: Install the New Brake Disc
Clean the wheel hub thoroughly. Mount the new brake disc onto the hub using the provided hardware. Ensure it sits flush and correctly aligned. Tighten the bolts to the manufacturer’s specified torque using a torque wrench. Overtightening or undertightening can lead to serious issues.
Step 4: Mount the New Brake Caliper
Attach the new caliper to its designated mounting point on the fork or swingarm. Again, use the correct bolts and tighten them to the specified torque. Ensure the caliper aligns properly with the brake disc. There should be a small, consistent gap between the disc and the caliper when the brake is not applied.
Step 5: Connect Brake Lines and Bleed the System
Connect the new brake lines from the master cylinder to the caliper. Ensure all connections are tight and leak-free. Now comes the critical step of bleeding the brake system to remove any air. This process involves pumping brake fluid through the system until no air bubbles are visible in the fluid lines. The specific bleeding procedure can vary, so refer to your kit’s manual or a reliable guide for your motorcycle. Improper bleeding will result in spongy brakes and reduced stopping power.
Bleeding Tip: A common method is the “pump and hold” technique: pump the brake lever several times, hold it down, and then open the bleeder screw on the caliper to allow fluid and air to escape. Close the screw before releasing the lever. Repeat until no air bubbles appear.
Step 6: Final Checks and Test Ride
Once the system is bled, double-check all bolts and connections for tightness. Ensure the brake lever feels firm and responsive. Before heading out on a full ride, perform a slow-speed test ride in a safe, open area. Gently apply the brakes to feel their performance. Listen for any unusual noises and check for any leaks. Gradually increase your speed and braking intensity as you gain confidence in the new system.
Pro Tip: Always bed in new brake pads and rotors according to the manufacturer’s recommendations. This typically involves a series of moderate stops from increasing speeds to properly seat the pad material against the rotor for optimal performance.
Maintenance for Longevity
To ensure your new CBZ Xtreme disc brake kit provides reliable performance for years to come, regular maintenance is key. Just like any other part of your motorcycle, proper care will extend its lifespan and maintain its effectiveness.
Regular Inspections:
- Brake Fluid Level: Check the brake fluid reservoir regularly. Low fluid levels can indicate leaks or worn pads. Top up with the correct type of brake fluid (DOT 3 or DOT 4) as specified by the kit manufacturer.
- Brake Pad Wear: Visually inspect your brake pads for wear. Most pads have wear indicator marks. If the pad material is getting thin, it’s time for a replacement.
- Rotor Condition: Check the brake disc for any signs of damage, deep scoring, or excessive wear. Warped rotors can cause pulsating sensations when braking.
- Brake Line Integrity: Inspect brake lines for cracks, leaks, or abrasions. Damaged lines can lead to brake failure.
Cleaning:
Regularly clean your brake components with a motorcycle-specific brake cleaner. This helps remove dust, dirt, and road grime that can impair performance and accelerate wear. Pay attention to cleaning around the caliper and between the spokes of the wheel.
Brake Fluid Changes:
Brake fluid absorbs moisture over time, which can lead to corrosion and reduced braking performance. It’s recommended to flush and replace your brake fluid every one to two years, or as per the manufacturer’s recommendations. This is a good time to bleed the system as well.
Professional Servicing:
Even with regular DIY checks, it’s wise to have your braking system inspected by a professional mechanic annually. They can identify issues that might be missed and perform more in-depth maintenance tasks.
Troubleshooting Common Issues
Even with the best components, you might encounter minor issues after installation or during regular use. Here are some common problems and how to address them:
Spongy Brake Lever
Cause: Air in the brake lines, low brake fluid, or a faulty master cylinder.
Solution: Re-bleed the brake system thoroughly. Check the fluid level and top up if necessary. Inspect the master cylinder for leaks or damage.
Brake Squeal
Cause: Glazed brake pads, loose mounting hardware, or dirt/debris caught between the pad and rotor.
Solution: Clean the brake components. Check that all bolts are torqued correctly. Sometimes, a light sanding of the pad surface or the use of anti-squeal compounds can help. If persistent, consider replacing the pads.
Brake Fade
Cause: Overheating, worn-out pads, old brake fluid.
Solution: Ensure you have adequate cooling for the disc. Replace worn pads. Flush and replace old brake fluid with fresh fluid.
Brake Lever Pulsating
Cause: Warped brake rotor or uneven pad material transfer.
Solution: Inspect the rotor for warpage. If warped, it needs replacement. Ensure the rotor is properly seated and tightened.
Brake Not Engaging Fully
Cause: Air in the lines, extremely worn pads, or a faulty caliper piston.
Solution: Bleed the system. Inspect pads for wear and replace if necessary. Check the caliper for seized or damaged pistons.
If you are unable to resolve an issue, or if the problem involves critical safety components like brakes, it is always best to consult a qualified motorcycle mechanic. For guidance on vehicle braking systems, you can refer to resources from the Federal Motor Carrier Safety Administration (FMCSA), which outlines safety standards for braking systems in commercial vehicles, highlighting the importance of well-maintained brakes for all road users.
FAQ: CBZ Xtreme Disc Brake Kit Upgrade
Q1: Is it difficult to install a CBZ Xtreme disc brake kit myself?
A1: For some riders, yes. It requires basic mechanical skills and the right tools. If you’re comfortable working on your bike, it’s manageable. However, if you’re new to motorcycle maintenance, it’s best to have a professional install it.
Q2: Will a disc brake kit fit my stock CBZ Xtreme wheels?
A2: Most kits are designed to be compatible with stock wheels. However, always confirm the specific compatibility of the kit you are purchasing with your CBZ Xtreme’s wheel hub and suspension components.
Q3: How much does a CBZ Xtreme disc brake kit typically cost?
A3: Prices vary widely depending on the brand, quality, and completeness of the kit. You can expect to pay anywhere from $100 to $400 or more for a good quality kit. Installation costs at a shop will be additional.
Q4: Do I need to change my master cylinder when upgrading?
A4: Often, if you’re upgrading from a drum brake, you’ll need to install a new master cylinder and lever assembly. If you’re upgrading an existing disc brake, the kit might be designed to work with your current master cylinder, but check the kit’s specifications.
Q5: How often should I change my brake fluid?
A5: It is generally recommended to change your brake fluid every 1-2 years or every 10,000-20,000 miles, as brake fluid degrades over time and absorbs moisture, reducing its effectiveness and potentially corroding components.
Q6: Can I use a disc brake kit designed for another bike on my CBZ Xtreme?
A6: It’s highly discouraged. Using a kit not specifically designed for the CBZ Xtreme can lead to improper fitment, compromised performance, and safety hazards. Always choose a kit made for your specific motorcycle model.
Q7: What’s the difference between sintered and organic brake pads?
A7: Organic pads are softer, quieter, and easier on the rotor but wear faster and have less heat resistance. Sintered pads are made of metallic compounds, offering much better durability and heat resistance, ideal for performance riding, but can be noisier and wear rotors faster.
Conclusion
Upgrading your Honda CBZ Xtreme with a disc brake kit is one of the most impactful improvements you can make. It directly enhances your safety by providing superior stopping power, better control in various conditions, and reduced risk of brake fade. The installation, while requiring attention to detail, is achievable for many DIY enthusiasts, and the benefits far outweigh the effort or cost. By choosing the right kit, following the installation steps carefully, and committing to regular maintenance, you’ll ensure your CBZ Xtreme performs at its peak. Embrace this upgrade and ride with newfound confidence, knowing your machine stops as brilliantly as it accelerates.


![Georgia Window Tint Laws [Updated 2025]: A Complete Guide to Stay Legal and Protected 5 Georgia Window Tint Laws [Updated 2025] A Complete Guide to Stay Legal and Protected](https://aautomotives.com/wp-content/uploads/2025/10/Georgia-Window-Tint-Laws-Updated-2025-A-Complete-Guide-to-Stay-Legal-and-Protected-768x408.jpg)
