Bmw 5 Series Headlights: 5 Upgrades
Upgrade your BMW 5 Series headlights with 5 essential modifications for enhanced visibility, modern aesthetics, and improved safety. Discover simple yet impactful transformations to make your sedan shine brighter.
Key Takeaways
- Boost nighttime driving with brighter LED headlight bulbs.
- Enhance safety and style with updated Xenon or Laser headlights.
- Improve road illumination with projector lens upgrades.
- Personalize your BMW with dynamic sequential turn signals.
- Ensure longevity with professional headlight restoration and sealing.
Your BMW 5 Series is a masterpiece of German engineering, blending performance, luxury, and advanced technology. Its distinctive design wouldn’t be complete without its iconic headlights. However, over time, even the best headlights can dim or become outdated, impacting both your car’s appearance and your nighttime visibility. If you’re looking to elevate your driving experience, improving your BMW 5 Series headlights is a fantastic place to start. You might be wondering what options are available and if they’re complex to install. This guide will walk you through five impactful upgrades that are surprisingly accessible for the average car owner, making your BMW safer, sleeker, and more advanced.
Let’s explore how you can transform your BMW 5 Series headlights from functional to phenomenal.
1. Brighter LED Headlight Bulb Upgrade: See and Be Seen
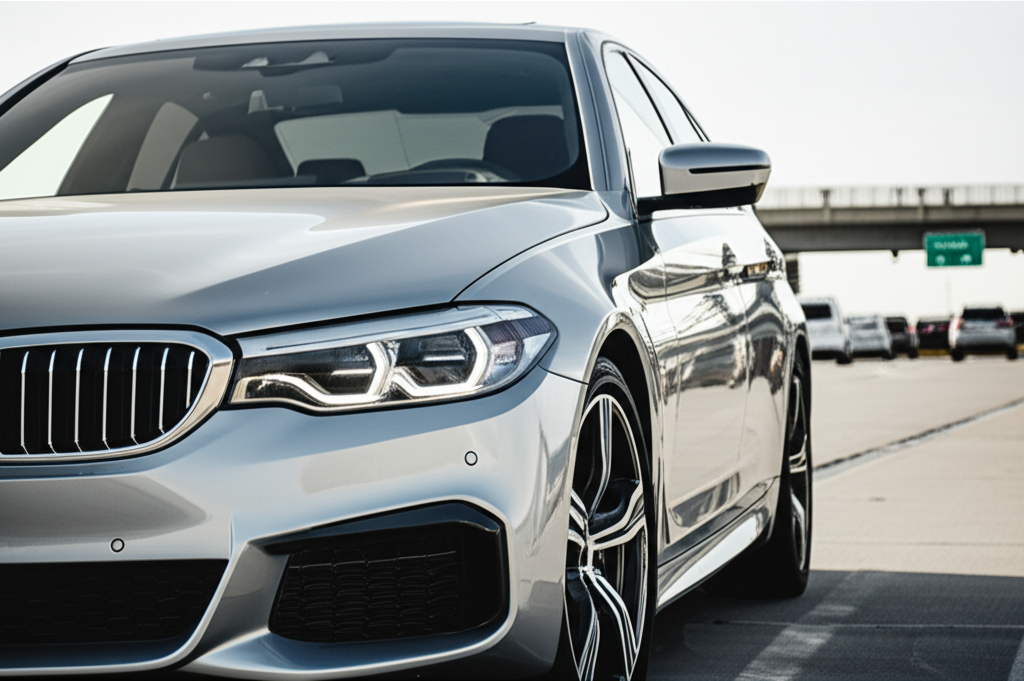
One of the most common and effective upgrades for any vehicle is switching to LED (Light Emitting Diode) headlight bulbs. Halogen bulbs, while standard on many vehicles, can be dim and have a yellowish hue. LED bulbs offer a significantly brighter, whiter light that mimics natural daylight, providing superior visibility on dark roads. This isn’t just about aesthetics; better visibility means quicker reaction times, which can be crucial for avoiding hazards.
Why Choose LED Headlight Bulbs?
- Enhanced Brightness: LEDs produce more lumens (light output) than traditional halogens, illuminating more of the road ahead.
- Improved Color Temperature: The crisp white light of LEDs reduces eye strain and makes it easier to distinguish colors of road signs and other vehicles.
- Longer Lifespan: LEDs typically last much longer than incandescent or halogen bulbs, meaning fewer replacements and long-term cost savings.
- Faster Illumination: LEDs turn on instantly at full brightness, unlike halogens which take a moment to warm up.
- Modern Look: The clean, white light gives your BMW 5 Series a more contemporary and premium appearance.
Choosing the Right LED Bulb for Your BMW 5 Series
When selecting LED bulbs, ensure they are compatible with your specific BMW 5 Series model year and headlight housing. Look for bulbs that are designed as direct replacements for your existing halogen bulbs (e.g., H7, H4, H1). Many reputable brands offer plug-and-play LED kits that require no modifications to your car’s wiring. Always check reviews and specifications to ensure quality and proper beam pattern to avoid dazzling other drivers.
Important Note: Some vehicles, especially those with complex headlight systems, might require CANbus decoders to prevent error messages on the dashboard. Check if your BMW 5 Series needs these to avoid compatibility issues.
Installation Process (General Steps):
- Safety First: Ensure your headlights are turned off and the engine is cool. It’s often recommended to disconnect the battery’s negative terminal for added safety.
- Access the Bulb: Open the hood and locate the back of the headlight assembly. You may need to remove a dust cover or access panel. On some 5 Series models, you might need to remove the headlight unit itself or access it from underneath the car. Refer to your owner’s manual or a model-specific guide for precise instructions.
- Remove Old Bulb: Twist and pull out the old halogen bulb or release its retaining clip.
- Install New LED Bulb: Insert the new LED bulb, ensuring it sits correctly in the socket. Secure it with the locking mechanism. Some LED bulbs have adjustable bases to fine-tune the beam pattern.
- Connect Wiring: Plug the LED bulb’s connector into your car’s wiring harness. If a CANbus decoder is needed, connect it between the bulb and the harness.
- Test: Turn on your headlights to test the new bulbs. Check both low beam and high beam functions.
- Reassemble: Replace any removed covers or panels.
This upgrade can often be completed in under an hour for both headlights.
2. Xenon or Laser Headlight Upgrades: Superior Illumination Technology
For those seeking the pinnacle of headlight performance, upgrading to Xenon (High-Intensity Discharge, or HID) or even Laser headlights offers a significant leap in illumination. Many modern BMW 5 Series models come equipped with Xenon headlights as standard or an option, but older models, or those with basic halogen setups, can be retrofitted.
Xenon (HID) Headlights
Xenon headlights use an electric arc through ionized gas to produce light. They are known for their intense, bright white light that is very close to natural daylight, offering excellent clarity and range. Compared to halogens, Xenons are more energy-efficient and last longer.
- Pros: Significantly brighter than halogens, efficient, long-lasting, sharp beam cutoff.
- Cons: More expensive than LEDs, requires ballasts and ignitors, can be complex to install as a retrofit, potential for glare if not properly aimed.
Laser Headlights
Laser headlights are the latest in automotive lighting technology, found on some high-end BMW models. They use high-intensity laser diodes to produce a very focused, powerful beam of light that is significantly brighter and reaches much further than even Xenon or LED lights. The light is then converted into a usable white light by a special phosphor.
- Pros: Extremely bright and long-range illumination, energy-efficient, compact design.
- Cons: Very expensive, typically only available as a factory option, complex technology, not a common aftermarket retrofit option for most 5 Series owners.
Retrofitting Xenon Headlights
Retrofitting Xenon headlights involves installing Xenon bulbs, ballasts (which convert the car’s voltage to the high voltage needed to ignite the Xenon arc), and ignitors. If your car did not originally come with Xenon headlights, you’ll also need to consider the wiring harness and potentially headlight housings that are designed for Xenon bulbs to ensure proper beam pattern and safety. Due to the complexity and the need for precise aiming to avoid blinding other drivers, it’s often recommended to have Xenon retrofits performed by a professional or to purchase a complete, model-specific retrofit kit.
A properly installed Xenon system can dramatically improve night driving safety. Visit the National Highway Traffic Safety Administration (NHTSA) for information on vehicle lighting standards and safety.
For most BMW 5 Series owners looking for a significant upgrade from halogens, a high-quality LED conversion kit that emulates Xenon brightness and color temperature is often the more practical and cost-effective choice, unless a factory Xenon option is available and budgeted for.
3. Projector Lens Restoration and Upgrade: Sharpen Your Focus
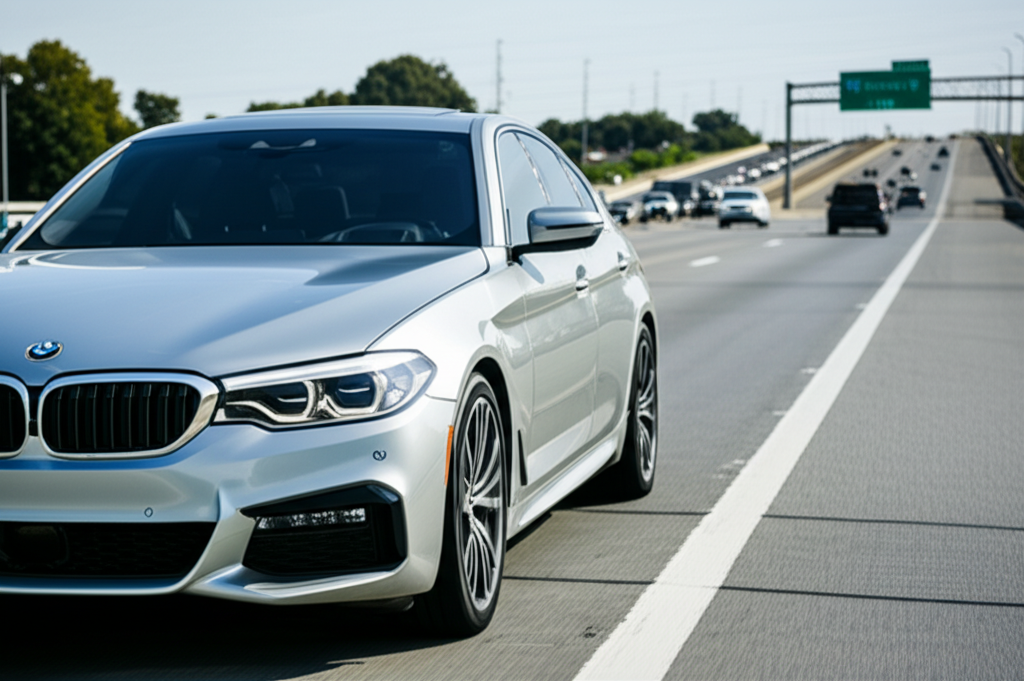
Even if you have good bulbs, the performance of your BMW 5 Series headlights can be hampered by degraded projector lenses. Over time, the plastic lenses can become yellowed, cloudy, and oxidized due to UV exposure from the sun and general wear and tear. This diffusion of light significantly reduces the effectiveness of your headlights, leading to dimmer beams and poor road coverage.
What is a Projector Lens?
BMW 5 Series models often use projector-style headlights. Instead of a simple reflector bowl, these use a lens with a light source behind it. The projector focuses the light into a sharp beam with a defined cutoff, which is crucial for maximizing visibility without causing glare for oncoming drivers. The quality of this lens is paramount to the headlight’s performance.
Restoration Process
Headlight restoration kits are readily available and can bring clarity back to dulled lenses. These kits typically involve a multi-step process of sanding the oxidized layer off the plastic, followed by polishing and applying a UV protectant clear coat.
Headlight Restoration Steps:
- Clean the Headlights: Thoroughly wash the headlight lenses to remove dirt and debris.
- Masking: Use painter’s tape to protect the surrounding paintwork and trim.
- Sanding: Use the abrasive pads included in the kit, starting with the coarsest grit and progressing to finer grits. Wet sanding is often recommended to keep the surface lubricated and prevent overheating.
- Polishing: Apply the polishing compound and buff the lens until it becomes clear.
- Protection: Apply the UV protectant clear coat to prevent future oxidation.
- Curing: Allow the clear coat to cure fully according to the product instructions before driving.
This process can restore clarity and light output significantly, often making a noticeable difference in nighttime visibility. It’s a budget-friendly DIY project that can make old headlights look and perform like new.
Projector Lens Upgrade
For those who want to go a step further, upgrading the projector lenses themselves is an option. This involves disassembling the headlight housing and physically replacing the old projector unit with a new, high-performance one. Modern projector assemblies often offer improved light dispersion, sharper cutoff lines, and compatibility with brighter bulbs like high-output LEDs or Xenons.
This is a more involved DIY project or a job best left to professional automotive lighting specialists. It requires careful disassembly and reassembly of the headlight unit, often involving heat guns to soften the sealant holding the lens to the housing, and meticulous sealing to ensure water-tightness afterward. The result, however, can be a beam pattern that rivals modern luxury vehicles.
4. Dynamic Sequential Turn Signals: Modern Flair and Enhanced Safety
While not directly related to the main beam of your headlights, the turn signals are an integral part of the front lighting system and offer a fantastic opportunity for a stylish and functional upgrade. Dynamic sequential turn signals, also known as “sweeping” or “scrolling” turn signals, are a feature found on many newer luxury cars, including recent BMW models. They consist of a series of LEDs that illuminate in a flowing sequence, creating a modern and eye-catching effect.
Benefits of Sequential Turn Signals
- Aesthetic Appeal: They give your BMW 5 Series a more contemporary and high-tech look, distinguishing it from cars still using standard flashing turn signals.
- Improved Visibility: The cascading light pattern can be more noticeable to other drivers, potentially improving communication of your intentions and enhancing safety.
- Modernization: It’s a relatively simple upgrade that can make an older 5 Series model feel much more current.
Types of Sequential Turn Signal Upgrades
For BMW 5 Series, you can often find plug-and-play sequential turn signal modules or direct replacement assemblies that come with the sequential function built-in. These are typically designed to replace your existing side marker lights or the turn signal elements within the headlight or bumper assembly.
Installation Considerations:
Many sequential turn signal kits are designed for easy installation, often plugging directly into the existing wiring harness without the need for cutting or splicing. However, it’s always crucial to:
- Verify Compatibility: Ensure the kit is specifically designed for your BMW 5 Series model year and trim.
- Read Instructions Carefully: Follow the provided installation guide precisely.
- Check Local Laws: While generally legal, be aware of any local regulations regarding aftermarket lighting modifications regarding the color and function of lights.
This is a popular DIY upgrade that can significantly enhance the visual appeal of your BMW 5 Series, adding a touch of modern luxury.
5. Headlight Sealing and Protection: Long-Term Durability
An often-overlooked aspect of headlight maintenance and enhancement is ensuring they are properly sealed and protected. Water ingress, dust, and debris can cause significant damage to the internal components of your headlights, leading to fogging, corrosion of electrical connectors, and premature failure of bulbs and ballasts. Proper sealing and ongoing protection are crucial for the longevity of any headlight upgrade.
The Importance of Sealing
Headlight assemblies are designed to be sealed, typically using a specialized automotive-grade adhesive or sealant. Over time, especially after lens restoration or if the housing has been opened for bulb replacement or projector upgrades, this seal can degrade or be compromised. A faulty seal allows moisture and contaminants to enter.
Professional Resealing
If you’ve performed any internal headlight work or noticed signs of condensation, it’s vital to reseal your headlights. This usually involves:
- Disassembly: Carefully separating the headlight lens from the housing, often by heating the existing sealant with a heat gun.
- Cleaning: Thoroughly cleaning the surfaces where the sealant will be applied, removing all old residue.
- Applying New Sealant: Using a high-quality, UV-resistant automotive headlight sealant (e.g., butyl rubber sealant).
- Reassembly: Carefully pressing the lens back into place and ensuring an even, continuous seal.
- Curing: Allowing the sealant to cure properly before exposing the headlights to moisture.
This is a task that requires patience and precision. If you’re not comfortable with the process, a professional detailer or automotive lighting specialist can perform this service.
Protective Coatings
Beyond restoration, applying a protective film or ceramic coating to your headlight lenses can offer ongoing defense against the elements. Paint protection film (PPF) is a clear, durable urethane film that can be applied to the lenses to protect them from stone chips, scratches, and UV damage. Ceramic coatings, on the other hand, provide a hard, hydrophobic layer that repels water and dirt, making them easier to clean and enhancing their resistance to oxidation.
These protective measures, especially when combined with regular washing and waxing of your vehicle, help maintain the clarity and performance of your headlights for years to come, ensuring your investment in upgrades is well-protected.
| Upgrade Type | Primary Benefit | Complexity (DIY) | Estimated Cost | Impact on Visibility | Impact on Aesthetics |
|---|---|---|---|---|---|
| LED Bulb Swap | Brighter, whiter light | Low | $50 – $200 | High | Medium |
| Xenon Retrofit | Intense, long-range light | Medium to High | $200 – $800+ (depending on components and labor) | Very High | High |
| Projector Lens Restoration | Clarity and improved beam pattern | Medium | $20 – $50 (DIY kit) | Medium | Medium |
| Sequential Turn Signals | Modern aesthetics | Low to Medium | $50 – $200 | Low (indirectly) | Very High |
| Sealing & Protection | Durability and moisture prevention | Medium | $10 – $50 (DIY sealants) / $300+ (professional sealing/coating) | Low (maintains existing) | Low |
Pro Tips
When upgrading your BMW 5 Series headlights, always ensure your new bulbs are E-marked or DOT-approved for legal use on public roads in the USA. Improperly designed or installed headlights can lead to hefty fines and, more importantly, dangerous glare for other drivers.
Frequently Asked Questions (FAQ)
Q1: Are LED headlight upgrades legal in my state?
A1: In the USA, all vehicle lighting, including aftermarket upgrades, must comply with Federal Motor Vehicle Safety Standards (FMVSS), particularly FMVSS 108. While LED bulbs themselves are legal, they must produce a beam pattern that meets safety regulations and doesn’t cause excessive glare. Look for bulbs that are specifically advertised as street-legal and compliant with DOT standards. Laws can vary slightly by state, so it’s always wise to check your local Department of Motor Vehicles (DMV) guidelines or consult with law enforcement if you have doubts.
Q2: Will upgrading my BMW 5 Series headlights void my warranty?
A2: This depends on the nature of the upgrade and your vehicle’s warranty terms. Simple plug-and-play LED bulb replacements are generally less likely to void your warranty than complex Xenon retrofits or modifications that involve cutting into the car’s wiring harness. BMW, like other manufacturers, can deny warranty claims if they can prove an aftermarket part or modification caused the failure. It’s best to consult your BMW dealership or warranty documentation for specifics.
Q3: How do I know if my BMW 5 Series headlights are Xenon or Halogen?
A3: The easiest way to tell is by looking at the bulb type when the car is off. Halogen bulbs typically have a clear glass envelope and a filament inside. Xenon (HID) bulbs have a more metallic appearance, often with a ceramic base, and they don’t have a visible filament. Also, Xenon headlights often have a distinct “warm-up” time where the light gradually brightens, whereas halogens come on instantly. Many BMW 5 Series models with Xenon lights also have a distinct projector lens design.
Q4: Can I install sequential turn signals myself?
A4: For most BMW 5 Series models, sequential turn signal upgrades are designed as plug-and-play solutions, making them a relatively easy DIY modification. You typically remove the old side marker or turn signal bulb/assembly and plug in the new one. However, always refer to the specific instructions that come with your chosen kit, as the process can vary slightly. If you’re not comfortable working with automotive electrical components, a professional installation is recommended.
Q5: What is the difference between a headlight restoration kit and a protective coating?
A5: A headlight restoration kit is used to fix existing damage, such as yellowing, cloudiness, and oxidation, by removing the damaged outer layer and polishing the lens. A protective coating (like a UV sealant or ceramic coating) is applied after restoration or on a clear lens to prevent future damage from UV rays, road debris, and environmental contaminants. Restoration fixes what’s broken; protection keeps it from breaking again.
Q6: Do I need to adjust my headlights after installing new bulbs?
A6: Yes, it is highly recommended. Even with bulbs designed for direct replacement, the light source’s position within the housing can be slightly different. This can alter the beam pattern and potentially cause glare for oncoming drivers or reduce the effectiveness of your illumination. After installing new bulbs, always check your headlight aim using a wall or a dedicated alignment tool. Many auto repair shops can perform this adjustment for a small fee.
Conclusion
Upgrading your BMW 5 Series headlights is a rewarding endeavor that enhances your vehicle’s safety, functionality, and aesthetic appeal. From the simple yet effective LED bulb swap that brightens your path, to the sophisticated performance of Xenon systems, and the visual flair of sequential turn signals, there are options to suit every need and budget. Don’t forget the crucial steps of restoring or upgrading projector lenses and ensuring a proper seal for long-term durability. By investing in these five areas, you’ll not only drive with greater confidence and safety in the dark but also ensure your BMW 5 Series continues to turn heads for all the right reasons.


