
How to Reset the Check Engine Light on a Toyota Corolla
Contents
- 1 Key Takeaways
- 2 📑 Table of Contents
- 3 Understanding Your Corolla’s Check Engine Light
- 4 Golden Rule: Diagnose, Then Decide
- 5 Method 1: The OBD2 Scanner Reset (The Professional Way)
- 6 Method 2: The Battery Disconnect Reset (The Old-School Method)
- 7 Method 3: The Drive Cycle (Letting the Computer Verify the Fix)
- 8 When You Should NOT Reset the Light
- 9 Preventing Future Check Engine Light Illumination
- 10 Conclusion: A Light is a Message, Not an Annoyance
- 11 Frequently Asked Questions
Resetting the check engine light on a Toyota Corolla is a simple process, but it’s critical to diagnose and fix the underlying problem first. You can reset the light using an OBD2 scanner, by disconnecting the battery, or by completing a successful drive cycle. Never ignore the light, as it indicates a problem that could cause expensive damage if left unrepaired. Always address the root cause before clearing the code.
That little amber glow on your dashboard. The words “Check Engine” or a simple engine icon. For any Toyota Corolla owner, it’s a moment of instant worry. Your mind races—is it something minor like a loose gas cap, or a major, costly repair? The immediate instinct is often to make that annoying light go away. But before we dive into the “how,” we need to talk about the most important “why.” Resetting your Corolla’s check engine light is not a magic fix. It is simply turning off a warning alarm. If the fire is still burning, the alarm will just sound again. This comprehensive guide will walk you through the correct, safe, and effective way to reset the light on your Toyota Corolla, emphasizing that diagnosis and repair are non-negotiable first steps.
Key Takeaways
- Diagnosis Before Reset: Always use an OBD2 scanner to read the trouble code(s) and identify the problem before attempting any reset.
- Fix the Root Cause: Resetting the light without repairing the issue will cause it to return, often within a few drive cycles.
- Multiple Reset Methods: You can reset the light via an OBD2 scanner (most reliable), a battery disconnect, or by fulfilling a manufacturer drive cycle.
- Battery Disconnect Caveats: Disconnecting the battery resets the engine computer but also resets radio presets, climate control settings, and may require steering wheel recalibration.
- Drive Cycle Specifics: A drive cycle is a specific sequence of driving conditions (speed, acceleration, temperature) that the car’s computer must complete to verify a repair.
- Professional Help Recommended: If you’re uncomfortable diagnosing the problem or the light persists after a reset, consult a qualified mechanic.
- Light vs. Maintenance: The check engine light (usually yellow/amber) is different from the maintenance required light (often “MAINTENANCE REQUIRED”), which is reset separately.
📑 Table of Contents
- Understanding Your Corolla’s Check Engine Light
- Golden Rule: Diagnose, Then Decide
- Method 1: The OBD2 Scanner Reset (The Professional Way)
- Method 2: The Battery Disconnect Reset (The Old-School Method)
- Method 3: The Drive Cycle (Letting the Computer Verify the Fix)
- Preventing Future Check Engine Light Illumination
- Conclusion: A Light is a Message, Not an Annoyance
Understanding Your Corolla’s Check Engine Light
The check engine light, officially called the Malfunction Indicator Lamp (MIL), is part of your Corolla’s On-Board Diagnostics II (OBD-II) system. Since 1996, all cars sold in the U.S., including every Toyota Corolla, have been required to have this standardized system. Its job is to monitor the performance of your engine, transmission, and emissions control systems. When the car’s computer (the Engine Control Unit or ECU) detects a problem that could increase emissions, it stores a diagnostic trouble code (DTC) and illuminates the check engine light.
What Triggers the Light?
The triggers range from trivial to serious. A common, simple cause is a loose or faulty gas cap. A bad cap breaks the seal in the evaporative emissions (EVAP) system, causing fuel vapors to escape. The ECU detects this vapor leak and sets a code, like P0455 (EVAP system large leak). Other frequent culprits include:
- Faulty Oxygen (O2) Sensors: These monitor exhaust gases. A failing sensor reduces fuel efficiency and increases emissions.
- Mass Air Flow (MAF) Sensor Issues: This sensor measures incoming air. A dirty or failed MAF sensor causes poor performance and fuel economy.
- Catalytic Converter Problems: This is a more serious and expensive issue. The cat reduces harmful emissions. Failure often follows ignored O2 sensor problems.
- Misfires: Codes like P0300-P0304 indicate a cylinder isn’t firing properly. This can damage the catalytic converter quickly.
- Spark Plug or Ignition Coil Failure: Worn spark plugs or bad coils are a common cause of misfires.
There are hundreds of possible codes. The light being on means your Corolla is likely running in a “limp mode” with reduced performance and poorer fuel economy to protect itself. It also means it will almost certainly fail an emissions test for state registration.
Check Engine Light vs. Maintenance Required Light
It’s crucial to distinguish the check engine light from the “MAINTENANCE REQUIRED” light. The latter is a simple mileage/timer-based reminder for routine service (oil change, tire rotation, etc.). It is not triggered by a diagnostic problem. The process to reset the maintenance light is completely different and much simpler, often done via the odometer button. If your light says “MAINTENANCE REQUIRED,” you do not need an OBD2 scan. You can find the specific procedure for your Corolla model year in your owner’s manual. Confusing the two leads to ignoring real problems. This article focuses solely on the check engine light (MIL).
Golden Rule: Diagnose, Then Decide
You cannot properly reset a check engine light without understanding why it came on. The reset is the final step in a repair process, not the first. Here is the mandatory workflow:
Visual guide about How to Reset the Check Engine Light on a Toyota Corolla
Image source: toyotacheckenginelight.com
Step 1: Retrieve the Trouble Code(s)
You need an OBD2 scanner. All 1996+ Corollas have the OBD2 port under the dashboard, usually below the steering column. You have options:
- Basic Code Reader ($20-$50): Devices like the Autel or Innova basic readers will pull the generic P-codes. This is the minimum viable tool. It tells you the area of the problem (e.g., P0171 = System Too Lean) but not the exact failed part.
- Advanced Scanner/App ($50-$150+): Tools like the BlueDriver smartphone adapter or more advanced scan tools provide detailed code definitions, live data streaming (you can watch sensor values in real-time), and sometimes even repair information. This is highly recommended for DIYers.
- Free Code Reading: Many auto parts stores (AutoZone, Advance Auto, O’Reilly) offer free code scanning as a service. They’ll plug in their professional scanner and print the codes for you. This is a great zero-cost first step.
Step 2: Research the Code
Once you have the code (e.g., P0420), do not immediately buy a part. Search online for “[Your Code] Toyota Corolla.” You’ll find forums, repair guides, and YouTube videos. Common codes often have common fixes. For example, a P0420 on a high-mileage Corolla might be a failing catalytic converter, but it could also be a bad O2 sensor or an exhaust leak before the cat. Research helps you understand the possible causes and required tests.
Step 3: Inspect and Repair
Based on your research, perform visual inspections and simple tests. Check for loose or damaged wiring, disconnected vacuum hoses, or a gas cap that doesn’t click. For sensor-related codes, you might need to clean a MAF sensor with special cleaner or replace an O2 sensor. This is the most important part. You must correct the problem that caused the code to set. If you reset the light without doing this, it will return, often within 50-100 miles of driving. You’ve just wasted your time and potentially masked a growing problem.
Method 1: The OBD2 Scanner Reset (The Professional Way)
This is the preferred, cleanest, and most reliable method. It directly communicates with the ECU to clear the stored codes and turn off the light.
Visual guide about How to Reset the Check Engine Light on a Toyota Corolla
Image source: toyotacheckenginelight.com
What You Need
- An OBD2 scanner (basic or advanced).
- Your Corolla’s ignition key.
The Step-by-Step Process
- Ensure the Problem is Fixed: Confirm you have completed all necessary repairs. The check engine light should be on, and your scanner should be able to communicate with the car.
- Connect the Scanner: Plug the OBD2 connector into your Corolla’s port, located under the dashboard on the driver’s side. Turn the ignition to the “ON” position (do not start the engine). The scanner should power on and connect.
- Read and Clear Codes: On the scanner, navigate to the “Read Codes” or “Trouble Codes” menu. You should see one or more codes (e.g., P0455). Document these codes for your records. Then, navigate to the “Erase Codes,” “Clear Codes,” or “DTC” menu. Confirm the action. The scanner will communicate with the ECU and clear the memory.
- Verify the Reset: The check engine light should immediately go out. The scanner may show “No Codes Detected.”
- Test Drive: Start the engine and drive the car normally for 15-20 minutes. The light should remain off. If it comes back on, the problem was not fixed correctly, or a new problem has developed. The code will have returned.
Pro Tip: Some advanced scanners have a “Monitor Reset” or “I/M Monitor Reset” function. After clearing codes, you should also reset the readiness monitors. These are tests the computer runs (like the EVAP system test) to ensure all emissions components are working. An emissions tester will check these monitors. If they are not all set to “Complete,” you may fail an emissions test even with the light off. Driving the car under varied conditions (see Drive Cycle section) will eventually set them. Some scanners can force a reset of these monitors after a repair.
Method 2: The Battery Disconnect Reset (The Old-School Method)
This method works by cutting power to the ECU, forcing it to forget all stored data, including learned fuel trim values and trouble codes. It’s effective but has significant downsides.
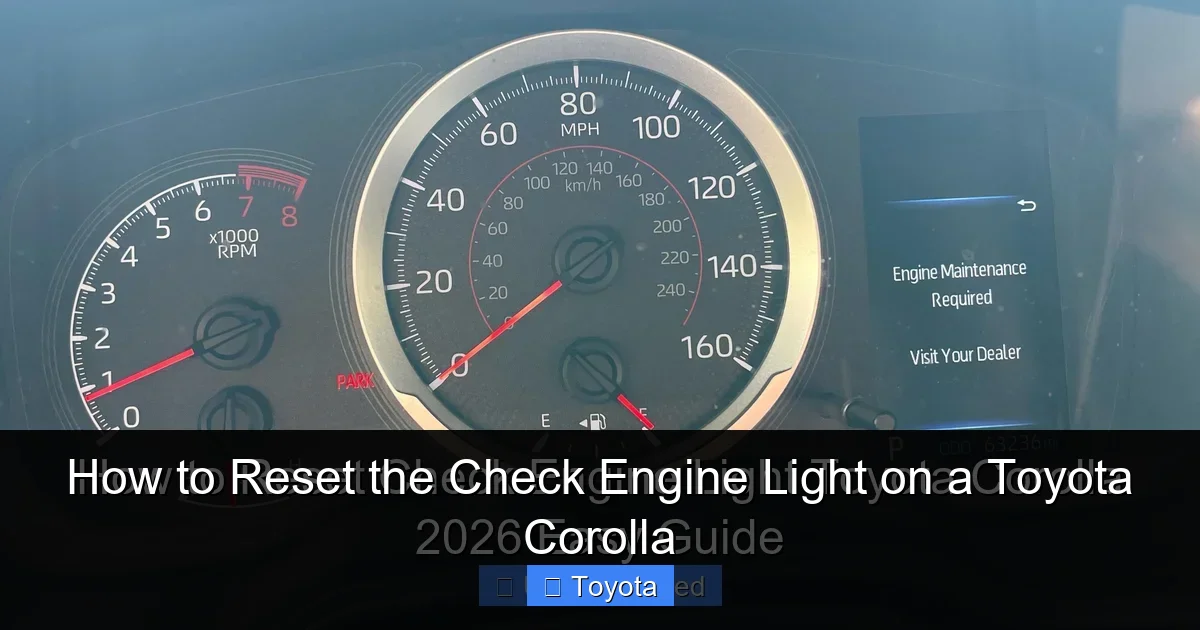
Visual guide about How to Reset the Check Engine Light on a Toyota Corolla
Image source: enginelightfixers.com
What You Need
- Basic hand tools (wrench/socket for battery terminals).
- Safety gloves and eye protection.
- Your Corolla’s radio code (if equipped with an anti-theft system). This is usually in your owner’s manual or on a card in the glove box. You will need this to reactivate the radio after.
The Step-by-Step Process
- Safety First: Park your Corolla on a flat surface, engage the parking brake, and turn off the engine. Open the hood.
- Locate the Battery: In most Corollas, it’s in the engine bay. Some later models (like certain 2020+ hybrids) may have it in the trunk. Consult your manual.
- Disconnect the Negative Terminal: Using the correct wrench, loosen the nut on the NEGATIVE (-) battery terminal (black cable, minus sign). Always disconnect the negative terminal first to avoid short circuits. Once loose, carefully lift the terminal off the battery post and tuck the cable away so it cannot touch the post.
- Wait: This is the crucial step. You must wait at least 10-15 minutes. This allows all residual power (capacitors) in the ECU and other modules to drain completely. Simply disconnecting and reconnecting immediately will often not clear the codes.
- Reconnect: Reattach the negative terminal and tighten the nut securely. Do not overtighten.
- Reactivate Systems: Start your Corolla. The engine may idle a bit rough for the first minute as the ECU relearns fuel trims—this is normal. You will likely need to:
- Enter your radio code to restore audio functionality.
- Re-set the clock.
- Re-program any personalized steering wheel or climate control settings.
- The steering wheel may feel stiff or the electric power steering may need a few turns to recalibrate. Drive slowly in a safe area for a minute.
- Check the Light: The check engine light should be off. However, it may take a few drive cycles for all readiness monitors to reset. If the underlying problem persists, the light will return.
Major Caveats of This Method: This is a blunt instrument. It resets everything—radio, HVAC, seat memory, window timers, and transmission adaptations. For a modern car like a Corolla, this can be a major inconvenience. It also does not address the root cause. Use this method only if you have no scanner and have already diagnosed and fixed the problem, or as a last resort.
Method 3: The Drive Cycle (Letting the Computer Verify the Fix)
After you’ve fixed the problem and cleared the codes with a scanner, the check engine light will go off. However, for your Corolla to pass an official emissions test, the OBD2 system’s “readiness monitors” must all report “Complete.” These monitors are self-tests the ECU runs on various emissions components. Simply clearing codes sets all monitors to “Incomplete.” You must drive the car under a specific set of conditions—a drive cycle—to allow these tests to run and complete successfully.
Why a Drive Cycle is Necessary
A smog or emissions test station will check the status of these monitors. If any are “Incomplete,” you will fail, even if the check engine light is off and no codes are stored. A proper drive cycle forces the ECU to run all its tests. The exact cycle can vary slightly by model year and engine type (1.8L vs. 2.0L vs. Hybrid), but the general principles are the same.
A Generic Toyota Corolla Drive Cycle
This is a general guide. For the most precise cycle for your specific year, search “[Your Year] Toyota Corolla OBD2 drive cycle.”
- Start Cold: The engine must be cold. Let the car sit for at least 4 hours or overnight.
- Start and Idle: Start the engine and let it idle for 2-3 minutes with all accessories (AC, rear defroster) OFF.
- Low-Speed Steady Cruise: Drive at a steady 40-50 mph for 5-10 minutes on a flat road. Do not use cruise control for this part, as gentle throttle variations help.
- Decelerate: Slowly take your foot off the gas and let the car decelerate from 40-50 mph down to about 20 mph without braking. Do this 2-3 times.
- Accelerate: From 20 mph, firmly but smoothly accelerate to 55-60 mph. Hold that speed for 2-3 minutes.
- High-Speed Cruise: Continue at 55-60 mph for 5-7 minutes.
- Slow Down: Let the car decelerate from 55-60 mph down to a stop without braking (if safe and traffic allows).
- Idle with Accessories: At a stop, put the transmission in Park (or Neutral for manual). Let the engine idle for 2 minutes. Then, turn the AC to max and rear defroster on. Let it idle for another 2-3 minutes.
- Final Acceleration: Accelerate from a stop to about 30-40 mph, then cruise for a minute.
After completing this cycle, drive normally for a day or two. The monitors should set to “Complete.” You can check their status with an OBD2 scanner under the “I/M Readiness” or “Monitor Status” menu. Important: If the original problem was not fixed, the ECU will detect it again during this cycle and set a new code, turning the light back on.
When You Should NOT Reset the Light
There are absolute no-go scenarios for simply clearing the light and driving away.
The Light is Flashing
A flashing check engine light indicates a severe, imminent problem—most often a severe engine misfire. Unburned fuel is flooding into the exhaust, which can overheat and destroy the catalytic converter within minutes. If your light is flashing, stop driving immediately. Have the vehicle towed to a mechanic. Do not try to reset it. Driving with a flashing MIL will cause catastrophic and expensive damage.
You Have No Idea What the Code Means
If you pulled a code but have no idea what it signifies or how to fix it, do not clear it. The code is your best clue. Take it to a professional. Clearing it erases that vital diagnostic information. A mechanic will have to recreate the fault to read the code again, which can be difficult and time-consuming.
The Problem is Obvious and Serious
If you hear loud knocking noises, see smoke, smell strong fuel or coolant odors, or experience a total loss of power, the check engine light is the least of your worries. These are symptoms of major failure. Reset the light? No. Get the car to a shop.
You’re About to Take an Emissions Test
If your registration is due and you need an emissions (smog) test, do not just reset the light and go. You must perform the necessary repairs and complete the drive cycle so all monitors are “Ready.” A tester will see an incomplete monitor and fail you immediately. Resetting the light the day before a test is a surefire way to fail.
Preventing Future Check Engine Light Illumination
An ounce of prevention is worth a pound of cure. While you can’t prevent all issues, proactive maintenance drastically reduces the chances of a check engine light.
- Use High-Quality Fuel: Buy gas from reputable stations. Poor-quality fuel can cause deposits and misfires.
- Always Tighten the Gas Cap: After refueling, ensure the cap clicks at least three times. A loose cap is the #1 cause of avoidable check engine lights.
- Follow Your Maintenance Schedule: This is the big one. Stick to the schedule in your owner’s manual. Replace spark plugs, air filters, and PCV valves on time. Change engine oil regularly. A well-maintained engine is a happy engine.
- Address Minor Issues Immediately: That slight rough idle, the occasional stalling, or a drop in fuel economy are your car’s way of asking for help. Investigate before a small problem becomes a big one that triggers the MIL.
- Use OEM or High-Quality Replacement Parts: Cheap aftermarket sensors and components often fail prematurely and can cause new codes.
For other Toyota models, the principles of maintenance are similar. You can learn about specific maintenance light reset procedures for vehicles like the Toyota Highlander or Toyota RAV4 to keep your service reminders on track, which is a separate but equally important part of vehicle upkeep.
Conclusion: A Light is a Message, Not an Annoyance
Resetting the check engine light on your Toyota Corolla is a straightforward technical task. The process itself—whether using a scanner, disconnecting the battery, or completing a drive cycle—takes minutes. The critical, time-consuming part is what comes before the reset: proper diagnosis and repair. Treat the check engine light as your car’s direct line of communication. It is telling you, “Hey, something’s not right under here.” Ignoring that message or silencing it without action is like turning off a fire alarm while the fire is still burning. It will only lead to more smoke, more damage, and a far higher bill when you’re finally forced to address it. By following the diagnostic-first approach outlined in this guide, you empower yourself as a car owner, save money on unnecessary repairs, and ensure your reliable Corolla stays reliable for years to come. Remember, the goal is not just a dark dashboard; the goal is a properly functioning, healthy vehicle.
Frequently Asked Questions
Will disconnecting the battery reset the check engine light on my Corolla?
Yes, disconnecting the negative battery terminal for 10-15 minutes will clear the codes and turn off the check engine light. However, this also resets all other electronic settings (radio, clock, steering wheel calibration) and does not fix the underlying problem. The light will return if the issue persists.
How long does it take for the check engine light to come back on after a reset if the problem isn’t fixed?
It varies. The ECU runs continuous tests. If a faulty component is detected again during normal driving, the light can return in as little as 50 miles or after just a few drive cycles. Some intermittent issues might take longer to reappear.
Can I reset the check engine light without an OBD2 scanner?
The only other method is disconnecting the battery, as described. There is no “secret” button combination or fuse pull on a Corolla that will clear check engine codes. The OBD2 port is the standard interface for this function.
My check engine light is off, but the code is still stored. Is that possible?
No. If a code is stored in the ECU’s memory, the check engine light will be illuminated. The light is controlled by the ECU. If the light is off, there are no current, active codes. However, there may be “historical” or “pending” codes that haven’t yet met the criteria to turn on the light.
Will resetting the check engine light affect my emissions test?
Yes, significantly. Simply clearing the code will set all the OBD2 system’s readiness monitors to “Incomplete.” An emissions tester will fail your vehicle for having incomplete monitors. You must drive the car through a full drive cycle after the repair to set the monitors to “Complete” before taking the test.
Is it safe to drive my Corolla with the check engine light on?
It depends. If the light is steady and the car is running normally (no strange noises, loss of power, or smoke), it is generally safe to drive a short distance to a repair shop or to complete a necessary trip. However, you should diagnose the issue as soon as possible. If the light is flashing, you must stop driving immediately and have the vehicle towed, as a severe misfire can destroy the catalytic converter.


