
How to Reset Check Engine Light on a 2015 Toyota Highlander
Contents
- 1 Key Takeaways
- 2 📑 Table of Contents
- 3 Understanding the Check Engine Light: More Than Just a “Reset”
- 4 Phase One: Diagnosis—You Can’t Fix What You Don’t Understand
- 5 Phase Two: The Reset—Methods and Procedures
- 6 Phase Three: After the Reset—The Drive Cycle and Monitoring
- 7 When to Seek Professional Help: Knowing Your Limits
- 8 Conclusion: The Responsible Approach to Your Check Engine Light
- 9 Frequently Asked Questions
Resetting the check engine light on your 2015 Toyota Highlander is a simple process, but it’s critical to understand it only turns off the warning, not the underlying problem. You must first diagnose and repair the issue that triggered the light, or it will simply return. The two primary methods are using an OBD2 scanner or performing a manual reset by disconnecting the battery. Never ignore a persistent check engine light, as it indicates a problem that could cause serious engine damage or failed emissions tests.
That little glowing icon on your dashboard—the one that looks like an engine with a line through it—has a way of ruining your day. For a 2015 Toyota Highlander owner, that check engine light (CEL) is your car’s way of saying, “Hey, we need to talk.” It’s not just an annoyance; it’s a vital communication tool from your vehicle’s onboard computer. You might be wondering, “Can I just turn it off and make it go away?” The answer is yes, you physically can reset it, but doing so without understanding why it came on is like turning off a fire alarm while a fire is still burning. This comprehensive guide will walk you through exactly how to reset check engine light on a 2015 Toyota Highlander, but more importantly, we’ll cover the absolutely essential steps you must take beforehand and what to expect after. Your goal shouldn’t just be a dark dashboard; it should be a healthy, reliable, and legally compliant vehicle.
The 2015 Highlander, like all modern cars, is a complex network of sensors and computers. The engine control unit (ECU) constantly monitors dozens of parameters. When a sensor reading falls outside the normal range, the ECU stores a diagnostic trouble code (DTC) and illuminates the check engine light to alert you. Resetting the light simply erases that stored code from the computer’s memory. If the faulty sensor or broken component is still there, the ECU will detect the same problem within a short drive cycle and turn the light right back on. Therefore, the proper sequence is always: Diagnose, Repair, then Reset. We will start by ensuring you follow that sequence correctly.
Key Takeaways
- Reset ≠ Repair: Resetting the light only clears the diagnostic trouble code (DTC) from the car’s computer; it does not fix the mechanical or electrical issue that caused it.
- Diagnosis First: Always read the specific trouble code(s) with an OBD2 scanner before resetting. This code (like P0171) tells you what system is malfunctioning.
- Two Main Methods: The standard method uses an OBD2 scanner to clear codes. The alternative manual method involves disconnecting the negative battery terminal for a few minutes to reset the ECU.
- Drive Cycle is Key: After a reset, the vehicle must complete a specific “drive cycle” for all emissions monitors to reset. The light may return if the problem persists during this cycle.
- Know the Difference: The check engine light (usually yellow/amber) is for emissions-related issues. A separate maintenance required light (often a wrench icon) signals routine service like oil changes. They are reset differently.
- Safety First: If the light is flashing, stop driving immediately. A flashing light indicates a severe misfire that can damage the catalytic converter.
- Professional Help: If you cannot diagnose the code or the light returns immediately after a reset, consult a qualified mechanic. Some issues require professional tools and expertise.
📑 Table of Contents
- Understanding the Check Engine Light: More Than Just a “Reset”
- Phase One: Diagnosis—You Can’t Fix What You Don’t Understand
- Phase Two: The Reset—Methods and Procedures
- Phase Three: After the Reset—The Drive Cycle and Monitoring
- When to Seek Professional Help: Knowing Your Limits
- Conclusion: The Responsible Approach to Your Check Engine Light
Understanding the Check Engine Light: More Than Just a “Reset”
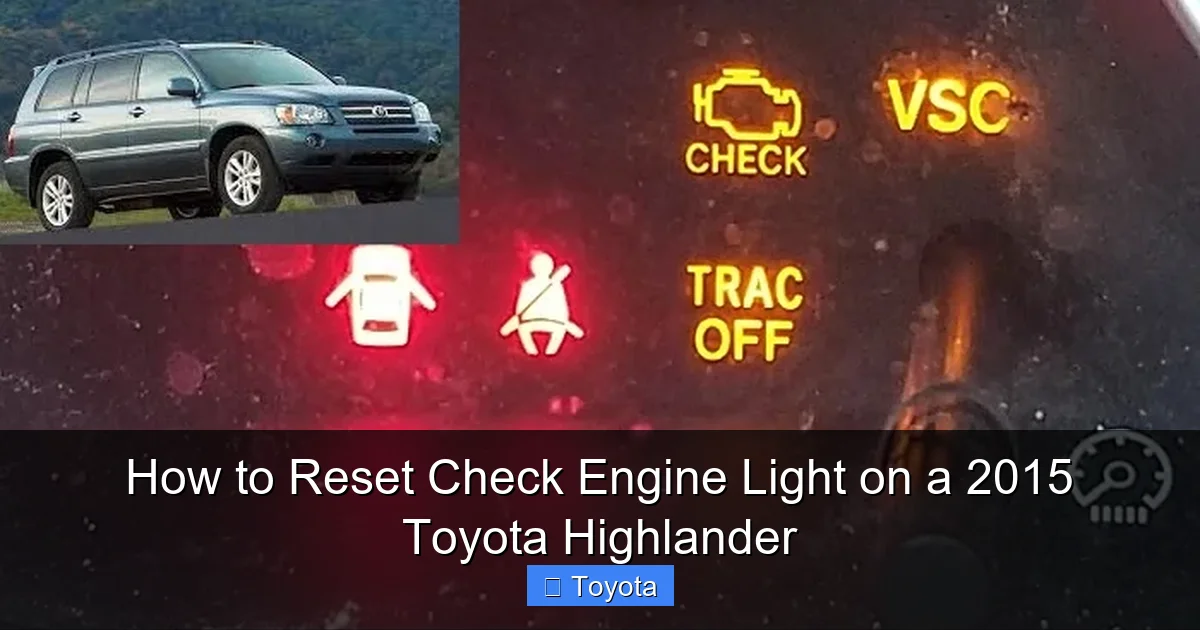
Before you grab a wrench or an OBD2 scanner, let’s demystify what that light truly means. It’s part of your Highlander’s On-Board Diagnostics II (OBD2) system, a standardized protocol mandated in the U.S. for all cars sold since 1996. When the light comes on steady, it generally indicates an issue that is increasing emissions—your car is polluting more than it should. This could be anything from a loose gas cap (which can cause vapor leaks) to a failing oxygen sensor or a faulty catalytic converter. A flashing check engine light, however, is a severe, urgent warning. It means the ECU has detected a condition that is likely causing immediate damage, most commonly a severe engine misfire where unburned fuel is flooding the exhaust system. Driving with a flashing CEL can destroy your expensive catalytic converter in minutes. If your light is flashing, pull over safely and shut off the engine. Tow the vehicle to a mechanic.
The Critical Difference: Check Engine Light vs. Maintenance Required Light
Many Highlander owners confuse the check engine light with the “Maintenance Required” light. This is a crucial distinction. The Maintenance Required light (usually a wrench icon or the words “MAINT REQD”) is a simple mileage/timer-based reminder for scheduled service, like oil changes, tire rotations, or inspections. It has nothing to do with engine faults. The process to reset the maintenance light on a 2015 Toyota Highlander is a manual procedure using the odometer button and does not involve the OBD2 system at all. You can find the specific steps for that in our dedicated guide on how to reset the maintenance light on a Toyota Highlander. The check engine light is a completely separate, serious warning system. Mixing these up can lead to ignoring a real problem. Always confirm you are dealing with the yellow/amber “check engine” icon before proceeding.
Phase One: Diagnosis—You Can’t Fix What You Don’t Understand
Skipping diagnosis is the single biggest mistake people make. You reset the light, drive for a day, and it’s back on. You’ve wasted time and possibly masked a growing problem. The first, non-negotiable step is to find out what fault code is stored. For this, you need an OBD2 scanner. These are widely available and range from basic $20 code readers to advanced $200+ scanners with live data capabilities.
Visual guide about How to Reset Check Engine Light on a 2015 Toyota Highlander
Image source: cararac.com
Choosing and Using an OBD2 Scanner
Your 2015 Highlander’s OBD2 port is located under the dashboard, just above the driver’s knees. It’s a trapezoidal 16-pin connector. Turn your ignition to the “ON” position (do not start the engine) and plug in your scanner. Follow the device’s menu to “Read Codes” or “Trouble Codes.” It will display one or more alphanumeric codes, like P0300 (Random/Multiple Cylinder Misfire Detected) or P0420 (Catalyst System Efficiency Below Threshold). Write these down. This code is your starting point. A quick internet search for “2015 Toyota Highlander P0420” will yield a wealth of information on common causes, from a faulty oxygen sensor to a failing catalytic converter. For a more in-depth look at reading codes on other Toyota models, the process is very similar, as detailed in our guide for the Toyota Corolla.
If you don’t own a scanner, many auto parts stores (like AutoZone, Advance Auto Parts, O’Reilly) offer free code reading services. This is a great first step. However, for a true diagnosis, you often need to see “live data” from the sensors to see if readings are within spec, which requires a more advanced tool or a professional mechanic.
Common Culprits on a 2015 Highlander
While the code tells you the system affected, some issues are more prevalent on this model year and platform. Common triggers include:
- Loose or Faulty Gas Cap: A classic. A cap that doesn’t seal properly allows fuel vapors to escape, tripping the EVAP system code (often P0455, P0456). Tighten or replace the cap first.
- Oxygen (O2) Sensor Failure: The Highlander’s upstream and downstream O2 sensors monitor exhaust gases. They wear out and can cause poor fuel economy, rough running, and failed emissions.
- Mass Air Flow (MAF) Sensor Issues: A dirty or failed MAF sensor, which measures incoming air, can cause lean conditions and hesitation. Sometimes, cleaning it with MAF cleaner helps.
- Catalytic Converter Problems: A failing cat will trigger codes like P0420 or P0430. This is an expensive repair, so confirm with live data before replacing.
- Spark Plugs/Ignition Coils: Worn plugs or failing coils cause misfires (P0300-P0304). On a V6 Highlander, coils and plugs are relatively accessible.
- EVAP System Leaks: Hoses, the charcoal canister, or purge valve can develop leaks, causing vapor leaks.
Important: Do not simply clear the code and hope for the best. Research the specific code, inspect the related components, and make the necessary repair. If the repair is beyond your skill level, this is the moment to call a professional.
Phase Two: The Reset—Methods and Procedures
Once you have diagnosed the problem, repaired the faulty part (or tightened the gas cap), and are confident the issue is resolved, you can proceed to reset the check engine light. There are two primary methods for a 2015 Toyota Highlander. Method 1 (OBD2 Scanner) is the preferred, standard way. Method 2 (Battery Disconnect) is a manual, universal fallback but has more side effects.
Method 1: The Standard Procedure—Using an OBD2 Scanner
This is the cleanest, manufacturer-recommended method. It communicates directly with the ECU to clear the stored codes and turn off the light.
- Preparation: Ensure the ignition is in the “ON” position (all dash lights on, engine off). Your scanner should be powered on and connected to the OBD2 port.
- Navigate to Clear Codes: Using the scanner’s menu, find the option labeled “Erase Codes,” “Clear DTCs,” or “Reset MIL.” The exact wording varies by brand.
- Execute the Command: Select this option. The scanner will likely ask for confirmation. Confirm. You may hear a series of beeps from the vehicle’s chime as the ECU resets.
- Verify: The check engine light should immediately go out. The scanner may also display a message like “Codes Cleared” or ” MIL Off.”
- Recheck: It’s good practice to turn the ignition off, wait 10 seconds, turn it back on, and confirm the light remains off. Then, start the engine and ensure no lights are on.
This method is quick, does not affect other vehicle settings (like radio presets or seat memory), and is the only way to reset certain manufacturer-specific codes on some models. For the Highlander, it works perfectly.
Method 2: The Manual Reset—Disconnecting the Battery
This is the old-school method. It works by cutting power to the ECU and other modules, forcing a full system reset. Use this only if you do not have access to an OBD2 scanner and you are certain the problem is fixed.
- Safety First: Park the Highlander on a level surface, engage the parking brake, and open the hood. You will need a 10mm socket or wrench (the most common size for the negative terminal).
- Locate the Battery: The 2015 Highlander’s battery is in the engine bay, on the driver’s side near the firewall.
- Disconnect the NEGATIVE Terminal: Loosen the nut on the black negative (-) cable clamp. Carefully lift the clamp off the battery post. Tuck the cable aside so it cannot accidentally touch the post or metal engine parts.
- Wait: This is the most important part. Leave the negative cable disconnected for at least 10-15 minutes. This ensures all residual power drains from the ECU’s capacitors. Some sources recommend 30 minutes for a full reset. During this time, you can clean the battery terminals if they are corroded.
- Reconnect: Place the negative clamp back on the post and tighten the nut securely. Do not overtighten and crack the battery case.
- Start the Vehicle: You may notice some things are reset—radio presets, clock, possibly even the power window calibration. The engine may idle a bit rough for the first start as the ECU relearns fuel trim values. This is normal.
- Check the Light: The check engine light should be off. However, it may come back on if the underlying fault persists or if the ECU re-detects the problem during the initial drive cycle.
Drawbacks of this method: It resets more than just the engine codes. It can reset the steering angle sensor (requiring a steering wheel calibration), the automatic transmission’s adaptive learning, and other system settings. While usually harmless, it’s less precise than the scanner method. Also, on some modern vehicles, a simple battery disconnect may not clear all codes, but it does on the 2015 Highlander.
Phase Three: After the Reset—The Drive Cycle and Monitoring
You’ve cleared the code. The light is off. You’re done, right? Not quite. Your Highlander’s computer uses a series of self-tests called “monitors” to verify emissions systems are working. For your vehicle to pass an official emissions test (like a smog check), all monitors must be set to “Ready.” After a reset, all monitors are cleared to “Not Ready.” You must drive the car under specific conditions (a “drive cycle”) to allow these monitors to run and complete.
Understanding the Drive Cycle
A drive cycle is a specific sequence of driving speeds, engine loads, and temperatures that triggers all onboard tests. Toyota’s drive cycle can be complex. A general, simplified version for most vehicles includes:
- Start with a cold engine (soaked for several hours).
- Drive at a steady 40-55 mph for 8-10 minutes.
- Include a period of gentle deceleration (coasting) without braking.
- Include a few minutes of stop-and-go driving.
- Ensure the engine reaches full operating temperature.
- Avoid hard acceleration and high speeds during this initial drive.
It often takes 50-100 miles of normal driving for all monitors to set. If you reset the light and immediately go for an emissions test, you will likely fail because the monitors aren’t ready. Wait until you’ve driven normally for a week or so before a test. If the check engine light comes back on during this period, it means the fault was not properly repaired or a new problem has developed. You must return to Phase One (Diagnosis).
What to Expect After the Reset
For the first few drive cycles, you might notice slightly different engine behavior. The ECU has lost its “learned” fuel trim and idle adjustments. It will use default, conservative values while it gathers new data. Your idle might be a tad high or rough for the first 10-15 minutes of driving. This is normal and should smooth out. Fuel economy might be slightly worse until the ECU re-optimizes. Also, if you disconnected the battery, your radio and clock will need to be reset. If your power windows or sunroof seem to operate differently (e.g., one-touch down doesn’t work), you may need to perform a recalibration procedure, which is usually in the owner’s manual.
When to Seek Professional Help: Knowing Your Limits
While resetting the light is a simple DIY task, the diagnostic and repair work that must precede it is not always so. There are clear signs it’s time to call a professional:
- The Light is Flashing: As stated, stop driving immediately. This requires urgent professional attention.
- Multiple Codes Appear: If your scan shows several codes from different systems (e.g., an oxygen sensor code AND a misfire code), it can indicate a more complex, interconnected problem.
- You Cannot Determine the Root Cause: You read a code like P0171 (System Too Lean). The causes could be a dirty MAF sensor, a vacuum leak, bad fuel pressure, or exhaust leaks. Pinpointing this requires experience and tools like a smoke machine for vacuum leaks or a fuel pressure gauge.
- The Light Returns Immediately or Very Quickly: If you reset it and it’s back on within a day or two of driving, the repair was either incomplete or incorrect.
- You Lack the Tools or Confidence: Working on fuel systems, sensors, and emissions components can be tricky. A mistake can be costly.
A reputable independent mechanic or a Toyota dealership’s service department has advanced scan tools that can read manufacturer-specific codes, view live sensor data streams, and perform bi-directional tests (like activating a fuel pump or EGR valve to test it). They can save you from a misdiagnosis and a wasted part. For persistent issues on your Highlander, professional diagnosis is a wise investment.
Conclusion: The Responsible Approach to Your Check Engine Light
So, you now know how to reset check engine light on a 2015 Toyota Highlander. You have the two methods at your fingertips: the precise OBD2 scanner tool and the universal battery disconnect. But the true takeaway from this 2500+ word guide is that the reset is the final, ceremonial step—not the first. It’s the “all-clear” signal after the “mayday.” Rushing to that final step without addressing the initial distress call is a recipe for more expensive repairs down the road, potential safety risks, and a guaranteed failure at your next emissions inspection.
Treat your Highlander’s check engine light with the respect it deserves. See it as a helpful mechanic, not an enemy to be silenced. Follow the sacred sequence: 1. Read the Code. 2. Research and Diagnose. 3. Repair the Fault. 4. Reset the Light. 5. Drive and Monitor. By adopting this disciplined approach, you protect your investment, ensure your family’s safety on the road, and maintain your vehicle’s performance and longevity. That dark, quiet dashboard isn’t just the absence of a light; it’s the peace of mind that comes from knowing your Toyota Highlander is truly healthy and ready for the journey ahead.
Frequently Asked Questions
Will disconnecting the battery reset the check engine light on my 2015 Toyota Highlander?
Yes, disconnecting the negative battery terminal for 10-15 minutes will reset the ECU and turn off the check engine light. However, this is a blunt instrument that also resets other settings like radio presets and steering angle sensor calibration. It does not fix the underlying problem, so the light will likely return if the issue persists.
How long does it take for the check engine light to come back on after a reset if the problem isn’t fixed?
It varies. The ECU runs a drive cycle of self-tests. If the fault is constant, the light may return within a few miles of driving. If the fault is intermittent (like a wiring connection that fails under vibration), it might take days or weeks to reappear. A persistent light returning quickly is a strong sign the repair was not made.
Can I pass an emissions test with the check engine light on or with “Not Ready” monitors?
No. In most states, a vehicle with an illuminated check engine light will automatically fail an emissions (smog) test. Furthermore, if you recently cleared the codes, all monitors will show “Not Ready,” which also causes a failure. You must drive 50-100 miles after a reset to allow monitors to set to “Ready” before testing.
Is it safe to drive my Highlander with the check engine light on?
It depends. If the light is steady and the car is running normally (no strange noises, smells, or performance issues), a short trip to a repair shop is generally okay. However, you should diagnose it promptly. If the light is flashing, you must stop driving immediately. A flashing light indicates a severe misfire that can cause catastrophic damage to the catalytic converter.
My check engine light is on, but the car seems to run fine. What could it be?
Common causes for a steady light with normal driving include a loose or faulty gas cap (most common), a failing oxygen sensor, a minor evaporative emissions (EVAP) system leak, or a dirty mass air flow (MAF) sensor. While not immediately dangerous, these issues will cause your vehicle to fail emissions tests and can hurt fuel economy. Always read the code to know for sure.
Do I need a special scanner for a 2015 Toyota Highlander?
Any standard OBD2 scanner (often called an “OBD2 code reader”) will work to read and clear generic powertrain codes (P-codes). For the most accurate and complete diagnosis, especially for manufacturer-specific codes related to hybrid systems or advanced safety features on the Highlander, a more advanced scanner like a Toyota Techstream or a professional-grade tool is ideal. However, for basic check engine light diagnosis and reset, a $20-$50 generic OBD2 scanner is sufficient for most common issues.


