
How to Reset Maintenance Light on Toyota Corolla with Push Button
Contents
- 1 Key Takeaways
- 2 📑 Table of Contents
- 3 Your Friendly Guide to Silencing That Dashboard Wrench
- 4 Understanding Your Corolla’s Maintenance Required Light
- 5 CRITICAL: The Golden Rule Before You Reset
- 6 The Step-by-Step Reset Process for Push-Button Start Corollas
- 7 Troubleshooting: What If the Light Won’t Reset?
- 8 Why Timely Resets and Service Matter for Your Corolla
- 9 Conclusion: You’ve Got This!
- 10 Frequently Asked Questions
Resetting the maintenance required light on a Toyota Corolla with push-button start is a simple, manual process you can do in under a minute. It does not require any special tools, just a clear understanding of your vehicle’s menu and odometer buttons. This reset is only for the maintenance reminder after you’ve performed the required service, like an oil change. Always address the underlying service need first before resetting the light.
Key Takeaways
- The maintenance light is a reminder, not an error. It illuminates based on mileage and time intervals to remind you of scheduled service like oil changes.
- You must perform the required service first. Resetting the light without changing the oil or performing the needed maintenance is unsafe and defeats the system’s purpose.
- The process uses the odometer button and menu. For push-button start models, you’ll navigate the “Settings” menu on the multi-information display using the “ODO/TRIP” or arrow buttons.
- No special tools or a dealership visit is needed. This is a user-serviceable reset designed to be done by the owner after maintenance is complete.
- A persistent light after a correct reset may indicate a problem. If the light returns quickly or won’t reset, there may be an issue with the sensor or the service wasn’t fully completed.
- The procedure is similar across many Toyota models. You can find the steps for other vehicles like the Toyota Avalon or Highlander on our site.
📑 Table of Contents
- Your Friendly Guide to Silencing That Dashboard Wrench
- Understanding Your Corolla’s Maintenance Required Light
- CRITICAL: The Golden Rule Before You Reset
- The Step-by-Step Reset Process for Push-Button Start Corollas
- Troubleshooting: What If the Light Won’t Reset?
- Why Timely Resets and Service Matter for Your Corolla
- Conclusion: You’ve Got This!
Your Friendly Guide to Silencing That Dashboard Wrench
Ah, the little wrench icon that has decided to make itself at home on your Toyota Corolla’s dashboard. For many drivers, that little symbol can spark a moment of panic. “What’s wrong? Is my car okay? Do I need to go to a mechanic immediately?” Take a deep breath. In most cases, that maintenance required light is simply your car’s way of giving you a friendly, electronic tap on the shoulder. It’s a reminder that it’s time for routine, scheduled service—most commonly an oil and filter change. And here’s the best news: if you’ve just had that service done, you can turn that light off yourself. It’s a straightforward process, especially on modern Corollas with the push-button start system. This guide will walk you through every single step, clearly and calmly, so you can get back to enjoying your drive with a clean, informative dashboard.
We’re going to focus specifically on Corolla models equipped with the push-button ignition. The method differs slightly from older models with a traditional key, but it’s just as easy. Think of it as navigating a simple menu on a small screen. By the end of this article, you’ll not only know exactly how to perform the reset but also understand what the light means, when you should (and shouldn’t) reset it, and what to do if things don’t go as planned. Let’s get that wrench icon under control.
Understanding Your Corolla’s Maintenance Required Light
Before we dive into button-pressing, it’s crucial to understand what you’re dealing with. This isn’t a “check engine” light that signals a fault or malfunction. The maintenance required light is a proactive, mileage-and-time-based reminder system programmed into your car’s computer, the ECU (Engine Control Unit).
Visual guide about How to Reset Maintenance Light on Toyota Corolla with Push Button
Image source: autovehicleparts.com
How Does It Know When to Light Up?
The system is quite simple in its brilliance. When your Toyota Corolla is serviced at a dealership or a trusted mechanic, the technician resets the maintenance counter to zero. From that reset point, the car’s computer begins counting down the miles and tracking the time until your next recommended service interval. For most modern Corollas, this primary interval is every 5,000 miles or 6 months, whichever comes first. When you hit that threshold, the little wrench icon illuminates on your instrument cluster. It’s a pre-scheduled alert, not a reaction to a problem.
What Service Does It Typically Remind You Of?
While the primary trigger is usually the engine oil and filter replacement, the maintenance reminder system can also be tied to other service items. Depending on your Corolla’s model year and specific maintenance schedule, it might also be a prompt for:
- Tire rotation
- Cabin air filter replacement
- Engine air filter inspection/replacement
- Brake system inspection
- Fluid level checks (coolant, brake fluid, etc.)
Consult your owner’s manual for the exact service schedule for your specific model year. The key takeaway is that the light is a holistic reminder for your car’s health, not just an oil change light.
CRITICAL: The Golden Rule Before You Reset
Let’s pause and talk about the single most important rule in this entire process. You must complete the required maintenance before you reset the light. Resetting the light without actually changing the oil or performing the necessary service is like tearing the batteries out of your smoke detector instead of checking for a fire. It silences the warning but creates a dangerous situation. Driving with old, degraded oil can cause severe engine wear, reduced performance, and ultimately, catastrophic engine failure. The cost of an engine rebuild or replacement is astronomically higher than the cost of a routine oil change. So, please, only proceed with these reset steps after you or your mechanic has finished the service.
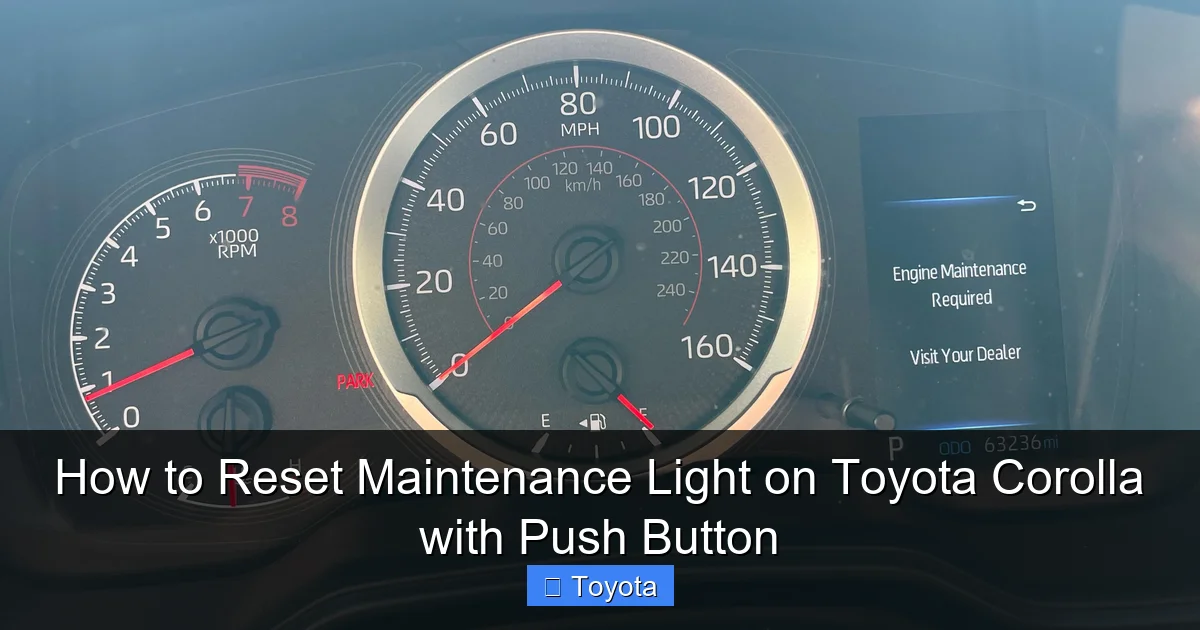
Visual guide about How to Reset Maintenance Light on Toyota Corolla with Push Button
Image source: i.redd.it
If you’re unsure whether the service was done correctly, or if you bought the car used and don’t know the service history, it’s always wise to have a professional inspect the vehicle first. You can also check the oil level and condition manually using the dipstick. Good oil should be translucent amber; bad oil is dark brown or black and may have a burnt smell. When in doubt, get the service done. Once it’s complete, come back here to turn off the light.
The Step-by-Step Reset Process for Push-Button Start Corollas
Now for the moment you’ve been waiting for. The process is menu-driven and uses the buttons on your steering wheel or the instrument cluster. These steps are validated for Corolla models from approximately 2014 onward with push-button start. The exact wording on your screen might vary slightly by model year, but the logic is identical.
Step 1: Prepare the Vehicle
This is the easiest step. Ensure your Corolla is parked safely with the parking brake set. You do not need to start the engine for this process, but the car must be in the “ON” or accessory mode. Press the push-button start once without touching the brake pedal. This will power on the dashboard and infotainment system. You should see all your normal warning lights illuminate briefly, including the maintenance required wrench. If your car has a traditional key, insert it and turn to the “ON” position (the position right before “START”).
Step 2: Access the Vehicle Settings Menu
Look at your multi-information display—the screen in the center of your gauge cluster. You need to get to the “Settings” menu. Use the button(s) on your steering wheel. Most commonly, you will use the “ODO/TRIP” button (often located on the instrument panel near the speedometer) or dedicated arrow/menu buttons on the left steering wheel stalk. Press the button to cycle through the display modes until you see an option like “Settings” or a gear icon 📐. Press the “Enter” or “Set” button (often the same ODO/TRIP button) to select it.
Step 3: Navigate to the Maintenance Reset Option
You are now inside the Settings menu. Use your arrow buttons (or press the ODO/TRIP button repeatedly) to scroll through the sub-menus. You are looking for an option labeled something like:
- “Maintenance”
- “Maintenance Reset”
- “Scheduled Maintenance”
- Or a sub-menu called “Vehicle Settings” that contains it.
The exact path is often: Settings -> Vehicle Settings -> Maintenance. Once you highlight the “Maintenance” or “Maintenance Reset” option, press the “Enter” or “Set” button to select it.
Step 4: Confirm the Reset
After selecting the maintenance menu, you should see a screen that shows the current maintenance item (e.g., “Oil & Filter”) and the mileage/distance until next service. There should also be an option to “Reset” or “Set”. Highlight this reset option and press “Enter.” The system will likely ask you for a final confirmation, such as “Reset Maintenance Data?” or “Yes/No.” Select “Yes” or “Confirm” using your button.
Step 5: Verification and Completion
If you’ve done it correctly, you should see a confirmation message like “Maintenance Data Reset” or “Setting Completed” appear on the screen for a few seconds. The wrench icon on your main instrument cluster should immediately go out. To be absolutely sure, cycle the display back to the standard odometer view. The maintenance light should be off. You can now turn off the car by pressing the push-button start again. The reset is complete! You’ve successfully told your car’s computer that the service has been done and it can start counting down to the next interval.
Troubleshooting: What If the Light Won’t Reset?
Sometimes, despite following the steps perfectly, the little wrench is stubborn and refuses to go away. Don’t panic. This is less common, but it happens. Here is a systematic checklist to diagnose why your reset might be failing.
Double-Check the Procedure and Model Year
First, ensure you have the correct steps for your specific model year. The menu structure can change slightly between generations. For example, a 2017 Corolla might have a different menu path than a 2023 model. Consult your owner’s manual—it has the definitive procedure for your exact vehicle. Also, ensure you are in the correct menu. Sometimes “Settings” is under a “Menu” button on the steering wheel, not the ODO/TRIP button.
The Service May Not Have Been Fully Completed
This is a frequent culprit. If the technician did not officially reset the maintenance counter after the service, the light will remain on. Some independent shops forget this step. If you changed the oil yourself, did you remember to reset it? If you’re certain the service is done, try the reset process again, carefully following each step. Sometimes it requires pressing and holding the reset button for a few seconds, not just a quick press.
Potential Electrical or Sensor Issues
If the light was on for an extremely long time before you addressed the service (e.g., thousands of miles past due), there is a small chance the maintenance reminder system has entered a fault state. Similarly, if other dashboard warning lights are also acting erratically, it could point to a deeper electrical issue, like a weak battery or a problem with the instrument cluster itself. A weak battery can cause all sorts of strange electronic behavior in modern cars. If you’ve tried the reset correctly multiple times and the light remains, or if it comes back on almost immediately after a reset, it’s time to visit a professional. They can use a professional diagnostic scan tool to communicate directly with the vehicle’s computer and force a reset or check for stored trouble codes.
For other Toyota models, the process is similar but the button locations may differ. You can find guides for vehicles like the 2021 RAV4 or 2016 Highlander on our site.
Why Timely Resets and Service Matter for Your Corolla
We’ve focused on the “how,” but let’s reinforce the “why.” Your Toyota Corolla is renowned for its reliability, but that reputation is earned through consistent, proper maintenance. The maintenance required light is your car’s built-in compliance officer.
Protecting Your Engine
The most critical service tied to this light is the oil change. Engine oil is the lifeblood of your engine. It lubricates thousands of moving parts, reduces friction, carries away heat, and prevents corrosion. Over time, oil breaks down, becomes contaminated with combustion byproducts, and loses its viscosity. Running an engine on degraded oil is like running a marathon without water—it causes excessive wear, sludge buildup, and can lead to sudden, expensive failure. Resetting the light after a timely oil change ensures your engine is protected with fresh, clean lubricant.
Maintaining Performance and Fuel Economy
A well-maintained engine runs efficiently. Clean air filters, properly inflated tires (often part of a rotation service), and fresh spark plugs all contribute to your Corolla’s peppy acceleration and excellent fuel economy. Neglecting these items, as reminded by the maintenance light, can lead to sluggish performance, poor gas mileage, and a less enjoyable driving experience.
Preserving Resale Value
When it comes time to sell or trade-in your Corolla, a complete and well-documented service history is a huge selling point. It proves to potential buyers that the car has been cared for. A persistent maintenance light, on the other hand, is a red flag that suggests neglect. By promptly addressing the reminders and resetting the light, you maintain a clear record of responsible ownership, which directly translates to a higher value for your vehicle.
Conclusion: You’ve Got This!
Resetting the maintenance required light on your push-button start Toyota Corolla is a simple yet empowering task. It’s one of the few routine maintenance procedures you can confidently handle yourself, saving you a trip to the dealership or shop just for a reset. Remember the core principle: service first, reset second. Follow the menu navigation steps carefully—power on, enter settings, find maintenance, select reset, confirm. With a little practice, it becomes second nature.
Your Corolla’s maintenance reminder system is a helpful tool designed to keep your reliable companion running smoothly for years, even decades, to come. By understanding its purpose and knowing how to reset it after service, you take an active role in your car’s health. You’re not just silencing a light; you’re acknowledging a job well done and resetting the clock on your next adventure. So, go ahead, tackle that reset with confidence, and enjoy the peace of mind that comes with a well-maintained vehicle and a clear dashboard.
Frequently Asked Questions
Will disconnecting the battery reset the maintenance light?
No. Disconnecting the battery will reset the radio and clock settings, but it will not reset the maintenance required light on a Toyota Corolla. The maintenance interval is stored in a non-volatile memory that retains data even when power is lost. You must use the specific menu-driven reset procedure outlined in this guide.
Can I reset the light if I’m not sure if the oil was changed?
It is strongly advised against. The maintenance light is a critical reminder for essential service. Resetting it without verifying the oil has been changed risks severe engine damage. Always check the oil level and condition with the dipstick, or better yet, have the service performed by a professional before resetting.
My maintenance light came on, but I just changed the oil myself. Why won’t it reset?
First, ensure you followed the exact reset procedure for your model year. The most common mistake is not navigating to the correct “Maintenance” sub-menu within the “Settings” menu. Second, confirm the service interval is actually due. Some systems require the car to be driven a short distance after an oil change before the reset can be accepted. Try driving for 5-10 minutes and attempt the reset again.
Is the procedure the same for a Corolla with a regular key?
No. The process for models with a traditional key ignition is different. It typically involves turning the key to the “ON” position, turning it back to “OFF,” and then holding the odometer button while turning the key back to “ON,” all while watching the odometer display. This guide specifically covers the push-button start method.
What does it mean if the maintenance light flashes when I try to reset it?
A flashing light or an error message during the reset attempt usually indicates the system did not receive the correct signal or the reset conditions weren’t met. This often means the vehicle’s computer thinks the service interval hasn’t been reached yet (e.g., not enough miles have accumulated since the last reset). Double-check your mileage against the recommended interval in your owner’s manual.
The light came back on just a few days after I reset it. Is my car broken?
A light returning immediately after a successful reset is a strong indicator that the underlying service was not actually performed. For example, if the oil wasn’t changed, the system’s internal counter may have detected a fault or the oil life monitor (if equipped) may have calculated poor oil quality instantly. Re-perform the required service (like an oil change) and then try the reset procedure again. If it persists, consult a mechanic.


