
How Do I Reset the Check Engine Light on a 2014 Toyota Camry
Contents
- 1 Key Takeaways
- 2 📑 Table of Contents
- 3 Understanding Your 2014 Toyota Camry’s Check Engine Light
- 4 Why You Should Never Just “Turn Off” the Light Without a Fix
- 5 The Three Primary Methods to Reset the Check Engine Light
- 6 Step-by-Step Reset Guide for Your 2014 Toyota Camry
- 7 When to Reset and When You Absolutely Should Not
- 8 What About Other Toyota Models? Similarities and Differences
- 9 Conclusion: A Simple Process with a Serious Responsibility
- 10 Frequently Asked Questions
Seeing the check engine light on your 2014 Toyota Camry can be stressful, but resetting it is a straightforward process once you understand the why and how. The light signifies an issue detected by the car’s computer, and simply resetting it without fixing the problem is only a temporary solution. You can reset it using three main methods: disconnecting the battery, using an OBD2 scanner, or completing a successful drive cycle after repairs. Always diagnose the underlying cause first to avoid repeated warnings and potential damage.
Key Takeaways
- The check engine light is a warning, not a direct indicator of a specific problem: It means the Engine Control Module (ECM) has detected a reading outside normal parameters from one of its many sensors.
- Never reset the light without diagnosing and repairing the cause: Resetting erases the trouble code but does not fix the faulty sensor, vacuum leak, or other issue, and the light will return, often quickly.
- An OBD2 scanner is the most reliable and recommended method: It allows you to read, clear, and reset specific diagnostic trouble codes (DTCs) without side effects like resetting other vehicle systems.
- The battery disconnect method is a universal but blunt tool: It will clear the code but also resets all learned data in other modules (like radio presets and transmission adaptations), which can cause temporary drivability issues.
- A natural drive cycle can sometimes reset the light automatically: If the repair was successful and the vehicle completes a specific drive pattern, the ECM may self-clear the light after confirming the issue is resolved.
- Your 2014 Camry’s OBD2 port is located under the dashboard, driver’s side: It’s a standardized 16-pin connector, making it compatible with any generic OBD2 scanner for reading and clearing codes.
- If the light returns immediately after resetting, the repair was not successful: This is a clear sign the underlying problem persists and requires further professional diagnosis.
📑 Table of Contents
- Understanding Your 2014 Toyota Camry’s Check Engine Light
- Why You Should Never Just “Turn Off” the Light Without a Fix
- The Three Primary Methods to Reset the Check Engine Light
- Step-by-Step Reset Guide for Your 2014 Toyota Camry
- When to Reset and When You Absolutely Should Not
- What About Other Toyota Models? Similarities and Differences
- Conclusion: A Simple Process with a Serious Responsibility
Understanding Your 2014 Toyota Camry’s Check Engine Light
That little yellow engine-shaped icon glowing on your dashboard is your car’s way of saying, “Hey, we need to talk.” Officially called the Malfunction Indicator Lamp (MIL), the check engine light is part of your 2014 Camry’s On-Board Diagnostics II (OBD2) system. This system is your vehicle’s central nervous system, constantly monitoring the performance of the engine, transmission, and emissions components through a network of sensors. When a sensor sends a reading that falls outside the acceptable range—say, an oxygen sensor detecting too much fuel in the exhaust or a misfire sensor noting an incomplete combustion—the Engine Control Module (ECM) logs a Diagnostic Trouble Code (DTC) and illuminates the check engine light to get your attention.
It’s crucial to understand that the light itself is not the problem. It’s merely a messenger. The problem is whatever triggered the code. Common culprits in a 2014 Camry with its 2.5L 4-cylinder or 3.5L V6 engine can include a loose or faulty gas cap (which can trigger a evaporative system leak code like P0455), failing oxygen (O2) sensors, a malfunctioning catalytic converter, spark plug or ignition coil issues causing misfires (P0300-P0304), or even a dirty Mass Air Flow (MAF) sensor. Before you even think about resetting the light, your first and most important step must be to diagnose the specific trouble code. This is non-negotiable for a responsible car owner.
The Critical Difference: Check Engine Light vs. Maintenance Required Light
Many drivers confuse the check engine light with the “MAINTENANCE REQUIRED” light, which is a separate, simpler system. The maintenance required light on your Camry is a mileage-based reminder for scheduled service, like an oil change or tire rotation. It is reset using a different procedure, often involving the odometer button and the ignition. Resetting the maintenance light does nothing for a check engine light. If you’re seeing a steady yellow engine icon, you’re dealing with an OBD2 fault. If you see a small wrench icon or the words “MAINTENANCE REQUIRED,” that’s your service interval reminder. You can find guides for that specific light for various models, including how to reset the maintenance light on a Toyota Tacoma, but the process and meaning are entirely different from the check engine light we’re addressing here.
Why You Should Never Just “Turn Off” the Light Without a Fix
Let’s be clear: “resetting” the check engine light is not the same as “fixing” the problem that caused it. Resetting simply erases the stored trouble code from the ECM’s memory and turns off the warning lamp. If the root cause is still present—a cracked vacuum hose, a dead oxygen sensor, or a cylinder that’s still misfiring—the ECM will detect the fault again within minutes or a short drive cycle and immediately relight the check engine icon. This cycle of resetting and relighting is not only frustrating but also dangerous and costly.
Visual guide about How Do I Reset the Check Engine Light on a 2014 Toyota Camry
Image source: i.ytimg.com
Driving with an unresolved check engine light can lead to severe consequences. A misfire, for example, can dump unburned fuel into the catalytic converter, overheating and destroying this very expensive emissions component. An incorrect air-fuel mixture can increase emissions, cause poor fuel economy, and damage the engine over time. Furthermore, in most states, a vehicle with an illuminated check engine light will fail an emissions (smog) test automatically, preventing you from renewing your registration. The responsible approach is to use the reset only as the final step after a proper diagnosis and successful repair. Think of resetting as the “period at the end of the sentence” of your repair work.
The Three Primary Methods to Reset the Check Engine Light
Once you have diagnosed the issue with a scan tool, performed the necessary repair (like tightening the gas cap, replacing a sensor, or fixing a leak), and are confident the problem is solved, you can proceed to reset the light. There are three common methods, each with its own pros and cons. For your 2014 Camry, method #2 is overwhelmingly the best choice.
Visual guide about How Do I Reset the Check Engine Light on a 2014 Toyota Camry
Image source: urbsgarage.com
Method 1: The Battery Disconnect (The “Hard Reset”)
This is the old-school, brute-force method. By disconnecting the negative battery terminal for a period of time, you cut power to the ECM, forcing it to clear all its memory, including stored trouble codes. Steps: Open the hood, locate the battery (in the engine bay, near the front on the driver’s side), and use a 10mm wrench to loosen the negative (black, marked with a “-” or “NEG”) terminal clamp. Carefully remove the clamp and tuck the cable away from the battery post. Wait at least 15-30 minutes to ensure all residual power drains from the ECM’s capacitors. Reconnect the negative terminal and tighten the clamp securely.
Major Drawbacks: This method is a sledgehammer. It doesn’t just clear the check engine code; it also resets all learned data in other vehicle modules. Your radio will lose its presets and security code. Your power window and sunroof initializations may be lost. Your automatic transmission’s adaptive learning, which tailors shift points to your driving style, will be erased, leading to harsh or sloppy shifts for the first 50-100 miles until it relearns. Your idle air control and fuel trim values are also reset. For these reasons, the battery disconnect is generally discouraged unless you have no other option and are prepared to deal with these minor annoyances.
Method 2: Using an OBD2 Scanner (The “Smart Reset”)
This is the professional, precise, and recommended method. An OBD2 scan tool plugs into your Camry’s standardized OBD2 port (located under the dashboard, just above the pedals on the driver’s side). After reading and confirming the repair by checking for stored codes, you use the scanner’s menu to select “Erase Codes” or “Clear DTCs.” Steps: Turn the ignition to the “ON” position (do not start engine). Plug the scanner’s connector into the OBD2 port. Follow the scanner’s on-screen prompts to establish a link with the vehicle, read codes, and finally, select the option to clear or erase them. Once cleared, the check engine light should turn off immediately. Turn the ignition off and on again to confirm.
Advantages: It’s clean, targeted, and preserves all other vehicle system memories. You can also use this opportunity to verify that no other codes are lurking. Basic code readers are inexpensive ($20-$50), while more advanced models with live data and manufacturer-specific codes can cost more. For a 2014 Camry, even a basic generic OBD2 scanner will work perfectly for reading and clearing the check engine light. The process is identical to resetting the light on many other vehicles; for example, the steps for how to reset the check engine light on a Toyota Corolla are virtually the same, highlighting the standardization of the OBD2 system.
Method 3: The Drive Cycle (The “Automatic Reset”)
The ECM is designed to self-clear a check engine light if it determines the fault is no longer present. This happens after a specific “drive cycle” or set of conditions is met and the sensor readings remain within spec for a predetermined number of warm-up cycles. After you’ve made a repair, simply driving the car normally under a variety of conditions (city and highway, different speeds, warm engine) can sometimes cause the light to go out on its own after 10-50 miles of driving. This is the ECM’s way of confirming the fix is valid. However, you cannot force this method reliably; it happens on the ECM’s schedule. If the light doesn’t go out after a few drive cycles, you must use a scanner to clear it or the repair is not complete. This method is not a “reset technique” you can actively perform; it’s a passive result of a successful repair.
Step-by-Step Reset Guide for Your 2014 Toyota Camry
Assuming you have diagnosed the issue (using a scanner at an auto parts store, for example) and performed the necessary repair, here are the detailed, model-specific instructions for each active reset method.
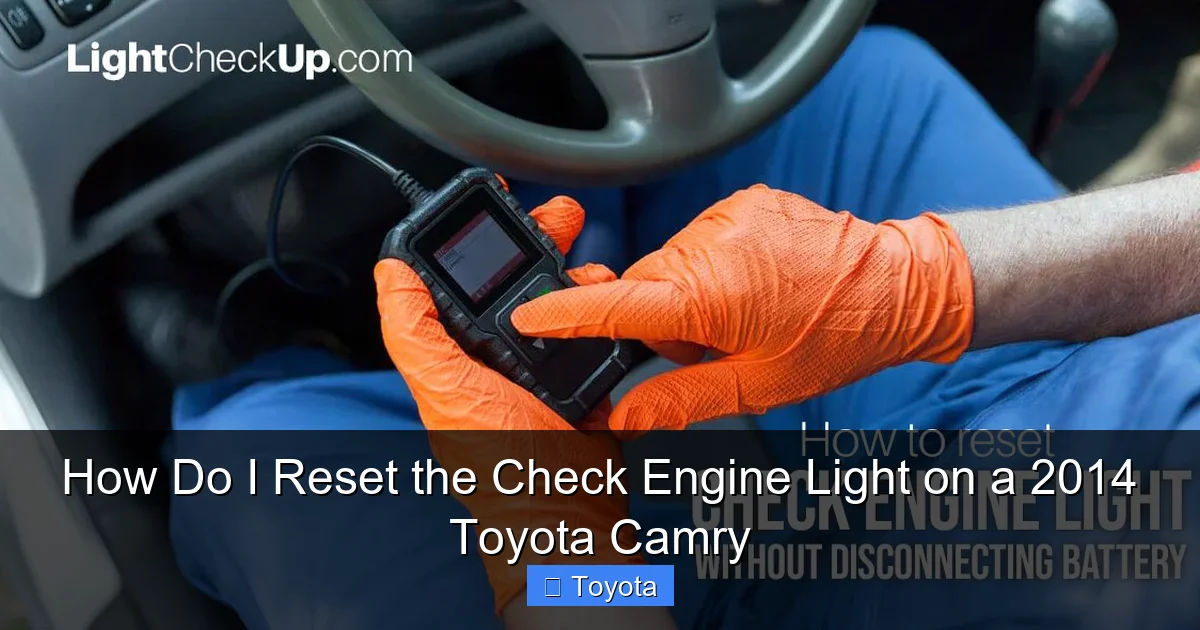
Visual guide about How Do I Reset the Check Engine Light on a 2014 Toyota Camry
Image source: lightcheckup.com
Pre-Reset Checklist
- Confirm the repair: Double-check that the gas cap is tightened until it clicks, that a replaced sensor’s connector is secure, or that a vacuum hose is properly reconnected.
- Clear any other codes: Before resetting, scan for all codes. If multiple codes are present, address them all. Resetting with other faults present is pointless.
- Ensure the battery is charged: A weak battery can cause communication errors with the scanner during the reset process.
- Gather your tools: For method 2, have your OBD2 scanner ready. For method 1, have the correct size wrench (usually 10mm) and possibly a terminal puller.
Executing the OBD2 Scanner Reset (Recommended)
1. Locate the OBD2 Port: Sit in the driver’s seat and look under the dashboard, just to the left of the steering column. You’ll see a rectangular, 16-pin connector, often with a plastic cover. It’s the only port of its size in that area.
2. Prepare the Vehicle: Do not start the engine. Insert the key and turn it to the “ACC” or “ON” position (the position right before start, where dash lights come on). This powers up the vehicle’s computer network.
3. Connect the Scanner: Plug your OBD2 scanner’s cable firmly into the port. The connection should be snug.
4. Initialize the Scanner: Turn on the scanner if it has a separate power button. Most will automatically power on when connected. Wait for it to communicate with the vehicle. This may take 10-30 seconds. You should see a menu or vehicle information on the screen.
5. Read Codes (Optional but Wise): Use the “Read Codes” or “Diagnose” function. Note any codes present (e.g., P0420, P0171). This confirms what you’re clearing. If new, unexpected codes appear, investigate before proceeding.
6. Clear the Codes: Navigate the menu to find “Erase Codes,” “Clear DTCs,” or “Reset MIL.” Select this option. The scanner may ask for confirmation. Confirm. You should see a message like “Codes Cleared” or ” MIL Off.”
7. Verify: The check engine light on your dash should extinguish immediately. Turn the ignition off, wait 10 seconds, and turn it back on. The light should remain off. Start the engine and ensure it runs smoothly. You have successfully reset the light.
Executing the Battery Disconnect Reset (Use with Caution)
1. Safety First: Ensure the engine is off and the key is removed. Wear safety glasses and gloves. Do not let the wrench touch both terminals simultaneously.
2. Open the Hood: Locate the battery in the engine bay, on the driver’s side near the firewall.
3. Identify Terminals: The negative terminal is connected with a black cable and marked with a “-” (NEG). The positive is red and marked with a “+” (POS). You will only disconnect the NEGATIVE terminal.
4. Loosen the Clamp: Using a 10mm wrench (or the correct size for your clamp), loosen the bolt on the negative terminal clamp until you can move the clamp. Do not remove the bolt completely unless necessary.
5. Disconnect and Secure: Once loose, carefully lift the clamp off the battery post. Tuck the black cable away so it cannot accidentally touch the battery post. You may use a non-metallic tool or cable tie to secure it.
6. Wait: Let the battery remain disconnected for at least 15 minutes. This ensures the ECM’s memory capacitors fully discharge. Some recommend 30 minutes for a complete reset.
7. Reconnect: Place the clamp back onto the negative post and tighten the bolt securely. Ensure there is no corrosion or looseness.
8. Reinitialize: You will now need to reset your radio presets, possibly enter a radio code (check owner’s manual), and allow the transmission to relearn shift points by driving conservatively for the first 50-100 miles. The idle may be slightly rough initially as the ECM relearns fuel trims. Start the engine and check that the light is off.
When to Reset and When You Absolutely Should Not
Timing is everything. The act of resetting is simple; the decision of when to do it is critical for your vehicle’s health and your safety.
The Golden Rule: Diagnose First, Reset Last
The only appropriate time to reset the check engine light is after you have identified the root cause via a trouble code and completed the necessary repair. If you reset first, you are essentially deleting the evidence of the problem. If the issue is serious (like a failing catalytic converter or a persistent misfire), driving with it will cause more damage, costing you far more in repairs later. Use a simple OBD2 code reader to get the code number (e.g., P0301 = Cylinder 1 Misfire Detected). Look up the code’s meaning online or in a repair manual to understand what system is affected. This guides your repair. If you’re not comfortable diagnosing, take it to a mechanic or use a service like those at many auto parts stores that offer free code reading.
Scenarios Where You Must NOT Reset
- Immediately after the light comes on without investigation: The code is your clue. Ignoring it is like ignoring a fever.
- If the light is flashing: A flashing check engine light indicates a severe, active misfire that can damage the catalytic converter. Stop driving the vehicle (except to a repair shop) and get it fixed immediately. Do not reset.
- If you have not performed any repair: Resetting is pointless and deceptive, especially if you are trying to sell the car or pass an inspection.
- If multiple codes are present, especially from different systems: This could indicate a more complex issue like a wiring problem or ECM fault. Clear only after addressing all root causes.
The Emissions Test Connection
In areas requiring emissions testing, your vehicle’s OBD2 system must be in a “ready” state, and the check engine light must be off. Simply clearing the codes right before the test will often fail because the ECM hasn’t had time to run its monitors and set the “ready” status. You must drive the vehicle through a complete drive cycle (which varies by model) after the repair to allow all monitors (like the oxygen sensor and EVAP monitors) to complete. This can take several days of normal driving. If you clear codes and go straight to the test station, it will almost certainly fail. This is why proper repair and subsequent natural resetting or scanner clearing after a drive cycle is essential.
What About Other Toyota Models? Similarities and Differences
The good news is that the fundamental process for resetting the check engine light is highly standardized across all modern Toyotas, thanks to the federal mandate for OBD2. The location of the OBD2 port (under the driver’s side dash), the basic menu functions on any OBD2 scanner, and the principle of clearing codes are identical whether you drive a Camry, Corolla, RAV4, or Highlander. The specific drive cycle patterns might have minor variations in speed and duration, but the core concept remains the same.
For instance, if you need to know how to reset the check engine light on a Toyota Corolla, you would follow the exact same OBD2 scanner steps outlined above for your Camry. The port is in the same place, and the scanner commands are universal. Similarly, the process for how to reset the check engine light on a Toyota Highlander is no different. This standardization is a huge benefit to DIYers. However, always be aware that some newer Toyota models with more advanced multimedia systems might have additional service menus, but for the check engine light, the OBD2 port is your gateway.
It’s worth noting that while the reset method is the same, the common causes of check engine lights can differ between models and engines. A 4-cylinder Camry might more commonly see codes related to the EGR system, while a V6 might have different ignition coil issues. Always diagnose your specific vehicle. If you own multiple Toyotas, understanding this process on your Camry gives you the knowledge to handle the same situation on a family member’s Toyota RAV4 or even a Tacoma pickup. The principles of diagnosing first and using a scanner are universal across the brand.
Conclusion: A Simple Process with a Serious Responsibility
Resetting the check engine light on your 2014 Toyota Camry is technically simple. With an OBD2 scanner, it’s a two-minute task: plug in, navigate menus, clear codes. The battery disconnect method is also quick but comes with significant side effects. The real work, and the critical responsibility, lies in the steps before the reset: accurate diagnosis and correct repair. Remember, the light is a symptom, not the disease. Treating the symptom without curing the disease will only lead to more pain, expense, and risk down the road.
Your Camry is a reliable vehicle, and its OBD2 system is a powerful tool for maintaining that reliability. Embrace it. Invest in a decent OBD2 scanner (they are affordable and invaluable). When the light comes on, stay calm. Read the code. Research it. Make the repair. Then, and only then, use your scanner to clear the code and extinguish the light. Drive it for a few days to ensure the light stays off and the car runs perfectly. If the light returns, go back to diagnosis. By following this disciplined approach, you protect your investment, ensure your safety, and keep your Camry running cleanly for years to come. You’ve got this!
Frequently Asked Questions
Can I reset the check engine light by just driving my Camry?
No, you cannot actively “reset” it by driving. Driving is part of a “drive cycle” that the ECM uses to automatically turn off the light after a repair is made and the system verifies the fault is gone. If the underlying problem exists, the light will not go out on its own, no matter how far you drive.
Will disconnecting the battery reset the check engine light on my 2014 Camry?
Yes, disconnecting the negative battery terminal for 15-30 minutes will clear the check engine light and its stored codes. However, this method also resets all other vehicle memories (radio, transmission adaptations, etc.), causing temporary inconvenience. It is not the preferred method; an OBD2 scanner is better.
How long does it take for the check engine light to reset after I fix the problem?
If you use an OBD2 scanner, the light resets immediately upon successfully clearing the codes. If you rely on the automatic drive cycle method, it can take anywhere from 10 to 50 miles of varied driving (including highway and city, with multiple cold starts) before the ECM confirms the fix and turns off the light on its own.
My check engine light came on after I refueled. What should I do?
This is very common and often points to a loose or faulty gas cap. First, remove the cap and reinstall it until you hear several distinct clicks, ensuring it’s tight. Then, drive for a day or two. If the light was due to a loose cap, it should go out on its own. If it remains on, you likely have a small evaporative system (EVAP) leak that needs diagnosis with a smoke machine.
Will my 2014 Camry pass an emissions test with the check engine light on?
Absolutely not. A vehicle with an illuminated check engine light will automatically fail any OBD2-based emissions inspection in all states. The test checks that the light is off and that all emissions system monitors are in a “ready” state, which requires the light to have been off for a period of driving after a repair.
Is it safe to drive with a steady (non-flashing) check engine light?
It depends on the severity of the underlying issue. A steady light for a minor issue like a loose gas cap is generally safe for a short period until you can tighten it. However, for other codes (like those for misfires, oxygen sensors, or catalytic converters), driving can cause progressive damage. The safest approach is to diagnose the code immediately and limit driving until the problem is repaired.


