
How to Reset the Check Engine Light on a 2013 Toyota Corolla
Contents
- 1 Key Takeaways
- 2 📑 Table of Contents
- 3 Understanding the Check Engine Light: It’s Not Just a “Check”
- 4 Preparation: Safety First and Tools Ready
- 5 Method 1: The Correct Way – Using an OBD2 Scanner
- 6 Method 2: The Manual Reset – Battery Disconnect
- 7 What to Do Immediately After Resetting the Light
- 8 When to Absolutely Seek Professional Help
- 9 Conclusion: It’s About Responsibility, Not Just a Reset
- 10 Frequently Asked Questions
Resetting the check engine light on your 2013 Toyota Corolla is a simple process, but it’s not a repair. The light is a warning indicator, and resetting it without fixing the underlying problem will cause it to return. First, you must diagnose the issue with an OBD2 scanner. Once the repair is made, you can clear the code using a scanner or, as a last resort, by briefly disconnecting the battery. Always drive the car after a reset to confirm the problem is solved.
That little, glowing amber light on your dashboard—the one that looks like an engine with a line through it—is the check engine light (CEL). For a 2013 Toyota Corolla owner, it’s a familiar sight that can spark immediate anxiety. Your first question is likely, “How do I make it go away?” But here’s the critical truth your friendly neighborhood mechanic would tell you over a coffee: resetting the light is not the solution; it’s merely the final step after the actual solution. The check engine light is your car’s way of saying, “Hey, something’s not right under here!” It’s a messenger, not the problem itself. This comprehensive guide will walk you through the entire process, from understanding what that light truly means to the precise steps for resetting it on your specific Corolla, all while emphasizing why rushing to the reset button is a mistake.
Key Takeaways
- Reset ≠ Repair: Clearing the light only turns off the warning; it does not fix the mechanical or electronic problem that triggered it.
- Diagnosis is Mandatory: You must read the stored trouble code(s) with an OBD2 scanner to understand why the light came on in the first place.
- Two Primary Methods: The professional way is using an OBD2 scanner to clear codes. The manual method is a temporary battery disconnect, which can reset other vehicle systems too.
- Drive Cycle Test: After resetting, you must drive the car under varied conditions (50-100 miles) to see if the light returns, confirming the repair’s success.
- Seek Help for Complex Codes: If the code indicates a serious issue (e.g., multiple codes, misfires, catalytic converter), have a professional diagnose and repair it before resetting.
- Prepare for Other Resets: Disconnecting the battery may also reset your radio presets, clock, and window/power seat settings, which will need to be reprogrammed.
- Emissions Test Imminent: A vehicle with a recently cleared code will fail an emissions inspection until all readiness monitors are re-set, which requires specific driving.
📑 Table of Contents
- Understanding the Check Engine Light: It’s Not Just a “Check”
- Preparation: Safety First and Tools Ready
- Method 1: The Correct Way – Using an OBD2 Scanner
- Method 2: The Manual Reset – Battery Disconnect
- What to Do Immediately After Resetting the Light
- When to Absolutely Seek Professional Help
- Conclusion: It’s About Responsibility, Not Just a Reset
Understanding the Check Engine Light: It’s Not Just a “Check”
Before we touch any tools, let’s get on the same page. The check engine light, officially called the Malfunction Indicator Lamp (MIL), is part of your Corolla’s On-Board Diagnostics II (OBD2) system. Since 1996, all cars sold in the US have had this system. Its job is to monitor the performance of your engine, transmission, and emissions control systems. When the car’s main computer (the Engine Control Unit or ECU) detects a parameter outside its normal range—say, an oxygen sensor reading too lean or a cylinder misfiring—it logs a specific Diagnostic Trouble Code (DTC) and turns on the CEL to get your attention.
Common Triggers on a 2013 Toyota Corolla
While hundreds of codes are possible, some are notably common for this model year and engine (likely the 1.8L 2ZR-FE). Knowing these can help you anticipate the issue:
- Loose or Faulty Gas Cap: The infamous P0455 (Evaporative Emission System Leak Detected) or P0442 (Small Evap Leak). A cap not tightened properly is the #1 simple fix.
- Oxygen (O2) Sensor Failures: Codes like P0131-P0134 (Bank 1 Sensor 1) or P0151-P0154 (Bank 1 Sensor 2). These sensors monitor exhaust gases and are wear items.
- Mass Air Flow (MAF) Sensor Issues: Code P0101-P0103. A dirty or failing MAF sensor, which measures incoming air, causes poor performance and fuel economy.
- Catalytic Converter Efficiency: Code P0420. This indicates the cat is not cleaning exhaust as it should, often due to a prior, unaddressed problem like misfires.
- Random Misfires: Codes P0300-P0304. A misfire on one or multiple cylinders can be caused by spark plugs, ignition coils, or fuel injectors.
For a Corolla, these are often the culprits. But you cannot guess. You must read the code. A parts store may scan it for free, or you can buy a basic OBD2 scanner for under $30.
Preparation: Safety First and Tools Ready
Jumping in without a plan is a recipe for frustration. Here’s your pre-reset checklist.
Visual guide about How to Reset the Check Engine Light on a 2013 Toyota Corolla
Image source: images.saymedia-content.com
Safety Precautions
Your 2013 Corolla’s engine compartment is generally safe, but always:
- Ensure the engine is completely cool. A hot engine and electrical components don’t mix.
- Park on a flat surface, set the parking brake, and remove the key from the ignition.
- Wear safety glasses and gloves if you plan to disconnect the battery (acid and sparks are possible).
Essential Tools
- OBD2 Scanner/Code Reader: This is non-negotiable for a proper reset. Any standard OBD2 scanner (not just “Toyota” ones) will work. A simple “code reader” can read and clear codes. A more advanced “scan tool” provides live data.
- For Battery Method: A 10mm socket or wrench (to loosen the negative battery terminal), and a terminal cleaning brush if corrosion is present.
- Your Corolla’s Owner’s Manual: It has the exact location of the OBD2 port and battery safety specifics.
Locating the OBD2 Port
The OBD2 port is a trapezoidal, 16-pin connector, usually under the dashboard, to the left of the steering column. In your 2013 Corolla, it’s almost certainly within arm’s reach of the driver’s seat, behind a small plastic cover. You won’t miss it. It’s the only port of that shape in that area.
Method 1: The Correct Way – Using an OBD2 Scanner
This is the professional, recommended, and safest method. It’s precise, doesn’t disrupt other systems, and is the only way to confirm what code caused the light.
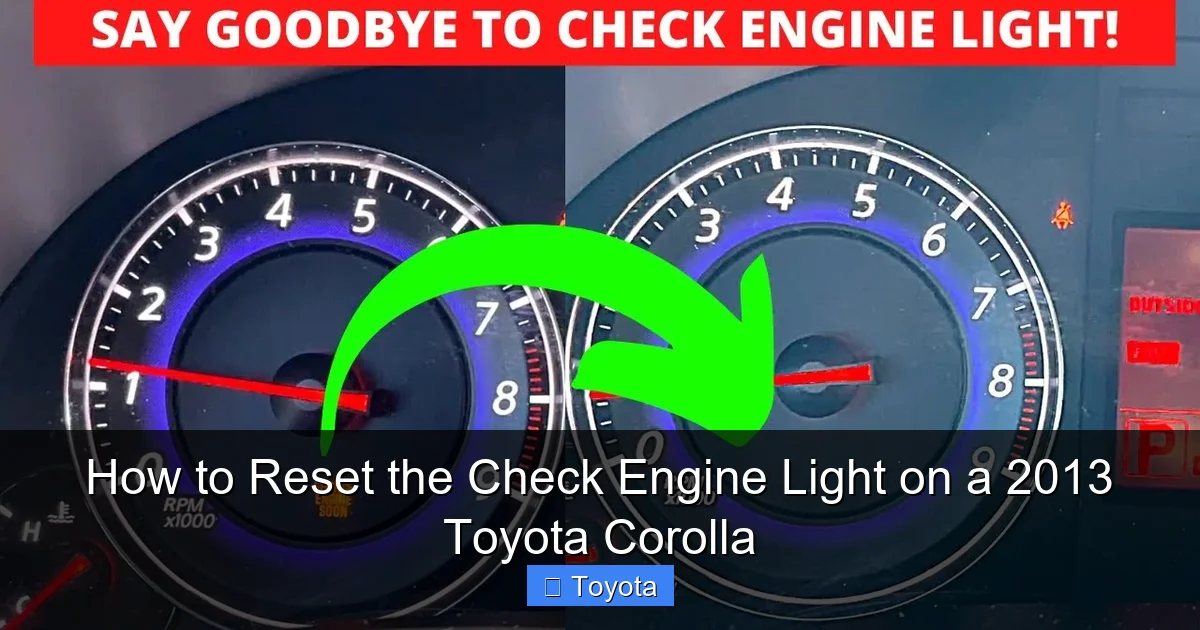
Visual guide about How to Reset the Check Engine Light on a 2013 Toyota Corolla
Image source: i.ytimg.com
Step-by-Step Scanner Reset
- Connect the Scanner: With the ignition OFF, plug the OBD2 scanner’s cable into your Corolla’s port. The connector is keyed, so it only fits one way.
- Turn Ignition to “ON”: Turn the key to the “ON” or “Acc” position (the position right before starting the engine). Do not start the engine. The dashboard lights will come on.
- Power Up the Scanner: Turn on your scanner. It will usually communicate with the car’s ECU automatically. You may need to select your vehicle (Toyota, Corolla, 2013) on some models.
- Read Codes First! Before you do anything else, select the “Read Codes” or “Trouble Codes” function. Write down or take a photo of all the codes displayed. This is your diagnostic report. Common codes will start with “P” (Powertrain). Example: P0420.
- Diagnose and Repair: Use the code(s) as a starting point. Research the code online with “2013 Toyota Corolla” or consult a mechanic. Do not clear the code until the underlying problem is fixed. If you clear a code for a faulty O2 sensor but don’t replace the sensor, the light will return within a few drive cycles.
- Clear the Codes: Once the repair is confirmed (e.g., gas cap tightened, spark plug replaced), return to the scanner menu. Select “Clear Codes” or “Erase Codes.” Confirm the action. The scanner will communicate with the ECU to delete the stored fault.
- Verify: The check engine light should immediately go out. The scanner may show “No Codes Detected.” Turn the ignition OFF for 10 seconds, then back ON. The light should remain off.
Pro Tip: For a related issue, if your Toyota’s maintenance required light (the wrench icon) is on instead of the check engine light, the reset procedure is entirely different. You can learn more about how to reset the maintenance light on a Toyota, which is a simple mileage-based reminder, not an emissions warning.
Method 2: The Manual Reset – Battery Disconnect
This is the old-school, “last resort” method. It works by temporarily removing power from the ECU, forcing it to reset and forget stored codes. Use this only if you have already diagnosed and repaired the problem and do not have a scanner to clear the code, or if the light is on erroneously after a repair.
Risks and Side Effects
Disconnecting the battery will clear the ECU’s memory, but it also resets other systems:
- Radio presets and security code (you may need the radio code).
- Clock and date.
- Power window and sunroof “learned” positions (they may need to be reprogrammed).
- Automatic transmission shift points (it will re-learn your driving style over time).
- Any adaptive learning in the engine (fuel trim, idle).
For a 2013 Corolla, these are generally minor inconveniences. However, it’s a blunt instrument compared to a scanner.
Step-by-Step Battery Disconnect
- Locate the Battery: Open the hood. The battery is in the front corner of the engine bay (driver’s side for US models).
- Identify Terminals: The positive terminal is red (+) and usually has a red cover. The negative terminal is black (-) and connected to the car’s chassis.
- Disconnect the NEGATIVE Terminal FIRST: Using a 10mm wrench or socket, loosen the nut on the negative (black) terminal clamp. Once loose, carefully lift the clamp off the terminal post. Tuck it away so it cannot accidentally touch the post.
- Wait: This is the most important step. You must wait at least 15 minutes. This allows all residual electrical charge to drain from the ECU and modules. Some guides say 5 minutes, but 15 is safer for a complete reset.
- Reconnect: Reattach the negative clamp to the terminal post and tighten the nut securely. Do not overtighten.
- Reconnect the Positive Terminal: If you disconnected it (some recommend disconnecting both), do so now. Tighten it.
- Start the Car: The check engine light will likely still be on when you turn the key to “ON.” This is normal. Start the engine. The light should go out within a few seconds as the ECU performs its startup check.
Important: If your Corolla has a battery management system or a key fob that needs reprogramming after power loss, consult your manual. Some later models have more sensitive electronics, but a 2013 is generally robust.
What to Do Immediately After Resetting the Light
The reset is complete. Your work is not. This phase is critical to confirm the repair was successful and that the light was not a false alarm or temporary glitch.
The Drive Cycle: Your Proof
The ECU needs to run its internal tests, called “monitors,” under specific driving conditions to verify all systems are working. If a problem still exists, the code will be stored and the CEL will illuminate again. You must drive the car to complete these monitors.
A typical drive cycle for a 2013 Corolla includes:
- A cold start (engine off for several hours).
- Driving at steady speeds (45-55 mph) for 10-15 minutes.
- Accelerating to 50+ mph, then letting off the gas to decelerate.
- Stop-and-go city driving.
- A complete stop and idle for a minute or two.
This cycle should cover the necessary conditions for the O2 sensor, catalytic converter, and EVAP system monitors to run. Total distance is typically 50-100 miles of varied driving.
Monitoring for Recurrence
After your drive cycle:
- Check if the light stays off during subsequent starts.
- If the light comes back on immediately or within a day or two, the original problem was not fixed correctly, or there is a new, separate issue. You must re-scan for codes.
- If the light stays off, you have likely succeeded. However, keep an ear out for any strange noises, performance changes, or smells that might indicate the original problem is still lurking.
Remember: For an impending emissions test, your car must have all monitors “Ready.” A just-cleared code will show monitors as “Not Ready,” and you will fail the test. You must complete the drive cycle to set them to “Ready.”
When to Absolutely Seek Professional Help
Some situations are beyond a DIY reset. Trying to handle them yourself can be dangerous or cause expensive damage.
Red Flag Codes
If your initial scan reveals any of these, stop and call a pro:
- P0300-P0304 (Misfires): Driving with a misfire can overheat and destroy the catalytic converter, a $1,000+ repair.
- P0420/P0430 (Catalyst Efficiency): This usually means the cat is already failing. A proper diagnosis is needed to find the root cause (often misfires or oil burning) before replacing the cat.
- Transmission Codes (P07xx, P08xx): These indicate serious transmission issues. Do not ignore.
- Multiple, Unrelated Codes: This could point to a major electrical problem like a bad ground or a failing ECU.
You Can’t Find the Problem
If you’ve tightened the gas cap, replaced a visible sensor, and the code persists, the issue may be intermittent or complex (e.g., wiring harness chafing, vacuum leak). A professional has advanced diagnostic tools (oscilloscopes, smoke machines) to find these ghosts.
The Light Flashes
A flashing check engine light is a dire warning. It means a severe misfire is occurring that can instantly damage the catalytic converter. If your light is flashing, stop driving the car immediately (except to a safe location off the road) and have it towed to a shop.
Conclusion: It’s About Responsibility, Not Just a Reset
Resetting the check engine light on your 2013 Toyota Corolla is the easy part. The hard, and correct, part is the diagnosis and repair that must precede it. Think of the CEL as your car’s cry for help. Ignoring the cry by just hitting “reset” is like turning off a fire alarm while a fire burns—it doesn’t solve the problem; it makes it worse. By following this guide—first reading the code, then addressing the specific issue (be it a $5 gas cap or a $500 oxygen sensor), and finally using an OBD2 scanner to clear the code—you become a responsible car owner. You protect your investment, ensure your Corolla remains reliable and efficient, and keep it passing those all-important emissions tests. Remember, a glowing light isn’t the end of the world, but it is the beginning of a proper diagnostic process. Handle it with care, and your Toyota will reward you with many more miles of smooth, worry-free driving.
For other common Toyota maintenance reminders, such as resetting the maintenance required light on a Toyota Corolla or a Toyota Highlander, the procedures are simpler and based solely on mileage intervals. Those are routine service reminders, not emergency warnings like the check engine light.
Frequently Asked Questions
Will resetting the check engine light fix the problem?
No. Resetting only turns off the warning light. The underlying mechanical or electronic issue that triggered the code will still exist and will cause the light to return, often within a few days of driving. You must diagnose and repair the problem first.
How long does it take for the check engine light to come back on after a reset if the problem isn’t fixed?
It varies. Some faults, like a loose gas cap, may trigger the light within one or two drive cycles (50-100 miles). More complex issues might take a week or two of regular driving to be detected again by the ECU’s monitors.
Can I drive my 2013 Corolla with the check engine light on?
It depends. If the light is solid and the car runs normally, you can drive it cautiously to a safe location for diagnosis. However, if the light is flashing, stop driving immediately, as this indicates a severe misfire that can destroy the catalytic converter. A solid light also means your car is likely emitting excess pollutants and will fail an emissions test.
Is disconnecting the battery the best way to reset the light?
No, it’s the least desirable method. Disconnecting the battery is a blunt tool that clears the ECU memory but also resets your radio, clock, and learned transmission settings. The best method is using an OBD2 scanner, which precisely clears only the stored trouble codes without affecting other vehicle systems.
Do I have to read the code before clearing it?
Absolutely, yes. Reading the code is the entire point of the diagnostic process. The code (e.g., P0420) tells you what system or component the ECU has flagged. Without this information, you are guessing. Guessing leads to wasted money on unnecessary parts and unresolved problems. Always read and research the code before clearing it.
My check engine light came on after I got an oil change. Is it related?
It’s possible but unlikely to be directly related to the oil change itself. However, during an oil change, someone might have accidentally knocked a sensor connector loose (like an O2 sensor) or left the gas cap unscrewed. It’s also possible the light was already on, and you just noticed it after the service. The first step is still to read the code, as it will point you to the specific area to inspect.


