
How Often Should You Replace the Cabin Air Filter on a Toyota Rav4?
Contents
- 1 Key Takeaways
- 2 📑 Table of Contents
- 3 The Unseen Guardian: What Exactly Is a Cabin Air Filter?
- 4 The Official Toyota Recommendation: A Baseline to Start From
- 5 The Real-World Rule: Your Driving Environment Dictates the Schedule
- 6 How to Change Your RAV4 Cabin Air Filter: A DIY Overview
- 7 The High Cost of Neglect: What Happens When You Wait Too Long
- 8 Cost Breakdown: DIY vs. Professional Replacement
- 9 When to Replace: A Simple Decision Flowchart
- 10 Frequently Asked Questions
Replacing your Toyota RAV4’s cabin air filter is a critical, often overlooked, maintenance task. Toyota typically recommends a change every 12 to 24 months or 15,000 to 30,000 miles, but your driving environment is the real deciding factor. Neglecting it hurts your HVAC system, reduces air quality, and can lead to costly repairs. This guide breaks down the official schedule, how to adjust it for your lifestyle, and whether to DIY or call a pro.
That new car smell is long gone, but what’s replacing it? If you’ve noticed a musty odor coming from your Toyota RAV4’s vents, or the airflow feels weaker than it used to, your cabin air filter is almost certainly crying out for attention. This simple, inexpensive component is your first and last line of defense against the outside world’s dust, pollen, soot, and pollutants. Yet, it’s one of the most neglected pieces of routine maintenance. So, how often should you replace the cabin air filter on a Toyota RAV4? The answer isn’t just a number from a manual; it’s a conversation between your car’s manufacturer and your daily driving reality. Let’s clear the air, literally and figuratively.
Key Takeaways
- Official Toyota Schedule: The general recommendation is every 15,000-30,000 miles or 12-24 months, whichever comes first.
- Your Environment Matters Most: Driving in heavy traffic, dusty areas, or high-pollen zones can cut the filter’s life in half, needing changes every 6-12 months.
- DIY vs. Professional: The cabin air filter is one of the easiest DIY car maintenance tasks, often taking 10-30 minutes with basic tools, saving you significant labor costs.
- Ignoring It Has Consequences: A clogged filter strains your blower motor, reduces A/C efficiency, causes foul odors, and allows allergens and pollutants into your cabin.
- Filter Type Varies by Year/Model: Your RAV4’s specific location and filter type (standard vs. activated carbon) depends on the generation and trim level, so verify before purchasing.
- It’s Not Just About Air Quality: A fresh filter protects your entire HVAC system from dust and debris, preventing expensive component failures down the road.
- Look for Warning Signs: Reduced airflow, whistling noises, musty smells, or foggy windows that won’t clear are clear indicators it’s time for a replacement.
📑 Table of Contents
- The Unseen Guardian: What Exactly Is a Cabin Air Filter?
- The Official Toyota Recommendation: A Baseline to Start From
- The Real-World Rule: Your Driving Environment Dictates the Schedule
- How to Change Your RAV4 Cabin Air Filter: A DIY Overview
- The High Cost of Neglect: What Happens When You Wait Too Long
- Cost Breakdown: DIY vs. Professional Replacement
- When to Replace: A Simple Decision Flowchart
The Unseen Guardian: What Exactly Is a Cabin Air Filter?
Before we talk schedules, let’s understand what we’re servicing. The cabin air filter, sometimes called a pollen filter or HVAC filter, is a pleated filter media—usually made of paper, fiberglass, or a composite material—sits somewhere in the air intake path for your car’s heating, ventilation, and air conditioning (HVAC) system. Its job is to trap airborne contaminants before they enter the cabin through the dash vents.
Standard vs. Activated Carbon Filters
Many modern RAV4s, especially higher trims, use a dual-stage filter. The first layer is a standard particulate filter that catches dust, dirt, and allergens like pollen. The second layer is an activated carbon layer, which adsorbs gaseous pollutants, exhaust fumes, and unpleasant odors. If your RAV4 has this type, it’s even more crucial to keep it fresh, as the carbon media becomes saturated over time and loses its odor-fighting power. Check your owner’s manual or the old filter itself to see if it has a charcoal gray/black layer.
Think of it like the filter in your home’s furnace or a high-quality face mask. A clean filter means clean air for you and your passengers. A dirty one does the opposite, recirculating trapped grime and forcing your system to work harder.
The Official Toyota Recommendation: A Baseline to Start From
Every vehicle manufacturer provides a maintenance schedule, and Toyota is no exception. For the RAV4, across most model years (2013-present), the official recommendation for cabin air filter replacement is generally every 15,000 to 30,000 miles or every 12 to 24 months, whichever occurs first. You’ll find this in your owner’s manual’s maintenance schedule table.
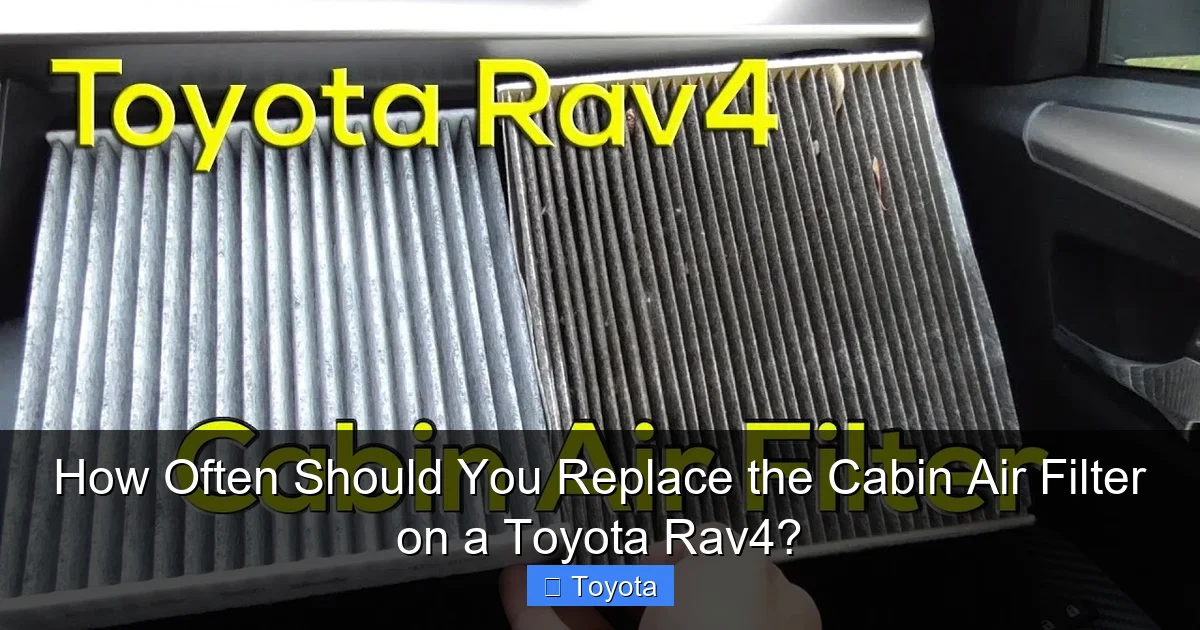
Visual guide about How Often Should You Replace the Cabin Air Filter on a Toyota Rav4?
Image source: i.ytimg.com
Why the Wide Range?
That 15k-30k mile gap isn’t an oversight; it’s Toyota acknowledging that driving conditions vary dramatically. The 15,000-mile/12-month interval is the conservative, “severe service” recommendation. The 30,000-mile/24-month interval is for ideal, “normal” conditions—think consistent highway driving in clean, rural environments. For the vast majority of drivers who deal with city traffic, construction zones, and seasonal allergens, the shorter end of that spectrum is far more realistic.
It’s also important to note that some earlier RAV4 models (pre-2013) may not have come standard with a cabin air filter, or its location might differ. Always confirm for your specific model year and trim. A quick check of your owner’s manual is the best first step.
The Real-World Rule: Your Driving Environment Dictates the Schedule
This is the most critical section. The factory schedule is a starting point, but you must adjust it based on where and how you drive. Your personal replacement interval could be significantly shorter.
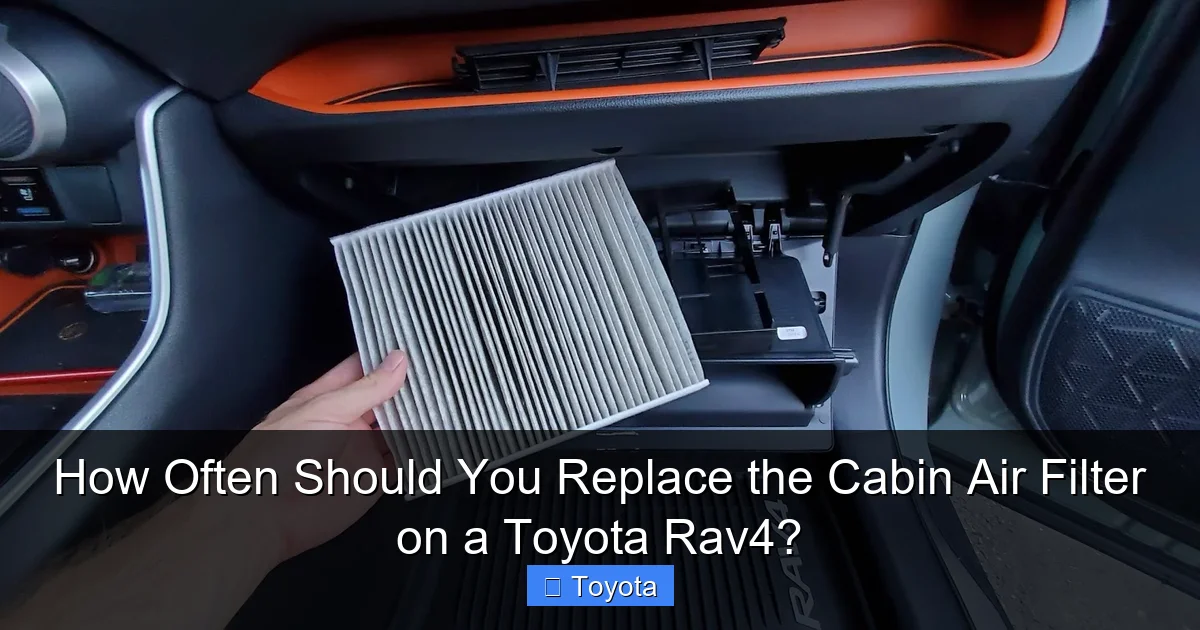
Visual guide about How Often Should You Replace the Cabin Air Filter on a Toyota Rav4?
Image source: 1.bp.blogspot.com
The “Severe Service” Driver
If any of these apply to you, you should lean toward the 12-month or 15,000-mile replacement mark:
- Heavy City/Stop-and-Go Traffic: Constant exposure to exhaust fumes, brake dust, and particulate matter from other vehicles.
- Dusty or Sandy Areas: Living near deserts, unpaved roads, or agricultural land. Dust is the number one filter killer.
- High-Pollen Zones: If you suffer from seasonal allergies, changing the filter before and after peak pollen seasons (spring/fall) can be a game-changer for your comfort and health.
- Industrial or High-Pollution Areas: Driving near factories, ports, or dense urban centers exposes your filter to a relentless barrage of soot and chemicals.
- Frequent Short Trips: Moisture from humidity and breath doesn’t fully evaporate from the system, creating a breeding ground for mold and mildew on a saturated filter, leading to that infamous ” gym sock” smell.
Practical Example: The Commuter vs. The Highway Cruiser
Imagine two RAV4 owners. Owner A has a 50-mile daily round-trip commute on rural highways with minimal traffic. Their filter might genuinely last 24-30 months. Owner B drives 20 miles in bumper-to-bumper urban traffic daily, with kids who track in dirt and a dog that sheds. For Owner B, a 12-month change is not overkill; it’s essential maintenance. Don’t just look at the odometer; look at your life on the road.
How to Change Your RAV4 Cabin Air Filter: A DIY Overview
One of the best reasons to stay on top of this maintenance is that it’s almost always a straightforward DIY job. For most RAV4 models (2013-2018), the filter is located behind the glovebox. For 2019+ models, it’s typically under the hood, behind the cowl panel. The process usually takes 10-30 minutes and requires only basic tools (screwdrivers, socket set). You can find detailed, model-year-specific guides online. For instance, a step-by-step visual guide for the common glovebox removal procedure can be invaluable for first-timers. If you’re comfortable with basic tools and following instructions, this is a perfect project to save $50-$150 in labor costs.
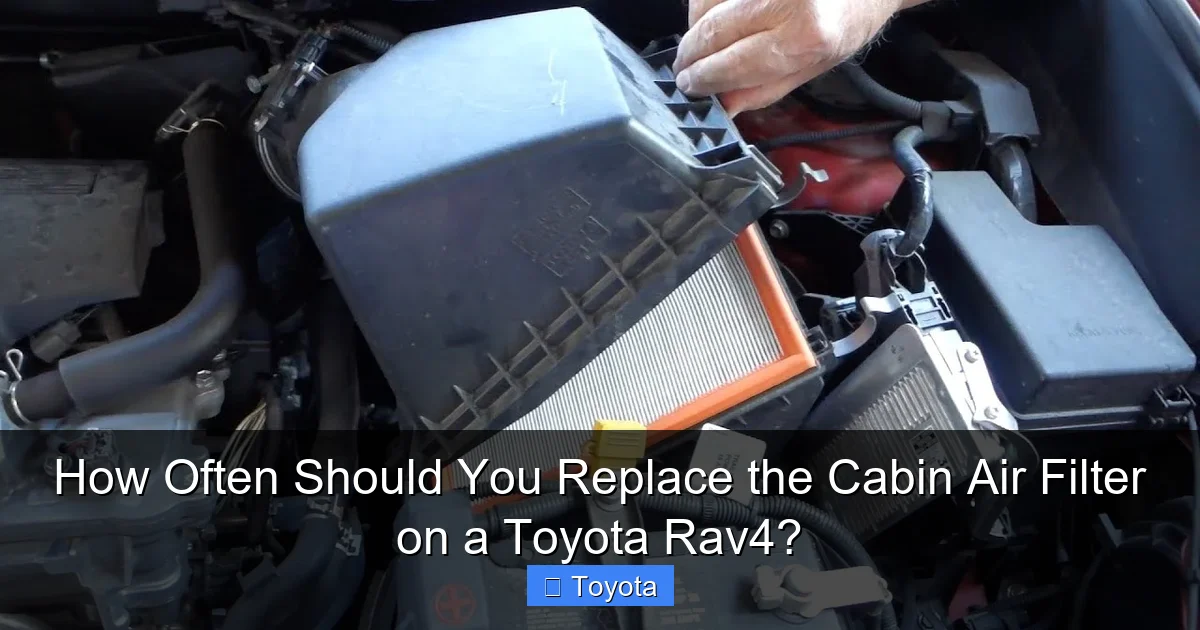
Visual guide about How Often Should You Replace the Cabin Air Filter on a Toyota Rav4?
Image source: i.ytimg.com
Tools and Steps (General Glovebox-Style)
- Buy the Correct Filter: Use your VIN or a parts store lookup to get the exact part number (e.g., Toyota Genuine Part # 87139-0C010). Generic brands like Fram, Wix, or Bosch are often excellent and more affordable.
- Access: Open the glovebox, remove any contents, and look for two or three pins/clips on the damper arms or the glovebox sides. Depress these to lower the glovebox fully.
- Remove the Cover: You’ll see a rectangular plastic access panel. Unclip or unscrew it.
- Swap the Filter: Note the airflow direction arrow on the old filter. Pull it out, and insert the new one with the arrow pointing the same way (usually down).
- Reassemble: Snap the cover back, raise the glovebox, and re-engage the damper pins.
For hood-mounted filters (common on newer RAV4s), you’ll pop the hood, remove the cowl trim pieces (usually just clips), and access the filter from under the windshield wiper area. It’s even simpler in many cases.
The High Cost of Neglect: What Happens When You Wait Too Long
Skipping this service might save you $20 and an afternoon now, but it can cost you hundreds later. A clogged cabin air filter creates a significant restriction in your HVAC system’s airflow.
Strained Blower Motor & Resistor
Your HVAC blower motor has to work exponentially harder to push air through a packed filter. This extra load causes it to overheat and wear out prematurely. The blower motor resistor, which controls fan speed, is also a common failure point when airflow is restricted, especially on lower fan settings. Replacing either of these components can cost $200-$600 in parts and labor.
Inefficient A/C and Heating
Restricted airflow means less cold air from your A/C in summer and less warm air from the heater in winter. Your system takes longer to reach the desired temperature, putting more strain on the compressor and other components.
Foul Odors and Mold
A moisture-saturated, dirty filter becomes a petri dish for mold and bacteria. This is the primary cause of persistent, musty “mildew” smells from your vents, which can be incredibly difficult to eliminate without replacing the filter and possibly treating the HVAC ducts.
Poor Air Quality & Health
The filter’s core function is defeated. You and your passengers breathe in more allergens, dust, and pollutants. For those with asthma or allergies, this can directly impact health and comfort.
Cost Breakdown: DIY vs. Professional Replacement
Understanding the cost helps you decide if DIY is worth it. The total cost is almost entirely the price of the filter itself.
- OEM Toyota Filter: $25 – $45
- Quality Aftermarket Filter (Fram, Wix, etc.): $15 – $30
- Professional Labor: $50 – $120 (often a 0.5 to 1.0 hour labor charge)
So, a professional service typically runs $70 to $165. For a filter that costs $20, that’s a significant markup for a simple 15-minute job. This is why the cabin air filter is one of the most recommended DIY maintenance items for car owners. The potential savings are substantial, and the risk of damage is extremely low if you follow a proper guide. If you’re not mechanically inclined, it’s still one of the cheaper professional services you can get.
When to Replace: A Simple Decision Flowchart
Let’s make this practical. Here’s how to decide it’s time:
1. Time & Mileage Check: Has it been 12-24 months OR 15,000-30,000 miles since the last change? If yes, replace it. If no, proceed to step 2.
2. Sensory Inspection: Turn your HVAC fan to max (with the engine on). Do you notice:
- A significant reduction in airflow compared to when it was new?
- A whistling, wheezing, or loud rushing sound from the vents?
- A persistent musty, moldy, or “old sock” odor, especially when the A/C first turns on?
If you answered “yes” to any of these, replace the filter immediately, regardless of your mileage.
3. Visual Inspection (If Accessible): If you can easily get to the filter (many are behind the glovebox), pull it out. Hold it up to the light. Can you see through it? If it’s pitch black, caked with debris, or visibly clogged, it’s done. This is the most definitive test.
For most drivers, a good rule of thumb is to plan for a replacement every 12-18 months. Set a calendar reminder if you need to. It’s cheap insurance for your health, comfort, and your RAV4’s HVAC system.
Frequently Asked Questions
Can I drive my RAV4 without a cabin air filter?
Technically yes, but you absolutely should not. Without it, unfiltered dust, pollen, and debris will enter your HVAC system, clogging evaporator cores and blower motors, and fill your cabin with contaminants. It’s a direct path to expensive repairs and poor air quality.
What happens if I install the cabin air filter backwards?
It will severely restrict airflow. The filter is designed with a specific pleat direction and a airflow arrow. Installing it backwards turns it into a solid block, killing your A/C and heater performance and straining the blower motor. Always check the arrow on the old filter and match it on the new one.
Is the cabin air filter the same as the engine air filter?
No. They are completely different filters. The engine air filter sits in the engine bay and cleans air going into your engine for combustion. The cabin air filter is inside the car, usually behind the glovebox or under the hood, and cleans air for the passenger compartment. Both need regular replacement on different schedules.
My RAV4 has a “recirculation” mode. Does that affect the filter?
Yes, but not as much as you’d think. Recirculation mode pulls air from inside the cabin, filtering it repeatedly. This can help the filter last slightly longer in extremely dirty environments because it’s not constantly ingesting new outside debris. However, it still needs regular replacement as interior dust, skin cells, and odors accumulate on the filter media.
Do I need a special tool to reset the maintenance light after changing the filter?
No. The cabin air filter is not part of the maintenance-required system that triggers the wrench light on the dashboard. That light is for engine oil changes and other major services. Replacing your cabin filter is an independent task and does not require a light reset. However, if your RAV4 has a separate filter change reminder in the infotainment system, consult your manual for how to reset that specific timer.
Can a clogged cabin air filter cause my windows to fog up?
Indirectly, yes. A severely clogged filter restricts the flow of air from your defroster and defogger system. This reduces the system’s ability to quickly clear moisture from the windshield, making fogging more persistent and harder to combat, especially in cold, wet weather.


