
How Do You Turn Off the Maintenance Required Light on a Toyota Rav4
Contents
- 1 Key Takeaways
- 2 📑 Table of Contents
- 3 Understanding Your RAV4’s “Maintenance Required” Light
- 4 Why You Should NEVER Reset It Without Doing the Work
- 5 How to Turn Off the Light: Methods by RAV4 Generation
- 6 When the Standard Reset Methods Don’t Work
- 7 A Step-by-Step Checklist Before You Begin
- 8 Conclusion: A Simple Task for a Healthy RAV4
- 9 Frequently Asked Questions
The maintenance required light on a Toyota RAV4 is a service reminder, not an emergency. You can typically reset it yourself using the odometer button or trip meter button within the instrument cluster after completing the scheduled maintenance. The exact steps vary slightly by model year. It’s crucial to only reset the light after the actual maintenance (like an oil change) has been performed to avoid engine damage.
Key Takeaways
- The light is a mileage-based reminder: It illuminates after a set interval (often 5,000 miles) to remind you of scheduled maintenance like oil changes, tire rotations, or inspections.
- You must perform the maintenance first: Never reset the light without completing the required service. Doing so can lead to severe engine wear and void warranty coverage.
- Methods differ by generation: Older RAV4s (pre-2019) often use the odometer “trip A” reset method, while newer models (2020+) use a dedicated menu within the multi-information display.
- No special tools are usually needed: The standard reset is done using only your vehicle’s instrument cluster buttons. A scan tool is only necessary if the light persists after a correct reset.
- It’s different from the check engine light: The maintenance required light is a simple reminder. A solid or flashing check engine light indicates a potentially serious problem that requires immediate diagnosis.
- If it won’t reset, seek help: A persistent light after a correct reset procedure could indicate an issue with the vehicle’s computer or that the maintenance wasn’t properly recorded by a professional scan tool.
📑 Table of Contents
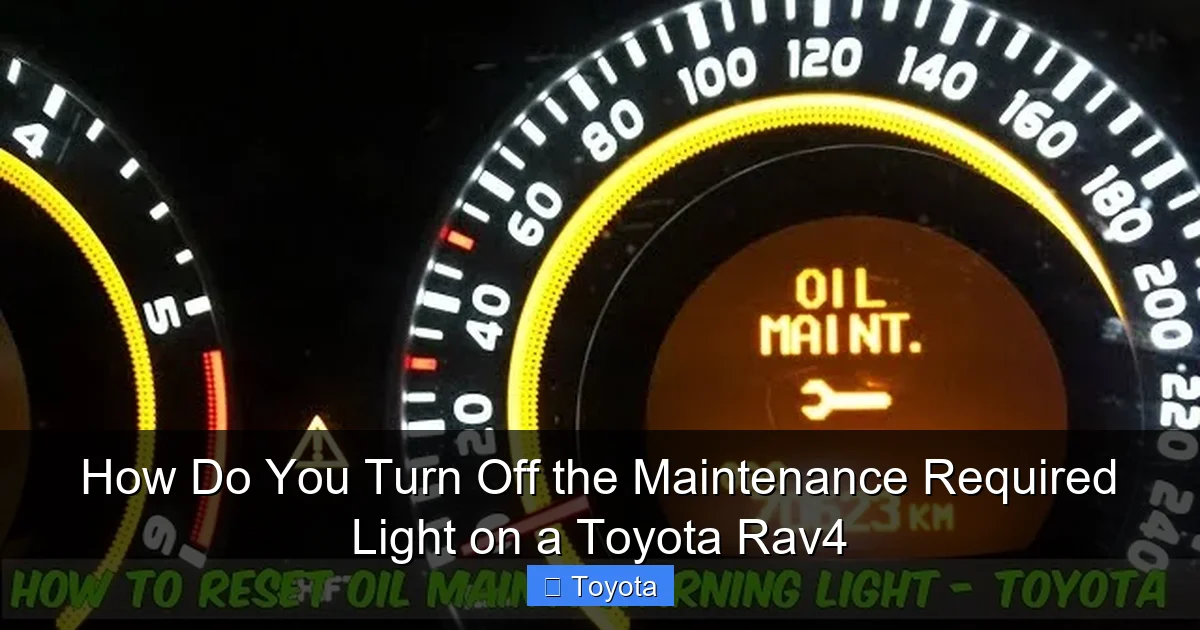
Understanding Your RAV4’s “Maintenance Required” Light
That little wrench icon or “MAINT REQD” text glowing on your Toyota RAV4’s dashboard isn’t trying to scare you. It’s your vehicle’s polite, electronic nudge. Think of it as your RAV4’s built-in planner, gently reminding you that it’s time for some scheduled love—like an oil change, tire rotation, or a multi-point inspection. Unlike the ominous check engine light, which signals a fault, this light is purely a mileage-counter reminder. It’s programmed to illuminate after a predetermined number of miles or days since your last service, which is typically around 5,000 miles for most modern RAV4s, but always check your owner’s manual for your specific interval.
The Science Behind the Reminder
Your RAV4’s engine control unit (ECU) keeps a running tally of your mileage. When you (or your mechanic) reset the light after a service, you’re essentially telling the computer, “Okay, the maintenance for this interval is done. Start counting from zero again.” The system then counts down the miles until the next service interval. This is a fantastic system for staying on top of your vehicle’s health, helping you maintain its reliability, fuel efficiency, and resale value. Ignoring it is like ignoring the “change oil” sticker your mechanic puts on your windshield—eventually, it can lead to preventable wear and tear.
Why You Should NEVER Reset It Without Doing the Work
This is the most critical point. The maintenance required light is a tool for longevity, not a suggestion. Resetting it without performing the underlying service is a serious mistake. Here’s why:

Visual guide about How Do You Turn Off the Maintenance Required Light on a Toyota Rav4
Image source: m.media-amazon.com
- Engine Damage Risk: If the light is on for an oil change and you simply reset it, your engine will continue to run on degraded, sludge-forming oil. This causes accelerated wear, overheating, and can lead to catastrophic engine failure.
- Warranty Implications: If your RAV4 is still under warranty, a dealer may deny a related claim if they see a history of resetting the light without documented service records. It proves neglect.
- Safety Hazards: The reminder could be for critical items like brake fluid, cabin air filter (affecting air quality), or tire pressure system checks. Skipping these compromises safety.
- Loses All Value: The system becomes meaningless. You’re essentially flying blind regarding your car’s maintenance schedule.
Always, always complete the factory-recommended service for that interval first. If you’re a DIY enthusiast, change the oil and filter. If you go to a shop, get your invoice. Then, and only then, proceed to the reset steps.
How to Turn Off the Light: Methods by RAV4 Generation
The procedure changed with the RAV4’s major redesigns. Identifying your model year’s generation is key to using the correct method.
Visual guide about How Do You Turn Off the Maintenance Required Light on a Toyota Rav4
Image source: i.ytimg.com
For 4th & 5th Generation RAV4s (2013-2018 & 2019-2024)
This covers the vast majority of RAV4s on the road today. The method is famously simple and uses the odometer button. For the newest 2024 models, the process is identical to the 2019-2023 models. You can find specific instructions for your exact year in our dedicated guide on how to turn off the maintenance light on a 2020 Toyota RAV4, which applies to all 2019+ models.
Step-by-Step: The Odometer Button Method (Most Common)
- Turn the ignition ON. Do not start the engine. Just press the “Start/Stop” button once without touching the brake pedal (if you have a keyless system).
- Press the “ODO/TRIP” button. This is the button you normally use to toggle between your odometer and trip meter readings. Press and release it repeatedly until your display shows the total odometer reading (not the trip meter A or B).
- Turn the ignition OFF. Press the “Start/Stop” button again to turn the car completely off.
- Press and hold the “ODO/TRIP” button. While holding it down, press the “Start/Stop” button to turn the ignition back ON (again, without starting the engine).
- Continue holding the button. The dash lights will come on, and you should see the odometer display change. It will show a series of dashes or zeros for about 5-10 seconds, then it will revert to your normal odometer reading. The wrench icon should be gone.
- Release the button. Start the engine to confirm the light is off. If it’s still on, repeat the process once more, ensuring you hold the button long enough to see the reset sequence.
For 3rd Generation RAV4s (2006-2012)
These older models have a slightly different sequence but still use the odometer button. The principle is the same: you must get the display to the odometer mode before the key-off/key-on sequence. The hold time might be slightly longer. If you have one of these, our general article on how to turn off the maintenance light on a Toyota covers this older procedure in detail.
For 2024+ RAV4 with Full Digital Instrument Cluster
Some very new RAV4s with a full digital gauge cluster might use a menu-based reset through steering wheel controls. If the button method above fails, consult your owner’s manual for the specific path, which is often: Menu → Vehicle Settings → Maintenance → Reset Maintenance Data. This is more common on hybrids and higher trims.
When the Standard Reset Methods Don’t Work
You followed the steps perfectly, but that wrench is still glaring at you. Don’t panic. Here’s your troubleshooting guide:
Visual guide about How Do You Turn Off the Maintenance Required Light on a Toyota Rav4
Image source: i.ytimg.com
First, Double-Check Everything
Are you absolutely sure you completed the required service? Is your oil level correct? Sometimes the light won’t reset if the system detects an immediate fault (like low oil pressure). Start the engine and let it idle for 15-30 seconds, then turn it off and try the reset again. Also, ensure you are in the correct odometer display mode (total miles, not trip A or B) before starting the key-off/key-on sequence.
Possible Reasons for a Stubborn Light
- Incorrect Procedure: Model year variation is the #1 culprit. A 2018 procedure won’t work on a 2021. Verify your generation.
- Unperformed or Incomplete Service: The system has sensors and algorithms. If an oil change wasn’t done correctly (wrong oil, filter not reset, etc.), it may not clear.
- Low Battery Voltage: A weak battery can sometimes interfere with the ECU’s ability to store the reset. Try jump-starting or charging the battery first.
- Faulty Sensor or ECU Issue: This is rare but possible. A sensor related to oil pressure or service intervals might have failed.
Your Next Steps: The Scan Tool
If all else fails, you need a professional-grade OBD2 scan tool that can access the Toyota-specific maintenance reset function. This is what any mechanic or dealership will use. Basic code readers from auto parts stores often cannot perform this reset; they only read check engine codes. A proper tool like a high-end Autel, Launch, or the official Toyota Techstream can communicate with the vehicle’s body control module or maintenance system to clear the light. This is also a good time to have a full diagnostic scan run to ensure no other hidden faults exist. If you’re not comfortable with this, a quick visit to a shop for a reset (often a low-cost or free service if you’re a customer) is the smart move.
A Step-by-Step Checklist Before You Begin
To ensure a smooth, successful reset, follow this pre-reset checklist:
- Confirm Service is Complete: Oil & filter changed? Tires rotated? All scheduled items for the current interval addressed? Have your service invoice handy.
- Identify Your Model Year & Generation: Look it up in your owner’s manual or on your registration. This determines the correct reset method.
- Read Your Owner’s Manual: It has the definitive procedure for your specific RAV4. This is your primary resource.
- Ensure a Fully Charged Battery: The process requires the vehicle’s electronics to be powered. A weak battery can cause the system to glitch.
- Find a Safe, Level Spot: Park, set the parking brake, and have all doors closed. You’ll need to be in the driver’s seat to operate the buttons.
- Have Your Smartphone Ready: Bookmark this page or our specific guide for your year (like the 2021 RAV4 reset guide) in case you need to reference it during the process.
Conclusion: A Simple Task for a Healthy RAV4
Turning off the maintenance required light on your Toyota RAV4 is one of the most straightforward DIY tasks you can do. It’s a 30-second process that rewards you with a clean dash and the peace of mind that your service interval is properly tracked. The core principle is universal across all Toyota models, from the RAV4 to the Tacoma or Highlander—the light is a reminder, not a diagnosis, and must only be reset after the actual maintenance is performed. By understanding the “why” behind the light and following the correct steps for your model year, you take a proactive step in your vehicle’s care. This small habit directly contributes to your RAV4’s legendary reliability, helps maintain its value, and ensures it’s ready for all your adventures for years to come. If you’re ever in doubt, your owner’s manual is the ultimate authority, and a quick call to your trusted mechanic is always a wise investment.
Frequently Asked Questions
Can I drive my RAV4 with the maintenance required light on?
Yes, you can drive it, but you should schedule the required maintenance (like an oil change) as soon as possible. The light means you’ve reached the service interval, and continuing to drive without the service can cause engine wear. It is not an immediate “stop driving” warning like a red oil pressure light.
Will disconnecting the battery reset the maintenance light?
No, disconnecting the battery will not reset the maintenance required light. This light is stored in a non-volatile memory within the vehicle’s computer that retains settings even when power is removed. You must use the specific odometer button reset procedure or a scan tool.
Why did my maintenance light come back on after I reset it?
The most common reason is that you reset it without actually performing the required maintenance. The system is designed to come back on after approximately 500 miles if the service isn’t done. Other reasons include an incomplete service (like an oil change where the filter wasn’t replaced) or a faulty sensor that needs diagnosis.
Is the maintenance required light the same as the check engine light?
No, they are completely different. The maintenance required light is a simple yellow or orange wrench icon that comes on at a set mileage interval for scheduled service. The check engine light is a yellow engine-shaped icon (or the words “Check Engine”) that illuminates when the computer detects a problem with the emissions or engine management system. A flashing check engine light requires immediate attention.
Can I reset the light myself if I just changed the oil?
Absolutely. In fact, resetting the light is the final step in a DIY oil change. As soon as you’ve filled the engine with the correct oil, replaced the filter, and checked for leaks, you can perform the reset procedure to turn off the reminder and start the new service interval counter.
My RAV4’s light won’t reset using the button method. What now?
First, triple-check you followed the steps exactly for your model year. Ensure you started with the ignition in the ON position (not running) and the display on the total odometer. If it still won’t reset, the most likely cause is that the service wasn’t properly completed or recorded. The next step is to visit a mechanic or dealership who can use a professional scan tool to both diagnose any underlying issues and perform the reset.


