
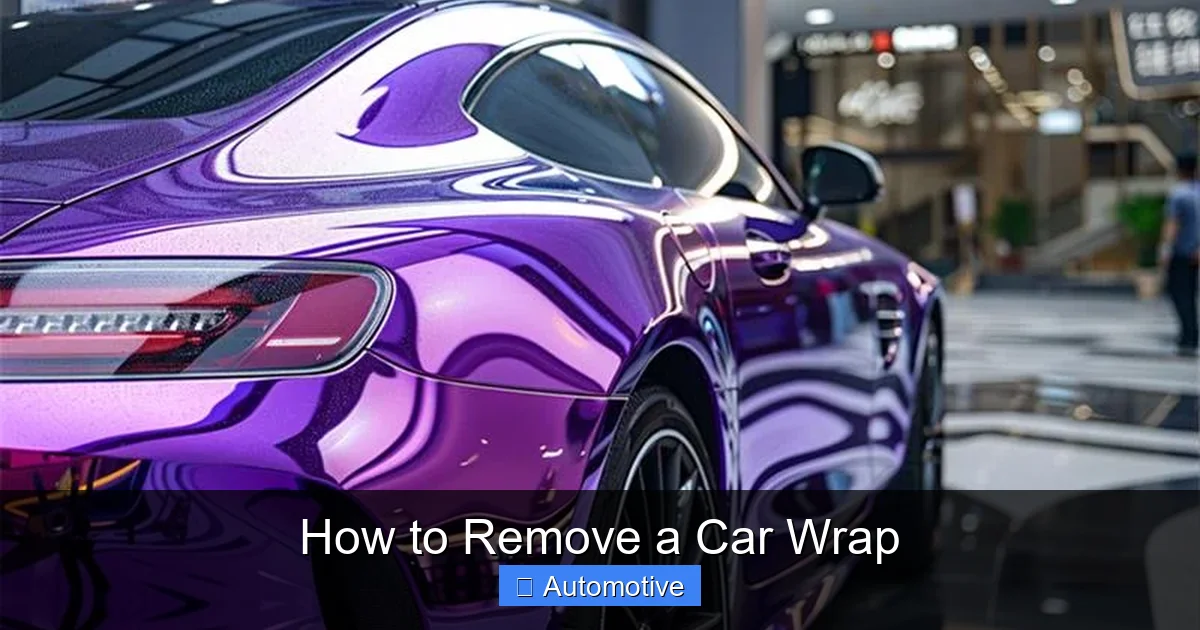
How to Remove a Car Wrap
Contents
- 1 Key Takeaways
- 2 📑 Table of Contents
- 3 Why You Might Want to Remove a Car Wrap
- 4 When Is the Right Time to Remove a Car Wrap?
- 5 Tools and Supplies You’ll Need
- 6 Step-by-Step Guide to Removing a Car Wrap
- 7 Common Mistakes to Avoid
- 8 Should You Hire a Professional?
- 9 Aftercare: Restoring Your Car’s Finish
- 10 Conclusion
- 11 Frequently Asked Questions
Removing a car wrap doesn’t have to be stressful. With the right tools, patience, and technique, you can strip off vinyl without damaging your car’s original paint. This guide walks you through every step—from prep to cleanup—so you can do it safely at home.
Key Takeaways
- Use heat to loosen the adhesive: A heat gun or hair dryer softens the vinyl, making it easier to peel off without tearing.
- Start at the edges: Begin removal from corners or seams where the wrap is already lifting for a smoother process.
- Work in small sections: Tackle one panel at a time to maintain control and avoid re-adhering peeled sections.
- Use a plastic scraper: Avoid metal tools that can scratch paint; opt for soft plastic scrapers designed for wrap removal.
- Remove adhesive residue with safe cleaners: Use isopropyl alcohol or dedicated adhesive removers—never harsh solvents like acetone.
- Protect surrounding areas: Tape off trim, lights, and rubber seals to prevent accidental damage during removal.
- Be patient and gentle: Rushing increases the risk of paint damage or leftover residue—take your time.
📑 Table of Contents
Why You Might Want to Remove a Car Wrap
Car wraps have surged in popularity over the past decade, and for good reason. They offer a cost-effective way to change your vehicle’s appearance, protect the original paint from scratches and UV damage, and even promote a business with custom graphics. Whether you went for a bold matte black, a glossy racing stripe, or a full-color brand logo, wraps give you flexibility that traditional paint jobs simply can’t match.
But what happens when you’re ready for a change? Maybe the design feels outdated, the wrap is peeling at the edges, or you’re preparing to sell your car and want to restore its factory look. Whatever the reason, removing a car wrap is a task many owners face—and it’s one that can seem intimidating at first. The good news? With the right approach, it’s entirely doable at home, even if you’re not a professional detailer.
The key is understanding that a car wrap isn’t just stuck on with glue—it’s applied using a high-strength, pressure-sensitive adhesive that bonds tightly to the surface. Over time, especially with exposure to sun, rain, and temperature changes, this adhesive can become more stubborn. But that doesn’t mean it’s impossible to remove. In fact, most modern vinyl wraps are designed to be removable, often lasting 5–7 years before needing replacement. The trick is doing it the right way to avoid damaging your car’s paint or leaving behind sticky residue.
When Is the Right Time to Remove a Car Wrap?
Visual guide about How to Remove a Car Wrap
Image source: kenteerwrap.com
Knowing when to remove a car wrap is just as important as knowing how. Timing can make a big difference in how easy—or difficult—the process will be. If you remove a wrap too soon, you might not get the full value out of your investment. But if you wait too long, the adhesive can harden, making removal more challenging and increasing the risk of paint damage.
One of the most common signs it’s time to remove a wrap is visible deterioration. Look for bubbling, cracking, or peeling along the edges, especially around door handles, mirrors, or wheel wells. These areas are prone to stress and friction, so they often show wear first. If the wrap is lifting on its own, it’s a clear signal that the adhesive is breaking down and removal should be considered.
Another reason to remove a wrap is aesthetic fatigue. Trends change, and what looked fresh and modern two years ago might now feel dated. Maybe you’re tired of the color, or the design no longer reflects your personality or brand image. In these cases, removing the wrap allows you to start fresh—whether you plan to apply a new one or go back to the original paint.
You might also need to remove a wrap before selling your vehicle. While some buyers appreciate a professionally wrapped car, others prefer to see the original paint condition. A well-maintained wrap can actually protect the paint underneath, but if it’s damaged or poorly applied, it can raise red flags. Removing it before listing your car can help you get a better price and avoid questions about hidden damage.
Finally, if you’re switching from a wrap to a new paint job, removal is a necessary first step. You can’t paint over vinyl, so the wrap must come off completely. In this case, it’s especially important to remove it carefully to preserve the integrity of the underlying surface.
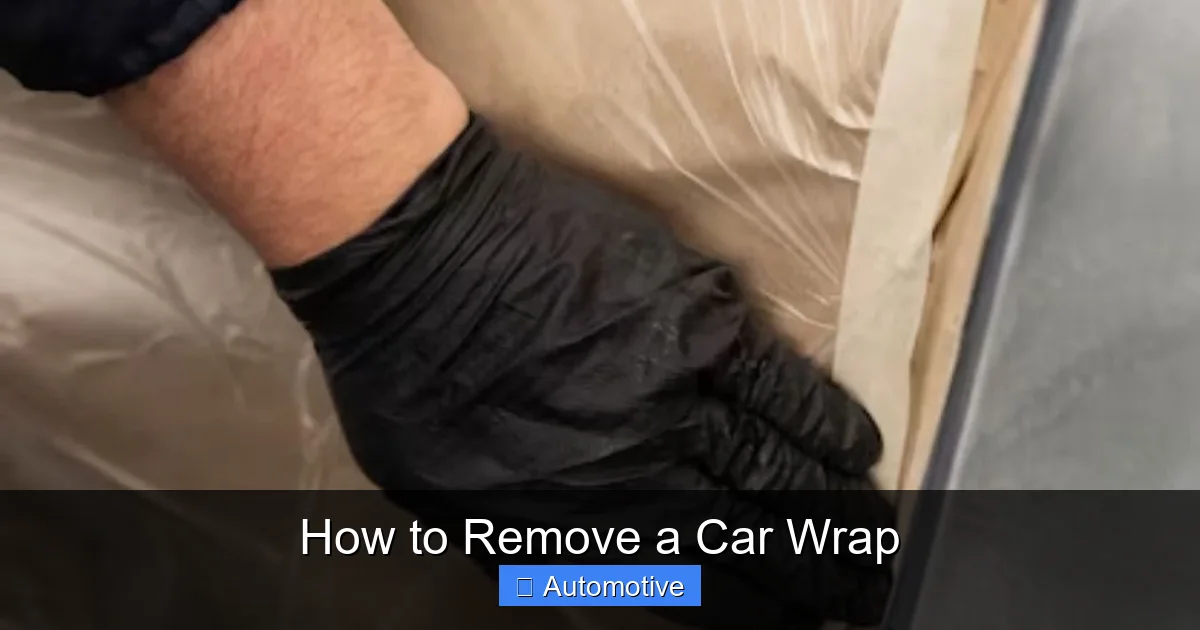
Tools and Supplies You’ll Need
Visual guide about How to Remove a Car Wrap
Image source: wraphubabudhabi.com
Before you start peeling, it’s essential to gather the right tools. Using improper equipment can lead to scratches, paint damage, or incomplete removal. The good news is that most of what you need can be found at an auto parts store, hardware store, or online—and many items you might already have at home.
First and foremost, you’ll need a heat source. A heat gun is the most effective tool for softening the adhesive, but a high-quality hair dryer can work in a pinch, especially for smaller areas. The goal is to warm the vinyl to around 150–170°F (65–75°C)—hot enough to loosen the bond but not so hot that it damages the paint or melts the vinyl.
Next, you’ll need a set of plastic scrapers or wrap removal tools. These are specifically designed to lift vinyl without scratching the surface. Avoid metal scrapers, putty knives, or razor blades—they’re too harsh and can leave permanent marks. Look for tools with rounded, flexible edges made from nylon or polycarbonate.
For adhesive residue, you’ll need a cleaner that’s safe for automotive paint. Isopropyl alcohol (70% or higher) is a popular choice because it evaporates quickly and doesn’t leave streaks. You can also use dedicated adhesive removers like Goo Gone Automotive or 3M Adhesive Remover. Avoid harsh chemicals like acetone, paint thinner, or brake cleaner—they can strip wax, damage clear coat, or even dissolve paint.
Microfiber towels are a must for wiping down surfaces and cleaning up residue. They’re soft, absorbent, and won’t scratch. Have several on hand—once they get sticky, they’re harder to clean and can spread residue around.
Don’t forget painter’s tape and masking tape. These will help you protect trim pieces, rubber seals, lights, and other areas you don’t want to accidentally scratch or heat. Taping off these zones gives you a clean boundary and reduces the risk of collateral damage.
A spray bottle filled with soapy water (a few drops of dish soap in water) can also be helpful. It acts as a lubricant when peeling stubborn sections and helps prevent the vinyl from re-adhering as you work.
Finally, consider wearing gloves—both for safety and cleanliness. Adhesive removers can be harsh on skin, and handling heated vinyl can cause burns. Nitrile or latex gloves will protect your hands and keep them clean.
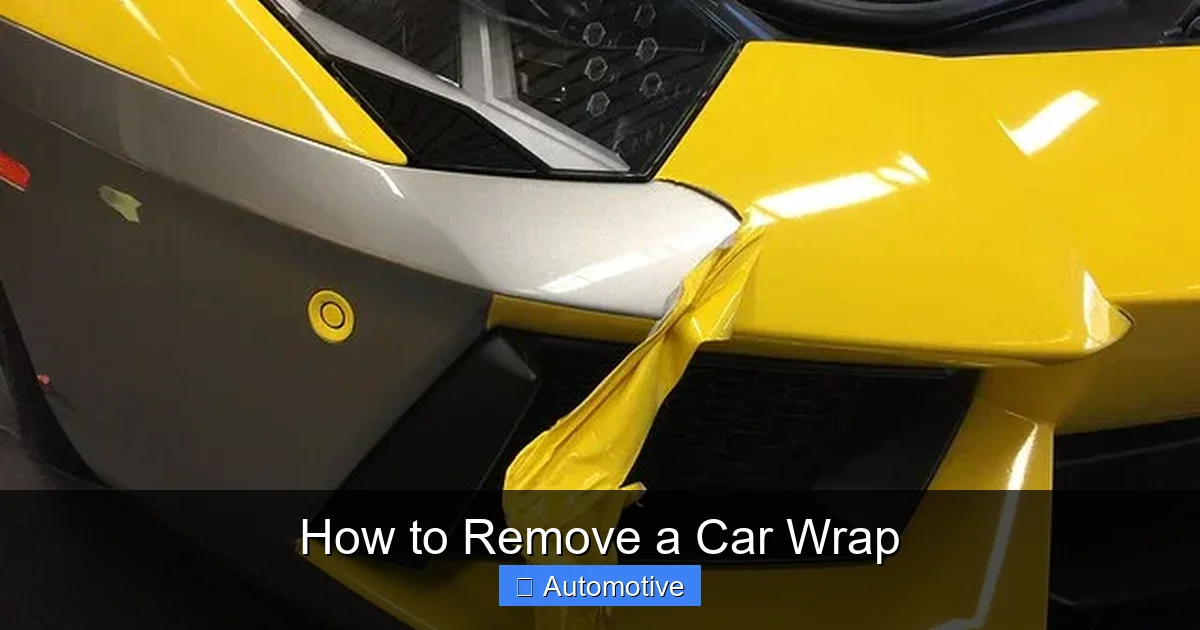
Step-by-Step Guide to Removing a Car Wrap
Visual guide about How to Remove a Car Wrap
Image source: cdn.shopify.com
Now that you’re equipped with the right tools, it’s time to get started. The process of removing a car wrap is methodical, but with patience and attention to detail, you can do it safely and effectively. Here’s a step-by-step breakdown to guide you through each stage.
Step 1: Prepare Your Workspace
Choose a clean, shaded area to work in—direct sunlight can cause the vinyl to dry out and become brittle, making it harder to remove. A garage or carport is ideal. Make sure the car is cool to the touch; if it’s been sitting in the sun, let it cool down for at least an hour before starting.
Start by washing the vehicle thoroughly. Use a mild car wash soap and a microfiber mitt to remove dirt, grime, and debris. This prevents scratching the surface as you work. Rinse well and dry completely with a clean towel. Any leftover dirt can get trapped under the vinyl and cause abrasions during removal.
Once the car is clean, inspect the wrap for any loose edges or areas that are already peeling. These make perfect starting points. If the wrap is fully adhered, you’ll need to create a small lift using a plastic scraper or your fingernail—gently work under a corner until you can get a grip.
Step 2: Apply Heat to Loosen the Vinyl
Heat is your best friend when removing a car wrap. It softens the adhesive, making the vinyl more pliable and easier to peel. Use your heat gun or hair dryer on a medium setting and hold it about 6–8 inches away from the surface. Move it in slow, circular motions to evenly distribute the heat.
Focus on one section at a time—start with a door, fender, or hood. Heat a 12- to 18-inch area for about 30–60 seconds. You’ll know it’s ready when the vinyl feels warm to the touch and begins to slightly curl at the edges. Be careful not to overheat—too much heat can damage the paint or cause the vinyl to bubble and tear.
Step 3: Begin Peeling the Wrap
Once the area is heated, use your fingers or a plastic scraper to lift a corner of the vinyl. Pull it back slowly at a 45-degree angle. The goal is to remove it in large, continuous pieces rather than small strips. If it starts to tear, stop and apply more heat to that section.
Work from one side to the other, keeping the peeled section taut but not stretched. If the vinyl begins to re-adhere, spray a little soapy water under the edge to act as a lubricant. This helps reduce friction and prevents the adhesive from sticking back down.
Step 4: Continue Section by Section
Move across the panel, heating and peeling in manageable sections. Don’t rush—take your time to avoid tearing or leaving behind chunks of vinyl. If you encounter a stubborn area, especially around curves or contours, use the heat gun to warm it again and gently work the scraper underneath.
For complex areas like mirrors, door handles, or wheel arches, be extra careful. These spots often have tight gaps and delicate trim. Use a smaller scraper or even a plastic credit card to get into narrow spaces. If the wrap is glued over emblems or badges, you may need to carefully slice around them with a precision knife—just be sure to protect the surrounding paint.
Step 5: Remove Adhesive Residue
Once the bulk of the wrap is off, you’ll likely notice a sticky, translucent layer left behind—this is the adhesive. It’s normal and expected. To remove it, spray a small amount of isopropyl alcohol or adhesive remover onto a microfiber towel (not directly on the paint, to avoid overspray).
Gently rub the residue in circular motions. The adhesive will start to dissolve and transfer to the towel. For tougher spots, let the cleaner sit for 30–60 seconds before wiping. Avoid scrubbing too hard—this can damage the clear coat. If needed, use a soft-bristle brush (like a toothbrush) for textured areas or tight corners.
Step 6: Final Cleaning and Inspection
After all residue is removed, wash the area again with car soap and water to remove any remaining cleaner or debris. Dry thoroughly with a clean microfiber towel. Inspect the surface under good lighting—look for any missed spots, scratches, or discoloration.
If the paint looks dull or hazy, it may need polishing. Wrap removal can sometimes leave the surface slightly faded compared to unwrapped areas, especially if the wrap was on for several years. A light polish or compound can restore shine and blend the transition.
Common Mistakes to Avoid
Even with the best intentions, it’s easy to make mistakes during wrap removal. Being aware of these common pitfalls can save you time, money, and potential damage to your vehicle.
One of the biggest errors is using too much heat. While heat is necessary, overheating can cause the paint to blister or the vinyl to melt into a sticky mess. Always use a controlled, moderate heat setting and keep the tool moving.
Another mistake is using metal tools. Razor blades, screwdrivers, or putty knives might seem effective, but they’re almost guaranteed to scratch the paint. Stick to plastic scrapers designed for this purpose.
Rushing the process is another common issue. Wrap removal takes time—especially on a full vehicle. Trying to peel large sections too quickly often leads to tearing, which means more work and more adhesive residue.
Skipping the cleaning step is also problematic. Removing a wrap over dirt or grime can scratch the paint as you scrape. Always clean the car first.
Finally, using the wrong cleaner can do more harm than good. Harsh solvents like acetone or lacquer thinner can strip wax, damage clear coat, or even dissolve paint. Stick to safe, automotive-approved products.
Should You Hire a Professional?
While DIY removal is possible, there are situations where hiring a professional is the smarter choice. If the wrap is old, brittle, or has been on for more than 5–7 years, the adhesive may have bonded too strongly. Professionals have specialized tools, experience, and access to stronger (but safe) removal products.
If your car has custom paint, matte finishes, or delicate coatings, it’s also wise to consult an expert. These surfaces are more vulnerable to damage, and a pro can assess the risk and use techniques tailored to your vehicle.
Additionally, if you’re not confident in your ability to remove the wrap without causing harm, it’s better to pay for professional service than risk costly repairs. Most wrap shops offer removal services at a reasonable rate, especially if you’re having a new wrap applied.
That said, for most standard wraps on factory paint, a careful DIY approach is perfectly safe—especially if you follow the steps outlined here.
Aftercare: Restoring Your Car’s Finish
Once the wrap is off and the adhesive is gone, your car’s paint may look a bit tired. Years under vinyl can leave the surface slightly faded or less glossy than unwrapped areas. This is normal and fixable.
Start with a thorough wash and clay bar treatment. A clay bar removes embedded contaminants and smooths the surface, preparing it for polishing. Follow up with a light polish or finishing compound to restore shine and blend any color differences.
After polishing, apply a high-quality wax or ceramic coating to protect the paint and give it a deep, reflective finish. This not only looks great but also helps prevent future damage from UV rays, dirt, and weather.
If you plan to apply a new wrap, make sure the surface is completely clean and free of wax or oils. Most installers will do a final prep, but it’s best to deliver a clean, dry vehicle.
Conclusion
Removing a car wrap might seem like a daunting task, but it’s well within reach for most car owners. With the right tools, a bit of patience, and a careful approach, you can strip off vinyl safely and restore your vehicle’s original look—or prepare it for a fresh new design.
The key is to work slowly, use heat wisely, and avoid harsh tools or chemicals. By following the steps in this guide, you’ll minimize the risk of damage and leave your car looking clean and polished. Whether you’re updating your style, prepping for a sale, or switching to paint, knowing how to remove a car wrap gives you greater control over your vehicle’s appearance.
And remember—when in doubt, there’s no shame in calling a professional. Sometimes, the peace of mind is worth the cost. But for most situations, a little DIY effort goes a long way.
Frequently Asked Questions
Can you remove a car wrap yourself?
Yes, most car owners can safely remove a car wrap at home with the right tools and techniques. Using a heat gun, plastic scrapers, and adhesive remover, you can strip the vinyl without damaging the paint if you work carefully and patiently.
Will removing a car wrap damage the paint?
If done correctly, removing a car wrap should not damage the original paint. However, using excessive heat, metal tools, or harsh chemicals can scratch or strip the clear coat. Always use gentle methods and test cleaners on a small area first.
How long does it take to remove a full car wrap?
The time needed depends on the vehicle size and wrap condition, but most full wraps take 3–6 hours to remove. Smaller areas like hoods or doors may take 30–60 minutes each. Rushing increases the risk of mistakes, so allow plenty of time.
What should I do if the wrap starts to tear?
If the vinyl tears during removal, stop pulling and apply more heat to that section. Let it warm for 30–60 seconds, then gently lift again. Tearing often happens when the adhesive is still too strong—heat will soften it and make peeling easier.
Can I reuse a removed car wrap?
No, once a car wrap is removed, it cannot be reused. The adhesive loses its strength, and the vinyl may stretch or tear. It’s best to dispose of old wraps responsibly or recycle them if your local facility accepts vinyl materials.
Is it better to remove a wrap in cold or warm weather?
Warm weather is ideal for wrap removal because heat softens the adhesive more effectively. Avoid removing wraps in freezing temperatures, as cold vinyl becomes brittle and harder to peel. A shaded, temperate day is perfect.


