
Diy Car Windshield Snow Cover
Contents
A DIY car windshield snow cover is a smart, affordable solution to winter mornings spent scraping ice. With simple materials and a few minutes of effort, you can create a custom-fit shield that keeps snow and frost off your windshield, saving time and protecting your car’s glass.
Winter mornings can be brutal—especially when you step outside to find your car buried under a thick layer of snow and ice. The routine of scraping, chipping, and defrosting your windshield is not only time-consuming but also tough on your hands and your vehicle. But what if you could skip all that hassle? Enter the DIY car windshield snow cover—a simple, clever invention that’s easy to make, incredibly effective, and kind to your wallet.
Imagine walking out to your car on a freezing December morning and simply peeling back a protective cover to reveal a clean, clear windshield. No scraping, no waiting for the defroster to warm up, and no risk of damaging your glass with a metal scraper. That’s the magic of a homemade snow cover. Whether you live in a snowy climate or just experience occasional winter flurries, this DIY project is a game-changer. It’s not just about convenience—it’s about protecting your car and making winter life a little easier.
And the best part? You don’t need to be a DIY expert or spend a fortune on materials. With a few basic supplies and about 30 to 60 minutes of your time, you can create a durable, reusable cover that fits your car perfectly. Whether you’re sewing it yourself or using a no-sew method, this project is accessible to almost anyone. Plus, you can customize it with colors, patterns, or even reflective strips for added safety. In this guide, we’ll walk you through everything you need to know—from choosing the right materials to securing your cover in place—so you can enjoy frost-free mornings all winter long.
Key Takeaways
- Saves time and effort: Eliminates the need for scraping ice every morning, making winter commutes smoother.
- Cost-effective solution: Costs a fraction of store-bought covers, using materials you may already have at home.
- Customizable and reusable: Can be tailored to fit any vehicle size and reused for multiple seasons.
- Protects your windshield: Prevents scratches from ice scrapers and reduces wear on wiper blades.
- Easy to make in under an hour: Requires basic sewing or no-sew techniques, perfect for beginners.
- Weather-resistant materials recommended: Use waterproof fabrics like polyester or nylon for best results.
- Secure with straps or magnets: Ensures the cover stays in place during windy conditions.
📑 Table of Contents
Why Use a DIY Car Windshield Snow Cover?
Let’s face it—winter car care is no fun. Scraping ice off your windshield is cold, tedious, and can even be dangerous if you’re rushing to get to work. A DIY car windshield snow cover solves these problems in one smart, practical solution. Instead of battling the elements every morning, you can simply remove the cover and drive off. It’s like giving your car a winter coat—one that keeps the snow and ice at bay while protecting the glass underneath.
One of the biggest advantages of a homemade snow cover is cost. Store-bought covers can range from $20 to $50, depending on size and features. But with a DIY version, you can make one for under $15—sometimes even less if you repurpose old materials. That’s a huge savings, especially if you have multiple vehicles. Plus, because you’re making it yourself, you can ensure it fits your car perfectly. No more struggling with a cover that’s too small or slips off in the wind.
Another benefit is durability. Many commercial covers are made from thin, flimsy materials that tear easily or lose their waterproof coating after a few seasons. When you make your own, you choose high-quality, weather-resistant fabrics that can withstand harsh winter conditions. And if it does get damaged, repairs are simple—just patch it up with fabric glue or a needle and thread. You’re also in control of the design. Want a bright color so you can spot your car in a snowy parking lot? Go for it. Prefer a reflective surface to improve visibility at night? That’s easy too.
But perhaps the most compelling reason to try a DIY snow cover is the time it saves. On average, people spend 5 to 10 minutes each morning scraping their windshield. Over a 90-day winter season, that adds up to 7.5 to 15 hours—time you could be spending sipping coffee, getting dressed, or enjoying a few extra minutes of sleep. A snow cover eliminates that chore entirely. Just toss it on the night before a snowstorm, and wake up to a clear windshield.
Environmental and Vehicle Protection Benefits
Beyond convenience and cost, a DIY car windshield snow cover also offers environmental and mechanical advantages. Frequent scraping can scratch your windshield, especially if you use metal tools or don’t clear loose debris first. Over time, these micro-scratches can weaken the glass and reduce visibility, especially when driving at night. A snow cover acts as a barrier, preventing direct contact between ice and your windshield, which helps maintain its integrity.
It also protects your wiper blades. When snow and ice build up on the wipers, they can freeze to the glass, making them difficult to move. Forcing them to operate in this state can damage the motor or strip the blades. A cover keeps the wipers clean and free, so they’re ready to go when you need them. Plus, by reducing the need for constant defrosting, you’re using less fuel and putting less strain on your car’s battery—especially important in older vehicles.
From an environmental standpoint, a reusable snow cover reduces waste. Unlike disposable ice scrapers or single-use de-icing sprays, a fabric cover can last for years with proper care. It’s a sustainable choice that aligns with eco-friendly habits. And because it’s made from durable materials, it won’t end up in a landfill after one season.
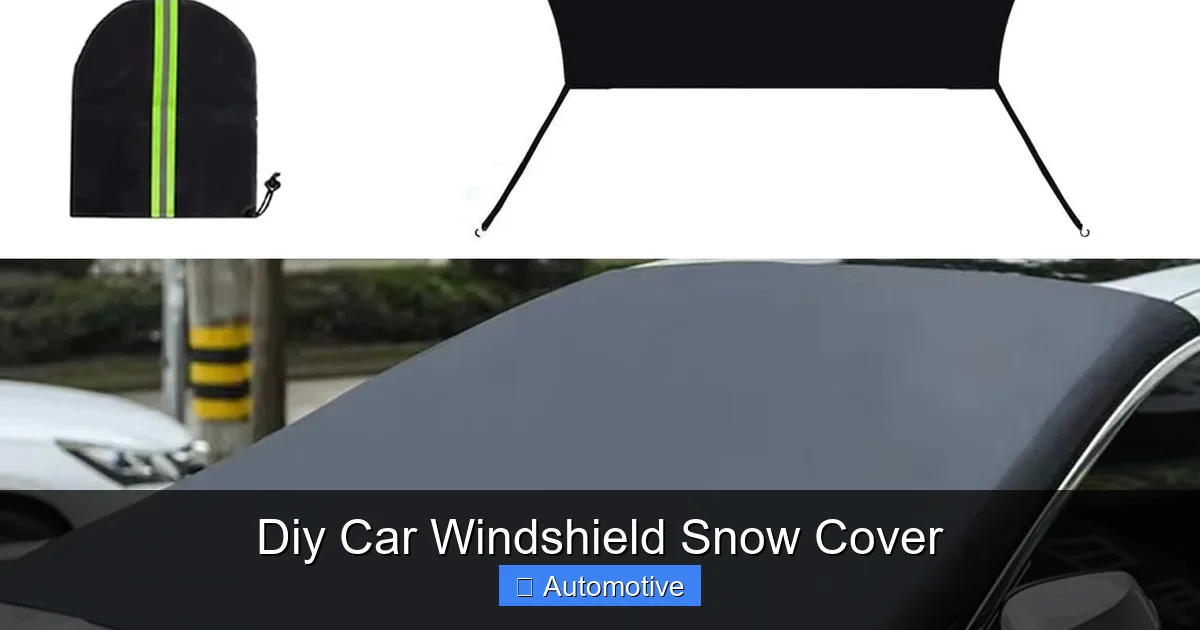
Materials You’ll Need
Visual guide about Diy Car Windshield Snow Cover
Image source: m.media-amazon.com
Creating your own DIY car windshield snow cover is surprisingly simple, and you likely already have some of the materials at home. The key is choosing the right fabrics and fasteners to ensure your cover stays in place and withstands winter weather. Let’s break down what you’ll need.
Fabric Choices
The most important component of your snow cover is the fabric. It needs to be waterproof, durable, and large enough to cover your entire windshield—including the edges. Here are some top options:
– **Polyester or Nylon Tarp Material:** These are ideal because they’re lightweight, water-resistant, and resist tearing. Look for ripstop nylon or coated polyester, often sold as “outdoor fabric” at craft or hardware stores.
– **Old Shower Curtains or Tablecloths:** If you’re on a tight budget, repurpose a vinyl or PVC shower curtain. These are naturally waterproof and come in large sizes.
– **Fleece or Felt Backing (Optional):** Adding a soft layer on the side that touches your car can prevent scratches. Fleece is gentle on glass and adds a bit of insulation.
Avoid cotton or thin cotton blends—they absorb water and will freeze solid in cold weather, making the cover difficult to remove.
Measuring and Cutting
Before you buy or cut anything, measure your windshield. Use a soft measuring tape to get the width from one edge to the other, including the side mirrors if they’re close to the glass. Then measure the height from the top of the windshield down to the hood or dashboard. Add 2–3 inches to each dimension for seam allowances and overlap.
For example, if your windshield is 60 inches wide and 24 inches tall, cut your fabric to 64 inches by 28 inches. This extra space ensures full coverage and allows you to secure the cover properly.
Fastening Options
To keep your cover in place during wind or snow, you’ll need a way to secure it. Here are some popular methods:
– **Elastic Straps with Hooks:** Attach elastic cords to the corners of the cover and hook them under your side mirrors or door handles. This is the most common and effective method.
– **Magnetic Edges:** Sew small magnets into the bottom edge of the cover. They’ll stick to your car’s metal frame, holding the cover snugly in place. Use strong neodymium magnets for best results.
– **Suction Cups:** Attach suction cups to the top corners and press them onto the roof or window frame. These work well but may lose grip in extreme cold.
– **Tie Straps:** Use fabric ties or paracord to loop around your side mirrors or door handles. Simple and reliable.
For added security, combine two methods—like elastic straps and magnets—to prevent the cover from blowing off.
Tools and Supplies
Here’s a quick checklist of what you’ll need to assemble your cover:
– Fabric (waterproof outer layer + optional soft inner layer)
– Scissors or rotary cutter
– Measuring tape
– Sewing machine or fabric glue (for no-sew option)
– Thread (polyester thread is strongest)
– Elastic cord or straps
– Hooks, magnets, or suction cups
– Fabric marker or chalk
– Pins or clips (to hold fabric in place while sewing)
If you’re not comfortable with a sewing machine, don’t worry—there are no-sew alternatives. Fabric glue, iron-on hem tape, or heavy-duty Velcro strips can all work in a pinch. Just make sure the bond is strong enough to handle wind and moisture.
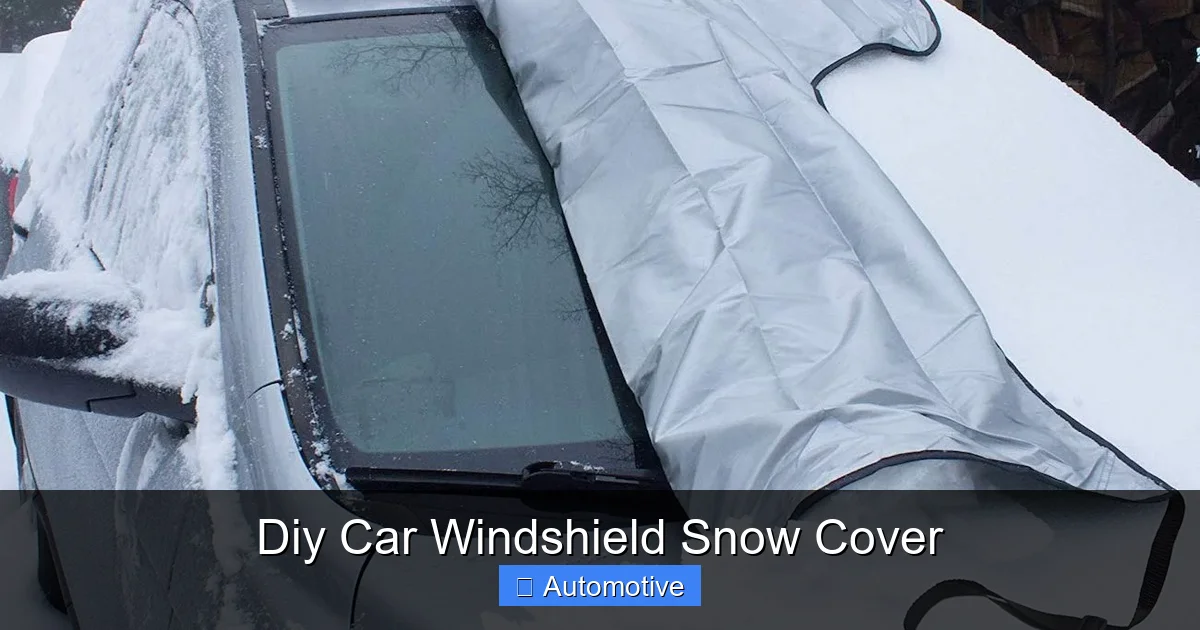
Step-by-Step DIY Instructions
Visual guide about Diy Car Windshield Snow Cover
Image source: thegadgetflow.com
Now that you have your materials, it’s time to build your DIY car windshield snow cover. Follow these step-by-step instructions to create a custom-fit, weather-resistant shield in under an hour.
Step 1: Measure and Cut the Fabric
Start by measuring your windshield as described earlier. Use a fabric marker or chalk to mark the dimensions on your waterproof fabric. If you’re using a double layer (waterproof outer + soft inner), cut two pieces of the same size. Pin or clip them together with the right sides facing inward.
Step 2: Sew the Edges (or Use No-Sew Method)
If you’re sewing, use a straight stitch to sew around all four edges, leaving a ½-inch seam allowance. Leave a 4–6 inch gap on one side so you can turn the cover right-side out. Trim the corners to reduce bulk, then turn the cover inside out through the gap. Use a pencil or chopstick to push out the corners for a clean finish.
Hand-stitch or machine-stitch the opening closed. For extra durability, go over the entire edge with a second row of stitching.
If you’re using a no-sew method, apply fabric glue or iron-on hem tape along the edges. Press firmly and let dry completely. For added strength, reinforce the corners with extra glue or small fabric patches.
Step 3: Attach Fasteners
Now it’s time to add the straps, magnets, or other fasteners. Here’s how:
– **Elastic Straps:** Cut four pieces of elastic cord, each about 12–18 inches long. Sew one end to each corner of the cover (inside the seam). Attach a small hook or loop to the other end. Test the length by placing the cover on your windshield and adjusting the straps so they stretch slightly when hooked under the mirrors.
– **Magnets:** Sew small neodymium magnets into the bottom edge of the cover, spacing them every 6–8 inches. Make sure the magnets are securely enclosed in fabric pockets to prevent scratching.
– **Suction Cups:** Attach suction cups to the top two corners using strong adhesive or by sewing a loop of fabric to hold them in place.
Step 4: Test and Adjust
Place the cover on your windshield and secure it using your chosen method. Check for gaps where snow could sneak in. If needed, add extra straps or magnets. Make sure the cover lies flat and doesn’t flap in the wind.
If you notice any loose areas, reinforce them with additional stitching or glue. Once everything is secure, your DIY car windshield snow cover is ready to use!
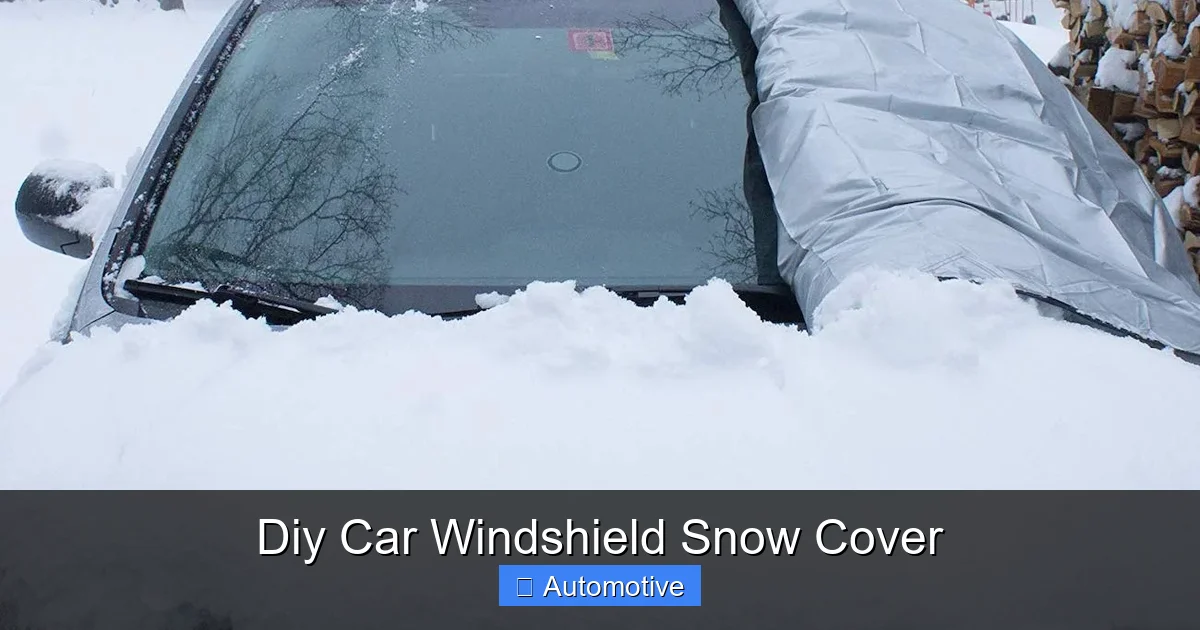
Tips for Maximum Effectiveness
Visual guide about Diy Car Windshield Snow Cover
Image source: thegadgetflow.com
A well-made snow cover is only as good as how you use it. Follow these tips to get the most out of your DIY creation and ensure it lasts all winter.
Install Before the Storm
The best time to put on your snow cover is before snow or ice begins to fall. If you wait until after a storm, you’ll still have to clear the windshield to install it—defeating the purpose. Make it a habit to check the weather forecast each evening. If snow is predicted, toss the cover on before bed.
Store It Properly
When not in use, store your cover in a dry place. Fold it neatly and keep it in a reusable bag or container to prevent mold or mildew. Avoid leaving it in a damp garage or trunk, as moisture can weaken the fabric over time.
Clean It Regularly
Over the season, your cover will collect dirt, salt, and grime. Rinse it with water every few weeks and let it air dry. For stubborn stains, use a mild soap solution and a soft brush. Never use harsh chemicals or bleach, as they can damage waterproof coatings.
Check for Wear and Tear
Inspect your cover periodically for holes, fraying edges, or loose fasteners. Small repairs can extend its life significantly. Keep a needle, thread, and fabric glue handy for quick fixes.
Use in Combination with Other Winter Tools
While a snow cover eliminates the need for scraping, it’s still a good idea to keep a small ice scraper and de-icer in your car for emergencies—like when you forget to put the cover on. Also, consider using a rear window cover if your car has a large back windshield.
Customization and Upgrades
One of the best things about a DIY car windshield snow cover is that you can personalize it to suit your needs and style. Here are some fun and functional upgrades to consider.
Add Reflective Strips
For added safety, sew or glue reflective tape along the edges of your cover. This makes your car more visible in low-light conditions, especially if it’s parked on a snowy roadside.
Choose Fun Colors or Patterns
Why settle for plain black or gray? Pick a bright color like red, blue, or yellow so you can easily spot your car in a crowded, snow-covered parking lot. You can even use patterned fabric—think plaid, camo, or holiday themes—to add a personal touch.
Include a Storage Pocket
Sew a small pocket to the inside of the cover to hold a microfiber cloth or a mini ice scraper. This keeps essentials handy and prevents them from getting lost in your car.
Make It Multi-Use
With a few modifications, your snow cover can double as a sunshade in the summer. Use a reflective outer layer (like Mylar or silver-coated fabric) to block UV rays and keep your car cool. Just flip it over when the seasons change!
Troubleshooting Common Issues
Even the best DIY projects can run into problems. Here’s how to solve some common issues with your car windshield snow cover.
Cover Blows Off in Wind
If your cover keeps flying off, your fasteners aren’t strong enough. Try adding more magnets, using longer elastic straps, or securing it under the hood or door seals. You can also weigh down the bottom edge with small sandbags or fabric weights.
Fabric Freezes to the Windshield
This usually happens if the cover gets wet and then freezes. To prevent it, make sure the cover is completely dry before storing. If it does freeze, gently lift the edges with your fingers—don’t pull hard, as this can tear the fabric.
Cover Doesn’t Fit Properly
If there are gaps or the cover is too tight, adjust the size or add extension straps. You can also sew in adjustable Velcro strips to customize the fit.
Water Seeps Through
If your cover leaks, the fabric may not be fully waterproof. Reapply a waterproof spray (like Scotchgard) or consider replacing the outer layer with a higher-quality material.
Conclusion
A DIY car windshield snow cover is more than just a winter accessory—it’s a smart, practical investment in your time, comfort, and vehicle care. By making your own cover, you save money, reduce waste, and gain a custom solution that fits your car perfectly. Whether you’re a seasoned DIYer or a complete beginner, this project is simple, rewarding, and incredibly useful.
Imagine the difference it will make on those cold, dark mornings when everyone else is hunched over their cars with scrapers in hand. You’ll walk out, peel back your cover, and drive off—clean windshield, no stress, no frost. That’s the power of a little preparation and creativity.
So gather your materials, follow the steps, and give it a try. Your future self will thank you every time you skip the ice-scraping routine. And who knows? You might even enjoy the process so much that you make covers for your family and friends. Winter doesn’t have to be a battle. With a DIY car windshield snow cover, you can face it with confidence, convenience, and a little homemade ingenuity.
Frequently Asked Questions
How long does it take to make a DIY car windshield snow cover?
It typically takes 30 to 60 minutes to make a DIY car windshield snow cover, depending on your sewing skills and the complexity of the design. No-sew versions can be even faster.
Can I use a shower curtain for a snow cover?
Yes, a vinyl or PVC shower curtain works well as a waterproof layer. Just make sure it’s large enough to cover your entire windshield and secure it properly to prevent flapping.
Will a snow cover scratch my windshield?
No, as long as the side touching the glass is soft (like fleece) and the cover is clean. Avoid using rough materials or letting dirt build up underneath.
How do I keep the cover from blowing off in strong winds?
Use a combination of elastic straps, magnets, and suction cups. Secure the cover under side mirrors or door handles, and consider adding weights to the bottom edge.
Can I wash my DIY snow cover?
Yes, rinse it with water and mild soap, then let it air dry. Avoid machine washing or using harsh chemicals, as they can damage the fabric and waterproof coating.
Is a DIY snow cover better than a store-bought one?
A DIY cover can be better because it’s customizable, often more durable, and much cheaper. You also control the materials and design, ensuring a perfect fit for your vehicle.


