How to Remove Wiper Scratches from Car Glass
Contents
- 1 Key Takeaways
- 2 📑 Table of Contents
- 3 Understanding Wiper Scratches: Causes and Types
- 4 Assessing the Severity of the Scratches
- 5 Tools and Materials You’ll Need
- 6 Step-by-Step Guide to Removing Wiper Scratches
- 7 Preventing Future Wiper Scratches
- 8 When to Call a Professional
- 9 Common Mistakes to Avoid
- 10 Conclusion
- 11 Frequently Asked Questions
Wiper scratches on car glass can impair visibility and reduce safety, but they’re often fixable with the right tools and techniques. This guide walks you through identifying scratch depth, choosing the best repair method, and restoring your windshield to near-perfect clarity—without costly replacements.
Have you ever turned on your windshield wipers during a light drizzle, only to notice strange streaks or hazy lines across your view? You’re not alone. Wiper scratches—those frustrating marks left behind by worn, damaged, or improperly maintained wiper blades—are one of the most common yet overlooked issues car owners face. They might seem minor at first, but over time, these scratches can seriously reduce visibility, especially at night or in rainy conditions. Worse, they can make your car look neglected and even lower its resale value.
The good news? Most wiper scratches aren’t permanent. With the right approach, you can restore your windshield’s clarity and safety without shelling out hundreds for a full replacement. Whether you’re dealing with faint haze from old rubber blades or deeper grooves caused by debris trapped under the wiper arm, this guide will walk you through every step—from diagnosis to repair—so you can tackle the problem confidently. We’ll cover everything from DIY polishing techniques to knowing when it’s time to call in a pro.
Key Takeaways
- Identify scratch depth first: Surface haze and fine lines are easier to fix than deep grooves that catch your fingernail.
- Use glass polish for light scratches: Products like cerium oxide or automotive glass polish can buff out minor wiper marks with a drill attachment.
- Deep scratches may need professional help: If light reflects unevenly or vision is distorted, consult a glass specialist to avoid further damage.
- Prevent future scratches: Replace worn wiper blades regularly and clean the windshield before each use.
- DIY kits work for moderate damage: Quality scratch repair kits include polish, pads, and instructions for safe at-home fixes.
- Never use abrasive household cleaners: Baking soda or toothpaste can worsen scratches—stick to glass-specific products.
- Test in a small area first: Always do a spot test to ensure the method won’t cloud or etch the glass.
📑 Table of Contents
Understanding Wiper Scratches: Causes and Types
Before jumping into repairs, it’s essential to understand what causes wiper scratches and how they differ from other types of glass damage. Not all marks on your windshield are created equal, and treating them correctly starts with proper identification.
What Causes Wiper Scratches?
Wiper scratches typically occur when the rubber blade deteriorates, hardens, or accumulates dirt, sand, or ice. Over time, the blade no longer glides smoothly across the glass. Instead, it drags, skips, or leaves behind abrasive residues that etch microscopic grooves into the surface. Common culprits include:
- Old or cracked wiper blades (most wipers should be replaced every 6–12 months)
- Driving in dusty or sandy environments without cleaning the windshield first
- Using wipers on a dry or icy windshield, which increases friction
- Debris like pebbles or twigs getting stuck under the blade during operation
Types of Wiper Damage
Not all wiper-related marks are true “scratches.” Here’s how to tell the difference:
- Surface Haze: A cloudy or milky appearance caused by fine abrasion. This is the mildest form and often responds well to polishing.
- Fine Scratches: Thin, hairline grooves that may only be visible under direct light. These usually don’t catch a fingernail but can scatter light.
- Deep Scratches: Noticeable grooves that you can feel with your fingernail. These distort vision and may require professional intervention.
- Streaking Patterns: Repetitive lines following the wiper’s arc—often a sign of blade misalignment or wear.
Understanding the type of damage helps you choose the right repair method. For instance, surface haze might vanish with a simple polish, while deep scratches could compromise structural integrity if mishandled.
Assessing the Severity of the Scratches
Not every scratch needs aggressive treatment. In fact, over-polishing can thin the glass or create uneven surfaces. That’s why a careful assessment is your first and most important step.
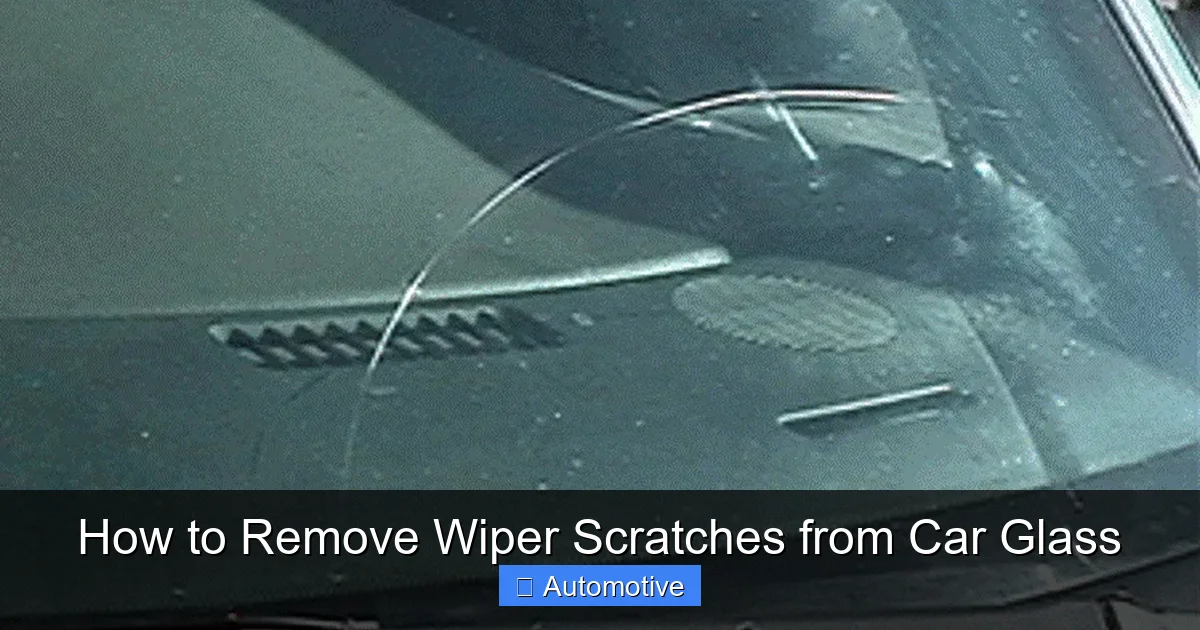
Visual guide about How to Remove Wiper Scratches from Car Glass
Image source: i.pinimg.com
The Fingernail Test
The easiest way to gauge scratch depth is the fingernail test. Run your fingernail gently over the affected area:
- If your nail doesn’t catch, it’s likely surface haze or a very fine scratch—ideal for DIY polishing.
- If your nail catches slightly, you’re dealing with a moderate scratch that may still be repairable at home.
- If your nail gets stuck or digs in, the scratch is deep. Proceed with caution—excessive polishing could weaken the glass.
Light Reflection Check
Turn on your headlights or shine a bright flashlight across the windshield at night. Observe how light behaves:
- Smooth, even reflection = minimal damage
- Scattered or distorted light = moderate to severe scratching
If you notice rainbow-like halos around lights or blurred zones, the glass may have micro-fractures beyond surface-level scratches. In such cases, consult a professional—they have specialized tools to assess structural safety.
When to Skip DIY Repairs
While many wiper scratches are cosmetic, some situations demand expert attention:
- The scratch is in the driver’s primary line of sight
- Multiple deep scratches overlap or form a cluster
- The windshield already has chips or cracks near the scratched area
- You’re unsure about the glass’s condition after an accident or impact
Remember: Your windshield isn’t just for visibility—it’s a critical structural component in modern vehicles, supporting the roof and airbag deployment. When in doubt, get it checked.
Tools and Materials You’ll Need
Once you’ve confirmed the scratches are repairable at home, gather the right tools. Using improper materials can worsen the problem, so quality matters.
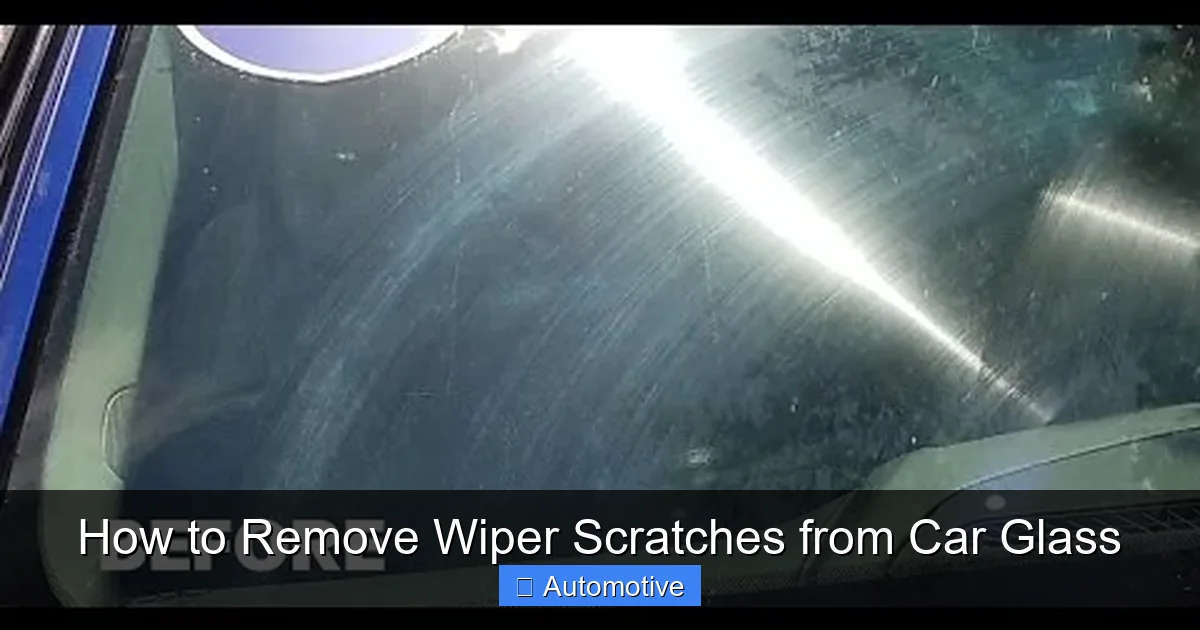
Visual guide about How to Remove Wiper Scratches from Car Glass
Image source: i.ytimg.com
Essential Supplies for Light to Moderate Scratches
- Glass polish: Look for cerium oxide-based products (e.g., Cerium Oxide Powder, Rain-X Glass Polish) or reputable automotive glass compounds. Avoid generic metal polishes—they’re too abrasive.
- Polishing pad or bonnet: A soft foam or microfiber pad that fits a drill or rotary tool. Dual-action (DA) polishers are gentler than rotary models.
- Drill or polisher: A variable-speed drill (max 1500–2000 RPM) works well. Higher speeds generate heat that can crack glass.
- Spray bottle with distilled water: Used to keep the polish moist during buffing.
- Microfiber towels: For cleaning and final wiping—lint-free is key.
- Masking tape: To protect surrounding paint and trim from accidental polish splatter.
Optional but Helpful Items
- UV lamp (for curing某些 resin-based repair kits)
- Glass cleaner (ammonia-free, like Invisible Glass)
- Soft-bristle brush (to clean wiper arms and pivots)
- Safety glasses and gloves
Investing in a dedicated automotive glass scratch repair kit (like those from 3M or Permatex) can simplify the process—they often include pre-measured polish, applicators, and detailed instructions.
Step-by-Step Guide to Removing Wiper Scratches
Now for the main event: restoring your windshield. Follow these steps carefully, and take your time—rushing leads to mistakes.
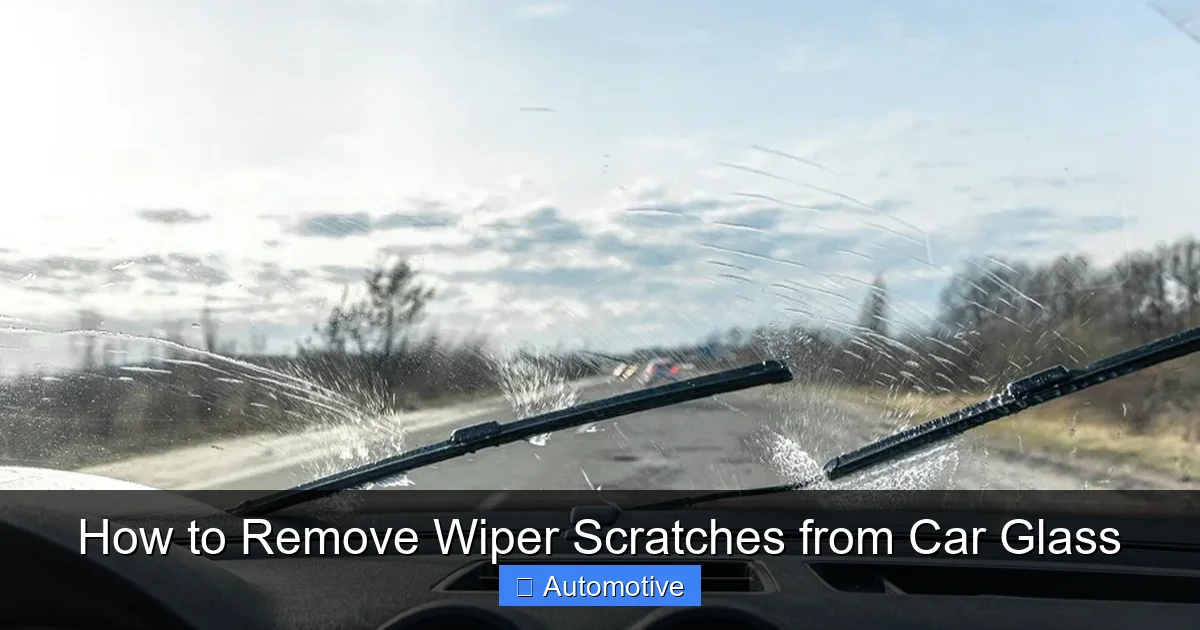
Visual guide about How to Remove Wiper Scratches from Car Glass
Image source: nuvisionautoglass.com
Step 1: Clean the Windshield Thoroughly
Start by washing the entire windshield with soap and water to remove dirt, grime, and wax residues. Dry it completely with a microfiber towel. Any leftover debris will act as an abrasive during polishing and create new scratches.
Step 2: Isolate the Damaged Area
Use masking tape to outline the scratched zone and protect the surrounding paint, rubber seals, and trim. This prevents accidental damage from polish or tool slippage.
Step 3: Apply Glass Polish
Place a small amount of cerium oxide polish (about the size of a pea) onto the pad. Add a few drops of distilled water to create a creamy paste. Apply the paste directly to the scratch.
Step 4: Begin Polishing
Attach the pad to your drill or polisher. Set the speed to low (around 800–1200 RPM). Work in small, overlapping circular motions, applying light to moderate pressure. Keep the pad moving—don’t linger in one spot. Reapply water as needed to prevent drying out.
For best results, polish for 2–3 minutes per section, then wipe away residue with a clean microfiber towel to check progress. Repeat until the scratch fades or disappears.
Step 5: Final Cleaning and Inspection
Once satisfied, remove the tape and clean the entire windshield with glass cleaner. Inspect under bright light and from different angles. If haze remains, repeat the process. For stubborn spots, switch to a finer polish or switch to a softer pad.
Pro Tips for Success
- Work in the shade or garage—direct sunlight dries polish too quickly.
- Use consistent pressure; too much force can create swirl marks.
- If using a rotary polisher, practice on a spare piece of glass first.
- After polishing, apply a glass sealant (like Rain-X) to repel water and reduce future scratching.
Preventing Future Wiper Scratches
Fixing scratches is one thing—keeping them from coming back is another. Prevention is always cheaper and easier than repair.
Replace Wiper Blades Regularly
Most manufacturers recommend replacing wiper blades every 6 to 12 months, or at the first sign of streaking, skipping, or squeaking. Inspect them monthly: if the rubber is cracked, torn, or hardened, swap them out immediately.
Clean Before You Wipe
Never run wipers on a dry or dirty windshield. Always spray washer fluid first to loosen debris. In winter, clear ice and snow completely before activating wipers.
Use Quality Washer Fluid
Cheap or diluted fluids can leave residues that accelerate blade wear. Opt for winter-rated or all-season washer fluid with anti-freeze and cleaning agents.
Park Smart
Whenever possible, park in a garage or use a windshield cover. This protects both the glass and wipers from UV damage, dirt, and extreme temperatures.
Check Wiper Arm Tension
Loose or overly tight wiper arms can cause uneven pressure, leading to skipping and scratching. If your wipers chatter or leave gaps, have the arms inspected.
When to Call a Professional
Despite your best efforts, some scratches are beyond DIY repair. Here’s when to seek expert help:
Deep or Structural Damage
If scratches are deeper than 0.5mm or located in the driver’s critical viewing zone, a certified auto glass technician can assess whether resin filling or replacement is needed.
Multiple Overlapping Scratches
Widespread scratching may indicate underlying issues like contaminated washer fluid or faulty wiper mechanics. A pro can diagnose and resolve root causes.
Insurance Coverage
Many comprehensive auto insurance policies cover windshield repair at little or no cost. Check your policy—you might get professional service for free.
Professional shops use industrial-grade polishers, UV-cured resins, and precision measuring tools that ensure safety and clarity. It’s worth the investment for peace of mind.
Common Mistakes to Avoid
Even with good intentions, it’s easy to make errors that worsen the problem. Steer clear of these pitfalls:
Using Household Abrasives
Toothpaste, baking soda, or metal polish may seem like quick fixes, but they’re formulated for softer surfaces. On glass, they create micro-scratches that scatter light and look worse than the original damage.
Over-Polishing
Excessive buffing thins the glass and can create “low spots” that distort vision. Stop once the scratch is gone—don’t chase perfection.
Ignoring Safety Gear
Glass dust and polish particles can irritate eyes and lungs. Always wear safety glasses and work in a well-ventilated area.
Skipping the Test Patch
Always try your method on an inconspicuous area first. Some polishes react differently based on glass type (laminated vs. tempered).
Conclusion
Wiper scratches on car glass are more than just an eyesore—they’re a safety hazard that deserves prompt attention. But with the right knowledge and tools, most can be safely and effectively removed at home. Start by assessing the damage honestly, choose appropriate polishing products, and follow a careful, methodical process. And remember: prevention is your best defense. Regular wiper maintenance, clean windshields, and mindful driving habits will keep your view crystal clear for miles to come.
If you’re ever unsure about the severity of the damage or your ability to fix it, don’t hesitate to consult a professional. Your safety—and the longevity of your vehicle—is worth the extra step. With this guide in hand, you’re now equipped to tackle wiper scratches like a pro and enjoy a safer, clearer drive every time you hit the road.
Frequently Asked Questions
Can you really remove wiper scratches from car glass?
Yes, light to moderate wiper scratches can often be removed using glass polish and a drill attachment. Deep scratches that catch your fingernail may require professional repair or replacement.
Will toothpaste fix wiper scratches on my windshield?
No, toothpaste is too abrasive and not formulated for automotive glass. It can create more micro-scratches and haze, making the problem worse.
How often should I replace my wiper blades to prevent scratches?
Replace wiper blades every 6 to 12 months, or sooner if you notice streaking, skipping, or cracking. Regular replacement prevents debris buildup that causes scratches.
Is it safe to polish my windshield myself?
Yes, as long as the scratches are superficial and you use proper tools and techniques. Avoid high-speed polishing and always test in a small area first.
Do scratch repair kits actually work?
Quality kits with cerium oxide polish and proper pads can effectively remove fine scratches. Results depend on scratch depth and user technique.
Should I worry about scratches in my line of sight?
Yes. Scratches directly in the driver’s primary viewing area can distort vision, especially at night. Consider professional assessment to ensure safety.