How to Adjust Trailer Brake Controller
Adjusting your trailer brake controller correctly ensures safe, balanced braking and prevents wear on both your tow vehicle and trailer. This guide walks you through everything you need to know—from setup to fine-tuning—so you can tow with confidence.
Key Takeaways
- Proper brake controller adjustment prevents jackknifing and skidding: Correct settings ensure your trailer brakes engage in sync with your tow vehicle, improving control and safety.
- Start with a level surface and empty trailer: Always calibrate your brake controller on flat ground with no load to establish a baseline setting.
- Use the gain setting to control braking intensity: The gain knob adjusts how strongly the trailer brakes respond—higher gain means stronger braking.
- Test in real-world conditions after initial setup: Fine-tune settings while driving at low speeds to match your typical towing weight and road conditions.
- Manual override is essential for emergency situations: Most controllers have a manual slider or button to activate trailer brakes independently during sudden stops.
- Regular maintenance improves performance: Inspect wiring, connectors, and brake components periodically to ensure reliable operation.
- Different trailers may require different settings: Always re-adjust when switching trailers or carrying heavy loads like boats or RVs.
📑 Table of Contents
- Why Adjusting Your Trailer Brake Controller Matters
- Understanding How Trailer Brake Controllers Work
- Step-by-Step Guide to Adjusting Your Trailer Brake Controller
- Common Mistakes to Avoid When Adjusting
- Tips for Different Towing Scenarios
- Maintaining Your Brake Controller for Long-Term Performance
- When to Seek Professional Help
- Conclusion
Why Adjusting Your Trailer Brake Controller Matters
Towing a trailer isn’t just about hitching it up and hitting the road. One of the most critical—and often overlooked—aspects of safe towing is properly adjusting your trailer brake controller. Whether you’re hauling a small utility trailer or a full-size travel camper, your brake controller plays a vital role in keeping you, your cargo, and other drivers safe.
Imagine driving down a highway at 60 mph when you suddenly need to slow down. If your trailer brakes are too weak, your tow vehicle will do most of the work, increasing stopping distance and risking a dangerous sway. On the flip side, if the trailer brakes are too aggressive, they can lock up, causing skidding or even jackknifing. That’s where the brake controller comes in. It’s the brain behind your trailer’s braking system, telling the brakes when and how hard to engage based on how hard you press your foot on the brake pedal.
Adjusting your trailer brake controller isn’t a one-time task, either. As your load changes—whether you’re carrying firewood, furniture, or a boat—you’ll need to tweak the settings to maintain optimal braking performance. Even switching between different trailers can require a fresh adjustment. Think of it like tuning a musical instrument: small changes make a big difference in the final result.
In this guide, we’ll walk you through everything you need to know about how to adjust trailer brake controller settings. From understanding how it works to step-by-step calibration and real-world testing, you’ll learn how to get the most out of your towing setup. By the end, you’ll feel confident hitting the road, knowing your brakes are working in perfect harmony.
Understanding How Trailer Brake Controllers Work
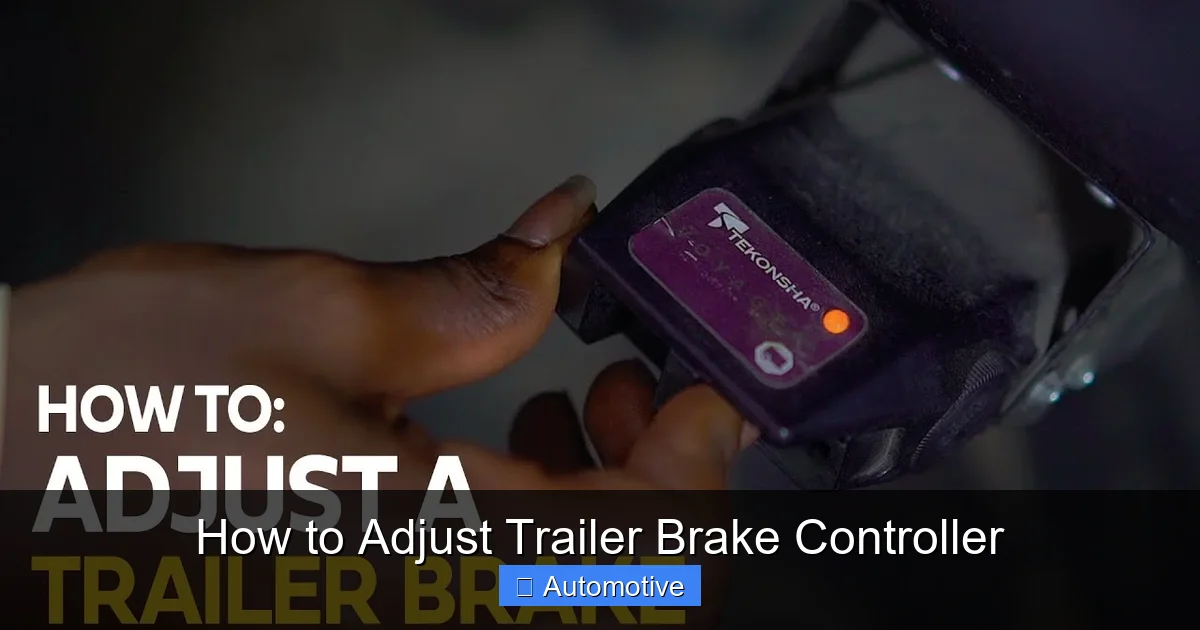
Visual guide about How to Adjust Trailer Brake Controller
Image source: gocarlife.com
Before you start turning knobs or sliding levers, it helps to understand what’s happening under the hood—or rather, under the dashboard. A trailer brake controller is an electronic device installed in your tow vehicle that sends signals to the electric brakes on your trailer. When you press the brake pedal, the controller detects the deceleration and activates the trailer brakes proportionally.
Most modern brake controllers are proportional, meaning they apply trailer brake force based on how hard and fast you’re braking. For example, a gentle stop triggers a light brake application, while a sudden stop sends a strong signal to lock the trailer wheels if needed. This is a huge improvement over older time-delayed systems, which applied brakes after a set delay regardless of driving conditions.
Inside the controller, sensors measure the vehicle’s deceleration using either a pendulum mechanism or an accelerometer. This data is then used to calculate the appropriate brake output. The signal is sent through the wiring harness to the trailer’s brake magnets, which engage the brake shoes against the drums.
But here’s the catch: the controller doesn’t know how heavy your trailer is or how much weight it’s carrying. That’s why you need to manually adjust the gain—the sensitivity of the brake response. Too low, and the trailer barely brakes. Too high, and it slams on the brakes at the slightest touch. Finding the sweet spot is key to smooth, safe towing.
Some advanced controllers even offer features like boost modes for heavy loads, manual override sliders, and diagnostic lights. These extras make fine-tuning easier, but the core principle remains the same: match the brake output to your specific towing situation.
Types of Brake Controllers
Not all brake controllers are created equal. The two main types are time-delayed and proportional (also called inertia-based). Time-delayed controllers apply trailer brakes after a preset delay and at a fixed power level. They’re simpler and cheaper but less responsive. Proportional controllers, on the other hand, react instantly to how hard you brake, offering smoother and safer performance.
If you’re towing frequently or carrying heavy loads, a proportional controller is worth the investment. It adapts to real-time driving conditions, reducing wear on your tow vehicle’s brakes and improving overall control. Many newer trucks and SUVs come with factory-installed proportional controllers, but aftermarket options are widely available and often more customizable.
Electric vs. Electric-Over-Hydraulic Systems
Most trailers use electric brakes, which are activated by an electrical current sent from the controller. These are common on utility trailers, campers, and small boats. However, larger RVs and heavy-duty trailers may use electric-over-hydraulic systems, which combine electric signals with hydraulic pressure for stronger braking.
The adjustment process is similar, but electric-over-hydraulic systems often require additional setup, such as priming the hydraulic pump. Always check your trailer’s manual to confirm the brake type before adjusting the controller.
Step-by-Step Guide to Adjusting Your Trailer Brake Controller
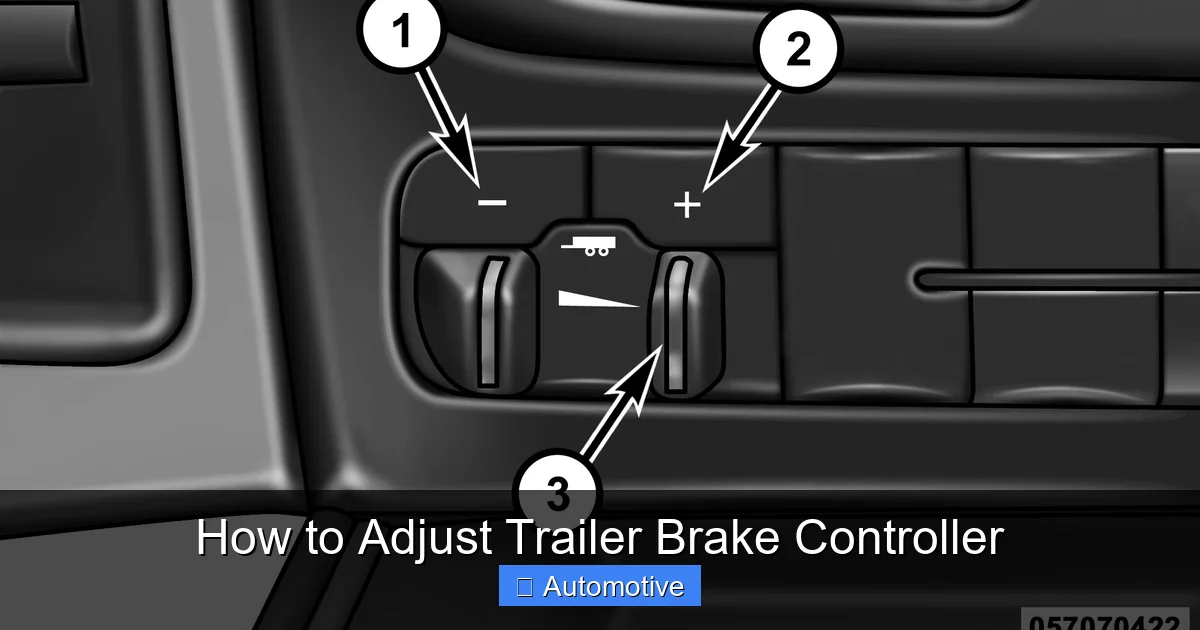
Visual guide about How to Adjust Trailer Brake Controller
Image source: msmownerassets.z13.web.core.windows.net
Now that you understand how it works, let’s get into the nitty-gritty: how to adjust trailer brake controller settings like a pro. Follow these steps carefully, and you’ll have smooth, reliable braking in no time.
Step 1: Prepare Your Setup
Start by parking your tow vehicle and trailer on a flat, level surface. This is crucial—adjusting on a slope can give false readings and lead to incorrect settings. Make sure the trailer is empty or loaded as you normally would tow it. If you’re calibrating for a specific trip, load the trailer first.
Next, check your connections. Ensure the 7-pin trailer plug is securely attached and the wiring is in good condition. Look for frayed wires, corrosion, or loose pins. A poor connection can cause weak or inconsistent braking.
Turn on your vehicle’s ignition but don’t start the engine yet. Locate your brake controller—it’s usually mounted under the dashboard, near the driver’s seat. Familiarize yourself with the controls: you’ll typically see a gain knob (or slider), a manual override lever, and possibly a display screen.
Step 2: Set the Initial Gain
The gain setting controls how aggressively the trailer brakes respond. Start by turning the gain knob to the lowest setting (usually marked “1” or “Min”). This gives you a safe starting point.
Now, press the brake pedal gently and hold it. You should feel the trailer brakes engage slightly. If nothing happens, check your wiring and fuses. If the brakes grab too hard even at the lowest setting, your controller may be faulty or incorrectly installed.
Slowly increase the gain in small increments—say, from 1 to 2, then 3—while pressing the brake pedal. Listen and feel for changes. At the right setting, the trailer should slow down smoothly without locking up the wheels.
Step 3: Test with Manual Override
Most controllers have a manual override feature—a slider or button that activates the trailer brakes independently of the brake pedal. This is useful for testing and emergency stops.
With the vehicle still off, slide the manual override to the halfway point. You should hear a clicking sound as the brake magnets engage. If the wheels don’t turn freely when you try to spin them by hand, the brakes are too tight. Reduce the gain slightly.
Now, start the engine and take a short test drive in a safe, empty parking lot. Drive at about 20–25 mph and apply the brakes gently. The trailer should slow down in sync with the tow vehicle. If it feels like the trailer is pushing you, the gain is too low. If it feels like the trailer is pulling you back too hard, reduce the gain.
Step 4: Fine-Tune Under Load
An empty trailer behaves very differently than a loaded one. Once you’ve set a baseline, load your trailer as you would for a real trip—whether that’s camping gear, a boat, or construction materials.
Repeat the test drive at higher speeds, around 40–50 mph. Apply the brakes firmly but smoothly. The goal is balanced deceleration: neither the tow vehicle nor the trailer should dominate the braking.
If the trailer still pushes you, increase the gain by half a notch. If it locks up or skids, reduce it. Make small adjustments and test after each change. It may take a few tries to get it just right.
Step 5: Use the Manual Override in Real Conditions
During your test drive, try using the manual override while moving slowly. Slide it gradually and observe how the trailer responds. This simulates an emergency stop and helps you understand how the brakes behave under stress.
If the wheels lock up, your gain is too high. If the trailer barely slows, it’s too low. Adjust accordingly and test again.
Common Mistakes to Avoid When Adjusting
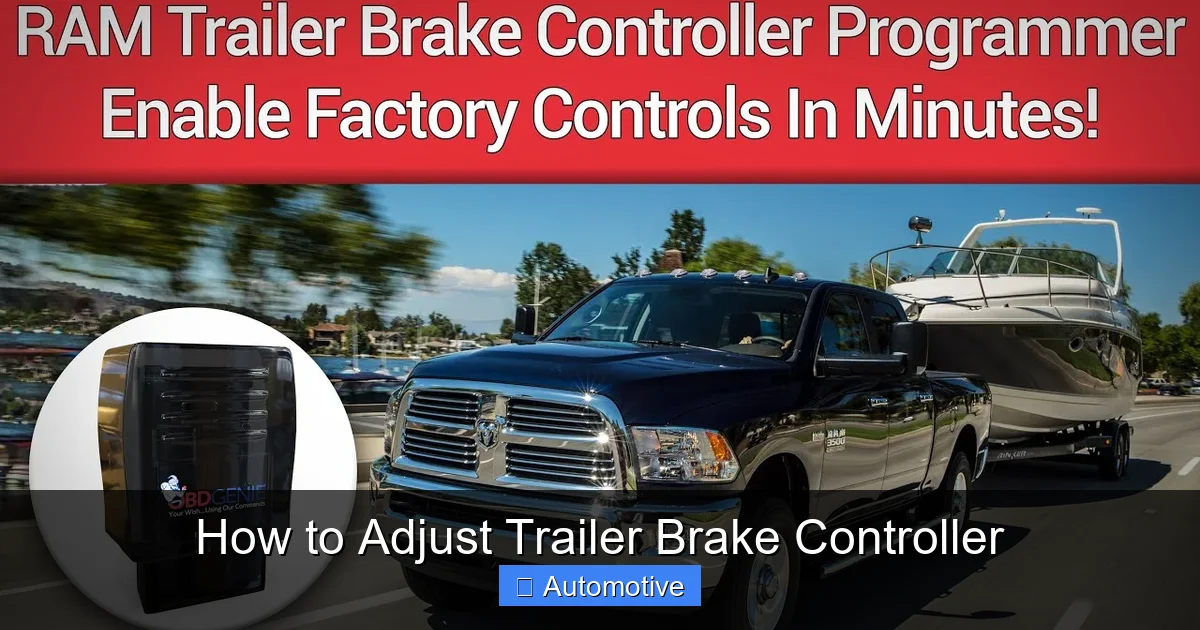
Visual guide about How to Adjust Trailer Brake Controller
Image source: i.ytimg.com
Even experienced towers can make errors when adjusting their brake controller. Here are some common pitfalls and how to avoid them.
Adjusting on a Slope
Never calibrate your brake controller on an incline. Gravity can cause the trailer to push or pull the tow vehicle, giving false feedback. Always use a level surface for accurate results.
Ignoring Load Changes
Many people set their controller once and forget about it. But if you tow different trailers or carry varying loads, you need to re-adjust each time. A lightweight utility trailer needs much less gain than a fully loaded travel camper.
Over-Reliance on Factory Settings
Some vehicles come with pre-set brake controller profiles, but these are generic. They won’t account for your specific trailer, load, or driving style. Always perform a manual adjustment for best results.
Skipping the Test Drive
Don’t assume your settings are correct just because the brakes engage. Real-world testing is essential. A parking lot test at low speed can reveal issues that don’t appear during static checks.
Neglecting Maintenance
Worn brake magnets, dirty connectors, or low brake fluid can all affect performance. Inspect your trailer brakes regularly and clean the 7-pin connector with electrical contact cleaner.
Tips for Different Towing Scenarios
Not all towing situations are the same. Here’s how to adjust your brake controller for common scenarios.
Towing a Lightweight Trailer
For small utility trailers or pop-up campers, start with a low gain setting (around 3–4). These trailers have less momentum, so they don’t need strong braking. Over-braking can cause skidding.
Hauling a Heavy Load
Boats, RVs, and construction equipment require higher gain settings—often 7 or above. You may also need to enable a “boost” mode if your controller has one. This increases brake output for heavy loads.
Driving in Hilly or Mountainous Areas
Steep descents put extra strain on your brakes. Increase the gain slightly to help control speed. Use the manual override to apply steady pressure on long downhill stretches, reducing wear on your tow vehicle’s brakes.
Towing in Wet or Icy Conditions
Reduce the gain in slippery conditions to prevent wheel lockup. Even a small adjustment can make a big difference in traction. Consider using lower gears to engine brake and reduce reliance on the trailer brakes.
Maintaining Your Brake Controller for Long-Term Performance
Adjusting your brake controller is important, but so is ongoing maintenance. A well-maintained system lasts longer and performs better.
Regular Inspections
Check the controller’s display (if it has one) for error codes. Look for loose wires, damaged insulation, or corrosion. Clean the 7-pin connector with a wire brush and apply dielectric grease to prevent rust.
Brake Component Checks
Inspect the trailer’s brake magnets, shoes, and drums. Worn magnets can’t generate enough force, even with high gain. Replace them if they’re cracked or pitted.
Software Updates
Some advanced controllers receive firmware updates. Check the manufacturer’s website periodically for improvements or bug fixes.
Battery and Power Supply
Ensure your tow vehicle’s battery is in good condition. Weak voltage can reduce brake output. Use a multimeter to check the voltage at the 7-pin connector—it should be at least 12 volts when the brakes are applied.
When to Seek Professional Help
While most adjustments can be done at home, some issues require a professional. If your controller shows error codes, the brakes don’t respond at all, or you notice burning smells or smoke, stop using it immediately.
A certified technician can diagnose electrical problems, replace faulty components, and ensure your system meets safety standards. It’s better to spend a little now than risk an accident later.
Conclusion
Adjusting your trailer brake controller might seem like a small detail, but it’s one of the most important steps you can take to ensure safe, smooth towing. By understanding how the system works, following a careful adjustment process, and maintaining your equipment, you’ll protect yourself, your cargo, and everyone else on the road.
Remember, there’s no one-size-fits-all setting. Every trailer, load, and driving condition is different. Take the time to fine-tune your controller each time you tow, and you’ll enjoy better control, shorter stopping distances, and greater peace of mind.
Whether you’re a weekend warrior hauling a boat or a full-time RVer crossing the country, mastering how to adjust trailer brake controller settings is a skill that pays off every mile of the way.
Frequently Asked Questions
How often should I adjust my trailer brake controller?
You should adjust your brake controller every time you change trailers or significantly alter your load. Even small changes in weight can affect braking performance, so it’s best to recalibrate regularly.
Can I adjust the brake controller while driving?
No, never adjust the gain or settings while the vehicle is in motion. Always make changes when parked on a level surface with the engine off or in accessory mode.
What if my trailer brakes don’t engage at all?
First, check the 7-pin connector, fuses, and wiring. If everything looks good, the brake controller or trailer magnets may be faulty. Test with a multimeter or consult a professional.
Is a higher gain setting always better?
No, too high a gain can cause wheel lockup, skidding, or jackknifing. The goal is balanced braking—find the setting where the trailer and tow vehicle slow down together smoothly.
Do I need a brake controller for all trailers?
Only trailers with electric or electric-over-hydraulic brakes require a controller. If your trailer has surge brakes or no brakes, a controller isn’t needed.
Can I use the same settings for different trailers?
Not necessarily. Each trailer has different weight, brake size, and design. Always adjust the controller when switching trailers to ensure optimal performance.