
How to Get Key Scratches Out of a Car
Contents
- 1 Key Takeaways
- 2 📑 Table of Contents
- 3 How to Get Key Scratches Out of a Car
- 4 Understanding Key Scratches: What You’re Dealing With
- 5 Tools and Materials You’ll Need
- 6 Step-by-Step Guide to Removing Light Key Scratches
- 7 Fixing Deeper Key Scratches: When Paint Is Needed
- 8 When to Call a Professional
- 9 Preventing Future Key Scratches
- 10 Conclusion
- 11 Frequently Asked Questions
Key scratches on your car can be frustrating, but they’re often fixable with the right tools and techniques. Whether you’re dealing with light surface marks or deeper gouges, this guide walks you through safe, effective methods to restore your vehicle’s finish—without breaking the bank.
Key Takeaways
- Assess the scratch depth first: Use your fingernail to determine if it’s a surface scuff, clear coat scratch, or deep paint damage—this dictates your repair approach.
- Start with the least invasive method: Always try gentle cleaning and polishing before moving to sanding or touch-up paint to avoid unnecessary damage.
- Use quality products: Invest in reputable scratch removers, rubbing compounds, and microfiber cloths for better results and paint protection.
- Work in small sections: Focus on one area at a time to maintain control and ensure even application of products.
- Protect after repair: Apply wax or sealant once the scratch is gone to shield the area from future damage and UV exposure.
- Know when to call a pro: Deep scratches that expose bare metal or span large areas should be handled by a professional to prevent rust and ensure a seamless finish.
- Prevention is key: Use car covers, avoid parking near high-traffic areas, and be mindful of keys and bags to reduce future keying incidents.
📑 Table of Contents
How to Get Key Scratches Out of a Car
Finding a fresh key scratch on your car’s door or hood can feel like a punch to the gut. Whether it happened in a crowded parking lot, by an angry ex, or just an unfortunate accident, those jagged lines are hard to ignore. But here’s the good news: many key scratches can be repaired at home with the right tools and a bit of patience. You don’t need to be a professional detailer or spend hundreds at a body shop to restore your car’s shine.
This guide will walk you through everything you need to know about how to get key scratches out of a car—from identifying the type of damage to choosing the best repair method. We’ll cover DIY solutions for minor scratches, when to use touch-up paint, and how to know when it’s time to call in the experts. By the end, you’ll have the confidence and know-how to tackle key scratches like a pro, saving money and keeping your ride looking its best.
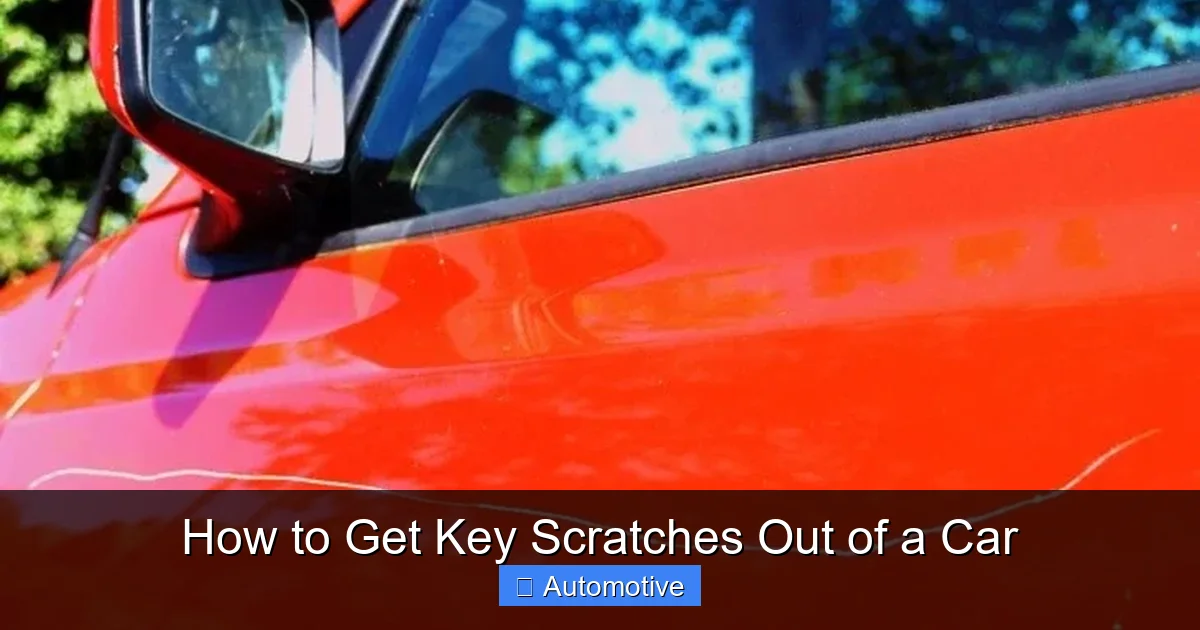
Understanding Key Scratches: What You’re Dealing With
Before you start scrubbing or sanding, it’s crucial to understand what kind of damage you’re facing. Not all scratches are created equal. The depth and location of the scratch determine the best repair method. Rushing in without assessment can lead to more harm than good—like accidentally sanding through the paint or making the scratch more visible.
Visual guide about How to Get Key Scratches Out of a Car
Image source: paintstrategies.com
Types of Car Paint Layers
Modern cars have three main layers of finish: the primer, the base coat (color), and the clear coat. The clear coat is the outermost layer—it’s what gives your car that glossy shine. Most key scratches only affect this top layer. But deeper scratches can go through the clear coat and into the base coat or even down to the metal.
How to Test Scratch Depth
The fingernail test is a quick and easy way to assess damage. Run your fingernail over the scratch at a perpendicular angle. If your nail catches or gets stuck, the scratch is likely deep—possibly into the base coat or metal. If your nail glides smoothly over it, it’s probably just a surface scuff or clear coat scratch, which is much easier to fix.
Common Causes of Key Scratches
Keying is often intentional vandalism, but it can also happen accidentally. People might drag keys, pens, or other sharp objects across your car while reaching into a pocket or bag. In tight parking spaces, doors from adjacent cars can scrape against yours. Understanding the cause can help you prevent future incidents, but for now, let’s focus on fixing what’s already there.
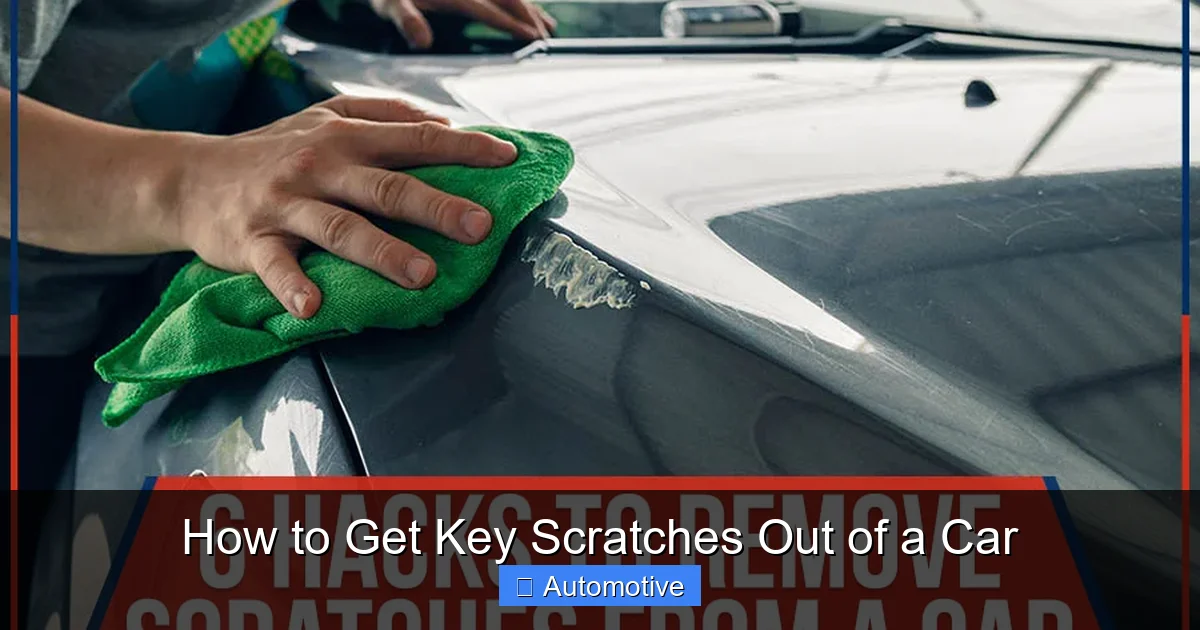
Tools and Materials You’ll Need
Having the right tools makes all the difference when learning how to get key scratches out of a car. You don’t need a full auto shop, but a few key items will set you up for success. Here’s a list of essentials, categorized by repair level.
Visual guide about How to Get Key Scratches Out of a Car
Image source: feldmanchevyoflansing.com
Basic Supplies for Light Scratches
- Microfiber cloths: Use clean, soft cloths to avoid adding more scratches. Have at least two—one for cleaning and one for buffing.
- Car wash soap and water: Start by washing the area to remove dirt and debris that could worsen the scratch during repair.
- Rubbing alcohol or wax and grease remover: Cleans the surface before applying any polish or compound.
- Scratch remover or polishing compound: Look for products labeled for clear coat repair. Popular brands include Meguiar’s, Turtle Wax, and 3M.
- Dual-action (DA) polisher (optional): A machine polisher speeds up the process and delivers more consistent results, but you can also do it by hand.
Supplies for Deeper Scratches
- Touch-up paint: Match your car’s exact color code (found on the driver’s side door jamb or owner’s manual).
- Fine-grit sandpaper (2000–3000 grit): Used wet to smooth deep scratches before painting.
- Clear coat spray: Applied after touch-up paint to restore shine and protection.
- Toothpicks or fine-tip applicators: For precise paint application.
- Masking tape and painter’s paper: Protect surrounding areas when sanding or painting.
Safety Gear
Don’t forget safety! Wear gloves to protect your hands from chemicals, and work in a well-ventilated area—especially when using sprays or compounds. If you’re sanding, consider a dust mask to avoid inhaling particles.
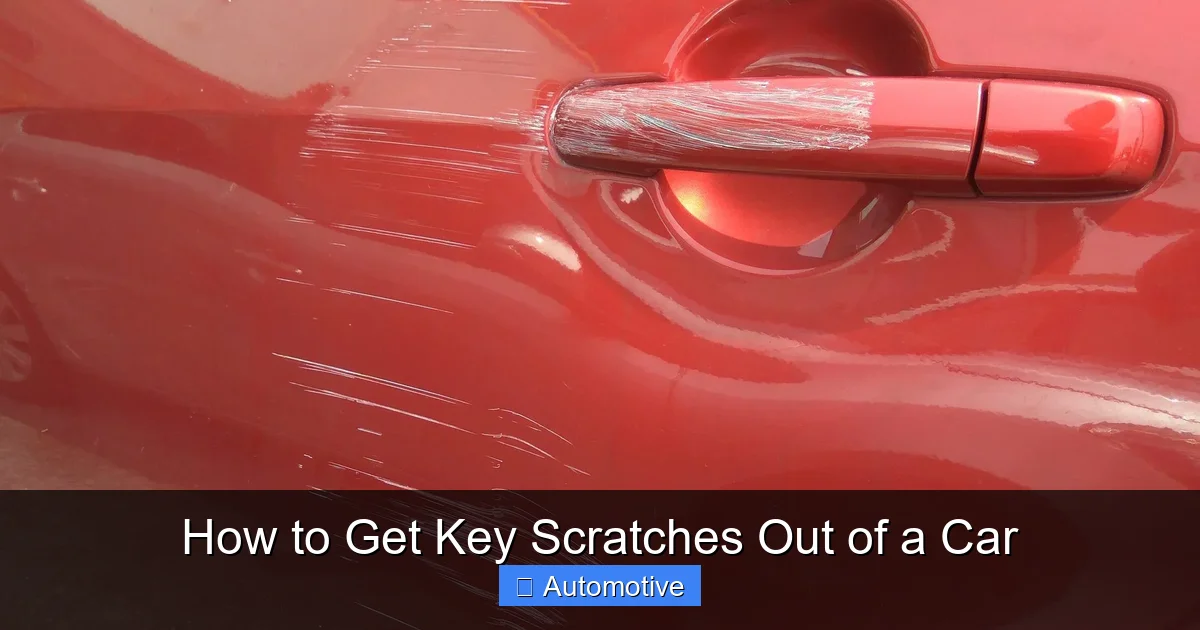
Step-by-Step Guide to Removing Light Key Scratches
Most key scratches are surface-level or affect only the clear coat. These are the easiest to fix and often don’t require paint. With the right technique, you can make them disappear completely. Here’s how to get key scratches out of a car when they’re minor.
Visual guide about How to Get Key Scratches Out of a Car
Image source: familyhandyman.com
Step 1: Clean the Area Thoroughly
Start by washing the scratched area with car soap and water. Dirt and grime can act like sandpaper during polishing, making the scratch worse. Rinse well and dry with a clean microfiber cloth. Then, wipe the spot with rubbing alcohol or a wax remover to eliminate oils and residues. This ensures the polish bonds properly and works effectively.
Step 2: Apply Scratch Remover or Polish
Squeeze a small amount of scratch remover onto a clean microfiber cloth or applicator pad. Work it into the scratch using circular motions. Apply light to medium pressure—don’t press too hard, as this can wear down the clear coat. Focus only on the scratched area, about the size of a dinner plate. Keep buffing for 30–60 seconds, then wipe away the residue with a clean part of the cloth.
Step 3: Inspect and Repeat if Needed
After the first pass, check the scratch under good lighting. If it’s still visible, repeat the process. Some deeper clear coat scratches may need two or three applications. Be patient—rushing can lead to uneven results.
Step 4: Polish and Protect
Once the scratch is gone or significantly reduced, apply a finishing polish to restore shine. Follow up with a coat of car wax or sealant. This protects the repaired area and blends it with the surrounding paint. Wax also adds a layer of defense against future scratches and UV damage.
Pro Tip: Use a Dual-Action Polisher
If you have access to a DA polisher, use it with a foam polishing pad. It reduces effort and delivers more uniform results. Set the speed to 3–4 (out of 6) and work in small sections. Always keep the pad moving to avoid burning the paint.
Fixing Deeper Key Scratches: When Paint Is Needed
When your fingernail catches in the scratch, it’s time to bring out the touch-up paint. These deeper gouges have penetrated the clear coat and possibly the base coat. While they’re more challenging to fix, they’re still manageable with care and precision.
Step 1: Sand the Scratch (Wet Sanding)
Wet sanding smooths the edges of the scratch and creates a surface for the paint to adhere to. Tape off the area with painter’s tape to protect surrounding paint. Soak 2000–3000 grit sandpaper in water for 10 minutes. Sand the scratch gently in one direction—never in circles—using light pressure. Keep the area wet to prevent scratching. Stop when the scratch feels smooth and the edges are feathered.
Step 2: Clean and Dry
Rinse the area thoroughly to remove sanding residue. Dry it completely with a microfiber cloth. Any moisture left behind can cause the paint to bubble or peel.
Step 3: Apply Touch-Up Paint
Shake the touch-up paint well. Use a toothpick or fine applicator to dab paint into the scratch. Don’t flood it—apply thin layers. Let each layer dry for 10–15 minutes before adding the next. Most deep scratches need 2–3 coats. Be patient; rushing can lead to drips or uneven texture.
Step 4: Apply Clear Coat
Once the paint is dry, apply a thin layer of clear coat using the same technique. This restores the glossy finish and protects the new paint. Let it dry for at least 24 hours before polishing.
Step 5: Polish and Blend
After the clear coat cures, use a fine polishing compound to blend the repaired area with the surrounding paint. This removes any orange peel texture and evens out the shine. Finish with wax to seal and protect.
Example: Fixing a Door Scratch
Imagine a 6-inch key scratch on your front door. After washing and testing, you find it’s deep. You wet sand it smooth, apply two coats of touch-up paint, and finish with clear coat. After polishing, the scratch is nearly invisible—just a faint line that’s hard to see unless you’re looking for it.
When to Call a Professional
While many key scratches can be fixed at home, some situations call for professional help. Knowing when to step back can save you time, money, and potential damage.
Deep Scratches That Expose Metal
If the scratch goes all the way down to the bare metal, it’s at risk of rust. Moisture and air can seep in, causing corrosion that spreads under the paint. Professionals have the tools and materials to properly seal and refinish these areas, often using spray guns for a factory-like finish.
Large or Multiple Scratches
A single scratch? DIY-friendly. But if your car has been keyed across multiple panels—doors, hood, trunk—it’s a bigger job. Professionals can blend repairs seamlessly and may offer paint correction services to restore the entire panel.
High-Value or Classic Cars
If you drive a luxury vehicle, classic car, or something with sentimental value, it’s worth investing in professional repair. Amateurs risk devaluing the car with mismatched paint or poor blending. A detailer or body shop can match the color perfectly and restore the original finish.
Unsatisfactory DIY Results
Sometimes, despite your best efforts, the scratch remains visible or the paint looks uneven. Don’t keep trying—you might make it worse. At this point, consult a professional. They can assess the damage and recommend the best course of action, whether it’s wet sanding, repainting, or clear coat restoration.
Preventing Future Key Scratches
The best way to deal with key scratches is to avoid them altogether. While you can’t control every situation, a few smart habits can significantly reduce your risk.
Park Smart
Choose parking spots away from high-traffic areas. Avoid squeezing into tight spaces where doors might swing open. If possible, park in a garage or use a carport. When parking in public, face your car toward the curb—this makes it harder for vandals to access the sides.
Use a Car Cover
A high-quality car cover protects against scratches, UV rays, and weather damage. Look for soft, breathable materials that won’t trap moisture. Even a simple indoor cover can prevent accidental scrapes from bags or tools.
Be Mindful of Your Belongings
Keys, pens, and sharp objects in your pocket can scratch your car when you lean against it. Keep keys in a pouch or use a keychain with a soft cover. Avoid placing bags or laptops directly on the paint.
Install Paint Protection Film (PPF)
For long-term protection, consider applying a clear paint protection film. This invisible layer absorbs impacts and resists scratches. It’s especially useful on high-risk areas like the hood, fenders, and door edges. While it’s an investment, it can save you from costly repairs down the road.
Stay Alert and Report Vandalism
If you suspect your car was intentionally keyed, document the damage with photos and report it to the police. Many insurance policies cover vandalism, and reporting can help prevent future incidents in your area.
Conclusion
Learning how to get key scratches out of a car doesn’t have to be overwhelming. With the right approach, most scratches—even deep ones—can be repaired at home. Start by assessing the damage, gather the proper tools, and work methodically. For light scratches, polishing and waxing are often enough. For deeper gouges, touch-up paint and clear coat can restore your car’s appearance.
Remember, patience and precision are key. Rushing the process can lead to mistakes that are harder to fix. And when in doubt, don’t hesitate to seek professional help—especially for valuable vehicles or extensive damage. By combining smart repair techniques with preventive measures, you can keep your car looking sharp and protected for years to come.
Frequently Asked Questions
Can you really remove key scratches from a car?
Yes, many key scratches can be removed, especially if they only affect the clear coat. Light scratches often disappear with polishing, while deeper ones may require touch-up paint and clear coat.
How do I know if a scratch is too deep to fix myself?
If your fingernail catches in the scratch or you see bare metal, it’s likely too deep for a simple DIY fix. These should be handled by a professional to prevent rust and ensure a quality repair.
Will touch-up paint perfectly match my car’s color?
Touch-up paint is formulated to match your car’s factory color code, but slight variations can occur due to aging, sun exposure, or lighting. For best results, blend the repair with polishing and wax.
Can I use toothpaste to remove key scratches?
Toothpaste is sometimes used as a mild abrasive for very light surface scuffs, but it’s not recommended for clear coat scratches. It can leave swirl marks and doesn’t offer the same protection as dedicated scratch removers.
How long does it take for touch-up paint to dry?
Touch-up paint typically dries to the touch in 10–15 minutes, but it’s best to wait 24 hours before polishing or waxing to ensure full curing and adhesion.
Does car insurance cover key scratches?
Comprehensive insurance often covers vandalism, including keying. Check your policy and file a claim if the repair cost exceeds your deductible. Always document the damage with photos.


