How to Put Air in a Road Bike Tire
Contents
- 1 Key Takeaways
- 2 📑 Table of Contents
- 3 Why Proper Tire Inflation Matters for Road Bikes
- 4 Understanding Road Bike Tire Valves: Presta vs. Schrader
- 5 Choosing the Right Pump for Your Needs
- 6 Step-by-Step Guide: How to Put Air in a Road Bike Tire
- 7 Recommended Tire Pressure for Road Bikes
- 8 Common Mistakes to Avoid When Inflating Road Bike Tires
- 9 Maintaining Your Pump and Tires for Long-Term Performance
- 10 Conclusion
- 11 Frequently Asked Questions
Knowing how to put air in a road bike tire is essential for performance, safety, and comfort. Proper inflation prevents flats, improves handling, and extends tire life—this guide covers everything from valve types to pump selection and pressure checks.
Key Takeaways
- Check tire pressure regularly: Road bike tires lose air over time and should be inflated before every ride for optimal performance.
- Know your valve type: Most road bikes use Presta valves, which require unscrewing the tip before inflating—Schrader valves are less common but easier to use.
- Use the right pump: A floor pump with a pressure gauge is ideal for home use, while a mini pump or CO2 inflator works best on the go.
- Follow recommended PSI: Check the sidewall of your tire for the ideal pressure range—typically 80–130 PSI depending on rider weight and tire width.
- Avoid overinflation: Too much air can cause blowouts, reduce traction, and make rides uncomfortable on rough roads.
- Inspect tires before inflating: Look for cuts, embedded debris, or wear that could lead to punctures or failures.
- Maintain your pump: Keep your pump clean and ensure the hose and chuck are in good condition for consistent performance.
📑 Table of Contents
- Why Proper Tire Inflation Matters for Road Bikes
- Understanding Road Bike Tire Valves: Presta vs. Schrader
- Choosing the Right Pump for Your Needs
- Step-by-Step Guide: How to Put Air in a Road Bike Tire
- Recommended Tire Pressure for Road Bikes
- Common Mistakes to Avoid When Inflating Road Bike Tires
- Maintaining Your Pump and Tires for Long-Term Performance
- Conclusion
Why Proper Tire Inflation Matters for Road Bikes
Riding a road bike with properly inflated tires isn’t just about convenience—it’s about safety, efficiency, and enjoyment. When your tires are at the right pressure, you’ll notice smoother handling, better grip on the road, and less effort required to maintain speed. Underinflated tires create more rolling resistance, making every pedal stroke harder and increasing the risk of pinch flats. Overinflated tires, on the other hand, can lead to a harsh ride, reduced traction, and even sudden blowouts, especially on bumpy surfaces.
Think of your tires as the only point of contact between you and the road. That small patch of rubber plays a huge role in how your bike performs. Whether you’re commuting, training, or racing, maintaining correct tire pressure ensures you get the most out of your ride. It also helps extend the life of your tires and reduces the chance of unexpected flats during a long ride. In short, learning how to put air in a road bike tire correctly is one of the simplest yet most impactful habits a cyclist can develop.
Many riders overlook this basic maintenance step, assuming that “close enough” is good enough. But even a small drop in pressure can significantly affect performance. Road bike tires are designed to operate within a specific pressure range, and straying too far from that range compromises their effectiveness. By making tire inflation a regular part of your pre-ride routine, you’re not just fixing a flat—you’re optimizing your entire cycling experience.
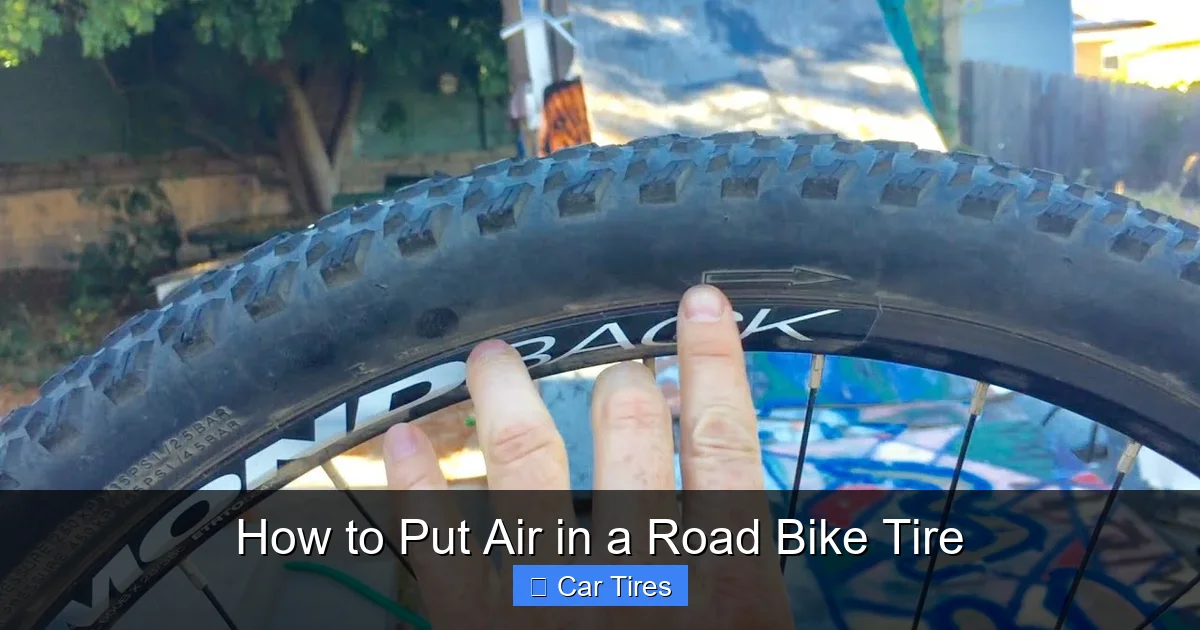
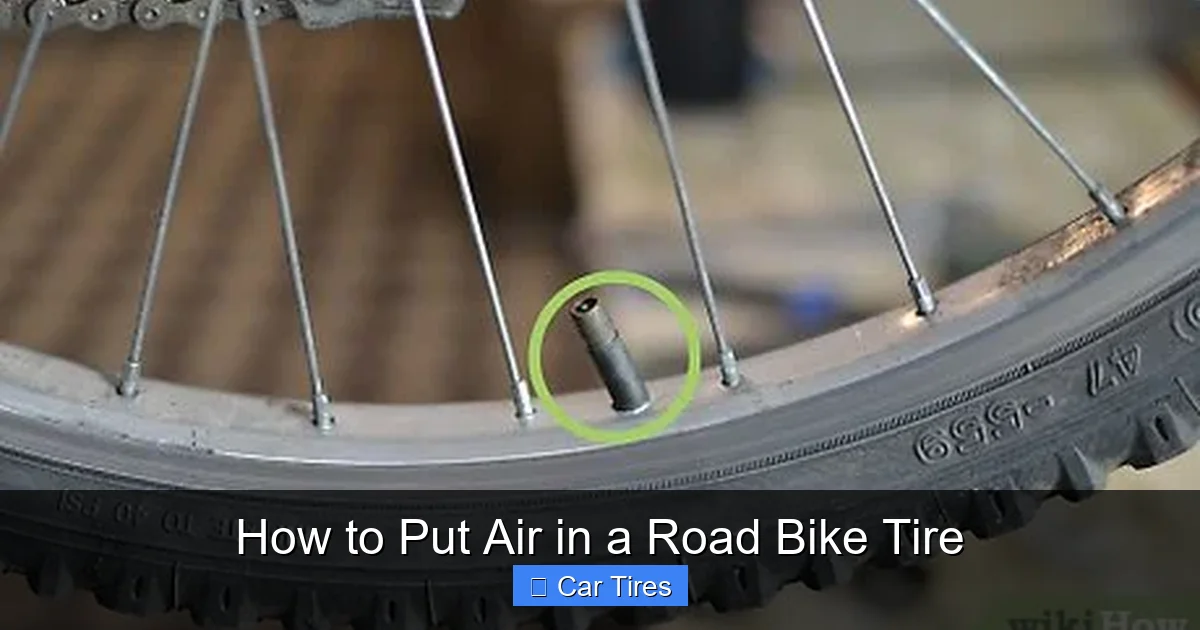
Understanding Road Bike Tire Valves: Presta vs. Schrader
Visual guide about How to Put Air in a Road Bike Tire
Image source: i.ytimg.com
Before you can learn how to put air in a road bike tire, you need to understand the two main types of valves you might encounter: Presta and Schrader. Most modern road bikes use Presta valves, which are slender, lightweight, and designed for high-pressure applications. Schrader valves, commonly found on cars and mountain bikes, are thicker and more robust but less common on road bikes due to their size and weight.
The Presta valve has a small nut at the top that must be unscrewed before air can flow in or out. This design allows for precise pressure control and prevents air from escaping unintentionally. To inflate a Presta valve, you’ll first need to loosen this nut by turning it counterclockwise. You’ll hear a slight hiss as air escapes—that’s normal. Once the nut is loose, you can attach your pump and begin inflating. After pumping, remember to tighten the nut again to seal the valve.
Schrader valves, while less common on road bikes, are easier to use if you’re familiar with car tires. They have a spring-loaded pin in the center that opens when pressure is applied by the pump. No unscrewing is needed—just press the pump head onto the valve and start inflating. Some older or hybrid road bikes may have Schrader valves, especially if they’re designed for casual riding or commuting.
It’s also worth noting that some pumps are compatible with both valve types, while others require an adapter. If you’re using a Presta valve with a pump designed for Schrader valves, you’ll need a small adapter that screws onto the Presta valve to create a seal. These adapters are inexpensive and worth keeping in your saddlebag or tool kit.
Knowing your valve type is the first step in mastering how to put air in a road bike tire. It ensures you don’t damage the valve or waste time trying to force a pump that doesn’t fit. Take a moment to inspect your valves before your next ride—most road bikes will have Presta valves, but it’s always good to confirm.
Choosing the Right Pump for Your Needs
Visual guide about How to Put Air in a Road Bike Tire
Image source: giyopumps.com
When it comes to inflating road bike tires, not all pumps are created equal. The right pump can make the process quick and accurate, while the wrong one can leave you frustrated and underinflated. There are three main types of pumps to consider: floor pumps, mini pumps, and CO2 inflators—each with its own advantages and best-use scenarios.
A floor pump is the gold standard for home use. These pumps are large, stable, and equipped with a built-in pressure gauge, making it easy to inflate your tires to the exact PSI you need. They’re designed for high-pressure applications, which is essential for road bike tires that often require 100 PSI or more. Look for a floor pump with a dual-head or adjustable chuck that fits both Presta and Schrader valves. Some models even have a bleed valve to release excess air if you overinflate.
Mini pumps, also known as hand pumps or frame pumps, are compact and portable, making them ideal for on-the-go repairs. They’re lightweight and can be mounted to your bike frame or carried in a saddlebag. However, mini pumps require more effort to reach high pressures, and many don’t have pressure gauges, so you’ll need to rely on feel or a separate gauge. Still, they’re a lifesaver when you’re miles from home with a flat tire.
CO2 inflators are the fastest option for emergency inflation. These devices use small cartridges of compressed carbon dioxide to fill a tire in seconds. They’re popular among racers and long-distance riders who need a quick fix. However, CO2 inflators are single-use, can be expensive over time, and don’t allow for precise pressure control. Once the gas is released, it’s hard to adjust the pressure without letting air out completely.
For most riders, a combination of a floor pump at home and a mini pump or CO2 inflator on the road is the best approach. This ensures you can maintain proper tire pressure during regular maintenance and handle flats during rides. When choosing a pump, consider your riding style, how often you ride, and whether you prioritize convenience, accuracy, or portability.
Step-by-Step Guide: How to Put Air in a Road Bike Tire
Visual guide about How to Put Air in a Road Bike Tire
Image source: wikihow.com
Now that you understand the basics, let’s walk through the actual process of how to put air in a road bike tire. This step-by-step guide will help you do it quickly, safely, and correctly—whether you’re at home or out on the road.
Step 1: Check the Current Tire Pressure
Before adding air, it’s important to know how much pressure is already in your tire. Use a reliable pressure gauge—either the one on your floor pump or a standalone gauge—to check both tires. Road bike tires typically lose 1–2 PSI per week, even without punctures, so it’s common to find them underinflated. If you don’t have a gauge, you can estimate pressure by squeezing the tire, but this method is unreliable and can lead to under- or overinflation.
Step 2: Identify the Valve Type and Prepare It
Look at the valve stem on your tire. If it’s thin and has a small nut at the top, it’s a Presta valve. Unscrew the nut counterclockwise until it’s loose—don’t remove it completely. You should hear a small puff of air as the seal breaks. For Schrader valves, no preparation is needed; just make sure the valve cap is removed.
Step 3: Attach the Pump
Place the pump head onto the valve. For Presta valves, ensure the pump head is fully seated and locked in place—most pumps have a lever or twist mechanism to secure the connection. For Schrader valves, press the pump head firmly onto the valve until it clicks or seals. If you’re using an adapter for a Presta valve on a Schrader-only pump, screw the adapter onto the valve first, then attach the pump.
Step 4: Inflate the Tire
Begin pumping. With a floor pump, use long, steady strokes to build pressure efficiently. Watch the gauge closely—road bike tires require high pressure, so it may take 20–30 pumps to reach the desired PSI. With a mini pump, you’ll need more strokes and greater effort, so take breaks if needed. For CO2 inflators, attach the cartridge, screw it into the inflator head, and release the gas quickly. Be careful—CO2 can make the tire very cold.
Step 5: Check Pressure and Adjust
Once you’ve added air, remove the pump and check the pressure again. If it’s too low, repeat the process. If it’s too high, use the pump’s bleed valve (if available) or press the valve pin gently to release a small amount of air. For Presta valves, remember to tighten the nut after inflating to prevent air leakage.
Step 6: Replace the Valve Cap
Although not essential, replacing the valve cap helps keep dirt and moisture out of the valve, which can cause leaks over time. It’s a small step that contributes to long-term tire health.
Following these steps ensures you’re inflating your tires correctly every time. Practice makes perfect—after a few tries, you’ll be able to do it in under two minutes.
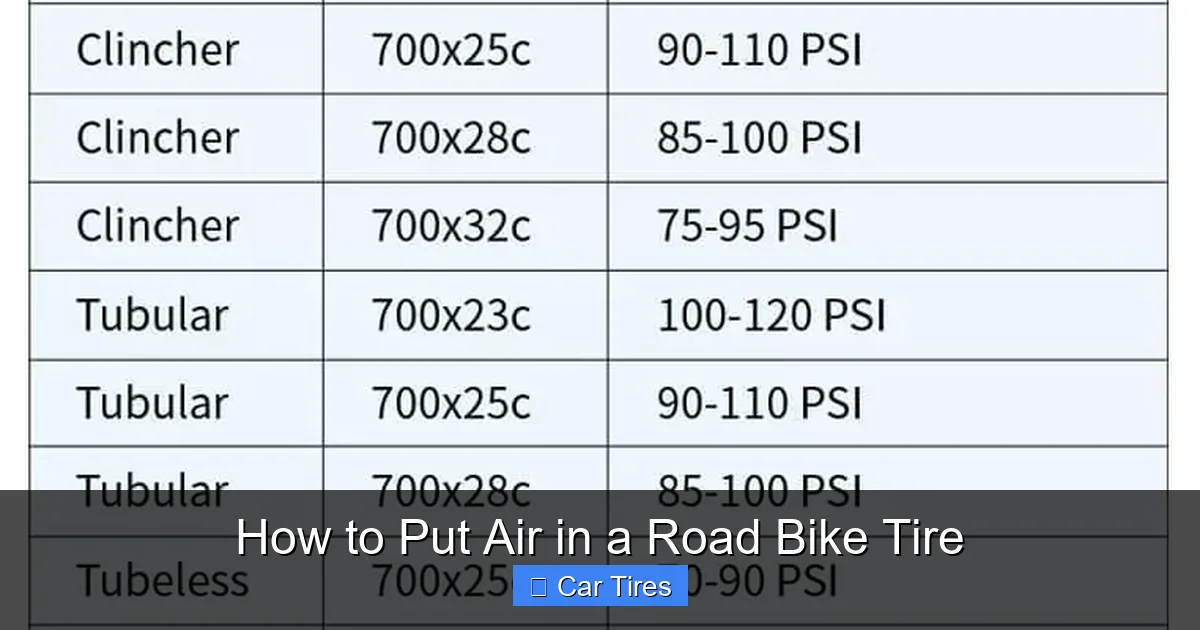
Recommended Tire Pressure for Road Bikes
One of the most common questions cyclists have is: “What pressure should I inflate my road bike tires to?” The answer isn’t one-size-fits-all. The ideal tire pressure depends on several factors, including your weight, tire width, riding conditions, and personal preference.
Most road bike tires have a recommended pressure range printed on the sidewall, usually in PSI (pounds per square inch) or BAR. For example, a typical 23mm tire might recommend 100–130 PSI, while a wider 28mm tire might suggest 80–100 PSI. These ranges are a good starting point, but you’ll need to adjust based on your specific needs.
Heavier riders generally need higher pressure to prevent pinch flats and maintain efficiency. Lighter riders can often go slightly lower for better comfort and grip. A good rule of thumb is to start at the middle of the recommended range and adjust based on how the bike feels. If you notice the ride is too harsh or you’re bottoming out on bumps, reduce the pressure slightly. If you’re experiencing sluggish handling or frequent flats, increase it.
Tire width also plays a role. Wider tires (25mm and above) can run at lower pressures than narrow ones (23mm or less) because they have more air volume. This allows for a smoother ride and better traction without sacrificing speed. Many modern road bikes are designed for 25mm or 28mm tires, which offer a great balance of comfort and performance.
Weather and road conditions matter too. On wet or rough roads, slightly lower pressure can improve grip and reduce the risk of skidding. On smooth, dry pavement, higher pressure minimizes rolling resistance. However, avoid going below 70 PSI or above 130 PSI unless your tires are specifically rated for it.
Finally, listen to your body. If your hands, arms, or back feel sore after a ride, your tires might be too hard. If the bike feels sluggish or you’re getting pinch flats, they might be too soft. Fine-tuning your pressure is part of becoming a better cyclist.
Common Mistakes to Avoid When Inflating Road Bike Tires
Even experienced cyclists make mistakes when learning how to put air in a road bike tire. Avoiding these common errors can save you time, prevent damage, and keep your rides safe.
One of the biggest mistakes is overinflating the tires. It’s easy to get carried away with the pump, especially when you’re in a hurry. But too much air increases the risk of blowouts, reduces traction, and makes the ride uncomfortably stiff. Always check the pressure with a gauge and stay within the recommended range.
Another mistake is forgetting to tighten the Presta valve nut after inflating. This small step is crucial—if the nut is loose, air will slowly leak out, and you’ll end up with underinflated tires on your next ride. Make it a habit to tighten the nut every time.
Using the wrong pump or adapter is also common. Trying to force a Schrader pump onto a Presta valve without an adapter can damage the valve or cause air to escape. Always ensure your pump is compatible with your valve type, and carry an adapter if needed.
Skipping pre-ride pressure checks is another oversight. Many riders assume their tires are fine if they were inflated recently, but air loss is normal. Checking pressure before every ride ensures you’re starting with optimal performance.
Finally, ignoring tire wear and damage can lead to problems. Cracks, bulges, or embedded glass can weaken the tire and cause sudden failures—even if the pressure is perfect. Always inspect your tires before inflating and replace them when necessary.
By avoiding these mistakes, you’ll get the most out of your tires and enjoy safer, more efficient rides.
Maintaining Your Pump and Tires for Long-Term Performance
Proper inflation is only part of the equation—maintaining your pump and tires ensures consistent performance over time. A well-cared-for pump delivers accurate pressure, and healthy tires last longer and perform better.
Start by cleaning your pump regularly. Dust, dirt, and moisture can clog the hose or damage the gauge. Wipe down the pump after each use and store it in a dry place. Check the hose for cracks or leaks, and replace it if necessary. If your pump has a rubber seal or O-ring, inspect it for wear and lubricate it lightly with silicone grease if needed.
For your tires, regular inspection is key. Look for cuts, abrasions, or embedded debris like glass or thorns. Remove any foreign objects carefully with pliers. Check the tread for wear—if it’s smooth or shiny in spots, it’s time for new tires. Also, inspect the sidewalls for cracks or bulges, which can indicate internal damage.
Rotate your tires if you notice uneven wear, though this is less common on road bikes. Keep your tires clean by wiping them down with a damp cloth after rides, especially if you’ve been on dirty or wet roads.
Finally, store your bike properly. Keep it in a cool, dry place away from direct sunlight, which can degrade rubber over time. If you’re storing your bike for a long period, slightly reduce the tire pressure to prevent flat spots.
By taking care of your equipment, you’ll make the process of how to put air in a road bike tire smoother and more reliable every time.
Conclusion
Learning how to put air in a road bike tire is a fundamental skill every cyclist should master. It’s not just about fixing a flat—it’s about optimizing performance, ensuring safety, and enhancing your overall riding experience. From understanding valve types to choosing the right pump and maintaining proper pressure, each step plays a vital role in keeping your bike in top condition.
Regular tire maintenance might seem like a small task, but its impact is huge. Properly inflated tires reduce rolling resistance, improve handling, and prevent unnecessary wear and tear. They also make your rides more comfortable and enjoyable, whether you’re cruising through the city or pushing your limits on a long ride.
By following the steps outlined in this guide, you’ll be able to inflate your tires confidently and correctly every time. Remember to check pressure before each ride, use the right tools, and listen to your bike—it will tell you what it needs. With a little practice, this routine will become second nature.
So the next time you grab your pump, take a moment to appreciate the importance of this simple act. It’s one of the easiest ways to care for your bike and get the most out of every mile. Happy riding!
Frequently Asked Questions
How often should I check my road bike tire pressure?
You should check your tire pressure before every ride. Road bike tires naturally lose air over time—typically 1–2 PSI per week—so even if you inflated them recently, they may be underinflated by the next ride.
Can I use a car tire pump to inflate my road bike tires?
Yes, but only if it has a pressure gauge and is compatible with Presta valves. Most car pumps are designed for Schrader valves, so you’ll need a Presta adapter. Also, car pumps may not reach the high pressures needed for road bike tires.
What happens if I overinflate my road bike tires?
Overinflation can cause a harsh ride, reduced traction, and increase the risk of blowouts, especially on rough roads. It can also damage the tire or rim. Always stay within the recommended PSI range.
Do I need a special pump for Presta valves?
Not necessarily. Many modern pumps are dual-head and work with both Presta and Schrader valves. If your pump only fits Schrader valves, you can use a small Presta adapter that screws onto the valve.
How do I know if my tire pressure is too low?
Signs of underinflation include a sluggish feel, increased rolling resistance, pinch flats, and the tire feeling soft when you squeeze it. You may also notice the bike handling poorly or bottoming out on bumps.
Can I ride with slightly underinflated tires in a pinch?
It’s not recommended, but you can ride short distances with slightly low pressure if necessary. However, this increases the risk of pinch flats and can damage the tire or rim. Always inflate to the proper pressure as soon as possible.