When Putting on a Car Battery Which Terminal First
Contents
- 1 Key Takeaways
- 2 📑 Table of Contents
- 3 Why the Order Matters When Putting on a Car Battery
- 4 Step-by-Step Guide: How to Safely Install a Car Battery
- 5 What Happens If You Connect the Wrong Terminal First?
- 6 Common Mistakes to Avoid When Installing a Car Battery
- 7 Tips for Maintaining Your Car Battery
- 8 Conclusion
- 9 Frequently Asked Questions
When putting on a car battery, always connect the positive terminal first, then the negative. This simple step prevents sparks, short circuits, and potential damage to your vehicle’s electrical system. Following the right sequence keeps you safe and your car running smoothly.
Key Takeaways
- Connect the positive terminal first: Always attach the red (positive) cable before the black (negative) to reduce the risk of sparks near the battery.
- Disconnect the negative terminal first when removing: This minimizes the chance of accidental short circuits during battery replacement.
- Wear safety gear: Use gloves and safety glasses to protect against acid burns and electrical shocks.
- Ensure the engine is off: Never work on a battery while the car is running or the ignition is on.
- Clean terminals before connecting: Corrosion can cause poor connections and starting issues—clean with a baking soda solution.
- Use the right tools: A wrench that fits your terminal nuts prevents slipping and damage.
- Double-check connections: Loose cables can cause electrical problems or leave you stranded.
📑 Table of Contents
Why the Order Matters When Putting on a Car Battery
You’ve probably heard the saying: “It’s not just about doing it—it’s about doing it right.” When it comes to car batteries, that couldn’t be more true. One of the most common questions DIY mechanics and everyday drivers ask is: When putting on a car battery which terminal first? The answer isn’t just a matter of preference—it’s a critical safety and functionality step that can prevent damage to your vehicle, injury to yourself, and even a fire.
Car batteries store a lot of electrical energy. A typical 12-volt car battery can deliver hundreds of amps when shorted. That’s enough to cause sparks, melt metal, or ignite hydrogen gas that batteries naturally emit. So, the sequence in which you connect the terminals plays a big role in controlling that risk. Connecting the wrong terminal first—especially the negative—can create a direct path to ground if your tool touches the car’s metal frame, leading to a dangerous spark right next to the battery.
Let’s break it down simply: always connect the positive terminal first, then the negative. This order reduces the chance of a short circuit because the negative cable is connected last, and it’s grounded to the car’s chassis. If you accidentally touch a metal part with your wrench while connecting the positive cable, there’s no complete circuit—so no spark. But if the negative is already connected and you touch the positive terminal with a grounded tool, you’ve just created a short. That’s why the sequence matters.
The Science Behind Battery Polarity
To really understand why the order is important, let’s take a quick look at how car batteries work. A standard car battery is made up of six cells, each producing about 2 volts, for a total of 12 volts. These cells contain lead plates and a sulfuric acid electrolyte. When the battery discharges, a chemical reaction produces electrons that flow through the cables to power your car’s starter, lights, and electronics.
The positive terminal (marked with a “+” and usually red) is where electrons exit the battery. The negative terminal (marked with a “–” and usually black) is where they return. The flow of electrons from negative to positive creates the electrical current that powers your vehicle.
Now, here’s the key: the negative terminal is connected to the car’s chassis—the metal frame of the vehicle. This is called a “ground” connection. Because of this, if you connect the negative cable first and then accidentally touch the positive terminal with a metal tool that’s also touching the car’s body, you complete a circuit. Electricity flows instantly, creating a spark. That spark can ignite hydrogen gas emitted by the battery, leading to an explosion.
By connecting the positive terminal first, you avoid this risk. The negative cable isn’t connected yet, so there’s no path to ground. Even if your wrench touches the car’s frame, nothing happens because the circuit isn’t complete. Only when you connect the negative cable last does the circuit close—safely and intentionally.
Step-by-Step Guide: How to Safely Install a Car Battery
Visual guide about When Putting on a Car Battery Which Terminal First
Image source: thumbs.dreamstime.com
Now that you know why the order matters, let’s walk through the correct process for installing a car battery. Whether you’re replacing an old battery or installing a new one, these steps will keep you safe and ensure a solid connection.
Step 1: Turn Off the Engine and Remove the Key
Before you even open the hood, make sure the engine is completely off. Remove the key from the ignition or, if your car has a push-button start, ensure the vehicle is in “off” mode. This prevents any accidental electrical surges or engagement of systems while you’re working.
It’s also a good idea to wait a few minutes after turning off the engine. This allows any residual electrical charge in the system to dissipate, reducing the risk of sparks.
Step 2: Gather Your Tools and Safety Gear
You’ll need:
– A wrench (usually 10mm or 13mm, depending on your vehicle)
– Safety gloves (rubber or nitrile)
– Safety glasses
– A wire brush or battery terminal cleaner
– Baking soda and water (for cleaning corrosion)
– A clean rag
Wearing gloves and safety glasses is non-negotiable. Battery acid is corrosive and can cause serious burns. Even if you don’t see visible leaks, residue on the terminals can still be harmful.
Step 3: Locate the Battery and Identify the Terminals
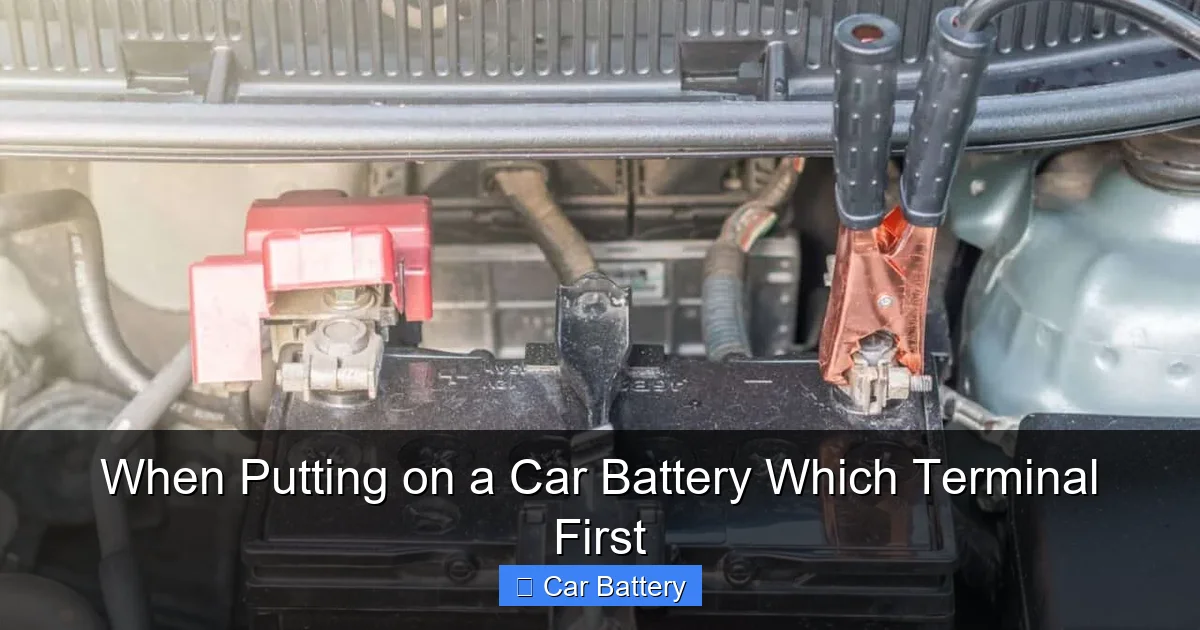
Most car batteries are under the hood, but some are in the trunk or under the rear seat—especially in modern vehicles with compact engine bays. Once you find it, identify the positive and negative terminals. The positive terminal is usually marked with a “+” sign and has a red cable. The negative terminal has a “–” sign and a black cable.
If the cables are disconnected or the battery is already out, look for the red and black clamps. The red one goes on the positive terminal, the black on the negative.
Step 4: Clean the Terminals and Cables
Over time, battery terminals can develop a white or greenish crust—this is corrosion caused by acid fumes. Corrosion increases resistance, which can lead to poor starting performance or electrical issues.
To clean:
1. Mix a tablespoon of baking soda with a cup of water.
2. Dip an old toothbrush or wire brush into the solution.
3. Scrub the terminals and cable clamps gently.
4. Rinse with clean water and dry with a rag.
This simple step ensures a solid electrical connection and prolongs the life of your new battery.
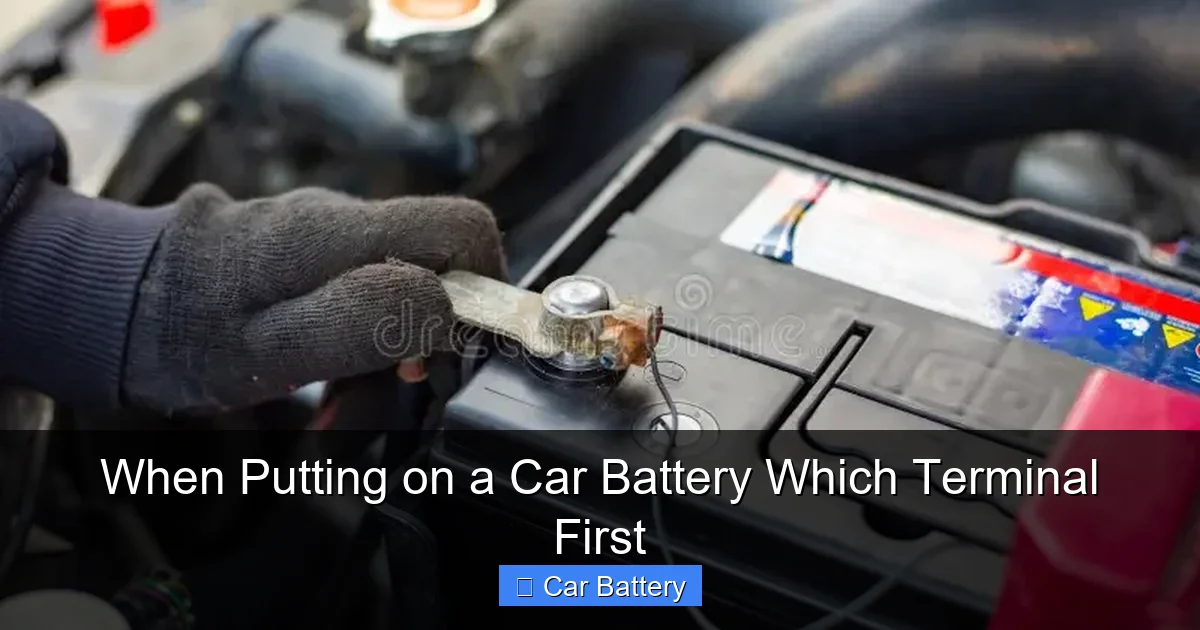
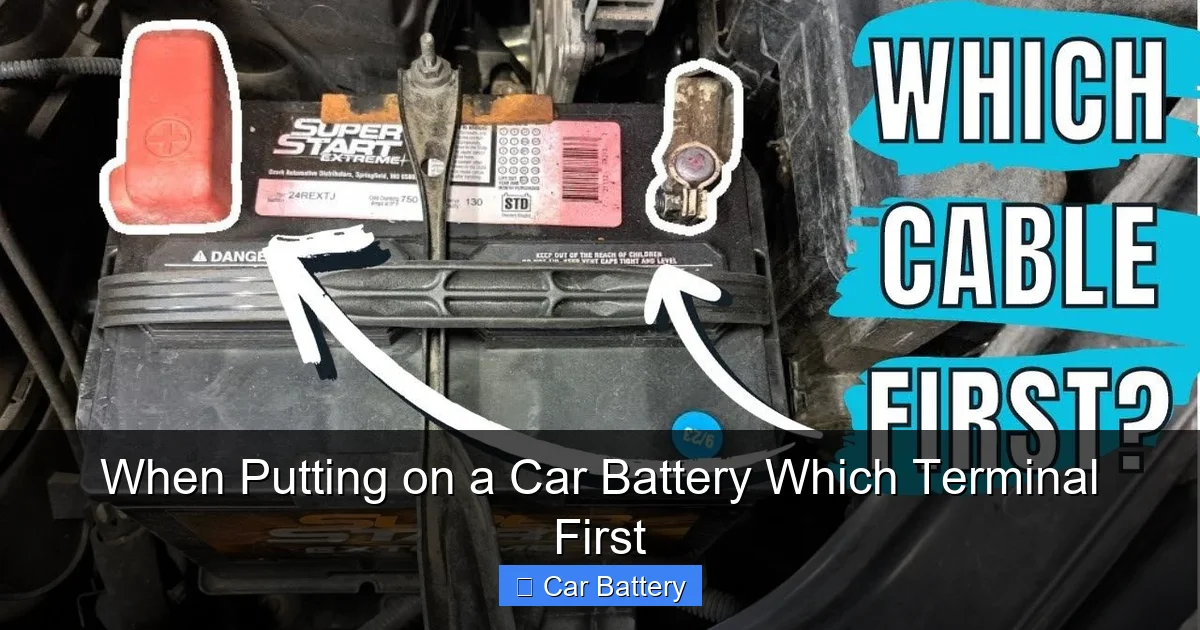
Step 5: Connect the Positive Terminal First
Now it’s time to install the new battery. Place it securely in the battery tray, making sure it’s oriented correctly (terminals in the right position).
Take the red (positive) cable and attach it to the positive terminal. Use your wrench to tighten the nut securely—don’t over-tighten, as this can strip the threads. A snug fit is all you need.
Why first? Because the negative cable isn’t connected yet, there’s no risk of a short circuit if your wrench touches the car’s metal frame. This is the safest way to begin.
Step 6: Connect the Negative Terminal Last
Once the positive terminal is secure, attach the black (negative) cable to the negative terminal. Tighten it firmly with your wrench.
Now the circuit is complete, and your battery is fully connected. But because you connected the positive first, you minimized the risk of sparks or shorts during the process.
Step 7: Double-Check Your Work
Before closing the hood, give both terminals a gentle tug to make sure they’re secure. Loose connections can cause intermittent power issues or prevent the car from starting.
Also, check that the battery is held down properly. Most batteries have a clamp or bracket to prevent movement. A loose battery can vibrate, damage terminals, or even tip over.
What Happens If You Connect the Wrong Terminal First?
Visual guide about When Putting on a Car Battery Which Terminal First
Image source: fourwheeltrends.com
You might be thinking, “It’s just a battery—how bad could it really be?” The truth is, connecting the negative terminal first can lead to several problems, some of them serious.
Risk of Sparks and Fire
As mentioned earlier, if the negative cable is already connected and you touch the positive terminal with a metal tool that’s also touching the car’s chassis, you create a short circuit. Electricity flows instantly, producing a bright spark. If hydrogen gas is present near the battery (which it often is), that spark can ignite it, causing an explosion.
While explosions are rare, they do happen—especially in poorly ventilated areas or with older, leaking batteries. The force can blow the battery apart, spraying acid and shrapnel.
Damage to Electrical Components
Modern cars have complex electrical systems with sensitive components like ECUs (Engine Control Units), sensors, and infotainment systems. A sudden surge from a short circuit can fry these parts, leading to expensive repairs.
Even a small spark can damage fuses or wiring. You might not notice the problem right away, but it could cause issues later—like a dead radio, malfunctioning dashboard lights, or even engine performance problems.
Personal Injury
A short circuit can cause tools to heat up rapidly or even weld themselves to the terminal. If you’re holding the wrench, you could get burned. Additionally, battery acid is highly corrosive. If a spark causes the battery to vent or leak, you could be exposed to harmful chemicals.
Wearing gloves and safety glasses significantly reduces this risk, but why take the chance when the correct order is so simple?
Common Mistakes to Avoid When Installing a Car Battery
Visual guide about When Putting on a Car Battery Which Terminal First
Image source: i.pinimg.com
Even experienced DIYers can make mistakes when handling car batteries. Here are some common pitfalls and how to avoid them.
Using the Wrong Tools
Using a wrench that’s too big or too small can slip, damaging the terminal or causing a spark. Always use the correct size wrench—usually 10mm or 13mm for most vehicles. A socket wrench with a ratchet is ideal because it gives you better control.
Avoid using pliers or adjustable wrenches if possible. They’re more likely to slip and can strip the nut.
Over-Tightening the Terminals
It’s important to tighten the terminal nuts securely, but over-tightening can crack the terminal or strip the threads. This makes future removal difficult and can lead to loose connections.
A good rule of thumb: tighten until the nut is snug, then give it a quarter-turn more. That’s usually enough.
Ignoring Corrosion
Skipping the cleaning step might save time, but it can cause problems down the road. Corroded terminals create resistance, which reduces the battery’s ability to deliver power. This can lead to slow cranking, dim lights, or a no-start condition.
Cleaning takes just a few minutes and can extend the life of your battery and electrical system.
Forgetting to Reconnect Accessories
Some cars have accessories powered directly by the battery, like alarm systems or memory seats. Disconnecting the battery can reset these systems. After reconnecting, you might need to reset the radio code, re-sync the key fob, or recalibrate the windows.
Check your owner’s manual for any post-installation steps.
Not Securing the Battery
A loose battery can move around, especially on rough roads. This can damage the terminals, cables, or even the battery case. Always use the hold-down clamp to keep the battery in place.
Tips for Maintaining Your Car Battery
Installing the battery correctly is just the first step. To get the most out of your battery and avoid future issues, follow these maintenance tips.
Check Terminals Regularly
Inspect your battery terminals every few months. Look for signs of corrosion, loose cables, or damage. Clean as needed with baking soda and water.
Keep the Battery Charged
A battery that’s frequently discharged (like in short trips or extreme cold) will degrade faster. If you don’t drive often, consider using a battery maintainer or trickle charger to keep it topped up.
Protect from Extreme Temperatures
Heat accelerates battery degradation, while cold reduces its ability to deliver power. Park in a garage when possible, and consider a battery insulation wrap in winter.
Test the Battery Annually
Most auto parts stores offer free battery testing. Have yours checked once a year, especially before winter. A weak battery might start your car today but fail in the cold.
Conclusion
So, when putting on a car battery which terminal first? The answer is clear: always connect the positive terminal first, then the negative. This simple rule protects you from sparks, short circuits, and potential injury. It also safeguards your car’s electrical system from damage.
While it might seem like a small detail, the order of connection has a big impact on safety and performance. By following the correct steps—turning off the engine, wearing safety gear, cleaning terminals, and connecting in the right sequence—you ensure a smooth, safe battery installation.
Remember, your car’s battery is a powerful piece of equipment. Treat it with respect, and it will keep you moving for years to come. Whether you’re a seasoned mechanic or a first-time DIYer, taking the time to do it right is always worth it.
Frequently Asked Questions
Why do you connect the positive terminal first on a car battery?
Connecting the positive terminal first reduces the risk of a short circuit. Since the negative cable isn’t connected yet, there’s no path to ground, so even if your tool touches the car’s metal frame, no spark occurs.
What happens if you connect the negative terminal first?
If the negative is connected first and you touch the positive terminal with a grounded tool, you create a short circuit. This can cause sparks, damage electronics, or even ignite hydrogen gas near the battery.
Can you install a car battery with the engine running?
No, never install or remove a battery with the engine running. This can cause voltage spikes, damage the alternator, or lead to electrical shocks.
Do I need to reset anything after replacing my car battery?
Some cars require resetting the radio code, key fob, or window positions after a battery change. Check your owner’s manual for specific instructions.
How often should I clean my car battery terminals?
Inspect and clean the terminals every 3–6 months, or whenever you notice corrosion. Regular cleaning ensures a strong connection and prevents starting issues.
Is it safe to touch both battery terminals at the same time?
While the voltage is low (12V), it’s still best to avoid touching both terminals simultaneously. You won’t get a dangerous shock, but you could complete a circuit if your body is grounded, potentially causing a spark.