How to Connect Car Cables to Battery
Contents
- 1 Key Takeaways
- 2 📑 Table of Contents
- 3 How to Connect Car Cables to Battery: A Complete Guide
- 4 Understanding Your Car Battery and Jumper Cables
- 5 Step-by-Step: How to Connect Car Cables to Battery
- 6 Common Mistakes to Avoid When Connecting Car Cables
- 7 What to Do After a Successful Jump-Start
- 8 Advanced Tips and Best Practices
- 9 Conclusion
- 10 Frequently Asked Questions
Connecting car cables to a battery might seem simple, but doing it wrong can damage your vehicle or cause injury. This guide walks you through the correct order, safety steps, and common mistakes to avoid when jump-starting a car.
Key Takeaways
- Always connect positive first: Attach the red (positive) clamp to the dead battery’s positive terminal before connecting the negative.
- Ground the negative cable safely: Instead of connecting the black clamp directly to the dead battery’s negative terminal, attach it to an unpainted metal surface on the engine block.
- Wear safety gear: Use gloves and safety glasses to protect against sparks, acid, and potential explosions.
- Check battery condition: Never jump-start a cracked, leaking, or frozen battery—this can be extremely dangerous.
- Follow the correct sequence: Connect cables in the right order and disconnect in reverse to prevent short circuits.
- Let the donor car run: Keep the working vehicle’s engine running for a few minutes to help charge the dead battery.
- Test after jump-start: Drive the jumped car for at least 15–20 minutes to allow the alternator to recharge the battery fully.
📑 Table of Contents
How to Connect Car Cables to Battery: A Complete Guide
Picture this: It’s a cold Monday morning, you’re running late for work, and your car won’t start. The dashboard lights flicker weakly, and the engine just clicks—no turnover. Chances are, your car battery is dead. But don’t panic. With a set of jumper cables and a working vehicle nearby, you can get back on the road in under 15 minutes.
Connecting car cables to a battery might sound straightforward, but there’s a right way and a wrong way to do it. One wrong move—like reversing the clamps or touching the cables together—can lead to sparks, damaged electronics, or even a battery explosion. That’s why knowing the correct procedure is essential, whether you’re a seasoned driver or a first-time jumper.
In this guide, we’ll walk you through every step of safely connecting car cables to a battery. From identifying the terminals to disconnecting the cables in the right order, we’ll cover it all. We’ll also share practical tips, common mistakes to avoid, and what to do after your car starts. By the end, you’ll feel confident handling a dead battery situation like a pro.
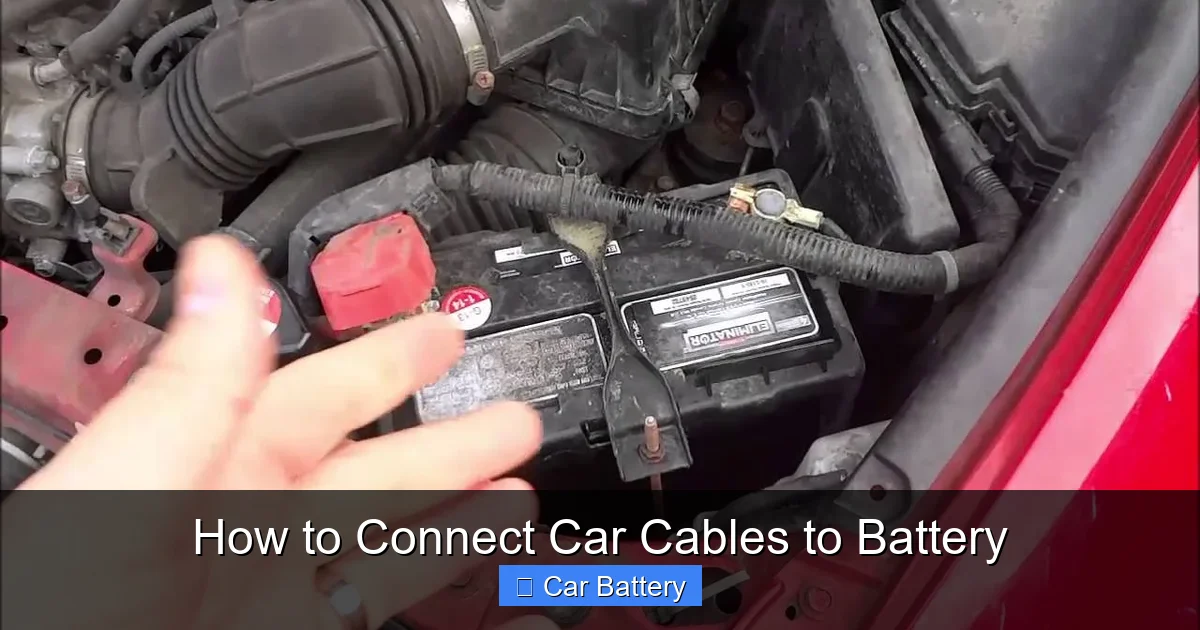
Understanding Your Car Battery and Jumper Cables
Before you even touch the cables, it helps to understand what you’re working with. Car batteries are typically 12-volt lead-acid batteries that store electrical energy to start your engine and power accessories when the engine is off. They have two terminals: positive (+) and negative (−). The positive terminal is usually marked with a red cover or a “+” symbol, while the negative is black or marked with a “−.”
Visual guide about How to Connect Car Cables to Battery
Image source: i.ytimg.com
Identifying Battery Terminals
Most modern cars have the battery under the hood, but in some models—especially European or compact cars—it might be in the trunk or under a seat. Once you locate it, look for the two terminals. The positive terminal is often larger in diameter and may have a red plastic cap. The negative is smaller and usually bare metal or covered in black.
If you’re unsure, consult your owner’s manual. Never assume—mixing up the terminals can cause serious damage.
Types of Jumper Cables
Not all jumper cables are created equal. Cheap, thin cables may not carry enough current to start a dead battery, especially in cold weather. Look for cables rated at least 4-gauge or thicker, with a length of 10 to 20 feet. Heavy-duty cables with copper clamps and insulated handles offer better conductivity and safety.
Some cables come with built-in surge protection or LED indicators that show when power is flowing. These features aren’t necessary but can add peace of mind.
Safety First: What You Need Before Starting
Safety should always come first. Here’s a quick checklist:
- Safety glasses: Protect your eyes from sparks or battery acid.
- Rubber gloves: Insulate your hands and reduce shock risk.
- Well-ventilated area: Batteries can release flammable hydrogen gas.
- Fire extinguisher (optional but recommended): Keep one nearby, just in case.
- Working vehicle: Ensure the donor car has a healthy battery and is turned off before connecting cables.
Also, make sure both cars are in park (or neutral for manual transmissions) with the parking brake engaged. Turn off all lights, radios, and accessories to reduce electrical load.
Step-by-Step: How to Connect Car Cables to Battery
Now that you’re prepared, let’s get into the actual process. Follow these steps carefully to safely jump-start your car.
Visual guide about How to Connect Car Cables to Battery
Image source: i.ytimg.com
Step 1: Position the Vehicles
Park the working car close enough so the jumper cables can reach both batteries, but make sure the cars aren’t touching. This prevents accidental grounding or short circuits. Turn off both engines and remove the keys.
Step 2: Identify the Terminals
Open both hoods and locate the batteries. Identify the positive (+) and negative (−) terminals on both the dead and working batteries. Double-check the markings—don’t rely on memory.
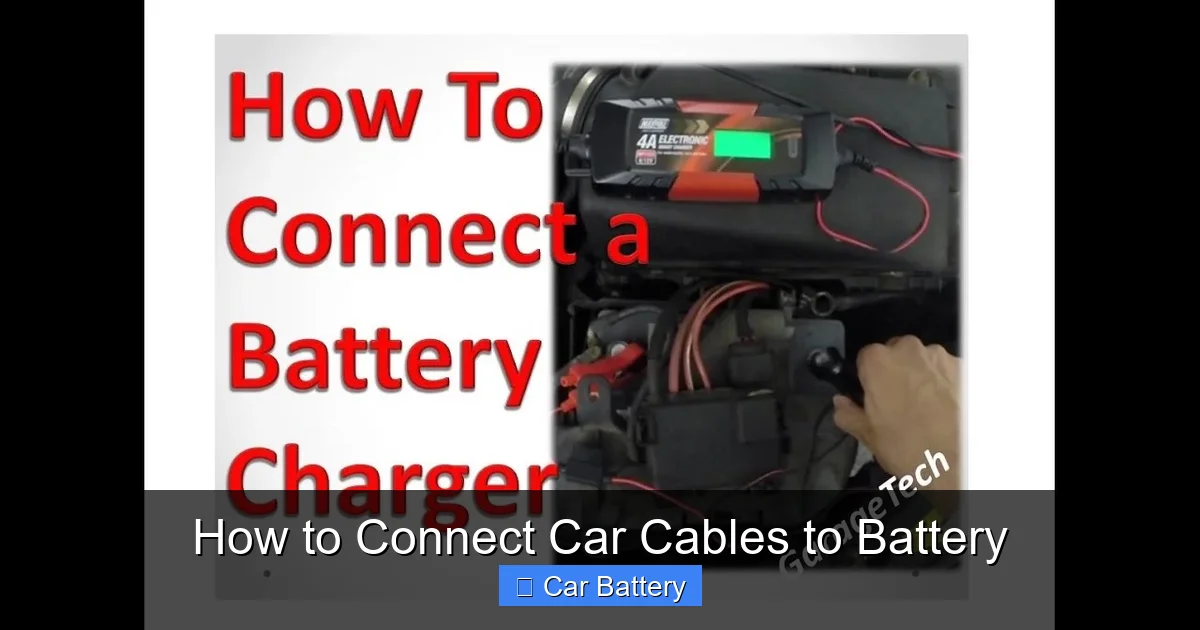
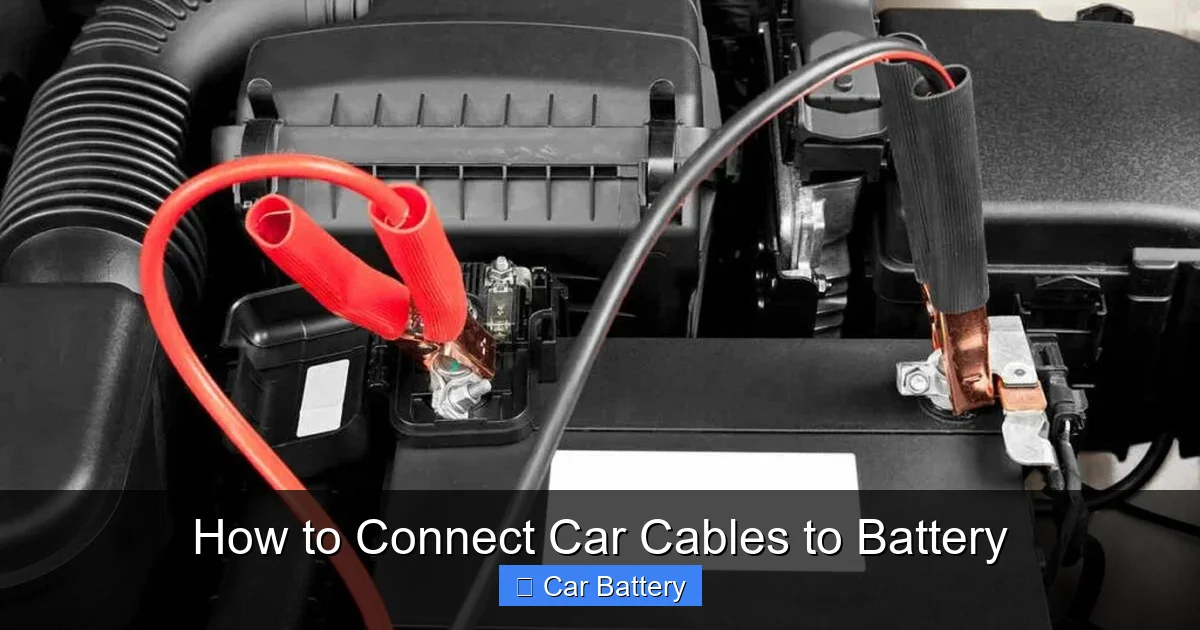
Step 3: Connect the Red (Positive) Cable
Take the red jumper cable and attach one clamp to the positive terminal of the dead battery. Make sure it’s secure and metal-to-metal contact is made. Then, connect the other red clamp to the positive terminal of the working battery.
Important: Always connect positive first. This reduces the risk of sparking near the battery, which could ignite hydrogen gas.
Step 4: Connect the Black (Negative) Cable
Now take the black jumper cable. Attach one clamp to the negative terminal of the working battery. For the other end, do not connect it to the negative terminal of the dead battery. Instead, attach it to an unpainted metal surface on the dead car’s engine block—like a bolt, bracket, or engine manifold.
This step is crucial. Grounding the negative cable away from the battery reduces the chance of a spark near the battery, which could cause an explosion if gas is present.
Step 5: Start the Working Car
Start the engine of the donor vehicle and let it run for 2–3 minutes. This allows the alternator to send charge through the cables to the dead battery.
Step 6: Attempt to Start the Dead Car
Try starting the dead car. If it doesn’t start right away, wait 30 seconds and try again. If it still won’t start after 2–3 attempts, wait 5 minutes before trying again. Repeated cranking can drain the donor battery.
If the car starts, leave it running and keep the cables connected for another 5 minutes to allow the battery to build up some charge.
Step 7: Disconnect the Cables in Reverse Order
Once the dead car is running, it’s time to remove the cables—in the exact reverse order:
- Remove the black clamp from the grounded metal surface on the previously dead car.
- Remove the black clamp from the negative terminal of the working battery.
- Remove the red clamp from the positive terminal of the working battery.
- Finally, remove the red clamp from the positive terminal of the previously dead battery.
Store the cables neatly and avoid letting the clamps touch each other or any metal surface while disconnected.
Common Mistakes to Avoid When Connecting Car Cables
Even experienced drivers make mistakes when jump-starting a car. Here are some of the most common errors and why they’re dangerous.
Visual guide about How to Connect Car Cables to Battery
Image source: heartautocare.com
Reversing the Cables
Connecting the red clamp to the negative terminal or the black clamp to the positive is a recipe for disaster. This can cause a short circuit, fry your car’s electronics, or even damage the alternator. Always double-check before clamping.
Connecting Negative to the Dead Battery
As mentioned earlier, never connect the black clamp directly to the negative terminal of the dead battery. This increases the risk of sparking near the battery, which can ignite hydrogen gas and cause an explosion.
Letting Cables Touch
Never let the red and black clamps touch each other while connected to a battery. This creates a direct short circuit, which can melt the cables, damage the batteries, or start a fire.
Jump-Starting a Damaged Battery
If the battery is cracked, leaking, swollen, or frozen, do not attempt to jump-start it. A damaged battery can explode when electricity is applied. In cold weather, a frozen battery may appear normal but can rupture when charged. If in doubt, call a professional.
Not Letting the Engine Run Long Enough
After a jump-start, many people turn off the car immediately. But a dead battery often can’t hold a charge right away. Drive the car for at least 15–20 minutes to allow the alternator to recharge it. If the car dies again shortly after, the battery may be old or faulty and needs replacement.
Using Thin or Damaged Cables
Thin cables can overheat and fail to deliver enough current. Frayed or corroded cables are also dangerous. Always inspect your jumper cables before use. Replace any that show signs of wear.
What to Do After a Successful Jump-Start
Getting your car started is just the first step. What you do next can prevent future breakdowns and ensure your battery stays healthy.
Drive the Car
As mentioned, drive the car for at least 15–20 minutes. This gives the alternator time to recharge the battery. Avoid short trips—they don’t allow enough time for a full recharge.
Check the Battery and Charging System
If your battery dies frequently, it might be time for a replacement. Most car batteries last 3–5 years. Have a mechanic test the battery and alternator to rule out underlying issues.
Keep Jumper Cables in Your Car
Store a set of quality jumper cables in your trunk. You never know when you—or someone else—might need them. Consider keeping gloves and a flashlight with them for emergencies.
Consider a Portable Jump Starter
For added convenience, invest in a portable jump starter. These battery-powered devices don’t require another vehicle and can jump-start your car in minutes. They’re especially useful if you live in a rural area or frequently travel alone.
Prevent Future Dead Batteries
To avoid repeat incidents:
- Turn off lights and accessories when the engine is off.
- Limit short trips that don’t allow the battery to recharge.
- Use a battery maintainer if the car sits for long periods.
- Have the battery tested annually, especially before winter.
Advanced Tips and Best Practices
Once you’ve mastered the basics, these advanced tips can make jump-starting even safer and more effective.
Use a Memory Saver (Optional)
If your car has electronic settings like radio presets, seat positions, or navigation data, a memory saver can preserve them during a jump-start. These devices plug into the OBD-II port or cigarette lighter and draw power from a 9-volt battery to keep systems alive.
Jump-Starting Modern Cars with Start-Stop Systems
Many newer cars have advanced electrical systems and start-stop technology. These vehicles may require special procedures or even a professional jump-start. Check your owner’s manual—some manufacturers recommend using a dedicated jump-start terminal instead of the battery posts.
Jump-Starting in Cold Weather
Cold temperatures reduce battery efficiency. If your car won’t start in winter, let the donor car run for 5–10 minutes before attempting to start the dead car. This gives the battery more time to warm up and accept charge.
Using a Battery Charger Instead
If you have access to an outlet, a battery charger is a safer and more effective way to revive a dead battery. Chargers provide a slow, steady charge that’s better for battery health than a quick jump-start.
Know When to Call a Professional
If your car won’t start after multiple jump attempts, or if you notice smoke, strange smells, or sparks, stop immediately and call a tow truck or roadside assistance. There may be a deeper electrical issue.
Conclusion
Learning how to connect car cables to a battery is a valuable skill every driver should have. It’s not just about getting your car started—it’s about doing it safely and correctly to protect yourself, your vehicle, and others on the road.
By following the right sequence, wearing safety gear, and avoiding common mistakes, you can handle a dead battery with confidence. Remember: positive first, ground the negative, and disconnect in reverse. Keep your cables in good condition, drive the car after a jump, and consider upgrading to a portable jump starter for peace of mind.
With this guide, you’re now equipped to tackle a dead battery like a pro. Stay safe, stay prepared, and never let a dead battery leave you stranded again.
Frequently Asked Questions
Can I connect jumper cables with both cars turned off?
Yes, you can connect the cables with both engines off. However, you should start the working car first and let it run for a few minutes before attempting to start the dead car. This allows the alternator to send charge to the dead battery.
What if my car still won’t start after jump-starting?
If the car doesn’t start after several attempts, the issue may not be the battery. It could be a faulty starter, alternator, fuel system, or ignition problem. Have a mechanic inspect the vehicle.
Is it safe to jump-start a car in the rain?
Yes, it’s generally safe as long as you avoid direct contact with water and metal parts. Keep the cables dry and wear gloves. However, avoid jump-starting in heavy rain or flooding, as water can damage electronics.
How long should I leave the jumper cables connected?
Leave the cables connected for at least 5 minutes after the dead car starts. This gives the battery time to build up some charge. Then disconnect in reverse order.
Can I use jumper cables on a hybrid or electric car?
Most hybrids can be jump-started like regular cars, but check the owner’s manual first. Electric vehicles (EVs) typically don’t have 12-volt batteries that can be jump-started in the traditional way—consult the manufacturer’s guidelines.
Do I need to replace my battery after a jump-start?
Not necessarily. A jump-start can revive a temporarily discharged battery. However, if the battery dies frequently or is more than 3–5 years old, it may need replacement. Have it tested at an auto shop.