
Graco Grows4Me 4-in-1 Car Seat Rear-Facing Installation Guide

Quick Answer
Install the Graco Grows4Me rear-facing in the back seat using either the lower anchors or vehicle seat belt. Route your chosen system through the blue rear-facing belt path, tighten it, confirm the level indicator is correct, and check that the seat moves less than one inch at the belt path. Review the manual for your exact Graco model number before installation.
Rear-Facing Installation Steps
- Confirm eligibility: Use rear-facing mode for a child weighing 5–40 pounds whose head remains at least one inch below the headrest adjustment handle.
- Select the recline: Choose rear-facing position 1, 2, or 3 and use the level indicator to confirm the angle.
- Choose one method: Install with either the lower anchors or vehicle seat belt, unless your manual expressly says otherwise.
- Use the blue path: Route the lower-anchor strap or seat belt through the rear-facing belt path without twists.
- Tighten the installation: Apply pressure to the seat while removing slack from the belt or lower-anchor strap.
- Perform the one-inch test: Hold the seat at the belt path and check movement from side to side and front to back.
Important Safety Check
- Get hands-on help: Ask a certified Child Passenger Safety Technician to inspect the installation if the seat stays loose or the angle remains incorrect.
The Graco Grows4Me is an all-in-one car seat, but its different modes use different belt paths and settings. That makes following the rear-facing instructions especially important.
I’ll cover both approved installation methods, the correct recline, harness fit, and the mistakes that often leave this seat loose.
In This Guide
- What Should You Check Before Installation?
- How Do You Install the Grows4Me With Lower Anchors?
- How Do You Install It With a Seat Belt?
- How Do You Know the Installation Is Correct?
- How Should the Child Fit in Rear-Facing Mode?
- What Rear-Facing Installation Mistakes Should You Avoid?
- Frequently Asked Questions
What Should You Check Before Installation?
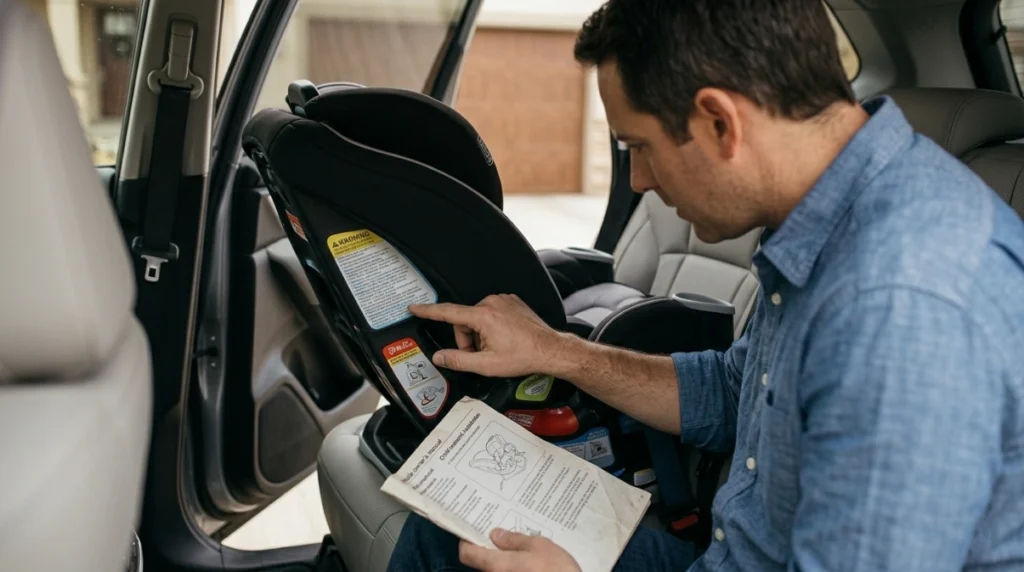
Confirm that the child and vehicle seating position meet every requirement before tightening a strap. The label on your particular seat and its manual take priority over general online instructions.
A rear-facing installation places the child facing the vehicle’s rear and secures the car seat through its designated rear-facing belt path.
Check the rear-facing limits
Graco lists the current Grows4Me rear-facing harness range as 5–40 pounds. The child’s head must remain at least one inch below the headrest adjustment handle.
Stop using this mode when either limit is reached. A child does not need to turn forward-facing simply because of age or bent legs.
The American Academy of Pediatrics recommends keeping children rear-facing until they reach the highest height or weight their seat permits.
Find the model number and manual
Check the label on the car seat for its model number and manufacture date. Use those details to locate the matching manual rather than relying on instructions for a similar Graco seat.
- Inspect the history: Do not use a seat with an unknown history, missing labels, prohibited crash exposure, or structural damage.
- Check the date: Graco says to stop using the Grows4Me ten years after its manufacture date.
- Install required parts: Make sure the included cupholder and other required components are correctly attached.
- Read both manuals: The vehicle manual identifies approved seating positions, anchors, and seat-belt locking instructions.
Choose the safest suitable seating position
Install the Grows4Me in the back seat. Never place a rear-facing car seat before an active frontal airbag.
The middle position is not automatically best. Use it only when both manuals allow a secure installation there.
Some vehicles lack dedicated lower anchors for the center seat. Never borrow one anchor from each side unless the vehicle and car-seat manuals specifically permit it.
Section Takeaway: Verify the child’s fit, car-seat label, vehicle seating position, and both manuals before beginning.
How Do You Install the Grows4Me With Lower Anchors?
Place the seat rear-facing, route its lower-anchor strap through the blue rear-facing belt path, attach both hooks, and tighten. Use this method only in a vehicle position approved for lower-anchor installation.
- Set the recline. Squeeze the recline handle and select rear-facing position 1, 2, or 3.
- Place the seat rear-facing. Position it flat against the selected vehicle seatback where permitted.
- Check the strap path. Confirm the lower-anchor strap runs through the blue rear-facing belt path and lies flat.
- Connect both hooks. Attach each connector to the correct lower anchor with the hook facing as shown in the manual.
- Remove the slack. Press down near the seating area while pulling the adjustment strap through the cover opening.
- Check the angle. Park on level ground and confirm the built-in indicator is within the approved rear-facing range.
- Test the installation. Grip the shell at the belt path and make sure it moves less than one inch in every direction.
The lower anchors and the vehicle seat belt are alternative installation systems. Using both together does not make the seat safer unless the manufacturer expressly approves combined use.
The Grows4Me’s top tether is intended for forward-facing installation. Store it as instructed while the seat is rear-facing.
If the tightening strap seems stuck, pull it in the natural direction of its belt path. Pulling straight up through the cover opening often gives better leverage than pulling from outside the seat.
Section Takeaway: Use the blue rear-facing path, connect only to approved anchors, and tighten until movement at that path stays below one inch.
How Do You Install It With a Seat Belt?
Thread the lap portion of the vehicle belt through the blue rear-facing belt path, buckle it, and lock the belt as your vehicle manual directs. Tighten it while maintaining the correct recline angle.
- Select the recline. Use rear-facing recline position 1, 2, or 3.
- Open the belt path. Move the seat cover aside only as the Graco manual shows.
- Route the belt. Pass both the lap and shoulder portions through the blue rear-facing path when using a lap-and-shoulder belt.
- Buckle the belt. Confirm it lies flat and has not entered the forward-facing belt path.
- Lock the belt. Follow the vehicle manual, which may require switching the retractor or using a locking latchplate.
- Press and tighten. Apply firm pressure where the child’s bottom rests while feeding slack toward the retractor.
- Verify the result. Recheck the level indicator and perform the one-inch test at the belt path.
Do not guess how the vehicle belt locks. Pulling a shoulder belt fully outward switches many retractors into locking mode, but not every vehicle uses that system.
A buckle that enters the belt path or rests against the shell can interfere with tightening. Consult the vehicle and Graco manuals if the buckle position creates this problem.
Lower anchors versus a seat belt
| Installation point | Lower anchors | Vehicle seat belt |
|---|---|---|
| Approved safety | Approved when both manuals permit it | Approved when routed and locked correctly |
| Attachment point | Vehicle’s designated lower anchors | Vehicle belt through the blue belt path |
| Main limitation | Anchor availability and stated weight limits | Belt must lock and fit the belt path correctly |
| Best choice | Whichever produces a correct, permitted installation | Whichever produces a correct, permitted installation |
Neither method is automatically safer. Choose the permitted method that gives you a secure installation in your vehicle.
Section Takeaway: The seat belt must pass through the blue path, remain flat, and lock according to the vehicle manufacturer’s directions.
How Do You Know the Installation Is Correct?
A correct installation passes two essential checks: the level indicator shows an approved rear-facing angle, and the seat moves less than one inch at the belt path.
- Test at the correct spot: Hold the shell where the lower-anchor strap or seat belt passes through it.
- Use moderate force: Check movement without pulling so aggressively that the entire vehicle rocks.
- Check both directions: Test side-to-side and front-to-back movement.
- Ignore normal top movement: A rear-facing seat may move near the child’s head because that end is not anchored.
- Recheck the level: Tightening can change the recline angle.
NHTSA’s rear-facing installation guidance also uses the one-inch standard. Its guidance emphasizes checking movement at the belt path, not at the top of the shell.
What if the seat is still loose?
Start again instead of adding an unapproved mat, towel, or accessory. Check for a twisted strap, unlocked seat belt, wrong belt path, or pressure applied in the wrong place.
A tightly rolled towel or pool noodle may be allowed to correct the angle in some installations. Use one only if the current Grows4Me manual permits it.
You can locate inspection help through the NHTSA car-seat safety portal. A certified technician can teach you how to install the seat correctly in your vehicle.
How Should the Child Fit in Rear-Facing Mode?
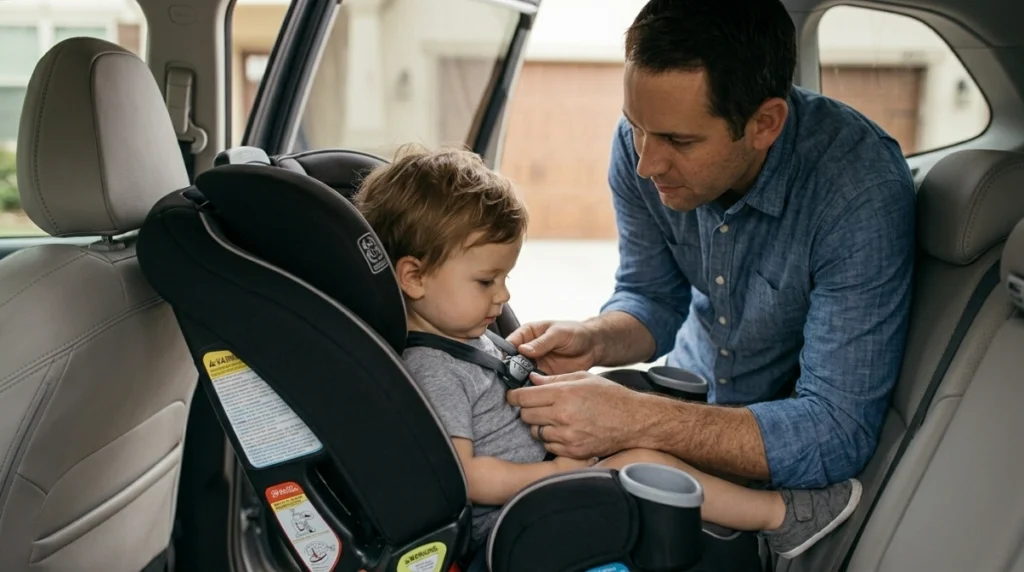
Set the harness at or below the child’s shoulders, remove slack, and position the chest clip at armpit level. The straps must lie flat against the child.
- Seat the child fully back. Their bottom and back should rest against the car-seat padding.
- Set the harness height. Use the Simply Safe Adjust headrest so the straps enter at or below shoulder level.
- Buckle every component. Fasten the crotch buckle and connect the chest clip.
- Pull the harness snug. Remove slack from the hip area before tightening at the front.
- Perform the pinch test. You should not be able to pinch excess webbing at the shoulder.
- Raise the chest clip. Position its center at the child’s armpit level.
Do not place a thick coat, snowsuit, or bulky blanket beneath the harness. Buckle the child in normal indoor clothing, then place a blanket over the secured harness.
Use only padding and inserts approved for this seat. The body insert is for rear-facing use and may be required when a small child’s shoulders remain below the lowest harness position.
Check the exact manual before removing or adding insert pieces. Rules can differ between production versions.
Section Takeaway: Rear-facing straps belong at or below the shoulders, with a snug harness and chest clip at armpit height.
What Rear-Facing Installation Mistakes Should You Avoid?
The most common problems involve the wrong belt path, an unlocked belt, a poor recline angle, or loose harness webbing. Each can be found through a careful final check.
- Using two installation methods: Do not combine lower anchors and a seat belt unless the exact manual permits it.
- Using the top tether: Store the tether during rear-facing use unless Graco’s instructions for your exact model say otherwise.
- Choosing the wrong belt path: Rear-facing installation uses the blue-marked path.
- Testing at the headrest: Judge tightness only at the belt path.
- Ignoring the level indicator: The correct recline helps protect a baby’s airway.
- Using unapproved accessories: Aftermarket inserts, strap covers, and mats may interfere with the tested setup.
- Turning forward too early: Continue rear-facing until the child reaches the seat’s height or weight limit.
- Using bulky clothing: Thick layers can create hidden harness slack.
- Skipping repeat checks: Inspect tightness, angle, and harness fit regularly.
One practical habit helps: leave the manual in its storage location on the seat. You will have model-specific directions available after moving the seat or changing vehicles.
Section Takeaway: Use one approved installation method, the blue belt path, the correct recline, and no unapproved accessories.
Frequently Asked Questions
Which recline position should the Grows4Me use rear-facing?
The Grows4Me uses recline positions 1, 2, or 3 in rear-facing mode. Select the position that puts the level indicator within its approved range while the vehicle is parked on level ground.
Can I install the Grows4Me with both LATCH and the seat belt?
No. Use either the lower anchors or vehicle seat belt unless the manual for your exact model expressly permits both. Combining systems without approval can change how the restraint performs.
Does the Grows4Me use the top tether rear-facing?
The top tether is generally stored during the Grows4Me’s rear-facing installation. It becomes important in forward-facing harness mode. Follow the manual because tether rules can vary between car-seat models.
How much can the installed car seat move?
It should move less than one inch from side to side and front to back when checked at the rear-facing belt path. Movement near the headrest does not determine whether the installation is tight.
When should my child stop riding rear-facing in this seat?
Stop when the child reaches 40 pounds or when the top of their head no longer stays at least one inch below the adjustment handle. Follow whichever limit is reached first.
Can I use lower anchors in the center seat?
Only when the vehicle manual identifies that position as approved or specifically permits inner-anchor borrowing. Do not assume the two visible center-adjacent anchors form an approved pair.
Where can I get the installation inspected?
Use NHTSA’s car-seat inspection resources to find a certified Child Passenger Safety Technician. A technician can check your work and teach you how to repeat the installation yourself.
The safest installation is the one that follows both current manuals and passes every fit check. Recheck the Grows4Me whenever you move it, adjust its recline, or notice new looseness.
