
Graco 4Ever Extend2Fit DLX 4-in-1 Car Seat Installation Guide

Quick Answer
To install a Graco 4Ever Extend2Fit DLX 4-in-1 car seat, first select the correct mode and belt path. Secure it with either the vehicle seat belt or lower anchors—not both unless your model’s manual permits it. A correct installation moves less than one inch when tested at the belt path, following current NHTSA car-seat guidance.
Installation checklist
- Confirm the model: Read the label and manual because Graco has produced several similar 4Ever Extend2Fit versions.
- Choose the mode: Use rear-facing, forward-facing harness, highback booster, or backless booster according to the child’s measurements.
- Select one method: Install with the vehicle belt or lower anchors as directed by both manuals.
- Use the right path: Route the belt through the labeled rear- or forward-facing belt path.
- Check movement: The seat should move less than one inch at the belt path.
- Attach the tether: Always use the approved top tether for forward-facing harness installation.
Before the first trip
- Have a certified Child Passenger Safety Technician check the installation if anything seems unclear.
The Graco 4Ever Extend2Fit DLX 4-in-1 car seat can handle several stages, but each stage uses a different setup. I’ll walk you through those changes without treating every similar-looking Graco model as identical.
Keep the car seat manual and vehicle manual beside you. The labels on your specific seat always override a general online guide.
In This Guide
What Should You Check Before Installation?
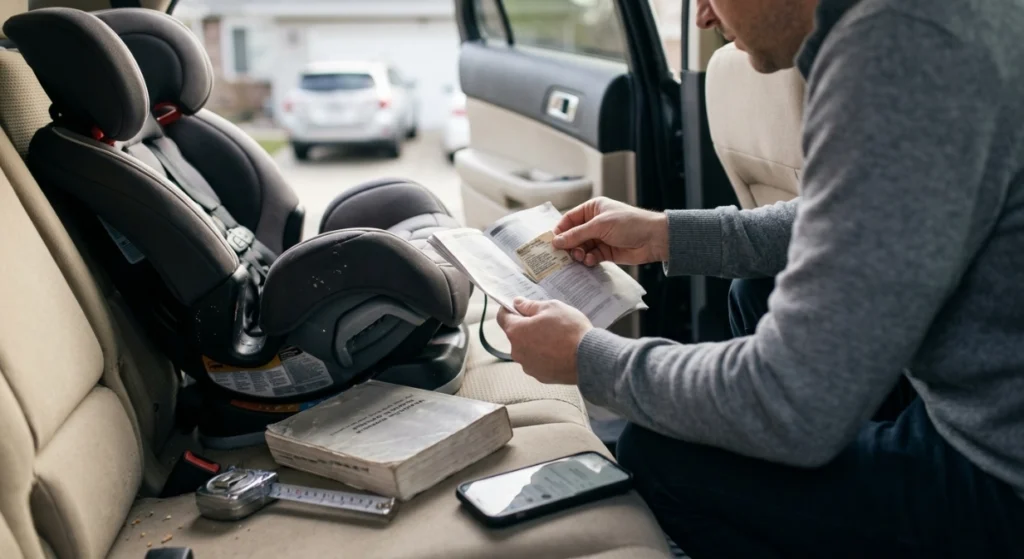
Start by identifying the exact model, intended seating position, and correct mode. These choices determine which belt path, recline setting, anchors, and limits apply.
A 4-in-1 car seat is a child restraint that changes between four modes as a child grows. This model family can provide rear-facing harness, forward-facing harness, highback booster, and backless booster use.
Confirm the exact Graco model
Look for the model number and manufacture date on the seat’s label. Use that information to locate the matching manual through the Graco product-instructions page.
This matters because “4Ever,” “DLX,” “Extend2Fit,” and “Premier” appear in several product names. Their lock-offs, weight limits, and installation details may differ.
Confirm your child’s correct mode
The current Graco 4Ever Extend2Fit product page lists the following ranges. Treat these as orientation only until you confirm the labels on your own seat.
| Mode | Published range | Restraint used | Key installation point |
|---|---|---|---|
| Rear-facing harness | 4–50 lb | Car seat’s five-point harness | Use rear-facing belt path and approved recline |
| Forward-facing harness | 26.5–65 lb | Car seat’s five-point harness | Use forward-facing path and top tether |
| Highback booster | 40–100 lb | Vehicle lap-and-shoulder belt | Route belt through the shoulder-belt guide |
| Backless booster | 40–120 lb | Vehicle lap-and-shoulder belt | Confirm proper head support and belt fit |
Do not move a child forward simply because they have entered the next mode’s minimum range. Keep them in the safer current stage until they reach its stated height or weight limit.
Choose a suitable vehicle position
Install the seat in the back seat. NHTSA recommends keeping children in the back through age 12.
- Check the vehicle manual: Confirm which positions permit child restraints and top-tether use.
- Find the anchors: Do not assume a seat crease contains a lower anchor.
- Check the seat belt: Learn how it locks for child-restraint installation.
- Protect front-passenger space: Follow both manufacturers’ rules about contact with the front seat.
Section Takeaway: Identify the exact seat and correct mode before routing any belt. Similar Graco names do not guarantee identical instructions.
How Do You Install It Rear-Facing?
Place the car seat rear-facing, select an allowed recline, and use the rear-facing belt path. Tighten either the lower-anchor strap or locked vehicle belt until movement stays below one inch at that path.
Rear-facing with lower anchors
- Place the car seat rear-facing in an approved back-seat position.
- Adjust the recline while the seat is resting on the vehicle seat.
- Check the level indicator against the instructions for your child’s age or size.
- Move the lower-anchor strap into the rear-facing belt path if it is not already there.
- Confirm the strap lies flat and has no twists.
- Connect each attachment to its designated vehicle lower anchor.
- Press down where the child’s bottom will rest while pulling the adjustment strap tight.
- Test for side-to-side and front-to-back movement at the belt path.
Do not connect to borrowed inner anchors from two seating positions unless the vehicle and car seat manuals expressly allow it. Standard spacing cannot be assumed in a center seat.
Rear-facing with the vehicle seat belt
- Route the lap-and-shoulder belt through the rear-facing belt path.
- Keep the belt under or around the cover exactly as the seat labels show.
- Buckle the belt and remove slack from the lap portion.
- Lock the vehicle belt using the approved vehicle procedure.
- Use the car seat’s lock-off only when your model’s instructions direct you to use it.
- Apply firm pressure to the seating area while tightening.
- Recheck the recline indicator and belt-path movement.
I find it easier to pull slack toward the buckle before feeding it back through the belt path. This keeps the lap section tight without forcing the seat sideways.
Adjust the rear-facing harness
- Harness height: Position the straps at or just below the child’s shoulders.
- Chest clip: Place it at armpit level.
- Harness tension: Tighten until you cannot pinch excess webbing at the shoulder.
- Clothing: Avoid bulky coats or padding not approved by Graco.
- Head position: Confirm the child remains within the manual’s height and head-clearance limits.
The Extend2Fit panel can provide up to five inches of additional rear-facing legroom. Set its position according to the manual because permitted panel settings may depend on the child’s weight.
Section Takeaway: Use the rear-facing path, maintain an approved recline, and test only at the belt path. Recheck the harness every time your child grows.
How Do You Install It Forward-Facing?
Forward-facing installation requires the forward-facing belt path and an approved recline setting. Attach and tighten the top tether whether you use lower anchors or the vehicle belt, when both manuals permit tether use.
Forward-facing with lower anchors
- Change the seat to a permitted forward-facing recline position.
- Move the lower-anchor strap into the forward-facing belt path.
- Set the seat flat against the vehicle seatback as directed.
- Connect both lower-anchor attachments without twisting the webbing.
- Press into the seat while pulling the strap tight.
- Connect the top tether to the correct vehicle tether anchor.
- Tighten the tether and check belt-path movement.
Lower anchors have usage limits. Switch to seat-belt installation when the child or combined-weight rule in your manuals requires it.
Never guess that limit from another Graco model. Check the label attached to your seat and the current manual.
Forward-facing with the vehicle belt
- Route the vehicle belt through the forward-facing belt path.
- Make sure the belt passes behind the harness as shown in the manual.
- Buckle the belt and remove slack from its lap section.
- Lock the belt or operate the integrated lock-off as instructed.
- Push the seat back and down while tightening.
- Attach the top tether to the designated tether anchor.
- Tighten the tether without lifting the seat from its proper position.
NHTSA states that the tether limits forward movement during a crash. A cargo hook or lower anchor is not automatically a tether anchor.
Adjust the forward-facing harness
- Harness position: Place the straps at or just above the shoulders.
- Chest clip: Keep it at armpit level.
- Headrest: Raise it while maintaining the required harness position.
- Webbing: Remove twists before tightening.
- Fit test: Confirm you cannot pinch excess harness at the shoulder.
Section Takeaway: Every forward-facing harness installation needs the correct belt path and approved top tether. Track the lower-anchor limit as your child gains weight.
How Do You Set Up the Booster Modes?
In booster mode, the vehicle’s lap-and-shoulder belt restrains the child. The internal five-point harness must be stored or removed exactly as the Graco manual describes.
Highback booster setup
- Confirm the child satisfies every booster requirement in the seat manual.
- Convert and store the harness according to the model-specific instructions.
- Place the booster upright against the vehicle seatback.
- Raise the headrest so the shoulder-belt guide sits above the child’s shoulder.
- Thread the shoulder belt through the marked guide.
- Buckle the lap-and-shoulder belt across the child.
- Remove slack and confirm the belt retracts freely.
The lap belt should lie low across the upper thighs. It should not rest on the soft abdomen.
The shoulder belt should cross the center of the chest and shoulder. It should not rub the neck, fall off the shoulder, or pass behind the child.
Backless booster setup
Remove the back only as the manual directs. The vehicle must provide adequate head support behind the child.
- Use both belt sections: A lap-only belt cannot provide proper booster restraint.
- Check head support: Follow the manual’s requirements for the vehicle seatback or head restraint.
- Check posture: The child must sit upright for the whole trip.
- Check belt fit: The lap belt stays low while the shoulder belt crosses the chest.
- Buckle an empty booster: Secure it when unoccupied if the instructions require this.
A child’s weight alone does not prove booster readiness. They must meet the seat’s limits and remain correctly positioned without leaning or placing the belt behind them.
Section Takeaway: Booster mode changes the restraint from the internal harness to the vehicle belt. Proper belt fit and sitting maturity matter on every trip.
How Can You Check the Installation?
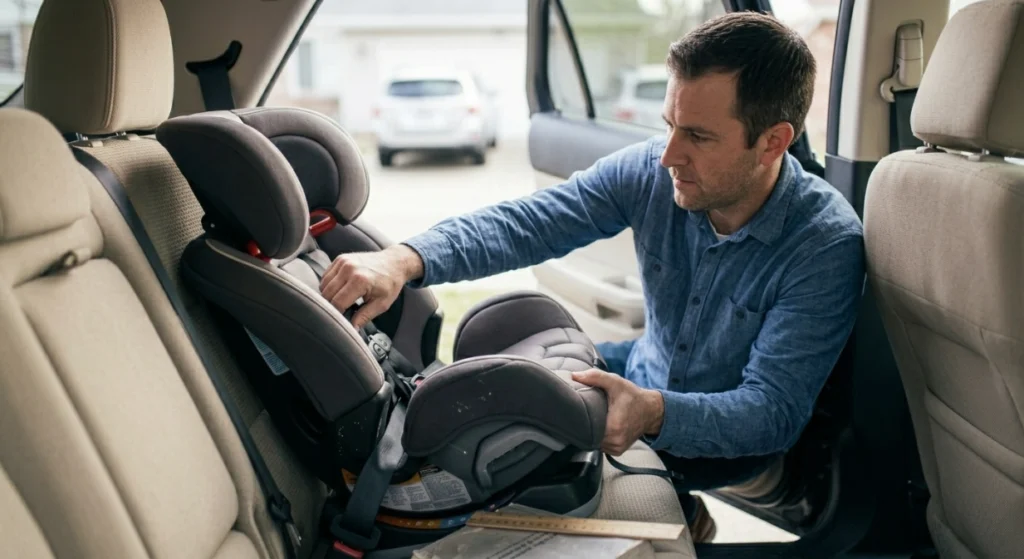
Grip the seat at the active belt path and apply firm side-to-side and front-to-back pressure. It should not move more than one inch in either direction.
Do not test at the headrest or front edge. Normal movement there can make a secure installation appear loose.
Common installation mistakes
- Wrong belt path: Rear- and forward-facing paths are not interchangeable.
- Two methods together: Do not combine lower anchors and a seat belt unless the manual permits it.
- Unlocked belt: A buckled belt may still need its locking mode or approved lock-off.
- Twisted webbing: Twists can interfere with tightening and force distribution.
- Missing tether: Forward-facing installations should use the approved top tether.
- Wrong anchor: Do not substitute a cargo hook for a marked tether anchor.
- Loose harness: Remove slack around the hips before checking at the shoulder.
- Bulky clothing: Thick coats can create hidden harness slack.
Final five-minute safety check
- Confirm the correct mode for the child’s height, weight, age, and development.
- Check the recline and level indicator.
- Verify the belt uses the correct path and locking method.
- Test movement at the belt path.
- Check the tether during forward-facing harness use.
- Place the harness and chest clip correctly.
- Confirm every unused strap and connector is stored safely.
- Repeat the check after moving the seat to another vehicle.
As of 2026, NHTSA continues to recommend reading both manuals and seeking hands-on help when needed. Its car-seat installation tips also explain seat-belt locking and anchor use.
You can arrange a free or low-cost check through NHTSA’s car-seat inspection finder. A certified technician can teach you how to repeat the installation yourself.
Section Takeaway: Less than one inch of movement at the belt path is the main installation test. A technician check is worthwhile whenever the manual, anchor, or belt behavior remains unclear.
Frequently Asked Questions
Can I use LATCH and the seat belt together?
Usually, you should use either lower anchors or the vehicle seat belt. Do not use both unless the instructions for your exact Graco model and vehicle explicitly permit that combination.
How tight should the Graco 4Ever Extend2Fit be?
The installed seat should move less than one inch from side to side or front to back when tested at the active belt path. Movement near the headrest does not determine whether the installation is tight.
Does the top tether matter with a seat-belt installation?
Yes. Use the top tether for forward-facing harness mode when permitted, even when the vehicle belt secures the car seat. The tether reduces forward movement and must connect to the vehicle’s designated tether anchor.
When should I switch from rear-facing to forward-facing?
Keep your child rear-facing until they reach the rear-facing height or weight limit stated on their exact seat. Do not switch merely because the child has reached the forward-facing mode’s minimum weight.
Can I install this car seat in the center position?
You can use the center only when the vehicle allows a child restraint there and you can achieve a correct installation. Do not borrow inner lower anchors unless both the vehicle and car seat manuals permit it.
Why does the car seat still move at the top?
Some movement at the top of a rear-facing seat is normal. Test tightness only where the seat belt or lower-anchor strap passes through the car seat, not at the headrest or front edge.
Where can I find the correct Graco manual?
Find the model number and manufacture date on the car seat label. Enter that information on Graco’s official instruction-manual page to avoid relying on directions for a similar but different model.
Take a few minutes to repeat the belt-path, harness, and tether checks before the first drive. If any step still feels uncertain, pause and arrange a certified car-seat inspection before using the seat.
