
How to Put a Cosco Infant Car Seat Back Together Safely

Taking a Cosco infant car seat apart for cleaning can seem simple—until you are looking at a seat pad, buckle, chest clip, harness straps, and plastic shell wondering where everything goes.
If you are searching for how to put a Cosco infant car seat back together, the most important rule is not to rely on memory alone. Harness routing, buckle positions, pad attachment points, and other details can vary by model and manufacturing date. Cosco specifically advises owners to follow the instructions for their particular seat. (Cosco Kids)
This guide explains a safe, practical reassembly process for non-mechanic parents and caregivers. You will learn how to identify your model, reinstall the cover and harness components, check the buckle and chest clip, inspect your work, and know when professional child-passenger-safety help is the better choice.
Quick Answer
To put a Cosco infant car seat back together, first identify the exact model and find its manual. Reinstall the seat pad, buckle, harness straps, chest clip, and other components exactly as the manufacturer shows. Make sure straps are untwisted and securely anchored. Do not use the seat until every component has been checked for correct routing and operation.
Start With the Exact Cosco Model
Before touching the harness, look for the model information label on the car seat.
Cosco states that the model number and manufacture date can be found on the side or back of its infant car seats. You can then use that information to locate the correct instructions through Cosco Kids product support. (Cosco Kids)
This step matters because two Cosco seats can look similar while having different:
- Harness routing
- Buckle positions
- Seat-pad attachment points
- Shoulder-harness height settings
- Base designs
- Cleaning instructions
- Weight and height limits
Never substitute instructions from a different Cosco model just because the seats look alike.
A current Cosco Light ‘n Comfy infant seat, for example, uses a five-point harness and offers multiple harness-height positions, while other Cosco products use different configurations. (Cosco Kids)
What Parts Are You Putting Back Together?
If you removed the fabric for washing, you may be working with several components.
Common pieces include:
| Component | What It Does | What to Check |
|---|---|---|
| Seat pad/cover | Provides the approved fabric surface around the child | Fully attached with no bunching |
| Harness straps | Holds the child’s shoulders and hips | Flat, untwisted, correctly routed |
| Chest clip | Helps position harness straps | Correct orientation and smooth operation |
| Crotch buckle | Connects the lower harness | Securely anchored in approved position |
| Harness adjuster | Tightens or loosens the harness | Moves smoothly and holds tension |
| Canopy | Provides shade on equipped models | Attached without interfering with harness |
| Infant inserts | Improve fit when manufacturer-approved | Used only as instructed |
| Carrier/base | Secures the infant seat in the vehicle | Locks together correctly |
Do not assume every loose piece needs to be installed. Some padding may be optional, depending on the specific model and the child’s size.
Likewise, do not add padding, strap covers, inserts, or accessories that were not supplied or specifically approved by the manufacturer. NHTSA advises against aftermarket car-seat products unless the car-seat manufacturer permits them. (NHTSA)
How to Put a Cosco Infant Car Seat Back Together Step by Step
The following sequence is a general workflow. Your Cosco manual remains the final authority for exact strap routing and component locations.
1. Place the Empty Seat on a Stable Surface
Work somewhere bright and clean, such as a large table or clean floor.
You want to be able to see both sides of the shell and turn the seat over safely.
Gather:
- Car-seat shell
- Clean, completely dry seat pad
- Harness straps
- Chest clip
- Buckle
- Approved infant padding
- Canopy, if equipped
- The correct Cosco manual
Do not rush the job while your child is waiting to leave. A car seat is safety equipment, not ordinary upholstery.
2. Inspect Every Part Before Reassembly
Cleaning is a good opportunity to look closely at the restraint.
Check for:
- Frayed or cut harness webbing
- Melted or heat-damaged straps
- Cracked plastic
- Broken clips
- Damaged buckle tongues
- Missing attachment tabs
- Warped components
- Rust or contamination around hardware
- Harness straps that no longer adjust smoothly
Do not attempt to sew, glue, tape, or otherwise repair damaged safety components yourself.
If something is damaged or missing, stop and contact Cosco about the appropriate next step or approved replacement part.
3. Reinstall the Crotch Buckle if You Removed It
Some car seats allow the buckle to be repositioned as the child grows.
If yours was completely removed, identify the approved buckle slot specified by your manual.
Typically, the buckle has a metal retaining piece below the shell. That retainer must sit correctly underneath the shell so the buckle cannot pull back through the opening.
After installation:
- Pull firmly upward on the buckle.
- Confirm that the retainer stays securely underneath the shell.
- Make sure the buckle faces the correct direction.
- Verify that it is in a manufacturer-approved slot.
Do not invent a new buckle position or route the buckle through an opening that merely appears to fit.
4. Fit the Seat Pad Back Over the Shell
Work gradually rather than stretching the fabric forcefully.
Start at the location shown in your manual and fit the cover around:
- Seat bottom
- Backrest
- Harness openings
- Buckle opening
- Side edges
- Attachment hooks or elastic loops
Make sure the pad is seated smoothly.
The harness openings in the fabric should line up naturally with the appropriate openings in the plastic shell.
Do not cut the fabric to create additional openings.
5. Route the Harness Straps Exactly as the Manual Shows
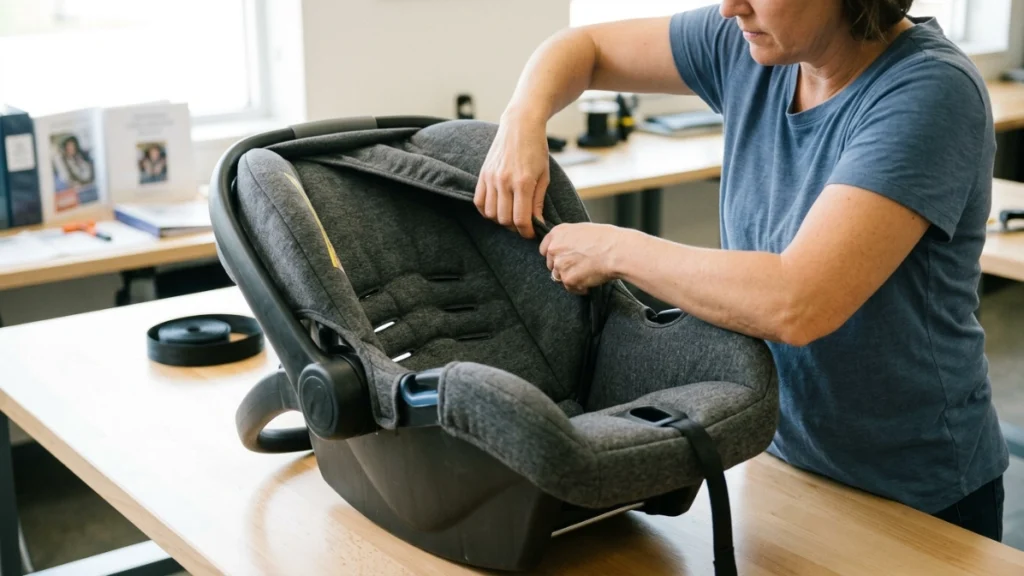
This is the most safety-critical part of putting the seat back together.
Do not guess.
Harness straps may need to pass:
- Through hip slots
- Around specific shell guides
- Through shoulder slots
- Into or onto an adjustment mechanism
Depending on the seat, the rear or underside of the harness may connect differently from another model.
Keep the webbing completely flat as you route it. A half-twist can be surprisingly easy to miss.
Run your fingers along each strap from one end to the other.
You should not see:
- Spirals
- Folded webbing
- Straps crossing each other incorrectly
- Webbing trapped under the seat cover
- Unequal routing between the left and right sides
6. Reinstall the Chest Clip
Thread the harness through the chest clip in the orientation shown by your manual.
After assembly, both sides should move freely along their respective harness straps.
The clip should not:
- Be upside down
- Twist either harness strap
- Prevent adjustment
- Separate unexpectedly
When the child is later secured in the seat, NHTSA says the chest clip should be positioned around mid-chest, approximately level with the armpits. (NHTSA)
7. Check the Shoulder-Harness Height
Putting the straps through a shoulder slot is not enough. They must be through the correct slot for your child and the seat’s rear-facing configuration.
For rear-facing children, NHTSA instructs caregivers to position the harness straps through slots located at or below the child’s shoulders. (NHTSA)
Confirm the exact requirements in your Cosco manual because fit limits are model-specific.
Do not estimate based only on your child’s age. Use actual height, weight, and harness fit.
8. Reinstall Approved Padding and the Canopy
If your seat has infant padding, reinstall only the pieces originally supplied or specifically permitted for the seat.
Some inserts have:
- Harness slots
- Buckle openings
- A required orientation
- Child-size restrictions
Make sure padding never forces the harness away from the child’s body.
Reattach the canopy according to the manufacturer instructions. Verify that canopy fabric or hardware cannot interfere with the harness.
9. Test the Harness Before Putting Your Baby in the Seat
Operate the harness several times while the seat is empty.
Buckle the harness and chest clip.
Then:
- Pull the adjustment strap to tighten.
- Release the adjustment mechanism.
- Loosen the harness.
- Tighten it again.
- Pull individually on the harness connection points.
- Check that both sides move properly.
The harness should move smoothly but remain securely anchored.
If a strap pulls out, slips unexpectedly, jams, or routes differently on the two sides, stop using the seat.
Expert Tip
Expert Tip: Take several clear photos of the front, back, and underside of your car seat before removing the cover or harness. Photos do not replace the manual, but they can help you notice a twist, misplaced cover tab, or routing difference during reassembly.
Perform a Final Child-Fit Check
Once you are confident that the seat itself is correctly assembled, place your child in it while the seat is stationary.
The child’s back should lie flat against the seat.
Check that:
- Harness straps lie flat.
- Straps are positioned correctly for rear-facing use.
- The crotch buckle position matches the manufacturer’s instructions.
- The chest clip is around armpit level.
- The harness is snug.
NHTSA recommends tightening until you cannot pinch excess harness material vertically at the child’s shoulder. See its rear-facing infant car-seat guidance for additional fit instructions. (NHTSA)
Do not solve a loose fit by adding blankets behind the child or unapproved padding underneath the harness.
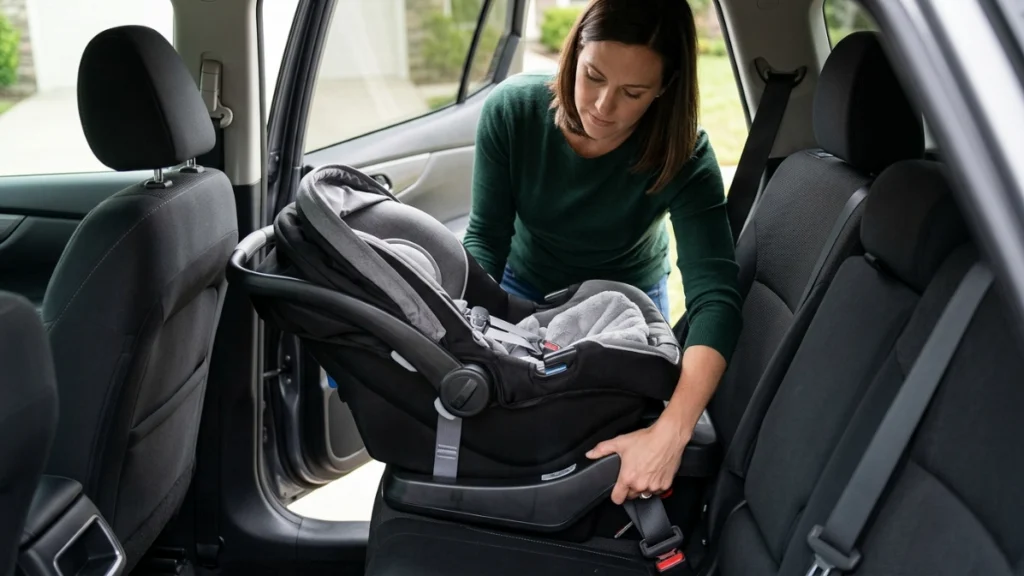
Reinstalling the Infant Seat in Your Vehicle
Reassembling the carrier is only half the job. It also needs to be correctly installed in the vehicle.
For rear-facing-only infant seats with a detachable base, the base normally remains rear-facing in the back seat. Follow both your Cosco manual and your vehicle owner’s manual.
NHTSA’s rear-facing car-seat installation instructions emphasize using the correct belt path or lower-anchor system, obtaining the proper recline, and checking installation tightness. (NHTSA)
When checking installation, test movement at the belt path—not at the top of the carrier.
NHTSA states that a properly secured seat or base should not move more than 1 inch side to side or front to back at the belt path. (NHTSA)
Do Not Wash or Repair Parts Any Way You Want
Parents sometimes remove an infant-seat cover because of milk, food, vomit, or a diaper leak. The instinct to deep-clean everything is understandable.
However, harness components are engineered safety parts.
Avoid experimenting with:
- Bleach
- Strong cleaners
- Solvents
- Abrasive chemicals
- Lubricants
- Ironing
- High heat
- Sewing damaged webbing
- Replacing straps with generic webbing
Follow the cleaning instructions for your exact model.
A machine-washable pad does not automatically mean the harness or buckle can be machine washed.
How to Know the Car Seat Is Ready to Use
Use this checklist before putting the restraint back into service.
| Safety Check | Ready to Use? |
|---|---|
| Correct model-specific manual followed | Yes |
| Seat pad properly secured | Yes |
| No harness twists | Yes |
| Harness anchored exactly as instructed | Yes |
| Buckle cannot pull through shell | Yes |
| Chest clip installed correctly | Yes |
| Harness tightens and loosens normally | Yes |
| No damaged or missing components | Yes |
| Child fits manufacturer’s limits | Yes |
| Base/seat installed correctly in vehicle | Yes |
| Any item above is uncertain | No—get help first |
What If You Cannot Remember Where the Harness Goes?
Stop rather than experimenting.
Searching photos online can be risky because a photo may show:
- A different production year
- Another Cosco model
- Incorrect owner installation
- An outdated configuration
- A seat with altered components
Instead, identify the model number and manufacture date and obtain the matching manual.
If the manual still does not make sense, contact the manufacturer or have the seat checked by a certified Child Passenger Safety Technician.
NHTSA provides a car-seat inspection finder that can help families locate trained technicians, and many checks are available at little or no cost. (NHTSA)
When to Call a Professional Mechanic
A regular automotive mechanic is usually not the appropriate professional for car-seat harness reassembly.
Mechanics specialize in vehicles. Child-restraint systems require different training.
For questions about the Cosco seat itself, the better choices are:
- Cosco customer support
- A certified Child Passenger Safety Technician (CPST)
- A recognized car-seat inspection station
A mechanic or dealership may be useful when the problem involves the vehicle, such as:
- Damaged seat belts
- Suspected seat-belt retractor failure
- Damaged vehicle seating
- Vehicle anchor hardware concerns following a crash
For the child restraint, use manufacturer instructions and child-passenger-safety expertise.
When Replacement May Be Smarter Than DIY Reassembly
Most routine cover removal does not mean the seat needs replacing.
However, stop and investigate further if:
- Harness webbing is cut, frayed, melted, or heavily contaminated.
- Plastic is cracked.
- A buckle or chest clip is damaged.
- A structural component is missing.
- You cannot determine how the harness was originally routed.
- You do not have the correct parts.
- The seat has been involved in a crash.
- The seat’s required labels are missing or unreadable.
- You cannot confirm the model’s history or instructions.
Do not buy random secondhand harness parts because they look compatible.
Safety components should be approved for the exact restraint.
Common Mistakes Car Owners Should Avoid
Even careful parents can make simple reassembly mistakes. Watch for these:
- Guessing harness routing. The seat may look fine from the front while being incorrectly routed underneath.
- Leaving one twist in a strap. Check the entire length of both harness straps.
- Installing the chest clip backward. Follow the model-specific diagrams.
- Using the wrong buckle slot. Only use positions approved for your child’s fit.
- Forgetting attachment tabs on the cover. Loose fabric can interfere with normal operation.
- Adding aftermarket padding. Extra cushions or strap covers can change harness fit.
- Using damaged straps. Never sew or tape restraint webbing.
- Assuming every Cosco manual is identical. Model and manufacture date matter.
- Reinstalling the seat without checking the base. Reassembly and vehicle installation are two separate safety checks.
- Driving while still uncertain. Get a CPST or manufacturer representative to verify the setup.
FAQs
Can I put a Cosco infant car seat back together without the manual?
You should avoid doing so when the harness, buckle, or other safety components have been removed. Find the model number and manufacture date and use the matching Cosco instructions.
How do I know whether my Cosco harness straps are twisted?
Trace each strap with your fingers from its anchor point to the shoulder area and buckle. The webbing should remain flat along its entire path without making a half-turn or spiral.
Where should the chest clip sit on a Cosco infant car seat?
When your baby is buckled in, the chest clip should generally be positioned at mid-chest, approximately level with the armpits. Always confirm the instructions for your model. (NHTSA)
Should the harness straps be above or below my baby’s shoulders?
For a rear-facing seat, NHTSA says the shoulder straps should pass through the appropriate slots at or below the child’s shoulders. Your Cosco manual should be used to select the correct permitted slot. (NHTSA)
Can I replace a lost Cosco harness strap with a universal strap?
Do not substitute generic webbing or a universal restraint part unless Cosco specifically approves it for your seat. Safety-related replacement parts need to be compatible with the exact model.
Can I use the car seat if I am unsure about one harness connection?
No. If you cannot confirm that a safety-critical component is correctly installed, do not transport your child in the seat. Consult Cosco or a certified Child Passenger Safety Technician first.
How tight should a rear-facing infant car seat be in the vehicle?
When installed according to its instructions, the restraint should move no more than about 1 inch side to side or front to back when checked at the belt path. (NHTSA)
Final Safety Check
Learning how to put a Cosco infant car seat back together is mostly about following the correct sequence without guessing. Refit the approved seat pad, install the buckle correctly, route every harness strap exactly as the model-specific manual shows, eliminate twists, reinstall the chest clip, and test the adjustment system before your child rides in the seat.
Then check your child’s harness fit and reinstall the restraint or base according to both the Cosco instructions and your vehicle owner’s manual.
Most importantly, do not treat uncertainty as “good enough.” If one strap, buckle, anchor, or attachment point does not look right, stop using the seat until you can confirm it. Contact Cosco or arrange a certified car-seat inspection so your next drive starts with the restraint assembled and installed the way its manufacturer intended.
