
How to Repair a Rip in a Leather Car Seat: A Practical DIY Guide

A rip in a leather car seat can start small and quickly become a much larger problem. Every time you sit down, the damaged leather flexes and pulls apart. Dirt, moisture, and normal movement can make the tear worse.
If you are wondering how to repair a rip in a leather car seat, the good news is that many small tears can be repaired at home with a quality leather repair kit, flexible adhesive, backing material, filler, and matching color.
However, not every seat should be repaired using a basic DIY method. Large tears, badly dried leather, damaged foam, and areas near seat-mounted airbags often need professional attention.
This guide explains how to inspect the damage, choose the right repair method, complete the repair step by step, and know when professional help is the smarter choice.
Quick Answer
To repair a rip in a leather car seat, clean the damaged area, place a backing patch underneath the tear, bond the edges with flexible leather adhesive, fill any remaining gap, match the color, and apply a protective finish. Small tears are usually DIY-friendly, but airbag seams, large rips, and damaged foam should be professionally repaired.
Can You Repair a Ripped Leather Car Seat?
Yes. Many leather seat rips can be repaired without replacing the entire seat cover.
The key is determining how serious the damage is before applying glue or filler.
A small, clean tear in otherwise flexible leather is usually a good DIY candidate. A long rip across a heavily worn seat cushion is more difficult because that area experiences constant pressure and movement.
You should also confirm that the damaged material is actually leather. Many modern vehicle interiors use combinations of:
- Genuine leather
- Coated leather
- Synthetic leather
- Vinyl
- Leather only on seating surfaces
- Synthetic material on side bolsters
A repair product designed for leather may not bond or color-match correctly on every synthetic surface. Check your owner’s manual, vehicle specifications, or repair-kit instructions if you are uncertain.
First, Inspect the Rip Carefully
Before buying supplies, look closely at the damaged area.
Measure the Damage
Pay attention to:
- Length of the rip
- Width of the opening
- Condition of the edges
- Whether material is missing
- Whether the foam underneath is exposed
- Whether nearby leather feels dry or brittle
- Whether stitching has separated
A short tear with two intact edges is much easier to repair than an area where a chunk of leather is missing.
Check the Seat Foam
Press gently around the damaged area.
If the foam still feels firm and returns to shape, you may only have upholstery damage.
If the foam is:
- Crumbling
- Torn
- Flattened
- Wet
- Permanently compressed
the seat may need more extensive work before repairing the leather.
Look for an Airbag Label or Seam
Do not treat a seat-mounted airbag area like ordinary upholstery.
Many vehicles have side-impact airbags built into the front seat backrests. NHTSA’s guidance on vehicle air bags and injury prevention explains that modern vehicles may use side airbags as part of their occupant-protection systems.
NHTSA has also addressed concerns about materials covering seat-mounted side airbags because improperly designed coverings may affect deployment.
If the tear is along an AIRBAG-marked seam, outer backrest bolster, or known deployment area, consult the owner’s manual and use a qualified automotive upholstery or dealership repair service.
Do not glue, stitch, reinforce, or heavily patch an airbag deployment seam yourself.
DIY Repair vs. Professional Repair
| Seat Condition | DIY Repair | Professional Repair |
|---|---|---|
| Small clean rip | Usually suitable | Optional |
| Minor surface cracking | Usually suitable | Optional |
| Small hole with intact surrounding leather | Often suitable | Optional |
| Long tear in seat cushion | Possible, but difficult | Recommended |
| Large missing section | Poor DIY candidate | Recommended |
| Torn stitching | Limited DIY suitability | Recommended |
| Damaged seat foam | More involved | Recommended |
| Brittle or heavily cracked leather | Temporary results likely | Recommended |
| Airbag seam damage | Do not DIY | Professional repair required |
A DIY repair is usually best when your goal is to stop a small tear from spreading and improve its appearance.
Professional work makes more sense when structural strength, factory appearance, stitching, foam reconstruction, or safety-system compatibility matters.
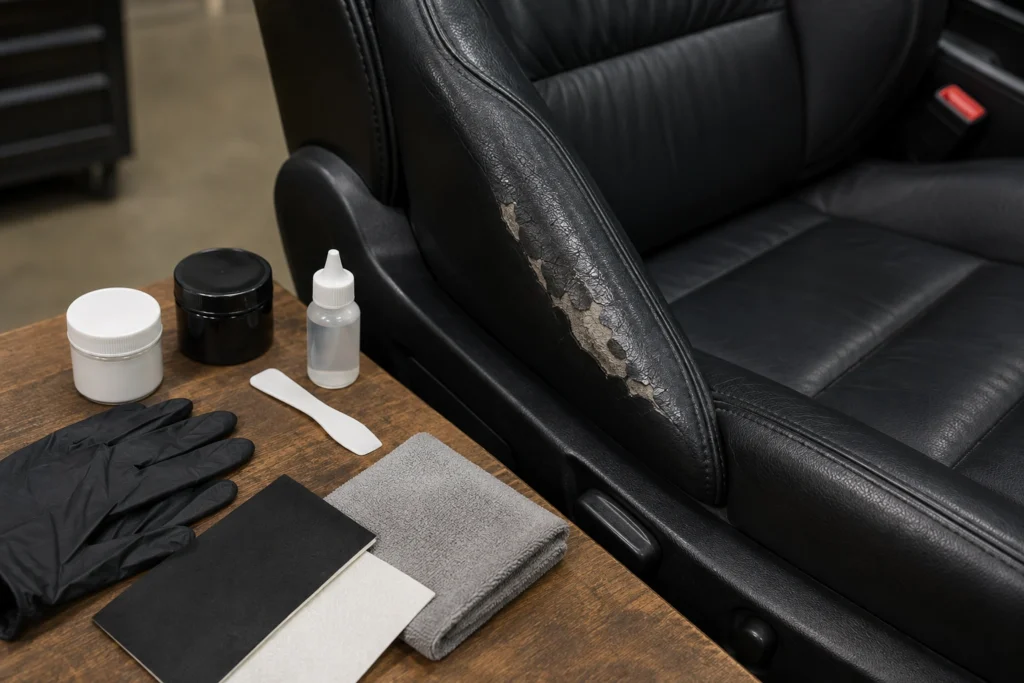
What You Need to Repair a Leather Car Seat Rip
Most repairs require a leather or automotive upholstery repair kit.
Useful supplies include:
- Leather cleaner
- Clean microfiber cloths
- Flexible leather adhesive
- Backing fabric or repair patch
- Leather filler or repair compound
- Small applicator or palette knife
- Color-matching leather dye
- Protective topcoat
- Small scissors
- Fine abrasive pad, if specified by the repair-kit manufacturer
- Disposable gloves
Always follow the instructions supplied with the repair products. Cure times and surface-preparation requirements vary between adhesives, fillers, dyes, and coatings.
If your products contain solvents or other hazardous ingredients, use them in a well-ventilated area and follow the product label. The EPA’s household hazardous waste guidance also recommends following product instructions for safe use, storage, and disposal.
How to Repair a Rip in a Leather Car Seat Step by Step
1. Clean the Damaged Area
Start with a clean seat.
Use a cleaner that is compatible with automotive leather. Remove:
- Body oils
- Dirt
- Dust
- Conditioner residue
- Food residue
- Grease
Do not saturate exposed foam.
After cleaning, allow the area to dry completely. Adhesives and fillers generally bond better to a clean, dry surface.
2. Remove Only Loose, Unusable Material
Inspect the edges of the tear.
If tiny fibers or pieces are already detached, carefully trim only what is necessary to create manageable edges.
Do not enlarge the rip just to make it look neat.
Preserve as much original upholstery as possible.
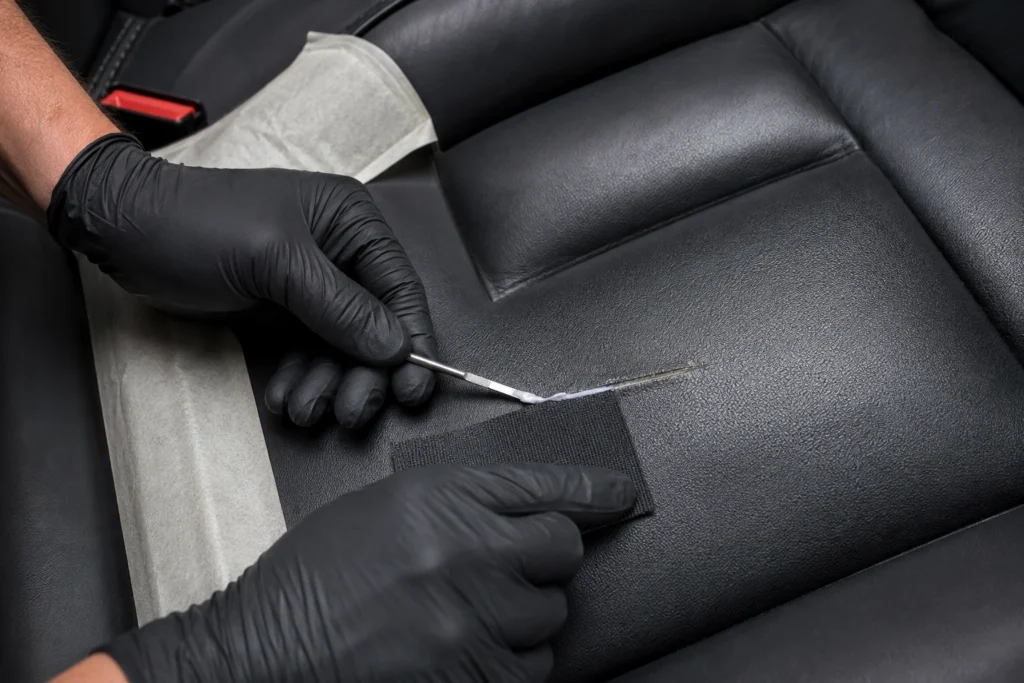
3. Insert a Backing Patch
A backing patch supports the damaged leather from underneath.
Cut the backing material slightly larger than the rip. Carefully slide it underneath the leather using a small applicator.
Center it so there is material behind every side of the tear.
The backing should lie reasonably flat without creating a visible lump.
4. Apply Flexible Leather Adhesive
Apply a small amount of compatible adhesive between the backing patch and the underside of the leather.
Bring the torn edges toward their original position without stretching them excessively.
Remove excess adhesive before it hardens.
Then allow the adhesive to cure for the time specified by its manufacturer.
Trying to rush this stage is one of the easiest ways to create a weak repair.
5. Apply Leather Filler
Once the tear is supported and bonded, you may still see a shallow groove where the edges meet.
Apply leather filler in thin layers.
Do not attempt to build one thick layer because thick filler may cure unevenly or become more noticeable when the seat flexes.
Allow each layer to dry according to the product instructions.
Build the repair gradually until the damaged area is close to the level of the surrounding upholstery.
6. Smooth the Repair
Some repair systems require gentle smoothing or fine abrasion after the filler cures.
Follow the instructions for your particular product.
The goal is not to remove surrounding leather texture. You only want to reduce obvious high spots in the repaired area.
7. Match the Seat Color
Color matching often determines whether a repair looks professional or obviously patched.
Black seats are not always identical shades of black. Beige, tan, brown, gray, red, and white interiors can be even more difficult.
Whenever possible, test the dye on an inconspicuous location first.
Apply several light coats rather than one heavy coat.
Let each coat dry before judging the final color.
8. Apply the Protective Finish
Many repair systems use a final topcoat to improve appearance and provide additional wear resistance.
The topcoat may also help match the original:
- Matte finish
- Satin finish
- Low-gloss appearance
- Higher-gloss leather finish
Follow the manufacturer’s cure instructions before using the seat.
9. Give the Repair Time to Cure
Avoid sitting on the repaired section too soon.
Even when the surface feels dry, adhesive, filler, dye, or topcoat underneath may still be curing.
Using the seat before the repair fully cures can cause the tear to reopen.
Expert Tip
Expert Tip:
Repair a small tear as soon as you notice it. A one-inch rip is much easier to stabilize than a tear that has been repeatedly stretched every time the driver gets in and out of the vehicle.
How Long Will a Leather Seat Repair Last?
There is no single lifespan for a repaired leather seat.
Durability depends on:
- Size of the original damage
- Quality of the repair materials
- Condition of the surrounding leather
- Correct surface preparation
- Location of the tear
- Amount of seat movement
- Temperature exposure
- How frequently the vehicle is used
A repaired tear on a lightly used rear seat may last much longer than the same repair on the driver’s outside bolster.
That bolster constantly rubs against clothing as the driver enters and exits the vehicle.
A DIY kit can produce a useful cosmetic repair, but it does not make severely deteriorated leather new again.
How to Keep the Rip From Coming Back
After the repair has fully cured, reduce stress on the area.
Keep the Leather Clean
Dirt acts like an abrasive when passengers slide across the seat.
Clean the upholstery periodically with products compatible with your vehicle’s leather finish.
Avoid Excessive Heat
High cabin temperatures can accelerate drying and aging of upholstery materials.
Parking in shade or using a windshield sunshade may reduce heat exposure.
Do Not Overcondition the Seat
More conditioner is not automatically better.
Use products suitable for automotive leather and follow their directions. Heavy residue can attract dirt and may change the surface feel.
Watch the Driver-Side Bolster
The outer driver’s bolster is one of the highest-wear parts of the seat.
Try not to drag belts, tools, keys, metal clips, or other sharp objects across it.
Common Mistakes Car Owners Should Avoid
Avoid these common leather-seat repair mistakes:
- Repairing an airbag seam yourself. Upholstery around a seat-mounted airbag can be safety-critical.
- Applying glue directly over a dirty surface. Oils and residue can weaken adhesion.
- Using household super glue. A rigid adhesive may not flex properly with the seat material.
- Using too much filler. Thick repairs can become stiff and noticeable.
- Skipping the backing patch on an open tear. Surface filler alone may not provide enough support.
- Stretching the leather together. Excess tension can pull the repair apart later.
- Using the seat before curing is complete.
- Expecting a DIY kit to restore badly deteriorated leather. Sometimes replacement is the better long-term solution.
- Ignoring damaged foam underneath the upholstery.
- Applying an unmatched dye without testing it first.
When to Call a Professional Mechanic
Leather upholstery problems are usually handled by an automotive upholstery specialist, interior repair technician, dealership, or qualified repair facility rather than a traditional engine mechanic.
Professional evaluation is the safer choice when:
- The rip is near a seat-mounted airbag
- An AIRBAG tag or deployment seam is involved
- The tear is several inches long
- A large section of material is missing
- Seat foam is damaged
- Seat stitching has failed
- Electrical seat components are exposed
- Heated or ventilated seat components may be damaged
- The surrounding leather is badly cracked
- The seat frame feels loose
- You want a near-factory cosmetic result
If you are comparing shops, the FTC’s consumer guidance for choosing an auto repair facility recommends comparing shops, understanding warranties, asking about technician experience, and obtaining a written estimate before approving significant work.
For upholstery work, ask whether the technician has experience specifically with your vehicle’s seat design and safety equipment.
Should You Repair or Replace the Leather?
Repair is usually worthwhile when the surrounding upholstery is still healthy.
Consider replacement when:
- Multiple large cracks cover the seat
- Leather is brittle throughout
- Previous repairs keep failing
- Large sections are missing
- Several stitched seams are failing
- Foam reconstruction is required
- Repair costs approach replacement costs
Replacement does not necessarily mean buying an entire new seat.
Depending on the vehicle, an upholstery specialist may be able to replace only a damaged seat panel or seating-surface section.
Ask for both repair and replacement estimates when the damage is extensive.
FAQs
Can I repair a leather car seat rip myself?
Yes, if the tear is relatively small, the surrounding material is healthy, and the damage is away from airbag seams or other safety components. A leather repair kit with backing material, flexible adhesive, filler, and color compound can work well for minor damage.
What is the best glue for a ripped leather car seat?
Use a flexible adhesive specifically designed for leather, vinyl, or automotive upholstery, depending on your seat material. Avoid ordinary rigid household glues unless the repair-product manufacturer specifically recommends them.
Can I repair a leather seat without removing it from the car?
Usually, yes. Small surface repairs can often be completed with the seat installed. Seat removal may be necessary for extensive upholstery work, damaged foam, stitching repairs, or areas that are difficult to access.
Can leather filler repair a large tear by itself?
No. Filler is primarily used to smooth small gaps and surface imperfections. An open tear generally needs support underneath, such as a backing patch, before filler and color are applied.
Will a repaired leather seat look completely new?
A carefully repaired small tear can become much less noticeable, but perfect results are not guaranteed. Leather texture, color, wear, and aging make exact matching difficult. Professional repair usually provides better cosmetic results on visible or complicated damage.
What should I do if the rip is next to an airbag label?
Stop before applying adhesive, filler, stitching, or a patch. Check your owner’s manual and have the area inspected by a qualified professional familiar with seat-mounted airbags.
Is it worth repairing an old leather car seat?
It depends on the overall condition. Repair makes sense when most of the seat remains flexible and intact. If the leather is brittle, heavily cracked, and failing in several areas, replacing damaged upholstery panels may provide better value.
Conclusion
Learning how to repair a rip in a leather car seat can save a small tear from becoming a much larger upholstery problem.
For a basic repair, clean the area carefully, support the tear with a backing patch, use flexible leather adhesive, build filler in thin layers, match the color, apply the appropriate finish, and allow everything to cure completely.
The most important decision is knowing when not to DIY. Damage involving seat-mounted airbags, large missing sections, failed stitching, electrical components, or deteriorated foam deserves professional attention.
Inspect the rip now while it is still manageable. If it is small and safely located, repair it early. If the damage affects a safety-related area or the seat is badly deteriorated, get a professional upholstery estimate before spending money on a temporary fix.
