
How to Get a Stain Out of a Car Seat: A Safe Step-by-Step Guide

A spilled coffee, greasy food mark, muddy footprint, or mystery spot can make an otherwise clean car interior look neglected. The good news is that many common seat stains can be removed at home if you use the right cleaner, the right amount of moisture, and the right technique.
Learning how to get a stain out of a car seat starts with one important step: identify the seat material before applying anything. Cloth, leather, vinyl, and synthetic upholstery react differently to moisture and cleaning chemicals.
This guide explains how to clean common stains safely, which methods work for different seat materials, what mistakes can cause permanent damage, and when a professional detailer or repair shop is the smarter choice.
Quick Answer
To get a stain out of a car seat, blot fresh liquid first, vacuum away loose debris, identify the upholstery material, and test your cleaner in a hidden spot. Apply a small amount of upholstery-safe cleaner, gently work the stain from the outside inward, blot away residue, and let the seat dry completely.
Identify Your Car Seat Material First
Do not start scrubbing until you know what your seat is made from.
Most vehicles use one of these materials:
- Cloth or woven fabric
- Genuine leather
- Synthetic leather
- Vinyl
- Suede-like or microfiber materials
- Mixed-material seats with fabric and leather sections
Check your owner’s manual if you are unsure. Some manufacturers provide specific instructions about which cleaners should or should not be used.
For example, Ford’s vehicle interior cleaning guidance recommends checking the vehicle-care section of the owner’s manual before using cleaning products and generally recommends mild soap and water for many interior materials.
Never assume a cleaner that is safe for household carpet will automatically be safe for automotive upholstery.
Some car seats contain special coatings, dyes, flame-resistant materials, heating elements, ventilation systems, occupant sensors, or seat-mounted airbags.
Match the Cleaning Method to the Stain
Different stains respond to different cleaning methods.
| Stain Type | Best First Step | Main Concern | DIY Difficulty |
|---|---|---|---|
| Coffee or soda | Blot immediately | Sugar and discoloration | Easy to moderate |
| Water or rain mark | Blot and evenly clean area | Water rings | Easy |
| Mud | Let heavy mud dry, then vacuum | Grinding dirt into fabric | Easy |
| Food | Remove solids, then blot | Grease and odor | Moderate |
| Grease or oil | Absorb excess before cleaning | Spreading oily residue | Moderate |
| Blood | Use cold water, not hot | Protein setting into fabric | Moderate |
| Ink | Use material-approved stain treatment | Dye spreading | Difficult |
| Dye transfer | Use upholstery-specific product | Permanent discoloration | Difficult |
| Pet accident | Blot and use upholstery-safe odor cleaner | Odor below surface | Moderate |
| Mold or mildew | Determine moisture source first | Health and moisture problems | Professional help often best |
A fresh spill is normally much easier to remove than a stain that has dried for several weeks.
What You Need Before Cleaning
You usually do not need expensive equipment for a small stain.
Gather:
- Clean white microfiber towels
- Vacuum with a crevice attachment
- Soft upholstery brush
- Small bowl of lukewarm water
- Mild soap or automotive upholstery cleaner
- Spray bottle if needed
- Clean dry towel
- Gloves when using cleaning chemicals
White towels are helpful because you can see whether color from the stain—or dye from the upholstery—is transferring to the towel.
If you are buying a household-style cleaner for general cleaning tasks, the EPA provides a searchable list of Safer Choice-certified cleaning products that meet its Safer Choice criteria. For your vehicle, however, you should still confirm that the specific product is approved for your seat material before using it.
How to Get a Stain Out of a Cloth Car Seat
Cloth upholstery absorbs liquid quickly, so controlling moisture is extremely important.
1. Blot Fresh Spills Immediately
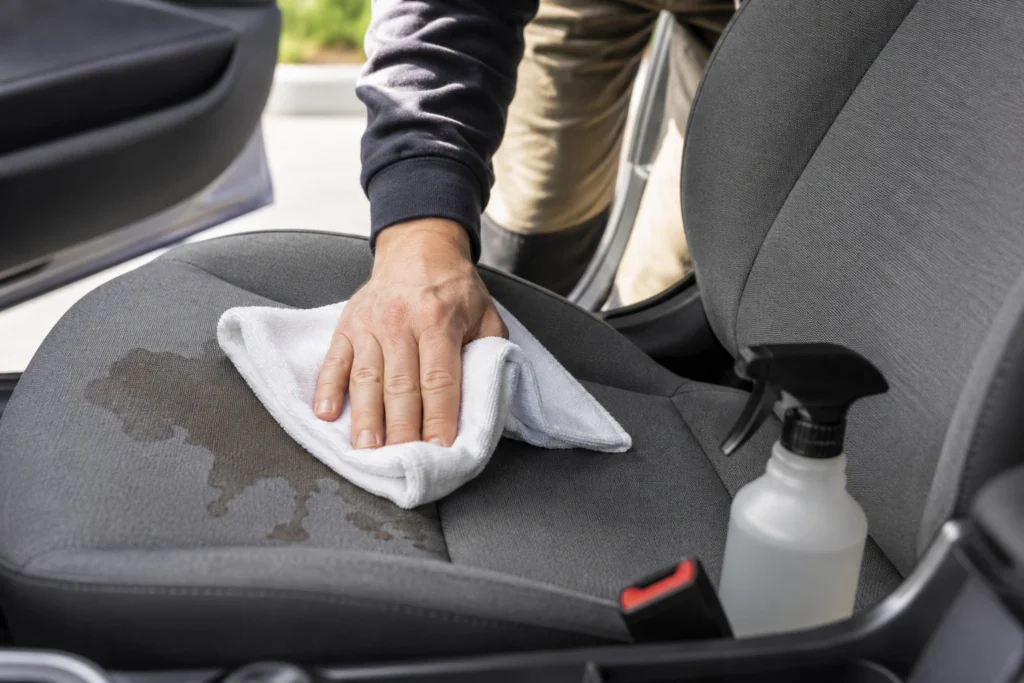
If the stain is still wet, press a clean microfiber towel onto it.
Blot instead of rubbing.
Rubbing can:
- Spread the stain
- Push liquid deeper into the foam
- Damage fabric fibers
- Create a larger visible mark
Continue using clean sections of the towel until little moisture transfers.
2. Vacuum the Area
Vacuum the stained area and the surrounding fabric.
This removes crumbs, sand, dried dirt, and other particles that could scratch or become muddy once cleaner is added.
Pay attention to seams and creases.
3. Test Your Cleaner
Apply a tiny amount of cleaner to a hidden section of upholstery, such as near the lower rear edge of the seat.
Wait for it to dry.
Check for:
- Color fading
- Darkening
- Stiffness
- Dye transfer
- Texture changes
If the material changes, stop and choose another product.
4. Apply Cleaner Lightly
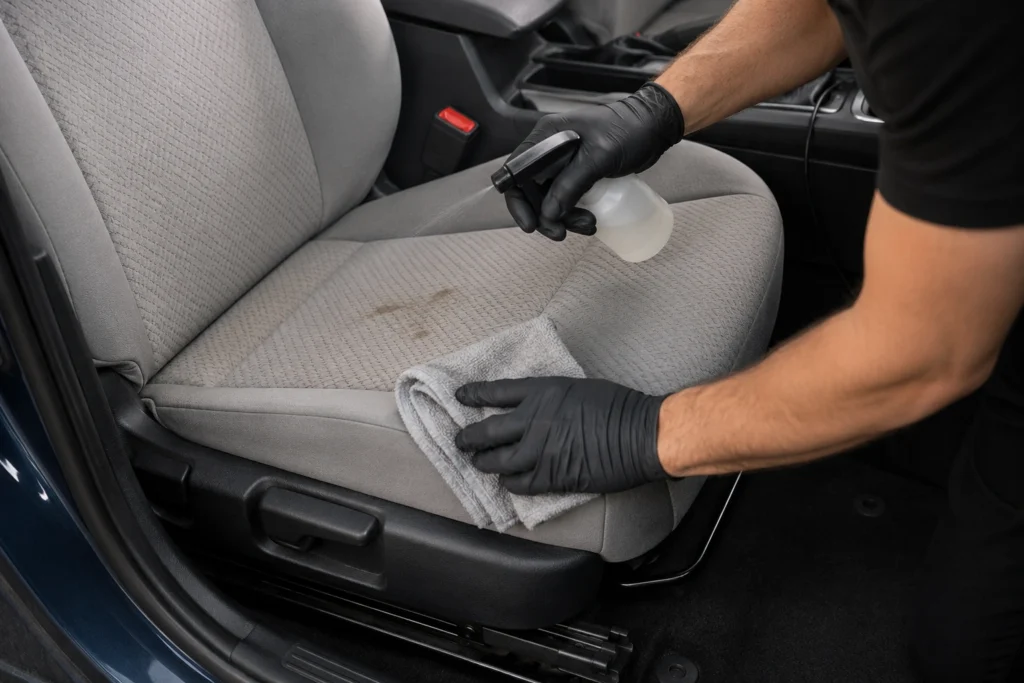
Apply a small amount of upholstery-safe cleaner.
Do not soak the seat.
Automotive seat cushions can contain thick foam that holds water much longer than the surface fabric. Excessive moisture may lead to odor, water rings, mildew, or problems around electrical components.
5. Work From the Outside In
Gently clean from the outside edge of the stain toward its center.
This helps keep the stain from spreading.
For textured cloth, a soft upholstery brush can help loosen contamination. Use light pressure rather than aggressive scrubbing.
6. Blot Away the Cleaner
Use a slightly damp clean towel to remove loosened dirt and cleaning residue.
Then use a dry microfiber towel to absorb as much remaining moisture as possible.
Repeat the process if necessary rather than using a large amount of cleaner at once.
7. Dry the Seat Completely
Leave doors or windows open when conditions are safe, or use moving air to speed drying.
Do not sit on the seat while it is still wet.
A seat that feels dry on the surface may still contain moisture in the cushion underneath.
How to Remove Stains From Leather Car Seats
Leather requires a gentler approach because aggressive chemicals can remove protective coatings or change the finish.
Start by vacuuming dirt from seams and creases.
Then:
- Place leather-safe cleaner on a microfiber towel rather than pouring it directly onto the seat.
- Test the product in a hidden area.
- Gently wipe the stained section.
- Avoid aggressive scrubbing.
- Remove remaining cleaner with another clean towel.
- Allow the surface to dry naturally.
- Apply a compatible leather protectant or conditioner only if recommended for that upholstery.
Avoid experimenting with alcohol, strong degreasers, household stain removers, or solvents on leather.
Some modern automotive “leather” seats also contain coated leather, vinyl, or synthetic sections. That is another reason the owner’s manual matters.
What If the Leather Is Still Discolored?
Cleaning and repairing are not the same thing.
If a stain has actually damaged or removed the leather’s color coating, additional cleaning may make the problem worse.
Signs you may need a leather repair specialist include:
- A lighter patch remains after cleaning
- Color transfers to your towel
- The surface becomes sticky
- Leather begins peeling
- The stained area has a different sheen
- Dye from clothing has deeply transferred into the seat
How to Clean Vinyl and Synthetic Leather
Vinyl and many synthetic leather surfaces are less absorbent than cloth, which makes fresh stains easier to handle.
Use:
- A damp microfiber towel
- Mild soap and water when manufacturer-approved
- A cleaner specifically labeled for automotive vinyl or synthetic upholstery
Wipe gently and dry the surface afterward.
Do not assume synthetic leather is chemical-resistant. Strong solvents can cause fading, hardening, cracking, or loss of the protective finish.
Removing Common Car Seat Stains
Coffee, Soda, and Juice
Blot the liquid immediately.
For cloth seats, use a small amount of approved upholstery cleaner and work gradually.
Sugary drinks require thorough residue removal because even when the visible stain disappears, leftover sugar can leave the fabric sticky and attract dirt.
Grease and Oily Food
Remove solid food without pushing it deeper into the upholstery.
Blot oily residue using a clean towel.
Then apply a cleaner specifically approved for grease on your upholstery type.
Avoid aggressively adding water at first. Oil can spread across wet fabric.
Mud
If thick mud is still wet, remove excess material carefully and allow the remaining surface dirt to dry.
Vacuum dried dirt before adding cleaner.
Turning dry dirt into wet mud before vacuuming usually creates more work.
Blood
Use cold water, not hot water.
Heat can make protein-based stains harder to remove.
Blot carefully and follow with an upholstery-safe cleaning product. Avoid excessive scrubbing.
Ink or Permanent Marker
Ink can spread rapidly.
Do not immediately reach for alcohol, nail-polish remover, or strong solvents. These substances may also remove the upholstery’s dye or protective coating.
A material-specific stain remover or professional detailer is usually safer.
Old Mystery Stains
Start conservatively.
Vacuum the area, test a mild cleaner, and work in several small cleaning cycles.
If you do not know what caused the stain, applying several different chemicals can make the stain harder to remove.
Do Not Oversaturate the Seat
Using too much liquid is one of the most common DIY mistakes.
Modern seats may contain:
- Seat heaters
- Cooling or ventilation components
- Occupant-detection sensors
- Power-seat wiring
- Airbag-related components
- Electrical connectors
Normal surface cleaning should not harm these systems when performed correctly.
A large spill or heavily soaked seat is different.
If liquid reaches electrical components underneath the seat or an airbag warning light appears afterward, stop DIY cleaning and have the vehicle inspected.
Be Careful When Mixing Cleaning Products
More chemicals do not necessarily mean better cleaning.
Never mix bleach with ammonia, disinfectants, or other cleaning products.
The CDC’s guidance on cleaning chemicals and bleach warns that mixing bleach with other cleaners or disinfectants can create dangerous vapors and recommends good ventilation when such chemicals are used.
For an ordinary upholstery stain, strong disinfecting chemicals are generally unnecessary.
Use the mildest product capable of doing the job.
Expert Tip:
When cleaning a stain, use several light cleaning passes instead of one heavily saturated pass. You can always apply a little more cleaner, but removing excessive water or chemical residue from deep seat foam is much harder.
What About a Child Safety Seat?
A removable child restraint is different from your vehicle’s built-in upholstery.
Do not automatically use the methods in this guide on:
- Child-seat harness straps
- Buckles
- LATCH straps
- Foam inserts
- Child-seat padding
These components may have manufacturer-specific cleaning restrictions.
NHTSA’s child car seat safety guidance emphasizes following the child restraint manufacturer’s instructions because car seats and installation requirements vary.
Always follow the child-seat manufacturer’s cleaning manual before washing straps, covers, padding, or hardware.
Common Mistakes Car Owners Should Avoid
- Scrubbing a fresh stain immediately. Blot first so you do not spread it.
- Using too much water. Wet seat foam can take a long time to dry.
- Skipping the spot test. Even products labeled for upholstery can react differently with specific materials.
- Using household bleach. It can discolor or damage automotive upholstery.
- Mixing cleaners. Chemical combinations can create dangerous fumes or damage the seat.
- Using hot water on protein stains. Blood and similar stains should normally be treated with cool or cold water.
- Using strong solvents on leather. They may remove protective coatings and color.
- Ignoring cleaner residue. Residue can attract dirt and create a new visible patch.
- Closing the vehicle while the seats are damp. Poor airflow can encourage unpleasant odors.
- Assuming every remaining mark is dirt. Sometimes a “stain” is actually faded dye or damaged material that requires repair.
DIY Cleaning vs Professional Help
| Situation | DIY Cleaning | Professional Detailer/Upholstery Specialist | Repair Shop |
|---|---|---|---|
| Small fresh drink stain | Usually appropriate | Usually unnecessary | No |
| Light food stain | Usually appropriate | Optional | No |
| Old set-in stain | Worth trying carefully | Often helpful | No |
| Heavy grease | Possible with correct product | Often safer | No |
| Ink or major dye transfer | Riskier | Recommended | No |
| Leather color damage | Cleaning may not fix it | Recommended | No |
| Large liquid spill | Limited DIY drying | Detailer may extract moisture | Possibly |
| Mold or persistent mildew | Not ideal | Recommended | Possibly |
| Wet electrical components | Stop DIY work | Cleaning alone may not be enough | Recommended |
| Airbag warning after spill | Do not diagnose with cleaners | No | Recommended |
Professional cleaning costs more than DIY spot cleaning, but it may be worth the expense when a mistake could permanently damage expensive upholstery.
A quality detailer may also have extraction equipment that removes more contaminated liquid from cloth and seat foam than towels alone.
When to Call a Professional Mechanic
Most stains do not require a mechanic. A professional automotive detailer or upholstery specialist is usually the better choice for cosmetic cleaning problems.
A mechanic or qualified repair facility becomes appropriate when the spill may have affected vehicle systems.
Arrange an inspection if:
- An airbag or supplemental restraint warning light appears
- A power seat stops moving normally
- Seat heating or ventilation stops working
- Electrical connectors under the seat became soaked
- You notice burning smells or unusual electrical behavior
- A large amount of liquid entered the seat base
- Water entered the vehicle during flooding
Do not disconnect wiring underneath a modern vehicle seat simply to clean around it. Some connectors may belong to airbags, seat-belt pretensioners, or occupant-detection systems.
For a stubborn stain without electrical symptoms, start with a reputable automotive detailer rather than a mechanical repair shop.
What If the Stain Comes Back After Drying?
A stain that disappears while wet but returns after drying can be caused by contamination deeper in the fabric or foam.
Moisture may pull residue back toward the surface as it evaporates. Detailers often call this wicking.
Try another light cleaning cycle and remove as much moisture as possible afterward.
If the stain repeatedly returns, professional extraction may be more effective.
How to Prevent Car Seat Stains
Prevention is much easier than restoring deeply stained upholstery.
Simple habits help:
- Keep microfiber towels in the vehicle
- Clean spills as soon as practical
- Avoid leaving open drinks on seats
- Vacuum seats regularly
- Use washable seat protection when transporting pets
- Remove wet clothing or towels instead of leaving them on the seat
- Follow manufacturer recommendations for leather protection
- Keep food containers properly closed
Frequent light cleaning is also easier on upholstery than occasional aggressive scrubbing.
FAQs
Can I use baking soda to remove a car seat stain?
Baking soda may help absorb some odors or surface contamination, but it is not the best solution for every upholstery material. Check the vehicle manufacturer’s recommendations first and avoid leaving powder inside perforated leather, ventilation holes, seams, or electrical areas.
Can I use vinegar on car seats?
Vinegar is commonly suggested as a household cleaner, but it is not automatically safe for every automotive material. It may affect certain finishes or leave an odor. A manufacturer-approved automotive upholstery cleaner is generally the more predictable option.
How do I remove an old stain from a cloth car seat?
Vacuum first, test an upholstery-safe cleaner in a hidden area, and clean the stain using several light applications. Gently agitate the fabric, blot away residue, and let it dry. Very old stains may require professional extraction.
Can I use a carpet cleaner on car seats?
Only if the equipment and cleaning solution are suitable for automotive upholstery. Avoid saturating the seat foam. Seats containing heaters, ventilation systems, sensors, or electrical components require especially careful moisture control.
How long should a car seat dry after cleaning?
Drying time depends on how wet the seat became, humidity, temperature, and airflow. Do not judge only by the surface. Allow the upholstery to dry completely before regular use or closing the vehicle for a long period.
Why does my car seat stain keep coming back?
Liquid or residue may have soaked deeper into the fabric or foam and returned to the surface as the seat dried. Repeated light extraction may help, but persistent stains often respond better to professional upholstery extraction.
Can every car seat stain be removed?
No. Some marks are permanent because the upholstery has been bleached, dyed, worn, burned, or chemically damaged. If cleaning does not change the mark—or makes the material lighter—stop before causing additional damage and consult an upholstery specialist.
Conclusion
Knowing how to get a stain out of a car seat is mostly about using the right technique rather than using the strongest cleaner available.
Identify the upholstery material, blot fresh spills quickly, vacuum loose debris, test cleaners in a hidden area, use as little moisture as necessary, and let the seat dry completely. Cloth, leather, vinyl, and synthetic materials all require slightly different care.
Most small stains are reasonable DIY jobs. However, ink, heavy grease, leather discoloration, mold, deeply soaked upholstery, or stains near electrical components may justify professional help.
Start with the gentlest safe method and check your vehicle’s owner’s manual before using unfamiliar products. A few careful cleaning passes can save the seat—and potentially save you from paying for upholstery repairs caused by an overly aggressive cleaning attempt.
